This site is supported by our readers. We may earn a commission, at no cost to you, if you purchase through links.

The first time I hung rosemary upside down in my pantry, I forgot about it for three weeks. No mold, no fuss, just perfectly crisp leaves ready to crumble into dinner. That’s the quiet magic of air drying herbs: no electricity, no fancy gear, just gravity and patience doing the work.
Not every herb behaves this way, though. Basil bruises if you look at it wrong, while rosemary practically dares you to neglect it.
Once you know which herbs want to hang and which ones need a different approach, you’ll harvest, dry, and store your garden’s bounty like someone who’s done this a hundred times before.
Table Of Contents
- Key Takeaways
- Best Herbs for Air Drying
- Harvest Herbs for Peak Flavor
- Air Dry Herbs Step-by-Step
- Top 3 Herb Drying Tools
- Store Dried Herbs Properly
- Frequently Asked Questions (FAQs)
- Do herbs need to be air dried?
- How long does it take to air dry herbs?
- What is the best way to dry fresh herbs?
- How to dry herbs without special equipment?
- How long should you air dry herbs?
- Why hang herbs upside down to dry?
- What herbs should you not dry?
- Which herbs can you air dry?
- How long does air drying herbs typically take?
- Can you air dry herbs in winter months?
- Conclusion
Key Takeaways
- Woody-stemmed herbs like rosemary, thyme, oregano, and sage air dry best by hanging, while tender herbs like basil and mint should be tray-dried and moisture-rich herbs like cilantro and parsley are better frozen.
- Harvesting matters as much as drying: pick herbs after morning dew dries but before midday heat, before flowers open, and never take more than one-third of a plant at a time.
- Proper hang-drying technique—bundling 5 to 10 stems loosely, hanging them upside down in a dark spot at 65-85°F, and covering with ventilated paper bags—prevents mold and preserves essential oils.
- Herbs are fully dried and ready for storage in airtight glass jars once leaves crumble easily and stems snap cleanly, with labeling harvest dates ensuring proper freshness tracking.
Best Herbs for Air Drying

Not every herb behaves the same way once you cut it, and air drying works better for some than others. Woody herbs handle the process beautifully, while soft, juicy ones need a different touch entirely. Here’s how to sort out which method fits which herb.
For those tender, moisture-rich leaves, this guide to drying and storing fresh herbs walks through a quicker method that locks in flavor better than simply letting them air dry.
Woody Herbs Dry Best
Woody-stemmed herbs are your best bet for air drying. Their sturdy stems resist mold and hold onto essential oils like nobody’s business.
Expect 1 to 3 weeks to reach that perfect brittle stage. Here’s why they excel:
- Naturally moisture-resistant
- Rich in preserved oils
- Dry evenly when bundled
- Resist photodegradation in dark spaces
You can also use various herb drying methods like dehydrators or ovens to speed up the process.
That combo means better flavor retention and longer shelf life.
Rosemary, Thyme, Oregano, Sage
Let’s meet the four stars of your drying rack. Rosemary brings piney, resinous notes perfect with roasted potatoes; thyme’s earthy warmth suits soups and beans; oregano adds peppery punch to Mediterranean sauces; sage rounds out pork dishes with balsamic depth. All four crave full sun and drain-y soil.
| Herb | Aroma Profile | Best Pairing |
|---|---|---|
| Rosemary | Piney, resinous | Roasted lamb |
| Thyme | Earthy, minty | Root vegetables |
| Sage | Savory, balsamic | Pork sausage |
Herbs Needing Tray Drying
Basil, mint, and other tender herbs don’t hang well — their high moisture content makes them bruise and mold on a rack. Lay them flat instead.
- Space leaves 1cm apart for airflow
- Rotate trays for even drying
- Keep humidity below 60%
- Use parchment to absorb moisture
- Check for crumbly texture, not bend
Herbs Better Frozen
Some herbs just don’t want to dry — they want to freeze. Cilantro and parsley lose their punch on a rack, but freezing locks in those essential oils.
Try the ice cube tray method: chop, pack into water or olive oil, freeze solid. Flash freezing beats slow freezing here, cutting freezer burn while keeping color bright for up to 12 months.
Harvest Herbs for Peak Flavor
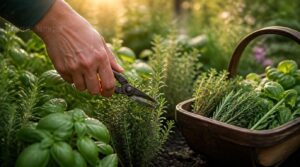
Great dried herbs start way before you ever hang a single stem. Timing and technique at harvest matter just as much as the drying itself. Here’s exactly what to look for when you head out to snip.
For a full rundown on prepping stems and choosing the right spot to hang them, check out this guide to air-drying herbs indoors.
Pick After Dew Dries
Timing is everything when you harvest fresh herbs. Wait until morning dew evaporates, but beat the midday heat — that window locks in essential oils and aroma.
- Turgid, dew-free leaves
- Stronger fragrance when crushed
- Less wilting and bruising
- Lower mold risk before air drying fresh herbs
This simple habit before you hang herb bundles boosts flavor, moisture removal, and shelf life extension down the line.
Harvest Before Flowers Open
Catch your herbs just as buds begin to color but before full bloom. This bud stage timing is your ticket to concentrated essential oil concentration and vibrant, clean aroma after drying.
Early picking means leaves hold more volatile compounds, and you’ll dodge bitter, woody flavors. If you wait for flowers to open, those oils fade and the green color loses its shine.
Cut Above Leaf Nodes
Where you make the cut matters as much as when. Snip your stem just above a leaf node, and you’re waking up a dormant bud, sparking fresh growth right where you want it.
This directs new growth outward, curbs stem dieback, and keeps plants bushy instead of leggy. Sharp, clean cuts protect the node so it’s ready to sprout.
Take One-third Maximum
Ever wonder why a plant looks fuller after you trim it? That’s sustainable harvesting at work.
Never take more than one third of any plant in a single session, this keeps regrowth strong and prevents stress.
- Protects root energy reserves
- Ensures balanced yield over the season
- Makes safe, repeated harvesting possible
Think of it as sharing the plant’s bounty, not stripping it bare.
Harvest herbs like you’re sharing the plant’s bounty, not stripping it bare
Remove Damaged Leaves
A brown, crispy edge on a leaf is nature’s warning sign, so don’t ignore it. Check for leaf necrosis spreading from tip to base, or soft mushy spots signaling mold and bacteria.
Snip damaged leaves right at the petiole using sterilized shears, cutting at an angle for quick drying. Toss them away from healthy plants, keeping excess moisture and disease at bay during postharvest handling.
Air Dry Herbs Step-by-Step
Once your herbs are harvested and trimmed, it’s time to get them hanging. This part’s simple, but a few small details make all the difference between crumbly, fragrant herbs and a moldy mess. Here’s exactly how to set them up for drying, step by step.
Rinse Only if Needed
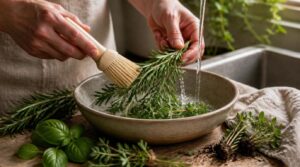
Not every sprig needs a bath. Only rinse if you actually see soil, sand, or grit clinging to the leaves—clean herbs with strong fragrance can skip it entirely.
If rinsing, use cold water only, just 5-10 seconds, to protect essential oils. For light dust, try brushing or a damp cloth instead. Excess water invites mold, so rinse smart, not automatically.
Dry Moisture Completely

Patience pays off here. Wait until leaves feel crisp, not just dry—no cool or swampy patches lurking underneath. Give them a sniff: fresh, faintly sweet aroma means good; musty or damp smells mean mold’s brewing.
For real certainty, weigh your bundles daily. Once weight holds steady for 24 hours straight, moisture’s gone for good, and bacteria won’t stand a chance.
Bundle Five to Ten Stems
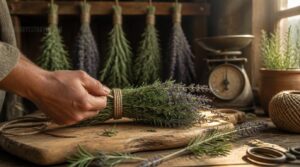
Gather five to ten stems per bunch—any more and airflow suffers. Tie loosely with twine, not rubber bands, since twine adjusts as stems shrink.
- Match leaf density for even drying
- Trim stems to similar lengths
- Keep bundles lightweight, 15-40 grams
- Space bunches 3-4 inches apart
- Check bundle weight stays consistent
Good airflow optimization prevents mold before it starts.
Hang Upside Down
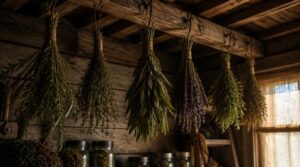
Once your bundle herb stems are tied, find a spot for the hang drying process with good air circulation, warmth between 65-85°F, and zero direct light—sunlight cooks herbs, stealing color and oils.
| Do | Avoid |
|---|---|
| Dark, dry spots | Sunny windowsills |
| Hooks or racks | Damp kitchens |
| 3-4 inch spacing | Crowded bunches |
Secure hooks tightly; gravity’s unforgiving.
Use Ventilated Paper Bags

A ventilated paper bag keeps dust off your bundles while still letting air move freely, so moisture control stays on your side. Slip each bunch inside, cinch loosely, and let those tiny perforations do their job preventing mold.
- Blocks dust and light
- Maintains good air circulation
- Food-grade, safe for herbs
- Cheap, biodegradable, easy to swap
Top 3 Herb Drying Tools
You don’t need a fancy setup to dry herbs well, but a few good tools make the whole process easier and more reliable. From washing to stripping to speeding things along on busy weeks, the right gear saves you time and hassle. Here are three tools worth having in your kitchen.
1. OXO Good Grips Salad Spinner
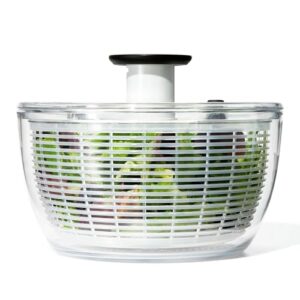
Ever tried drying wet basil and ended up with mush instead of herbs? That’s where the OXO Good Grips Salad Spinner earns its keep. Rinse your harvest in the basket, then pump the handle once to spin away excess water fast.
The perforated basket doubles as a colander, and the non-skid base keeps things steady on your counter. Getting herbs bone-dry before hanging or laying them out prevents mold — this tool just makes that first step painless.
| Best For | Home cooks and gardeners who wash a lot of leafy greens, herbs, or produce and want them dry and mold-free without a lot of fuss. |
|---|---|
| Herb Drying Use | Yes |
| Material | Plastic |
| Ease of Cleaning | Dishwasher safe (top rack) |
| Countertop Use | Yes |
| Reusable Design | Yes |
| Beginner Friendly | Yes |
| Additional Features |
|
- One-touch pump lets you spin greens dry with just one hand
- Non-skid base keeps the spinner steady even during vigorous spinning
- Detachable lid and basket make it easy to also use as a colander, mixing bowl, or lettuce keeper
- Lid needs manual disassembly for a truly deep clean
- Dishwasher-safe parts should stay on the top rack only, so care is a bit limited
- At 6.75 x 10.25 x 10.25 inches, it can take up meaningful counter or cabinet space
2. Stainless Steel Herb Stripping Tool
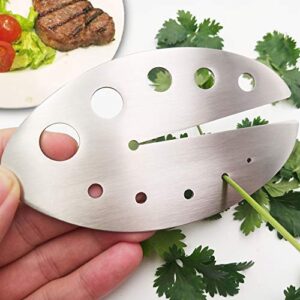
Stripping stems from rosemary or thyme by hand can leave your fingers sore fast. This 304 stainless steel stripper has eleven holes sized for everything from skinny thyme to thick rosemary stalks, so you just thread the stem through and pull.
It’s rust-resistant, dishwasher safe, and the built-in edge doubles as a mini knife for rough chopping. For woody herbs headed to the drying rack, this tool saves your hands and speeds up prep considerably.
| Best For | This tool is best for home cooks and herb gardeners who regularly prep woody herbs like rosemary, thyme, and oregano, or hearty greens like kale and collard greens. |
|---|---|
| Herb Drying Use | Yes |
| Material | Stainless Steel |
| Ease of Cleaning | Easy to clean |
| Countertop Use | Yes |
| Reusable Design | Yes |
| Beginner Friendly | Yes |
| Additional Features |
|
- Eleven different hole sizes make it easy to match the tool to whatever stem you’re working with, from delicate to thick
- Made from food-grade 304 stainless steel, so it resists rust and corrosion even with frequent use
- Reusable, eco-friendly, and simple to clean, making it a solid long-term addition to your kitchen tools
- Being a single tool, it may take some manual adjustment to handle very different leaf or stem sizes well
- Stems still need to be pulled through by hand, so it’s not a fully automated solution
- At just 0.08" thick, it’s a lightweight design that may feel less substantial than bulkier kitchen gadgets
3. Excalibur Electric Food Dehydrator Clear Door
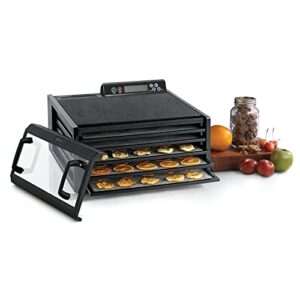
Some days, air drying just won’t cut it — humid weather or a bumper basil harvest calls for backup. That’s where the Excalibur comes in. If your basil harvest is booming thanks to smart herb and vegetable companion planting, the Excalibur makes quick work of preserving the surplus.
Its clear polycarbonate door lets you check progress without losing heat or airflow, while five trays offer 8 square feet of space across a 95°F to 165°F range. The Hyperwave horizontal airflow dries evenly, no rotating trays needed. It’s plastic, not metal, and limited to 110/120V — but for herbs, jerky, or fruit, it’s a serious upgrade.
| Best For | Home cooks who want to preserve garden herbs, fruits, and vegetables or make their own jerky without babysitting rotating trays. |
|---|---|
| Herb Drying Use | Yes |
| Material | Plastic |
| Ease of Cleaning | Easy to maintain |
| Countertop Use | Yes |
| Reusable Design | Yes |
| Beginner Friendly | Yes, with guide |
| Additional Features |
|
- Clear polycarbonate door lets you monitor progress without opening it and losing heat
- Hyperwave horizontal airflow dries food evenly across all five trays
- 48-hour digital timer with dual settings makes it easy to set and forget
- Plastic housing isn’t as durable as metal units
- Limited to 110/120V, so it won’t work with international 220V outlets
- Five trays may not be enough for large batches or commercial use
Store Dried Herbs Properly
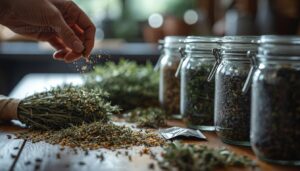
You’ve put in the work to grow and dry your herbs right, so don’t let sloppy storage undo it. All that flavor and aroma you worked for can fade fast if moisture sneaks back in. Here’s exactly how to check for dryness and lock in that freshness for the long haul.
Check Leaves Crumble Easily
Pinch a leaf between your fingers—does it crumble into flakes? That’s your sign the moisture content is gone.
Low humidity and good airflow during the dehydration process leave leaves thin, crisp, and papery.
Watch leaf texture and surface durability closely; damaged or thin leaves crumble faster.
Handle gently to avoid breakage, since handling stress on brittle leaves causes needless waste before storage.
Confirm Stems Snap Cleanly
When you test your dried herbs, listen for that audible snap—it’s the sign of perfect dryness. If the stem cracks cleanly near a node, you’ve nailed the moisture level. Thick, woody stems fracture sharply thanks to internal pith rigidity.
A snap means your air drying was just right and signals a stable shelf life for storage.
Remove Leaves From Stems
Once your herbs pass the snap test, it’s time for stemming. Strip leaves off woody stems by running your fingers down each one, or use a stainless steel herb stripper for speed. This prevents stem rot in storage and keeps jars tidy.
Crush what you can by hand—your fingers work fine here, no fancy tools required.
Use Airtight Glass Jars
Once crushed, get those herbs into airtight glass jars right away. Glass won’t leach chemicals or hold onto old flavors, protecting essential oils better than plastic ever could.
Choose wide-mouth jars, 8 to 16 ounces, with clamp or twist-top seals and BPA-free gaskets. Smaller jars mean less air, less oxidation. Check gaskets yearly, replace if hardened—your herb storage methods only work if the seal holds.
Label Harvest Dates
Grab a waterproof marker and jot the harvest date right on your jar, using YYYY-MM-DD for clarity. This one habit ties your air drying fresh herbs efforts to real shelf life tracking and traceability.
- Note the herb name and batch
- Back it up in a digital log
- Keep dates bold and visible
Good herb storage methods start with knowing exactly what you’ve got, and when you picked it.
Frequently Asked Questions (FAQs)
Do herbs need to be air dried?
Not always, but it’s one of the best natural dehydration methods for flavor retention. Air drying preserves essential oils better than store-bought dried herbs, while a dehydrator offers faster moisture control when time or humidity works against you.
How long does it take to air dry herbs?
Timing swings more than you’d think: 1 to 2 weeks for rosemary and sage, 10-14 days for basil or mint. Humidity, airflow speed, and ambient temperature all shift moisture evaporation, so drier seasons speed things up.
What is the best way to dry fresh herbs?
Match the method to the herb: hang bundles for woody stems like rosemary and thyme, lay delicate leaves flat, or freeze moisture-rich herbs in oil. Good airflow and low humidity matter more than any single technique.
How to dry herbs without special equipment?
No fancy gear needed — just string, a hanger, and airflow. Bundle five stems, hang them in a closet or attic, cover loosely with a paper bag for dust protection, and let natural ventilation do the rest.
How long should you air dry herbs?
Give woody herbs like rosemary or thyme 5 to 7 days, checking daily since ambient humidity and airflow shift drying time. Leaves should crumble, stems snap clean. Rushing risks mold; over-drying dulls flavor, so patience really pays off here!
Why hang herbs upside down to dry?
Gravity works in your favor here: gravity-assisted drainage pulls moisture downward and out through the tips, while vertical airflow dries every leaf evenly. This preserves essential oils, prevents mold, and keeps that vibrant color you want for peak flavor.
What herbs should you not dry?
Skip air drying soft-leafed herbs like basil, mint, cilantro, and tarragon—their high moisture invites mold and volatile oil loss. Freeze them instead for better flavor retention, since slow drying dulls their aromatic intensity fast.
Which herbs can you air dry?
Old herbalists say, "the sturdiest stems make the sweetest jars." Woody-stemmed herbs like rosemary, thyme, oregano, and sage air dry beautifully. Lavender and bay leaves work too, holding their fragrance and flavor profile long after harvesting.
How long does air drying herbs typically take?
Woody herbs like rosemary and thyme need 1 to 2 weeks, depending on airflow speed, ambient humidity, and temperature. Higher humidity slows moisture evaporation, so watch for crumbly leaves and clean-snapping stems as your true drying indicators, not the calendar.
Can you air dry herbs in winter months?
Winter turns your kitchen into a quiet greenhouse, holding warmth against the cold outside. Yes, you can air dry herbs then! Keep ambient humidity under 60%, choose sturdy herbs like rosemary and thyme, and manage indoor airflow to prevent mold.
Conclusion
Some skills quietly retire the need for fancy equipment, and that’s exactly what happens once you master how to air dry herbs. You’re not fighting nature here, you’re partnering with it, letting time and airflow finish what your hands started.
Hang your bundles, trust the process, and check back in weeks, not minutes. That crumbling leaf between your fingers? That’s proof you’ve earned a slower, wiser kitchen rhythm.
- https://nchfp.uga.edu/how/dry/recipes/herbs
- https://www.newsandsentinel.com/opinion/local-columns/2025/09/backyard-gardener-drying-herbs-for-preservation
- https://extension.psu.edu/lets-preserve-drying-herbs
- https://www.mountainfeed.com/blogs/learn/drying-herbs-and-flowers
- https://afarmgirlinthemaking.com/how-to-dry-fresh-herbs-from-the-garden-with-these-5-method/