This site is supported by our readers. We may earn a commission, at no cost to you, if you purchase through links.
Your garden gave you more tomatoes than you know what to do with. Again. Instead of watching them go soft on the counter, you could be stacking jars of sauce in your pantry by next weekend.
That jump from "overwhelmed by produce" to "confident home canner" comes down to one thing: having the right garden canning supplies for beginners before you start. A wobbly pot and mismatched lids lead to failed seals and wasted work.
Get your gear right from the start, and the whole process gets simpler, safer, and honestly kind of fun.
Table Of Contents
- Key Takeaways
- Beginner Canning Supplies Checklist
- Top 5 Beginner Canning Items
- Water Bath or Pressure Canning
- Step-By-Step Canning Setup
- Frequently Asked Questions (FAQs)
- What is the easiest canning for beginners?
- What supplies do you need to start canning?
- Do the Amish use pressure canners?
- What foods cannot be canned at home?
- How do I know if a seal failed?
- Can I reuse metal flat lids again?
- Why does pectin matter for jams and jellies?
- What causes mold or bulging in canned jars?
- How long do home-canned foods stay safe?
- Conclusion
Key Takeaways
- Match your canning method to your food’s acidity: water bath canning works for high-acid foods like tomatoes and berries, while low-acid vegetables and meats need a pressure canner to safely reach 240–250°F and prevent botulism.
- Getting the basics right matters most, so stock up on canning jars, single-use lids, reusable bands, a water bath or pressure canner, a jar lifter, and a funnel before you start.
- Careful prep steps, like measuring headspace accurately and letting jars cool undisturbed for 12 to 24 hours, are what actually create a safe, lasting seal.
- Always check your seals before storing food, since a flat unmoving lid means success, while a raised or flexible center means the jar should go straight to the fridge instead.
Beginner Canning Supplies Checklist
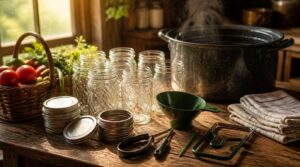
Before you fill a single jar, it helps to know what belongs on your shelf. Good canning starts with the right gear, not guesswork. Here’s what every beginner needs to get started safely.
Once you’ve got your jars, lids, and canner ready, wash and heat everything thoroughly before browsing beginner-friendly canning recipes for preserving your harvest to plan your first batch.
Canning Jars and Sizes
Five jar sizes cover almost every garden harvest you’ll can this season.
Selecting jar capacities depends on what you’re making:
- Half pints and pints for jams
- Quarts for sauces and pickles
- Half gallons for juice storage
Understanding common mason jar sizes helps you choose the right vessel for your specific preserves.
Wide mouth benefits show up when packing chunky produce, while regular mouth uses shine with pourable syrups. Check neck finish compatibility before buying lids for your mason jars.
Lids and Screw Bands
Once your jars are picked, you’ll need lids and rings to match. Canning lids have a sealing compound that creates the vacuum seal as jars cool — they’re single-use only.
Screw bands work differently. These metal rings hold lids in place during processing, then get reused for years. Tighten to fingertip resistance, dry them well to prevent rust, and always check for that solid seal before storing.
Water Bath Canner Basics
Once your lids are sorted, it’s time to think about the pot that brings it all together. A water bath canner just needs to be deep enough to fully submerge jars under 1-2 inches of boiling water, with a rack to prevent thermal shock.
Aluminum, enamel-coated steel, or stainless steel all work fine. Higher altitude? Adjust your processing time accordingly.
Pressure Canner Basics
Growing your own tomatoes or green beans? A water bath canner won’t cut it here. Low-acid foods need a pressure canner to hit 240–250°F and stop botulism cold.
- Check gasket and vent pipe often
- Learn proper venting procedures first
- Watch pressure maintenance during processing
- Calibrate dial gauges yearly for accuracy
Steam circulation and thermal safety matter for real canning safety.
Essential Hand Tools
A few small tools make canning day so much easier. A jar lifter grips hot jars safely, while a canning funnel stops spills at the rim.
| Tool | Job | Why It Matters |
|---|---|---|
| Magnetic lid wand | Lifts hot lids | No burned fingers |
| Bubble remover | Clears trapped air | Prevents seal failure |
| Jar wrench | Tightens bands | Finger-tight, not overtight |
Top 5 Beginner Canning Items
Now that you know what belongs on your list, let’s talk about which products actually earn a spot in your kitchen. You don’t need to guess or buy random gear off a shelf. Here are five beginner-friendly picks that make your first canning season easier.
Before stocking up on jars and lids, it’s worth checking ideal soil conditions for growing strawberries, since healthy fruit at harvest makes for better preserves down the line.
1. Ball wide mouth glass mason jars
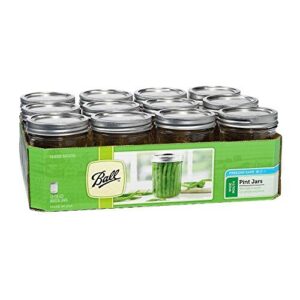
Big openings make big batches possible. Ball wide mouth mason jars hold a full 32 ounces per quart, so you can pack in chunky salsa or sliced peppers without a fight.
The wide mouth design means less mess and faster filling. They’re BPA-free, tempered glass, and dishwasher safe, plus freezer safe once you adjust the lids.
Best of all, they work with any standard water bath canner you already own.
| Best For | Home cooks and crafters who want a reliable, made-in-the-USA set of glass jars for canning, meal prepping, or gifting. |
|---|---|
| Material | Glass |
| Primary Use | Canning/Storage |
| Weight | 5.6 lbs |
| Unit Count | 12 count |
| Food Preservation Role | Storage Vessel |
| Care Instructions | Dishwasher Safe |
| Additional Features |
|
- BPA-free, food-grade glass that’s dishwasher safe for easy cleanup
- Comes as a complete 12-count set with matching lids and bands included
- Versatile enough for canning, meal prep, décor, or DIY gift projects
- Glass construction means jars are fragile and can break if dropped or mishandled
- Airtight sealing depends on properly fitted lids and bands
- Listed dimensions appear to be placeholder values, so exact sizing isn’t clear
2. Mason Regular Mouth Canning Lids
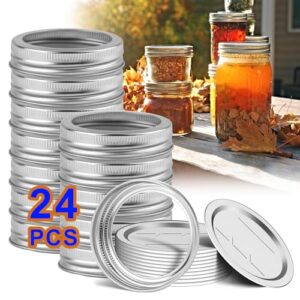
Every jar needs a good seal, and that’s where these lids earn their keep. Mason regular mouth canning lids fit any standard 70 mm opening and use a food-grade silicone gasket that flexes under heat to lock out air.
They’re single-use only for canning, so grab a fresh batch each season. Bands, though, get reused as long as they’re rust-free and dent-free.
Wash lids in warm, soapy water first, then apply them warm for the best shot at that satisfying seal.
| Best For | Home canners and DIY food preservers who want an airtight, rust-proof seal for storing jams, spices, cookies, fruit teas, and candies in regular mouth Mason jars. |
|---|---|
| Material | Stainless Steel |
| Primary Use | Sealing |
| Weight | 0.2 kg |
| Unit Count | 24 pieces |
| Food Preservation Role | Sealing Component |
| Care Instructions | Sterilize Before Use |
| Additional Features |
|
- Food-grade silicone gasket creates a reliable, airtight seal that helps food stay fresher longer
- Rust-proof stainless steel construction resists warping, so bands hold up for repeated use
- Generous 24-piece set (12 lids and rings) makes it easy to stock up for a full canning season
- Lids are single-use for canning, so you’ll need to buy fresh ones regularly
- May fit Kerr jars more snugly than Ball jars, so compatibility can vary
- Not all units are confirmed freezer-safe, which limits use for cold storage
3. Granite Ware Enamelware Water Bath Canning Kit
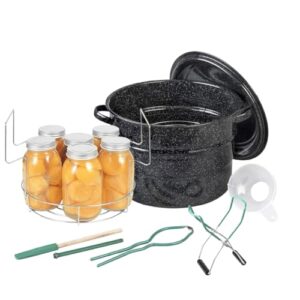
Want everything in one box? This kit gives you that. The 21.5-quart enamelware pot comes with a chromed steel rack that holds 7 quarts, 9 pints, or 12 half-pints at once.
You get five extra tools tucked inside: a bubble remover, ruler, jar lifter, magnetic lid lifter, and funnel. It’s built for stovetop water bath canning, not pressure canning or induction cooktops.
Just hand wash and dry it well so the enamel and steel stay rust-free for seasons of tomatoes and jam.
| Best For | Home cooks who want a complete, ready-to-go water bath canning setup for making jams, jellies, pickles, and preserving seasonal produce. |
|---|---|
| Material | Enameled Steel |
| Primary Use | Water Bath Canning |
| Weight | 4 lbs |
| Unit Count | 1 set |
| Food Preservation Role | Processing Equipment |
| Care Instructions | Hand Wash Only |
| Additional Features |
|
- Comes with everything needed to start canning right away, including a five-piece toolset and jar rack
- Rack holds a generous batch at once (7 quarts, 9 pints, or 12 half-pints)
- Tools and rack store neatly inside the pot for easy organization
- Won’t work on glass or induction stovetops
- Limited to water bath canning, so it can’t handle pressure canning for low-acid vegetables
- Requires hand washing and thorough drying to avoid rust
4. Ball Secure Grip Jar Lifter
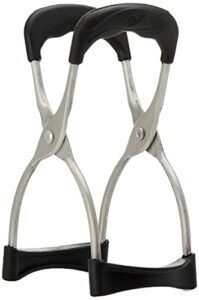
Hot jars and slippery hands don’t mix, and that’s exactly why a good jar lifter earns its spot in your kit.
This one has a spring hinge that pops open on its own, so you’re not fighting the tool while your hands are full. The molded grip hugs jar sides for a steadier hold, even on wide mouth jars.
Made from stainless steel, it’s dishwasher safe and built to handle season after season of tomatoes, pickles, and jam.
| Best For | home canners and preserve-makers who need a secure, comfortable way to lift hot jars in and out of boiling water. |
|---|---|
| Material | Stainless Steel |
| Primary Use | Jar Handling |
| Weight | N/A |
| Unit Count | 1 count |
| Food Preservation Role | Handling Tool |
| Care Instructions | Manual Operation |
| Additional Features |
|
- Spring hinge opens automatically, so you don’t have to fight the tool while your hands are full
- Molded grip provides a more secure hold on jars, even wide mouth ones, compared to standard lifters
- Stainless steel construction is sturdy and built to last through many canning seasons
- Designed for regular sized jars, so it may not fit oddly shaped or oversized containers
- Still requires manual gripping and operation, it’s not fully hands-free
- As a single-purpose tool, it only comes in handy during canning or preserving tasks
5. PrepWorks Canning Funnel for Jars
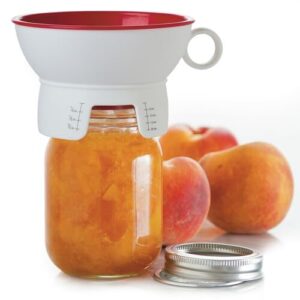
Guessing headspace with your eyes leads to weak seals, and that’s a risky habit to break.
This funnel takes the guesswork out. It fits both wide and regular mouth jars, so you’re not juggling two funnels mid-batch. Headspace lines are printed right on the base, giving you accurate fills every time.
The raised collar keeps it off your counter, and the outer edge catches drips before they hit your jar rim. Made from high heat plastic, it’s dishwasher safe and built for repeat use.
| Best For | Home canners who want consistent, accurate headspace fills without switching between funnels for wide and regular mouth jars. |
|---|---|
| Material | Plastic |
| Primary Use | Filling |
| Weight | 0.29 lbs |
| Unit Count | 1 unit |
| Food Preservation Role | Filling Aid |
| Care Instructions | Hand Wash Recommended |
| Additional Features |
|
- Printed headspace measurements take the guesswork out of filling jars accurately
- Works with both wide and regular mouth jars, so one funnel handles the whole batch
- Raised collar and outer edge design keeps countertops and jar rims cleaner during pours
- Made of plastic, so it has temperature limits to keep in mind despite being high heat rated
- Only one funnel comes in each package, which can slow down larger canning sessions
- Being plastic rather than metal, it may feel less durable over years of heavy use
Water Bath or Pressure Canning
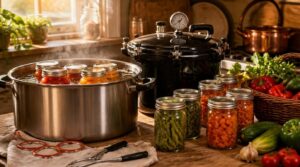
Not every fruit or veggie from your garden gets canned the same way. Some foods need a hot water bath, while others call for a pressure canner to stay safe. Here’s how to tell which method fits what you’re preserving.
High-acid Garden Foods
Tomatoes, berries, and sour apples fill most beginner canning baskets, and lucky for you, they’re naturally safe for water bath canning. A pH at or below 4.6 keeps botulism away. Tomatoes still need added lemon juice or citric acid, since acidity varies by cultivar.
Strawberry and cranberry preserves work great too, with sugar and citrus keeping pH low and seals reliable.
Low-acid Vegetables and Meats
Once you move past tomatoes and berries, the rules change fast. Potatoes, carrots, onions, corn, and green beans all need pressure canning for safety. So does any meat, whether raw or hot packed.
Why? Low-acid foods create the perfect home for botulism-causing bacteria. A water bath canner just can’t get hot enough to stop that risk.
Safe Processing Temperatures
Numbers matter here. Water bath jars need a full 212°F boil the whole time, while pressure canners hit 240–250°F for low-acid foods.
Anything between 41°F and 135°F is the danger zone, where bacteria multiply fast. A reliable thermometer keeps you honest, and proper venting before sealing your pressure canner stops botulism-causing spores in their tracks. Altitude changes these numbers, so adjust accordingly.
Choosing Your First Method
Once you’ve got your temperatures down, picking your first method comes easy: match it to what you’re actually growing.
Got a garden bursting with tomatoes or cucumbers? Start with water bath canning. Heavy on green beans or carrots? You’ll need pressure canning. Check your altitude adjustment needs before processing, and always follow tested guidelines for safety.
Foods Beginners Should Avoid
Why do so many beginners get burned early on? They try canning something that was never safe for a home kitchen.
Skip these every time:
- Dairy-based fillings and cream soups
- Raw ground meat or seafood mixtures
- Thickened sauces with flour or cornstarch
These low-acid foods invite botulism without pressure canning. High sugar syrups won’t save low-acid ingredients either — acidity, not sugar, keeps food safe.
Step-By-Step Canning Setup
Now that you’ve picked your method, it’s time to put everything to work. Canning follows a simple rhythm once you know the steps. Here’s exactly how to go from garden produce to sealed jars.
Wash and Inspect Jars
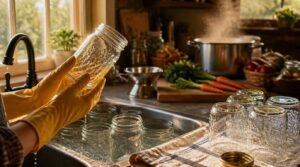
Every safe batch starts with clean glass. Wash your canning jars in hot, soapy water, skip harsh abrasives, and rinse well.
Check each jar for cracks, chips, or rim damage before use. Damaged jars risk breaking from thermal shock during processing. If you’re wondering how to sterilize canning jars properly, a boiling water bath does the trick.
Prepare Fresh Garden Produce
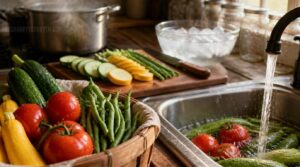
Grab your garden haul and give it a good rinse under cool running water before anything else. Skip the soap, trim away bruised spots, and slice everything into even pieces for consistent processing.
- Rinse produce under cool water
- Trim bruised or moldy sections
- Cut into uniform sizes
- Blanch sturdy veggies briefly
- Chill in ice water fast
Store prepped food cold and use it within a couple days.
Fill Jars With Headspace
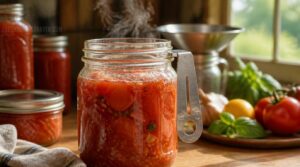
That gap of air at the jar’s top isn’t wasted space, it’s your safety margin. Food expands as it heats and needs room to breathe, so measuring headspace accuracy matters.
That gap of air at the jar’s top isn’t wasted space—it’s your safety margin
Use a headspace tool or ruler against pint jars or quart jars. Too little causes foaming and messy seals; too much can block a proper vacuum seal from forming.
Process Jars Safely
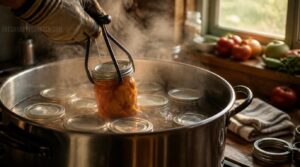
Heat is what makes canning safe, so this step matters most. Lower jars into your water bath or pressure canner using a jar lifter, avoiding thermal shock. Keep jars fully submerged under 1-2 inches of water. Start timing once boiling returns or pressure hits target psi. Never rush this stage.
Check Seals and Store
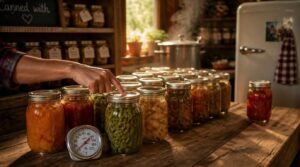
Once jars come out of the canner, let them sit untouched for 12 to 24 hours. This cooling period lets the vacuum sealing process finish properly.
Check each lid: it should be flat and won’t budge when pressed. A raised or moving center means lid failure—refrigerate that jar instead.
Label jars with contents and date, then store between 50-70°F for safe, shelf-stable food storage.
Frequently Asked Questions (FAQs)
What is the easiest canning for beginners?
Jam and jelly making is the easiest starting point. High-acid fruits need only a water bath canner, basic beginner canning kits, and simple recipes—no pressure canner required. Pickling with vinegar brine is a close second for confident, safe results.
What supplies do you need to start canning?
Think of it like assembling a telegraph line before you send your first message: you need canning jars, lids, bands, a water bath canner, a jar lifter, and a funnel—your basic canning essentials list.
Do the Amish use pressure canners?
Yes, many do — especially for low-acid foods like meats and stock. Practices vary by settlement, though. Some Old Order groups stick to water bath methods and tradition, while others rely on pressure canning equipment when safety truly demands it.
What foods cannot be canned at home?
Dairy, fatty meats, and thick purees pose serious botulism risks since fat and density block heat penetration.
Low-acid veggies need pressure canning, not water bath.
Always match acidic vs. low-acid foods to the right tested method.
How do I know if a seal failed?
Check for a concave, unmoving lid after cooling—no flex, no click. Watch for leaking liquid, cloudy contents, sticky residue, or off odors. If the lid lifts with light fingertip pressure, the seal failed—refrigerate and use soon.
Can I reuse metal flat lids again?
That flat lid did its job once, sealing compound flattened for good — no do-overs. Single-use lid safety matters: reused lids risk seal failure. Buy fresh canning lids each session, but screw bands are fair game if rust-free.
Why does pectin matter for jams and jellies?
Pectin drives gel network formation, working with sugar and acidic pH to set your jams and jellies. Natural pectin sources vary by fruit, so controlling gel firmness in your canning recipes means balancing sugar-pectin interaction carefully for reliable results.
What causes mold or bulging in canned jars?
Weak seal integrity, low processing temperatures, or wrong pH levels let air and spores back in.
Low-acid foods need pressure canning to prevent botulism.
Bulging lids or mold mean toxins may be present, so toss those jars immediately.
How long do home-canned foods stay safe?
Safety can outlast flavor: high-acid foods stay safe over a year, low-acid ones 2 to 5 years, yet taste and texture fade sooner. Trust your seal, not just the calendar, for true food safety.
Conclusion
A well-stocked pantry is like a good harvest, steady, colorful, and worth the effort. You don’t need fancy gear to get there.
The right garden canning supplies for beginners turn a messy kitchen counter into rows of sealed jars you’re proud of. Start small, follow safe steps, and trust the process. Your first batch won’t be perfect, but it will be real food you made yourself. That’s a skill worth keeping for years to come.
- https://forjars.co/collections/all-products
- https://www.thriftyfrugalmom.com/canning-supplies-for-beginners
- https://survivalgardenseeds.com/blogs/survival-garden-training/canning-101-water-bath-canning-vs-pressure-canning
- https://kowalskimountain.com/canning-supplies-for-beginners
- https://www.simplycanning.com/pressure-canning-vs-water-bath