This site is supported by our readers. We may earn a commission, at no cost to you, if you purchase through links.

That basil you grew all summer? It won’t last the winter fresh. But hang it upside down in a dark closet for two weeks, and it’ll flavor your soups clear into February.
That’s the quiet magic of drying garden herbs naturally — no machines, no electricity, just air, time, and a little know-how. Your grandmother probably did it this way, tying bundles with kitchen string and hanging them from rafters.
Get the timing and technique right, and you’ll lock in flavor that store-bought dried herbs can’t touch. Get it wrong, and you’re looking at moldy, musty disappointment. Here’s how to do it right, from the first snip to the last jar on the shelf.
Table Of Contents
- Key Takeaways
- Why Dry Herbs Naturally at Home?
- Harvesting Herbs for Drying Success
- Step-by-Step Natural Drying Methods
- Knowing When Herbs Are Fully Dried
- Storing Dried Herbs for Longevity
- Frequently Asked Questions (FAQs)
- What herbs should you not dry?
- Why hang herbs upside down to dry?
- What herbs can be hung to dry?
- Is it safe to dry your own herbs?
- Can you dry herbs in a microwave?
- What temperature setting works best for dehydrators?
- How do you know herbs need remoistening later?
- Can you use rubber bands instead of twine?
- How long do properly dried herbs actually last?
- Conclusion
Key Takeaways
- Hang woody herbs like rosemary, sage, thyme, and oregano upside down in small bundles of 3-10 stems, since gravity pulls oils into the leaves and vertical airflow keeps mold from forming in the center.
- Soft, high-moisture herbs like basil, cilantro, and mint bruise easily when hung, so they dry better laid flat on a screen or tucked loosely in a paper bag.
- Pick your drying spot carefully: aim for 20-25°C, humidity under 60%, indirect light, and airflow from more than one direction to keep herbs from going musty.
- Before storing, run a 24-hour jar condensation test to check for hidden moisture, then keep herbs in airtight, labeled containers between 60-70°F to lock in flavor for up to a year.
Why Dry Herbs Naturally at Home?
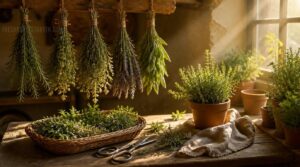
Drying your own herbs isn’t just a kitchen chore—it’s a small act of self-sufficiency. Done right, it locks in flavor and aroma that store-bought jars can only dream of. Here’s what makes the natural route worth your time.
If you want to try the simplest method around, this guide to hanging herbs to dry naturally walks through bundling and airflow tips that make all the difference.
Preserving Flavor and Aroma
Ever wonder why your homegrown basil smells stronger than store-bought? It’s all about volatile oil retention. Heat drives off those delicate aromatic compounds fast—terpene degradation happens quick above certain temps. Air drying keeps things low and slow, protecting essential oil profiles.
Air drying keeps things low and slow, preserving volatile oils that heat would quickly drive away
Once dried, using advanced barrier layers in storage containers can further prevent the loss of these precious scents.
Surface area matters too. Whole sprigs dry evenly, holding onto flavor better than chopped bits exposed to open air.
Natural Vs Artificial Drying Methods
So, air drying versus dehydrators—what’s the real trade-off? Natural drying costs you time, not money. No electricity, just sun and wind, but weather dependency means humid weeks can invite mold.
Dehydrators run 35-60°C, giving predictable timing and better contamination control indoors. Trade-off’s simple: slower and free, or faster and controlled. Your climate decides which wins.
Best Herbs for Air Drying
Weather decides the method, but the herb decides your odds. Woody types—rosemary, sage, oregano, thyme—air dry beautifully. Rosemary loves a tight bundle technique for good airflow. Sage’s thick cuticle means slower drying but stronger flavor. Thyme, harvested pre-flower, keeps its oils locked in. Lavender bundles hold fragrance almost a year.
Soft-leaved herbs like basil? They need faster methods.
Harvesting Herbs for Drying Success
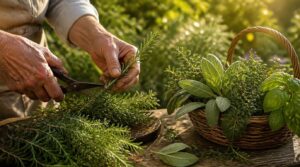
Good drying starts before you even touch a screen or a rubber band. It starts out in the garden, with the herbs still growing. Here’s what to get right at the harvest stage.
Best Time to Harvest
Timing is everything with herbs. Cut too early and you lose flavor. Cut too late and the oils fade fast.
Best window: mid-morning, after dew dries, before real heat hits.
Pick before flowering starts—that’s when aroma peaks.
Once you’ve harvested your rosemary and thyme at their peak, check this guide to harvesting fresh herbs daily for tips on timing your cuts to keep flavor and aroma strong all season.
- Morning dew gone, sun still gentle
- Plants not yet flowering
- Dry, calm weather—no rain, no wind
Selecting Healthy Plant Material
Grab only what’s thriving. Firm stems, vibrant green leaves, no yellowing or spots—that’s your green light.
Do a quick Visual Inspection: check leaf undersides for pests, look for mottled patches signaling disease.
| Sign | Healthy | Skip It |
|---|---|---|
| Stems | Snap cleanly | Mushy, soft |
| Leaves | Vibrant green | Yellow, spotted |
| Pests | None visible | Webbing, specks |
Plant vitality before flowering means peak flavor’s still locked in.
Cleaning and Prepping Stems
Cutting clean starts with sharp tools. Wipe your shears with 70% isopropyl alcohol between plants—cross contamination spreads faster than you’d think.
Rinse stems cool, pat dry, skip the harsh cleaners (residues mess with aroma).
- Trim at a diagonal for better surface area
- Point cut ends up briefly—stops sap seepage
- Brush off surface grit gently
- Discard any damaged bits
Bundling Techniques for Airflow
Bunching herbs right is where good drying starts. Group 3 to 10 stems per bundle—too many and the center stays damp, inviting mold before you even get to natural air drying.
Use rubber bands, not twine. They tighten as stems shrink.
| Bundle Size | Airflow Quality | Mold Risk |
|---|---|---|
| 3-5 stems | Excellent | Low |
| 6-10 stems | Good | Moderate |
| 11+ stems | Poor | High |
Step-by-Step Natural Drying Methods
Once your herbs are clean, trimmed, and bundled, it’s time to actually dry them. There’s more than one right way to do it, and the method you pick depends on the herb and your space. Here’s how to choose the approach that works best for you.
Hanging Bundles Upside Down
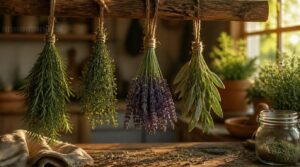
Turn your herbs upside down and let gravity pull the oils toward the leaves. This is the classic move for natural air drying, and for good reason.
Vertical airflow reaches every stem evenly, preventing mold hotspots in crowded bunches. Mind your bundle spacing—give each one room to breathe. Stems guide moisture downward, away from tender leaves, so hanging in bunches works better than piling herbs flat.
Screen Drying Delicate Leaves
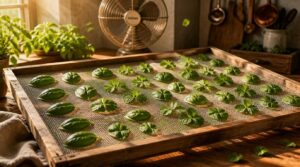
Basil, mint, cilantro—these soft-leaved herbs bruise if you hang them. Better off laying flat on a screen instead.
Space leaves out, no overlap. Optimizing airflow velocity matters more than heat here—warm, moving air beats a hot room every time. Keep humidity in check, and turn leaves every half day for uniform drying times. Gentle handling protects the oils that give your herbs their punch.
Paper Bag Drying Technique
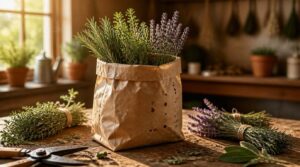
Got a plant that’s stubborn about drying? Paper bags are your answer.
Slip loosely bundled stems into a plain, unbleached paper bag—no printing, no bleach smell transferring to your herbs. Poke a few holes for airflow, then let moisture wick from the inside out. Check daily for condensation. It’s slower than hanging, but that’s the point: less mold risk, more flavor saved.
Choosing The Perfect Drying Spot
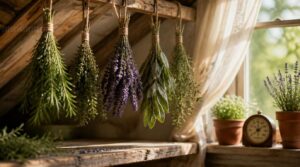
Where you dry matters as much as how. Look for a dry and airy space with wind from more than one direction—stagnant corners breed mold.
Skip direct sun; indirect light protects color and oils. Aim for 20-25°C, humidity under 60%. Lift bundles 6 inches up. Keep pets, dust, and misting plants away. Closets and steamy kitchens? Hard pass.
Special Care for High-Moisture Herbs
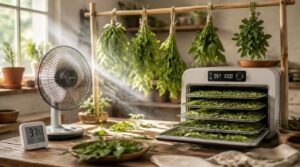
Basil, cilantro, mint—these guys panic without airflow. Cut leaf mass to boost circulation, skip crowded rooms, and watch for musty smells or fuzzy spots. Fastest fix: rapid dehydration methods like a dehydrator or fan. A little bruising helps oils release faster, too.
- Trim excess leaves
- Add fans or dehydrator
- Watch for mold signs
- Keep humidity below 60%
- Split into smaller batches
Knowing When Herbs Are Fully Dried
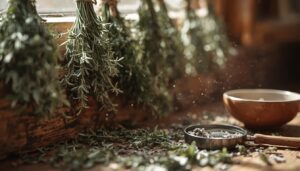
So how do you know when to stop waiting and start storing? Your herbs will actually tell you—no guesswork needed. Here’s what to look and listen for.
Signs of Complete Dryness
How do you know your herbs are truly done? Trust your senses, not the clock.
Leaves should feel papery and brittle, snapping rather than bending. Stems break clean. Scent fades from fresh and bright to faint or gone.
| Test | Fresh Herb | Fully Dried |
|---|---|---|
| Texture | Soft, pliable | Crisp, crumbles easily |
| Color | Vibrant green | Dull, muted |
| Stems | Bendy | Snap cleanly |
Preventing Mold Before Storage
Snap and crumble tests tell you dryness, but mold hides where you don’t look. Before packaging anything, do a quick moisture test—crumble a bit and seal it in a jar for 24 hours. Any fogging inside means it’s not ready.
Wipe containers clean first. Toss in a desiccant packet for insurance, and always check humidity stays under 60%.
Storing Dried Herbs for Longevity
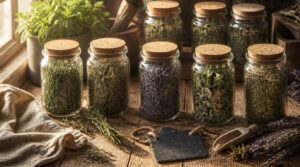
You’ve put in the work to dry your herbs just right. Don’t let poor storage undo all that effort. Here’s what actually keeps them fresh for months to come.
Best Containers for Storage
All that careful drying goes to waste if you toss herbs in a flimsy bag. Airtight containers are non-negotiable.
- Glass jars (mason jars work great) block moisture and odor
- Metal canisters resist crushing, stack neatly
- Plastic bins offer rugged, bulk storage
- Mylar bags vacuum-seal for long hauls
Amber glass spice jars fend off light damage too—your herbs stay potent longer.
Labeling and Dating Jars
Guessing what’s in an unmarked jar six months from now? Not fun.
| Line | Info | Why |
|---|---|---|
| 1 | Herb name | Quick ID |
| 2 | Dry date (YYYY-MM-DD) | Tracks shelf life |
| 3 | Batch number | Traceability |
Use waterproof labels on glass spice jars or mason jars—kitchen steam ruins ink fast. Color-code by herb family for faster grabs during cooking.
Ideal Storage Locations
Where you stash those jars matters as much as how you dried them.
Aim for 60 to 70°F, humidity between 40 and 60 percent. Skip the kitchen—steam and stove heat wreck flavor fast. A pantry or cupboard beats a shelf near windows or appliances every time.
Low shelves stay steadier than high ones. Keep herbs away from onions, cleaners, anything with a strong smell. Jars absorb odors easily.
Extending Shelf Life
Six months is decent. A year is better, and it’s within reach.
Toss in oxygen absorbent packets for bulk batches—they starve out oxidation. Vacuum sealing works too, though delicate leaves can crush. Run the condensation test: seal crumbled herbs 24 hours, check for fog. None? You’re golden. Fog means moisture’s still lurking, and mold’s next guest. Good moisture control now saves your harvest later.
Frequently Asked Questions (FAQs)
What herbs should you not dry?
Soft-leaved herbs like basil, cilantro, dill, and mint fight you the whole way. Their high moisture content invites mold and fragile aroma loss. Freezing beats air drying here—it locks in flavor before these perishable, mold-prone varieties turn dull or grassy.
Why hang herbs upside down to dry?
Gravity does the work here — pulling moisture down and away from leaves while keeping essential oils concentrated near the surface. This vertical airflow dries herbs evenly, preventing center dampness and locking in flavor better than flat, sprawled-out methods.
What herbs can be hung to dry?
Woody-stemmed herbs like rosemary, sage, thyme, and oregano handle hanging best — sturdy stems, lower moisture. Lavender and bay leaves work too, keeping their fragrance for weeks.
Softer, high-moisture herbs need faster methods, since hanging invites mold before they finish drying.
Is it safe to dry your own herbs?
Yes—like sealing a memory in glass, drying locks flavor in safely. Wash away pesticide residue, dry fully to avoid mold growth, and store properly. Clean prep plus correct technique means safe, potent herbs for your kitchen.
Can you dry herbs in a microwave?
Microwave drying works fast: leaves between paper towels, 30-second bursts, checking often. Great for oregano or thyme, riskier for basil since it scorches quickly. Good backup when you’re short on time, though air-drying still wins for preserving deeper aroma.
What temperature setting works best for dehydrators?
Low and slow, steady and gentle — that’s the dehydrator’s golden rule. Set your dehydrator tray to 95–115°F for the best heat ranges, preserving volatile oils and herb potency while avoiding case hardening.
Delicate herb settings run cooler; hardy ones tolerate a touch more.
How do you know herbs need remoistening later?
Brittle stems that snap instantly, crumbly leaves, and faded aroma all signal over-dried herbs. A quick mist test helps — if they stay stiff with no surface sheen or scent rebound, they’ve lost too much moisture and flavor.
Can you use rubber bands instead of twine?
In a pinch, sure. But rubber band degradation happens fast under heat, and stems shrink—so bands loosen or bruise tender leaves. Twine holds steady without odor transfer. If you love the convenience, try food-grade silicone instead.
How long do properly dried herbs actually last?
Like fine wine, they don’t last forever — but they age gracefully. Whole leaves hold peak flavor for a year or more; woody herbs outlast soft ones. Trust your nose and eyes over the calendar.
Conclusion
A machine strips moisture in minutes. Time, air, and patience do something a machine can’t—they keep the soul of the plant intact. That’s the real reward of drying garden herbs naturally: not just preservation, but flavor with character.
Hang your bundles, check your jars, trust the process. Come January, cracking open that lid and smelling summer again, you’ll understand why grandma never owned a dehydrator. Some things just take time.