This site is supported by our readers. We may earn a commission, at no cost to you, if you purchase through links.
Botulism spores laugh at boiling water. They shrug off 212°F like it’s a warm bath, and that single fact separates two canning methods people often treat as interchangeable.
Grab the wrong one for green beans, and you’re not just risking a ruined batch, you’re risking a serious illness. The difference between pressure canning and water bath comes down to acid and heat, not preference or tradition. Tomatoes, pickles, and jams play by different rules than meats, soups, and fresh vegetables.
Once you know which foods need which method, canning stops feeling like guesswork and starts feeling like a skill you actually trust.
Table Of Contents
- Key Takeaways
- Pressure Canning Vs Water Bath
- Why Acidity Decides The Method
- Foods for Each Canning Method
- Equipment and Process Differences
- Safety Risks Gardeners Should Know
- Choosing The Right Canning Method
- Frequently Asked Questions (FAQs)
- Do the Amish use pressure canners?
- Can I use my pressure canner as a water bath?
- Is a pressure canner better than a water bath?
- What foods cannot be pressure canned?
- Can I use a pressure canner for water bath recipes?
- How do I know if my pressure canner is accurate?
- How should I store canned jars after processing?
- What causes jar seals to fail after canning?
- Conclusion
Key Takeaways
- Water bath canning only reaches 212°F, which kills nothing but works safely for high-acid foods (pH 4.6 or below) like fruits, jams, and pickles.
- Pressure canning reaches 240°F or higher, the temperature needed to destroy botulism spores in low-acid foods like vegetables, meats, poultry, and fish.
- The 4.6 pH threshold determines your method: foods above this level lose their natural defense against bacteria and require pressure canning, no exceptions.
- Never substitute ingredients in tested recipes, since swapping vinegar, lemon juice, or acidifiers can push a food’s pH into unsafe territory without your knowledge.
Pressure Canning Vs Water Bath
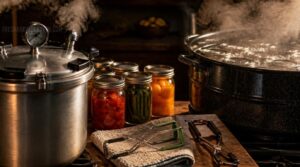
Choosing the right canning method isn’t a coin flip. Your safety depends on knowing what sets these two methods apart. Here’s what you need to know before you start.
Water bath canning suits high-acid foods, while pressure canning is essential for low-acid ones—this guide to preserving your garden harvest safely breaks down which method fits which produce.
Core Safety Difference
Botulism risk management is the whole reason these two methods exist. High-acid foods create an acidic environment that stops spores from growing, so water bath canning works safely. Low-acid foods need pressure canning’s higher heat for true spore inactivation.
| Method | Botulism Defense | Food Type |
|---|---|---|
| Water Bath | Acidity | High-acid |
| Pressure | Heat (240°F+) | Low-acid |
| Both | Sealed jars | All foods |
Heat and Pressure Levels
Water boils at 212°F (100°C), full stop. Boiling point physics caps water bath canning right there, no matter how hard it rolls.
Pressurized steam changes the game. At 10.5 psi, canners hit 240°F (116°C), the thermal sterilization threshold spores actually respect. This temperature increase is governed by the ideal gas law principles.
| Method | Max Temp |
|---|---|
| Water Bath | 212°F |
| Pressure (sea level) | 240°F |
| High Altitude | 245°F+ |
| Botulism Kill Point | 240°F+ |
Altitude demands gauge calibration.
Best Uses for Each
That extra 28°F buys real safety margin. High-acid foods like jams and fruit thrive in water bath canning, preserving fruit flavors beautifully. Low-acid vegetable safety demands pressure canning, along with meat preservation methods.
| Method | Best For |
|---|---|
| Water Bath | Fruits, acidic sauce suitability |
| Pressure | Vegetables, meats |
| Both | Beginner canning options |
Match the method to the food’s acidity, not convenience.
Quick Comparison Table
Method selection comes down to one question: acid or no acid?
| Factor | Water Bath | Pressure Canning |
|---|---|---|
| Temperature | 212°F | 240–250°F |
| Best For | Fruits, jams | Vegetables, meats |
| Processing Time | 5–45 min | 25–90 min |
Water bath canning skips pressure entirely, relying on acidity for food safety. Pressure canning demands sealed equipment reaching shelf-stable temperatures low-acid foods actually need.
Why Acidity Decides The Method
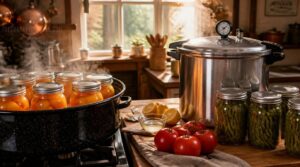
Acidity isn’t just a flavor detail. It’s the number that decides whether your jars need a simple hot water bath or a full pressure canner. Here’s what that number means for your kitchen.
Foods below 4.6 pH can safely process in a water bath, but anything less acidic needs pressure canning, so it’s worth stocking up on essential canning supplies for beginners before you start testing.
High-acid Foods Explained
Acidity is your first line of defense. Foods with a pH of 4.6 or lower—citrus, berries, tomatoes, fermented pickles—naturally block Clostridium botulinum growth. That’s why water bath canning works safely for them.
pH varies by ripeness and variety, so testing matters. Acidification with lemon juice or vinegar preserves fruit texture and color while ensuring safe processing every time.
Low-acid Foods Explained
Once pH climbs above 4.6, food loses its natural defense against bacterial spores. Vegetables, meats, poultry, fish, and most soups fall into this low-acid category.
Water activity stays high in these foods, creating perfect conditions for microbial growth. That’s why boiling water can’t protect them. Only pressure canning generates enough heat to destroy spores and prevent botulism from taking hold.
The 4.6 PH Rule
Every canning recipe hinges on one number: 4.6. This pH threshold importance can’t be overstated—it’s the line between high-acid foods and low-acid foods.
Every canning recipe hinges on one number: 4.6, the line between safe and dangerous
At or below 4.6, water bath canning works. Above it, you need pressure canning to prevent botulism.
Measuring acidity accuracy matters here. Use calibrated pH strips or meters, not guesswork, to meet food safety standards.
Why Tomatoes Need Acid
Tomatoes sit right at the borderline, naturally hovering close to 4.6 pH. Ripeness, variety, and growing conditions shift their organic acid balance, so you can’t assume safety without help.
That’s why tested recipes call for bottled lemon juice, citric acid, or vinegar as your acidifying agent selection. This locks in pH below 4.6, helps with botulism spore prevention, and even helps stabilize lycopene during processing.
Foods for Each Canning Method
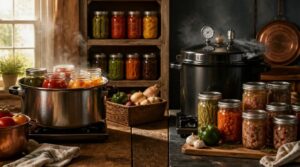
Your pantry shelf holds all kinds of foods, and each one needs the right method. Some jars call for a simple boiling water bath, while others demand the higher heat of a pressure canner. Here’s how to sort your harvest into the correct category.
Fruits, Jams, and Jellies
Fruit sits naturally in the high-acid category, which makes water bath canning the correct choice. Pectin, sugar, and fruit acidity work together for proper gel set. Ripeness affects pectin levels, so slightly underripe fruit often sets better.
Marmalades and conserves add texture through peels, nuts, or dried fruit, but the acidification and processing rules stay the same.
Pickles and Acidic Sauces
Vinegar does the heavy lifting here. Most pickle brines use 5 percent acetic acid vinegar, landing final pH around 2.5 to 3.0, well under the safety threshold.
Fermented pickles rely on lactic acid instead, built through salt brines at 2 to 6 percent concentration.
Either path qualifies as high-acid, so water bath canning stays the correct, safe method for pickles and relishes.
Vegetables and Garden Harvests
Garden vegetables sit firmly in low-acid territory, so pressure canning is required for safe storage. Skip Best Harvest Timing and Postharvest Cooling Techniques, and quality suffers before jars even seal.
- Beans, carrots, and corn need 240°F processing
- Water bath methods can’t destroy botulism spores
- Succession Planting Strategies mean staggered harvests, staggered canning batches
Vegetable Storage Methods work for fresh eating, but preserved food safety protocols demand pressure canning.
Meats, Fish, and Poultry
Beef, poultry, and fish are low-acid proteins, which puts them squarely in pressure canning territory. Only 240°F destroys botulism spores.
Check freshness first: firm texture, no sour odors. Thaw safely in the fridge, never on the counter.
| Food | Processing Temp | Method |
|---|---|---|
| Beef | 240°F | Pressure |
| Poultry | 240°F | Pressure |
| Fish | 240°F | Pressure |
| Ground meat | 240°F | Pressure |
| Broth | 240°F | Pressure |
Foods Needing Tested Recipes
Not every food fits neatly into "high-acid" or "low-acid." That’s where tested recipes matter most, covering:
- Altitude adjustment factors
- Headspace measurement accuracy
- Pectin sugar ratios for jams
- Microbial stability testing results
Water bath vs pressure canning choices depend on validated data, not guesswork. Skipping recipe validation risks unsafe seals or bacterial growth, undermining home canning safety entirely.
Equipment and Process Differences
Your canning method decides more than food safety. It also decides what tools sit on your counter. Here’s what each process asks of your kitchen, step by step.
Water Bath Canning Tools
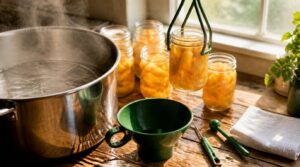
Good water bath canning tools keep hot jars safe in your hands, not on the floor. A large pot, rack, and jar lifter cover the basics.
| Tool | Purpose |
|---|---|
| Funnel | Guides food, protects rims |
| Debubbler | Removes trapped air |
| Headspace tool | Sets correct fill line |
| Clean cloth | Wipes rims before sealing |
Clean rims and proper headspace mean sealed jars you can trust for months.
Pressure Canner Parts
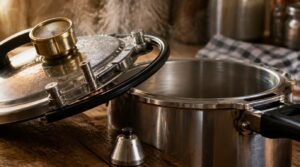
A locking lid, gasket, and gauge work together to build pressure safely. The gasket seals tight against steam loss. Your gauge—dial or weighted—shows when pressure’s reached. Some canners include a safety fuse that releases if pressure spikes too high.
Inner pots, usually aluminum or stainless steel, distribute heat evenly. Check your gasket regularly; cracks compromise the seal.
Venting and Pressurizing
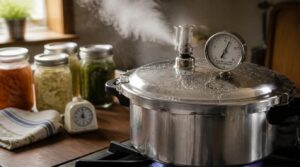
Steam hisses out first — that’s your pressure canner venting, not malfunctioning. Venting duration matters: run it a full 10 minutes to purge trapped air before you build pressure.
Skipping this causes air pockets and uneven heat. Watch your weighted or dial gauge closely, adjust for altitude, and let natural depressurization finish the job. Maintain that pressure regulator regularly — it’s your safety backbone.
Processing Time Differences
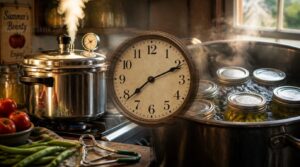
Once vented, your pressure canner needs 5 to 15 minutes to reach full pressure, then processes 25 to 90 minutes depending on food type.
Water bath canning runs 5 to 45 minutes total, no pressure buildup involved.
Altitude adds time to both methods. Summer heat buildup can slow your equipment, so factor that into batch processing efficiency during peak canning season.
Cooling and Sealing Jars
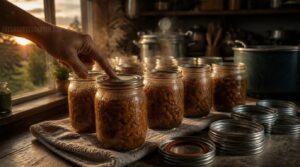
Once processing ends, jars need 12 to 24 hours of undisturbed cooling to form a proper vacuum seal. Don’t retighten lids while hot.
As jars cool, contracting air pulls lids down tight. Check seals by pressing the center; no flex means success. Remove bands after cooling to inspect gasket integrity, and refrigerate any jar that fails to seal.
Safety Risks Gardeners Should Know
Your garden harvest deserves more than good intentions in the kitchen. A few small mistakes at the canning stage can turn a safe jar into a dangerous one. Here’s what you need to watch for before you seal that lid.
Botulism Prevention Basics
Botulism is rare, but it’s deadly, and prevention is non-negotiable. Spore inactivation requires pressure canning, since spores survive boiling.
Never taste home-canned food to test safety; instead, boil low-acid foods 10 minutes for toxin destruction. Refrigerate infused oils, discard after 4 days. Skip honey for infants under 12 months.
Follow tested guidelines and maintain strict storage temperature control to stop microbial growth.
Why Boiling is Limited
Water has a temperature ceiling at sea level: 212°F, no matter how hard it boils. Atmospheric pressure locks vapor pressure in place, so boiling water canning can’t sterilize resilient botulism spores.
Heat transfer stalls once vapor loss matches heat input. That’s why low-acid foods need pressure canning, not just longer boiling times, to reach the temperatures required for microbial growth prevention.
Unsafe Recipe Substitutions
Swapping ingredients in a tested recipe seems harmless, but it changes the safety math. Replacing vinegar with lemon juice, or citric acid with a "natural" substitute, can shift acidity below safe levels. Pectin replacements weaken gel strength. Any change affecting pH of 4.6 or lower turns a high-acid food low-acid, raising botulism risk dramatically. Follow tested guidelines exactly.
Checking Jar Seals Safely
Once jars cool for 12-24 hours, check seals before storing anything. Remove the ring first, then try the center press technique—no give means success.
- Concave, immovable lid center
- Lid stays put when lifted alone
- Smooth rim, no cracks
- Solid thud on tap test
- No liquid seeping near rim
Failed seal? Reprocess with a new lid immediately for shelf stability.
Choosing The Right Canning Method
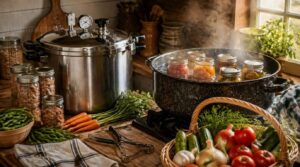
Now you know the science, it’s time to apply it. The right method depends on what’s sitting in your basket. Here’s how to match your harvest to the correct canning approach.
For Fruit Harvests
Peak-ripe apples, pears, and berries picked using gentle picking techniques and cooled quickly are naturally high-acid, making them ideal for water bath canning.
Post-harvest cooling and careful fruit sorting methods protect quality before processing. Check perfect ripeness indicators first, then process jams, jellies, and preserves in boiling water, no pressure canning required for these high-acid foods.
For Vegetable Harvests
Garden vegetables tell a different safety story than fruit. Green beans, carrots, corn, and summer squash are all low-acid, so they need pressure canning, not water bath.
Pressure canning garden harvests:
- Green beans at 240°F
- Carrots pressure processed
- Corn requiring full pressure
Skipping this step risks botulism. Follow tested guidelines for internal safety every time.
For Tomato Recipes
Why do tomatoes trip people up more than other produce? Because their acidity swings by variety and ripeness. Add lemon juice or citric acid to hit pH 4.6, then choose your method.
| Style | Method | Key Note |
|---|---|---|
| Plain sauce | Water bath | Test acidity |
| Mixed veggie | Pressure can | Required for safety |
| Whole/crushed | Either | Check recipe |
Adjust altitude timing always.
For Long-term Pantry Storage
Sealing the jar is only half the job. Storage temperature matters just as much: keep pantry shelves between 50 and 70°F, away from ovens and sunlight. Watch humidity too, staying under 15 percent prevents mold.
Use glass or BPA-free containers, and always practice FIFO rotation so older jars get used first.
Both canning methods offer 12 to 18 months shelf life when stored right.
When Pressure Canning is Required
When your recipe’s pH sits above 4.6, pressure canning isn’t optional. Low-acid foods like meat, poultry, fish, and most vegetables need 240°F to destroy botulism spores.
Ask yourself:
- Does it contain meat or seafood?
- Is it a vegetable without added acid?
- Does the recipe skip vinegar or lemon juice?
Any "yes" means pressure canning, no exceptions.
Frequently Asked Questions (FAQs)
Do the Amish use pressure canners?
Old ways bend before new needs, like a quilt patched with modern thread.
Yes—many Amish households use pressure canners for low-acid foods, while favoring water bath methods for fruits.
Community guidance and local bishops shape each family’s choice, blending tradition with proven safety.
Can I use my pressure canner as a water bath?
Yes. Remove the pressure lid or weight, keep it unlocked, and maintain a rolling boil with jars submerged one inch deep. Use a rack, follow tested water bath times, and adjust for altitude—never rely on the gauge.
Is a pressure canner better than a water bath?
Better" is like asking if a truck beats a sedan—depends on the load. For low-acid foods like meats, pressure canning wins outright. For jams and pickles, water bath canning stays simpler, cheaper, and plenty safe.
What foods cannot be pressure canned?
Dairy, grains, and eggs don’t pressure can safely.
Dairy spoilage risks, poor grain heat penetration, egg safety concerns, unsafe thickeners, and plant milk separation all cause uneven heating.
Stick to tested, low-acid or high-acid recipes matching your chosen method.
Can I use a pressure canner for water bath recipes?
Pressure canners technically permit water bath recipes if jars stay fully submerged and you follow water bath timing, not pressure timing.
But mismatched heat risks overprocessing and texture degradation.
Check your canner’s manual and trusted extension guidelines before attempting this dual-use approach.
How do I know if my pressure canner is accurate?
Test your dial gauge yearly at your local extension service, checking readings at 5, 10, and 15 psi. Weighted regulators rarely need this. Watch for steady jiggling during venting and processing—irregular movement signals your pressure canner needs attention.
How should I store canned jars after processing?
Cool shelves, firm lids, clear labels — that’s your trio. Store jars at 50–70°F, check for concave seals, remove bands, and label with contents and date. Use first in, first out to keep your pantry stocked safely.
What causes jar seals to fail after canning?
Rim contamination, jar rim defects, overtightened bands, and thermal shock from rapid cooling all break the seal. Improper lid handling, incorrect headspace, or skipping proper sterilization and processing times also cause failures, risking spoilage instead of preventing it.
Conclusion
Funny thing: the same jar holding sweet strawberry jam could turn deadly if filled with green beans instead. That coincidence captures the difference between pressure canning and water bath perfectly. Acid decides safety, not appearance or habit. Your canner choice depends on pH, never on guesswork. Trust tested recipes, watch your gauge, and respect the 240°F pressure canning requires. Botulism doesn’t announce itself. Your careful process remains the only warning label that truly matters.
- https://www.thedenmanhomestead.com/post/the-difference-between-water-bath-canning-pressure-canning
- https://extension.sdstate.edu/water-bathing-vs-pressure-canning
- https://blogs.cornell.edu/fruition/2025/06/26/canning
- https://www.growingagreenerworld.com/how-to-can-vegetables-safely
- https://www.theseasonalhomestead.com/water-bath-canning-a-beginners-guide