This site is supported by our readers. We may earn a commission, at no cost to you, if you purchase through links.
A single jar of improperly canned green beans can harbor Clostridium botulinum spores strong enough to survive a rolling boil, spores that stay dormant until they find the low-oxygen environment they crave inside a sealed jar. That’s not fearmongering; it’s basic food chemistry, and it’s why generations of home canners swear by pressure canners and precise pH readings instead of guesswork passed down from grandma’s kitchen. Your garden’s bounty deserves better than a risky shortcut.
Learning how to safely can garden produce means understanding acidity, temperature, and timing well enough to trust every seal on your pantry shelf. Get these fundamentals right, and you’ll turn today’s harvest into meals you can enjoy with confidence for months to come.
Table Of Contents
- Key Takeaways
- Safe Canning Basics
- Prepare Garden Produce
- Step-by-Step Canning Process
- Top 6 Canning Supplies
- Store Canned Produce Safely
- Frequently Asked Questions (FAQs)
- Is home canning safe?
- Why should you can your garden vegetables?
- Should you can your garden vegetables before they spoil?
- Is Canning your own vegetables a good idea?
- What vegetables should not be canned?
- How did people can before pressure canners?
- How to avoid botulism when sealing mason jars?
- What vegetables can be canned for beginners?
- What tools are essential besides the pressure canner itself?
- How long should green beans and corn process for?
- Conclusion
Key Takeaways
- Low-acid foods like green beans, meats, and dairy must be pressure canned at 240°F, since Clostridium botulinum spores can survive boiling and only high pressure destroys them.
- Correct pH matters as much as temperature, since high-acid foods (4.6 or below) are safe in a water bath while low-acid foods need pressure canning or added acid to reach that threshold.
- Proper preparation and jar technique—accurate headspace, trapped-air removal, clean rims, and full processing times—directly determine whether a seal holds and food stays safe.
- After processing, always verify each jar’s vacuum seal, label it with the canning date, and store it in a cool, dark place, using it within 12 to 18 months for the best quality.
Safe Canning Basics
Before you slice a single cucumber, you need to understand what makes canning safe in the first place. It all comes down to acidity, temperature, and a few non-negotiable rules that keep dangerous bacteria out of your jars. Here’s what every home canner needs to know before getting started.
Getting your acid levels and processing times right starts with having the correct gear on hand, so stock up using this beginner’s guide to essential canning supplies before you begin.
Acidity and PH Levels
Ever wonder why some pickles sit safely on a shelf while others need refrigeration? It comes down to pH levels. The scale runs 0–14, with 7 neutral; each step means a tenfold acidity shift.
High-acid foods (pH 4.6 or below) resist microbial growth—acid disrupts cell membranes.
Low-acid foods need pressure canning or acidification, since buffering compounds can mask true acidity without accurate measurement.
Understanding the potential of hydrogen is essential for maintaining these critical safety standards.
Botulism Prevention Essentials
Getting your pH right matters, but it’s only half the battle. Clostridium botulinum spores survive freezing and boiling, needing 240°F (only reachable via pressure canning) for destruction. Here’s your safety checklist:
- Never sensory-test canned goods
- Skip honey for infants under one
- Watch for double vision or weakness—seek help immediately
Following tested guidelines isn’t paranoia. It’s how you outsmart an invisible threat.
Water Bath Versus Pressure
So which method do you actually need? Let acidity decide, not habit.
High-acid foods (pH 4.6 or below—jams, pickles, most fruits) are safe in a boiling water bath at 212°F.
Low-acid foods like green beans, meats, and dairy demand a pressure canner reaching 240°F.
Altitude shifts your numbers too—adjust pressure or time accordingly.
Choose wrong, and you’re gambling with botulism.
Foods Needing Added Acid
Some low-acid foods can shift categories entirely with a little help. Tomatoes, pickled cucumbers, beans, and beets often need added acid—vinegar, lemon juice, or citric acid—to reach that safe 4.6 pH.
Lemon juice works predictably at one tablespoon per pint. Vinegar adds tang while acidifying. Citric acid measures precisely. Mix thoroughly; uneven acidity anywhere in the jar invites trouble.
Unsafe Shortcuts to Avoid
Occasionally, a tired canner reaches for a shortcut, and that’s exactly when trouble starts. Skipping sterilization, guessing at headspace, or shaving minutes off processing times invites botulism risk, not savings.
- Improper acidity adjustments
- Bypassing sterilization steps
- Rushed processing times
- Uncalibrated equipment dangers
Whether you’re using pressure canning or water bath canning, tested recipes exist for a reason—follow them exactly.
Prepare Garden Produce
Once you understand the science behind safe canning, it’s time to get your hands dirty with the produce itself. Good preparation makes all the difference between a jar that seals perfectly and one that lets you down months later. Here’s exactly what you need to do before a single jar goes near the canner.
Harvest at Peak Ripeness
Peak ripeness has a short window, so timing is everything during harvest season.
Tomatoes should show full red color, peaches yield gently to pressure, and berries release a sweet aroma when ready. Pick in the morning for crisp texture, and work quickly, since flavor and sugar content peak right at harvest, making that moment your best shot for preserving your homegrown harvest successfully.
Wash and Trim Thoroughly
Grab a soft brush and get scrubbing, because dirt hides in every crevice of your garden haul.
- Rinse under running water
- Brush firm veggies gently
- Trim bruised or moldy spots
- Separate greens leaf by leaf
- Sanitize knives between cuts
Uniform slicing speeds heat penetration, while checking for soil pockets keeps contamination out of your jars entirely.
Sort by Size
Ever wonder why one green bean cooks perfectly while its jar-mate turns mushy? Size is the culprit.
Measure primary dimensions with calipers, grouping similar-sized vegetables for even processing.
| Size Group | Example | Processing Note |
|---|---|---|
| Small | Baby carrots | Shorter cook time |
| Large | Thick zucchini | Risk of undercooking |
Consistent orientation matters—line up stem ends together for accurate batch processing every time.
Choose Hot or Raw Pack
Now comes the real decision point: raw or hot pack? Raw pack suits crisp pickles and high-acid foods, saving prep time. Hot pack boils produce 2-5 minutes first, shrinking pieces, removing air pockets, and reducing floating.
Dense vegetables like carrots benefit from hot pack’s preheating; pressure-canned items often do better raw, needing less heat exposure overall.
Use Correct Headspace
That gap between your food and the jar lid isn’t wasted space, it’s doing important work. Leave too little, and expansion during processing pushes food into the seal. Leave too much, and heat can’t penetrate properly. Aim for exactly 1 inch with raw-packed vegetables.
- Failed seals from crowded jars
- Cloudy liquid from overpacking
- Wasted harvest from underfilling
- Spoiled batches from guesswork
- Wobbly lids that won’t seal
Step-by-Step Canning Process
Once your produce is prepped and ready, it’s time to move into the actual canning process, where precision really matters.
Every step, from sterilizing jars to timing your processing, plays a role in keeping your food safe and shelf-stable.
Here’s exactly how to move through each stage, in the right order, without skipping a beat.
Sterilize Jars and Tools
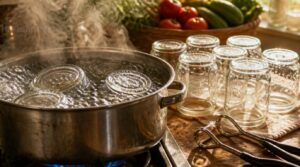
Before a single tomato hits a jar, your equipment needs its own hot bath. Sterilized jars are non-negotiable: boil jars 10 minutes, or oven-sterilize at 140°C for 10 (skip metal lids there). Microwave methods work only for glass, no metal parts. Check every rim for chips—damaged jars fail seals. Keep your jar lifter handy; hot glass and bare hands don’t mix.
Fill Jars Safely
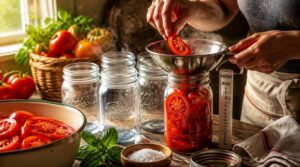
With hot, sterile jars ready, pack your produce right away using a wide-mouth funnel to keep rims clean. Leave 1/4 to 1/2 inch headspace, never more. Don’t push food down or let it touch the rim—that risks seal failure. Wipe rims before lids go on. Precise headspace accuracy now saves heartbreak later.
Remove Trapped Air
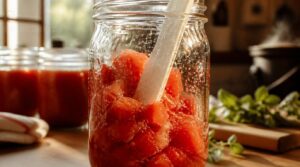
Those jars aren’t done yet—hidden bubbles can wreck your seal. Grab a bubble remover (or nonmetallic spatula) and slide it along the jar’s inner wall.
- Watch for rising bubbles
- Slide spatula gently
- Tap jar sides
- Recheck headspace
- Confirm no bubbles cling
Tapping jars dislodges stubborn pockets. Proper air removal ensures a true vacuum seal, so don’t skip it before processing.
Wipe Rims Clean
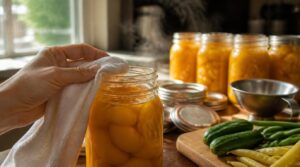
Bubbles gone? Good—now grab a damp cloth and check every rim for stray food or syrup, since even a tiny speck can keep your two-piece lids from sealing properly. Wipe in one clean motion around the entire edge.
This step matters as much as kitchen sterilization itself: a spotless rim is what lets your canning jars form that all-important vacuum seal, protecting your food safety every time.
Process for Proper Time
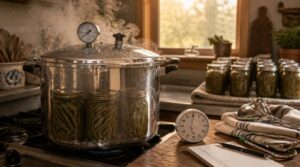
Once your jars enter the canner, resist any urge to rush. Processing time isn’t negotiable—it’s what neutralizes botulism spores in low-acid foods.
Green beans need 20 minutes (pints) or 25 (quarts) under pressure. Above 1,000 feet, add time per tested charts; altitude changes everything. If your timer falters, restart the full duration. Afterward, let jars cool undisturbed—rushing this risks seal failure and jar breakage.
Top 6 Canning Supplies
Once you understand the science and steps behind safe canning, having the right tools makes everything easier. Good equipment doesn’t just save you time in the kitchen; it protects the seal, the pressure, and ultimately your family’s safety. Here are six supplies worth adding to your canning setup.
1. Stainless Steel Canning Supplies Kit
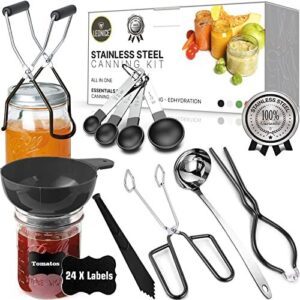
Think of this kit as your all-in-one starter arsenal. It packs a 21 to 22 quart stock pot, canning rack, jar lifter, magnetic lid lifter, funnel, and wrench, all in food-grade stainless steel.
The tri-ply bottom distributes heat evenly, while silicone-coated grips keep your grip steady around scalding jars. Heat-resistant gloves and a bubble remover round things out, and everything nests back into the pot, so cleanup and storage stay refreshingly simple.
| Best For | This kit is best for beginners who want an all-in-one set of stainless steel tools to get started with home canning, whether they’re using the water bath or pressure method. |
|---|---|
| Material | Stainless steel |
| Canning Method | Water bath & pressure |
| Skill Level | Beginner |
| Weight | 1.39 lbs |
| Use Case | Home preservation |
| Safety Features | Jar lifter, lid lifter |
| Additional Features |
|
- Includes a comprehensive set of tools—jam ladle, canning funnel, jar lifter, jar wrench, and a 3-in-1 bubble remover—covering most canning needs in one kit
- Made from food-grade stainless steel, so it’s durable and safe for repeated use with hot jars and liquids
- Comes with 24 jar labels plus measuring cups and tongs, making it easy to prep ingredients and stay organized
- Doesn’t include a canning pot, so you’ll need to buy one separately to get started
- Mason jars aren’t included either, adding another separate purchase
- Best results depend on processing same-sized jars in each batch, which can limit flexibility if you’re working with mixed jar sizes
2. Stainless Steel Canning Supplies Starter Kit
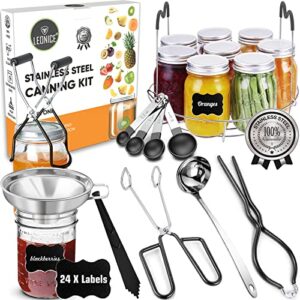
Twenty-two quarts of stainless steel and a rack that lets heat circulate freely — that’s the heart of this starter set. You get a jar lifter, magnetic lid wand, funnel, and often a wrench, ladle, and measuring cup tossed in for good measure.
BPA-free silicone accents keep hands safe from scalding metal, and everything’s dishwasher safe once you’re done. At 6 to 12 pounds total, it’s compact enough for cabinet storage yet sturdy enough to handle jars from 8 ounces up to a full quart.
| Best For | This kit is best for beginners who want an easy, complete introduction to home canning without hunting down separate tools. |
|---|---|
| Material | Stainless steel |
| Canning Method | Water bath & pressure |
| Skill Level | Beginner |
| Weight | 2.03 lbs |
| Use Case | Home preservation |
| Safety Features | Jar lifter, lid lifter |
| Additional Features |
|
- Comes with all the essentials — rack, ladle, funnel, tongs, jar lifter, and jar wrench — in one set
- Handy 3-in-1 magnetic lid lifter and bubble remover simplifies prep and jar handling
- Works for both boiling water bath and pressure canning, so it grows with your skills
- Doesn’t include the large canning pot, which you’ll need to buy separately
- Best results come from processing same-sized jars in each batch, which limits flexibility
- Stainless steel tools can get hot fast, so careful handling is still needed
3. Preservers Handbook Food Preservation Guide
Every good canning kitchen needs a reference that doesn’t assume you already know what "headspace" or "venting" means. The Preservers Handbook covers exactly that ground: pH thresholds, hot pack versus raw pack, and processing times by jar size, all in one 144-page guide.
At 7 ounces, it slips into a drawer without hogging shelf space. What makes it worth owning is the troubleshooting section, since even seasoned canners hit snags with seals or cloudy brine now and then.
| Best For | This guide is best for home cooks, preppers, and budget-minded families who want to safely preserve food through canning, fermenting, freezing, and dehydrating. |
|---|---|
| Material | N/A |
| Canning Method | Water bath & pressure |
| Skill Level | Beginner to advanced |
| Weight | 7 ounces |
| Use Case | Home preservation |
| Safety Features | Safety protocols guide |
| Additional Features |
|
- Clear, beginner-friendly instructions for water bath and pressure canning, including key concepts like headspace and venting
- Helpful troubleshooting section for common issues like seal failures or cloudy brine
- Compact and lightweight (7 ounces), making it easy to store in any kitchen
- Requires hands-on effort and strict adherence to safety and temperature protocols
- May involve upfront costs for basic preservation equipment
- Limited to 144 pages, so some advanced topics may not be covered in depth
4. Pressure Regulator Canning Weights for Presto Canner
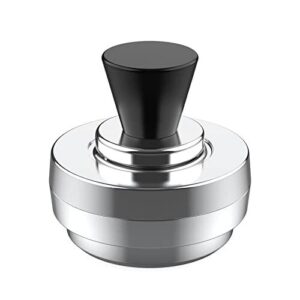
If your dial gauge is on the fritz, this three-piece weight set (5, 10, 15 lbs) fixes that headache for good, letting you trust the rocking motion instead. It converts gauged Presto canners into weighted systems, fitting models from 3 to 23 quarts, including the 16- and 23-quart workhorses.
Use 10 lbs for low-acid vegetables below 1,000 feet, 15 lbs above. Vent 10 minutes first, always. Check rings for cracks before each canning season.
| Best For | Home canners who already own a Presto pressure canner and want a reliable, gauge-free way to monitor pressure using the tried-and-true rocking motion method. |
|---|---|
| Material | Stainless steel |
| Canning Method | Pressure |
| Skill Level | Intermediate |
| Weight | 0.18 lbs |
| Use Case | Home preservation |
| Safety Features | Pressure regulation |
| Additional Features |
|
- Fits a wide range of Presto canners, from small 3-quart models up to large 16- and 23-quart workhorses
- Offers three pressure settings (5, 10, 15 lbs) to handle both high-acid and low-acid canning at different altitudes
- Durable stainless steel construction means it’s built to last through many canning seasons
- Requires watching for a steady rock rather than reading a simple gauge, which takes some getting used to
- Demands a full 10-minute venting period before use, adding extra time to the process
- Needs regular inspection for cracks each season to ensure safe, accurate performance
5. Nesco Smart Electric Pressure Canner
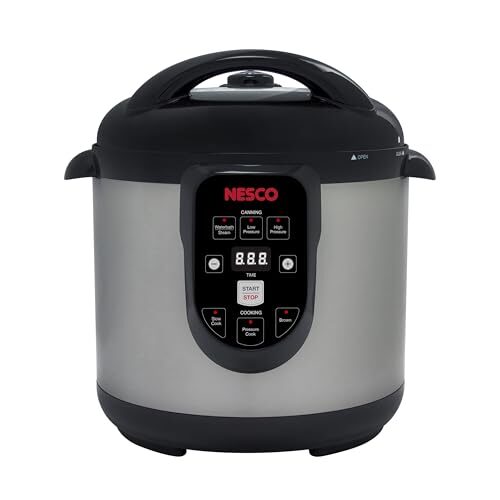
Ever wish canning day didn’t mean babysitting a dial gauge? The Nesco Smart Electric Pressure Canner does that watching for you. Its 9.5-quart chamber fits four quart jars, five pints, or sixteen jelly jars per load, with automatic pressure regulation and a locking lid that won’t open until it’s safe.
Beyond canning, it slow cooks, steams, and doubles as a rice cooker. For beginners especially, that built-in consistency takes real guesswork off your plate.
| Best For | home cooks and beginner canners who want an all-in-one appliance that automates food preservation without the need to watch a stovetop dial. |
|---|---|
| Material | Stainless steel |
| Canning Method | Pressure & water bath |
| Skill Level | Beginner |
| Weight | N/A |
| Use Case | Home preservation |
| Safety Features | Locking lid, float valve |
| Additional Features |
|
- Automatic pressure and temperature regulation reduces user error, especially for beginners
- Four-in-one functionality (pressure canning, slow cooking, steaming, water bath) adds everyday versatility beyond canning season
- Locking lid and float valve safety system provide added peace of mind during high-pressure cooking
- 16.53-inch height takes up significant counter or storage space
- Requires a power outlet, so it’s not an option for camping or off-grid use
- Nonstick inner pot means extra care is needed to avoid scratching the coating over time
6. Presto Digital 17 Quart Pressure Canner
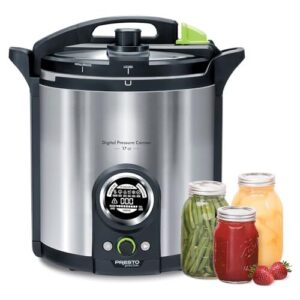
If you’d rather set a dial and walk away, the Presto Digital 17 Quart Pressure Canner delivers automated temperature control with a locking lid and ten safety features built in.
Its extra-tall design accommodates quart jars for pressure or boiling-water canning alike, with room for 8 pints or 5 quarts under pressure.
The LED display guides each step, while the removable PFAS-free ceramic pot makes cleanup painless after a long canning day.
| Best For | Home canners who want a hands-off, beginner-friendly setup with automated safety checks for both pressure and boiling-water canning. |
|---|---|
| Material | Stainless steel |
| Canning Method | Pressure & water bath |
| Skill Level | Beginner to advanced |
| Weight | 24.3 lbs |
| Use Case | Home preservation |
| Safety Features | 10 safety features |
| Additional Features |
|
- Automated temperature control and automatic boiling point detection take the guesswork out of canning
- Ten built-in safety features, including a cover locking system, add peace of mind
- Removable PFAS-free ceramic-coated pot makes cleanup quick and easy
- Requires electrical power, so it won’t work during outages or off-grid
- Large, extra-tall footprint may be tough to store in smaller kitchens
- At 24.3 pounds, it’s not the easiest appliance to move around
Store Canned Produce Safely
You’ve done the hard work of filling, processing, and sealing your jars, so don’t let a shortcut at the storage stage undo all that effort. A few simple habits protect both your food and your peace of mind for months to come. Here’s exactly what to check and do once those jars come out of the canner.
Check Every Jar Seal
Once jars cool completely, press each lid’s center: it shouldn’t flex or click back. A proper vacuum seal sits concave, stays silent when tapped firmly (a dull thud, not a ringing sound), and holds tight even with the band removed.
If any lid springs back or the button pops, that seal’s failed—reprocess within 24 hours using fresh two-piece lids to prevent spoilage.
Label Dates Clearly
Once that seal passes inspection, grab a permanent marker and get the date onto the lid before you shelve anything. Write the canning date in month-day-year format, every jar, every batch—consistency prevents mix-ups later.
Use waterproof ink so pantry humidity won’t smudge it. If you’re processing several batches, add a simple batch number for easy tracking, and place labels where seams won’t blur your handwriting.
Store Cool and Dark
Where you shelve those dated jars matters just as much as the canning itself. Aim for a spot holding 50 to 70°F, away from ovens and sunlight—basements or interior pantries beat garages every time.
Darkness protects color and vitamins, while steady humidity and airflow keep lids from sweating. Group jars by type, and your pantry stays organized and shelf-stable for months.
Watch for Spoilage Signs
Even sealed jars deserve a monthly once-over. Identifying discoloration, smelling off odors, or detecting slimy textures means the jar goes in the trash, not on the table.
Watch especially for:
- Bulging or leaking lids signaling gas buildup
- Cloudy liquid or spurting when opened
- Mold, no matter how small
Botulism prevention starts with your eyes and nose—when in doubt, throw it out.
Trust your eyes and nose to spot spoiled canned food—when in doubt, throw it out
Use Within Peak Quality
Rarely does home-canned food last forever, so plan to enjoy your harvest within 12 to 18 months for peak flavor, color, and texture.
Label every jar with its canning date, then rotate stock, using older jars first.
Nutrient retention and brightness fade gradually past that window—still safe if sealed properly, just less vibrant.
Track shelf life, and savor your work while it’s at its best.
Frequently Asked Questions (FAQs)
Is home canning safe?
Yes—done right, it’s almost bulletproof safe. Home canning becomes risky only when folks skip tested recipes, try oven canning, or ignore pressure canning rules for low-acid foods. Follow proper guidelines, and botulism risk drops to nearly zero.
Why should you can your garden vegetables?
Canning turns surplus harvest into shelf-stable food, reducing waste and stretching your growing season into winter.
You’ll lock in nutrients, gain meal-prep convenience, and build real self-sufficiency—turning today’s garden abundance into tomorrow’s dinner, no grocery run required.
Should you can your garden vegetables before they spoil?
Absolutely — race the clock like your harvest depends on it, because it does. Peak ripeness fades fast; spoilage waits for no one. Canning within hours locks in flavor and safety, turning garden abundance into shelf-stable success instead of compost.
Is Canning your own vegetables a good idea?
Turning your garden’s overflow into pantry staples is smart: it locks in homegrown flavor, helps with self-sufficiency goals, and builds seasonal food security. With tested pressure canning or water bath methods, you’ll save money while eating safely all winter.
What vegetables should not be canned?
Better safe than sorry: skip low-acid vegetables like leafy greens, mushrooms, and summer squash for plain canning. Their mushy texture, high moisture, and botulism risk demand pressure canning or tested unsafe-profile avoidance—not improper water-bath shortcuts that jeopardize food safety.
How did people can before pressure canners?
Long before pressure canners existed, folks relied on water bath canning for high-acid foods.
Plus ancient drying, salt curing, smoking, root cellaring, and fermentation—time-tested food preservation methods that kept low-acid produce edible without modern equipment.
How to avoid botulism when sealing mason jars?
Sealing’s the easy part—it’s what happens before the seal that counts. Skip guesswork: use tested recipes, verify pH below 6 or pressure can low-acid foods, and reach spore-killing temperatures. Botulism can’t survive proper pressure canning—your best defense against invisible risk.
What vegetables can be canned for beginners?
Green beans, carrots, tomatoes, potatoes, and squash are beginner favorites. Beans and carrots hold texture well under pressure canning; tomatoes need acidity adjustments for water-bath canning; potatoes require solid packing and headspace; squash needs quick blanching before jarring.
What tools are essential besides the pressure canner itself?
A jar lifter, canning funnel, and debubbler round out your kit, plus a headspace ruler for accuracy, lint-free cloths for rim wiping, and a magnetic lid wand—each keeping jar handling safety and clean seals front and center.
How long should green beans and corn process for?
Patience pays off here: since these are low-acid foods, rushing the clock invites real risk. Bean processing times run 20 minutes (pints) or 25 (quarts); corn canning duration stretches to 55 or 85 minutes—always adjusting for altitude and pressure accuracy.
Conclusion
Right acid, right heat, right time—that’s the rhythm behind every safe jar. Once you understand how to safely can garden produce, you stop guessing and start trusting your own hands. Your shelves become a record of patience, not luck. That satisfying pop of a sealed lid isn’t just sound; it’s proof your work paid off. So label your jars, store them cool, and taste summer again come January—safely, proudly, on your own terms.