This site is supported by our readers. We may earn a commission, at no cost to you, if you purchase through links.
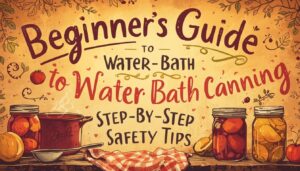
My grandmother never owned a pressure canner, yet her pantry shelf held rows of peaches, jam, and pickles that lasted all winter. Her secret wasn’t fancy equipment. It was a pot of boiling water, a rack, and a little know-how about acidity.
That’s the heart of water bath canning: a simple, beginner-friendly method built on one rule — high-acid foods stay safe when heated to 212°F long enough to seal out spoilage. No steam gauges, no guesswork, just timing and clean jars.
This beginner guide to water bath canning walks you through the exact steps, tools, and safety checks you need to fill your own shelf with food you made yourself.
Table Of Contents
Key Takeaways
- Water bath canning only works safely for high-acid foods (pH 4.6 or below), like fruits, jams, and vinegar-based pickles, since low-acid foods need pressure canning to reach the higher temperatures required to kill botulism spores.
- Success depends on precise, repeatable steps: use tested recipes, leave correct headspace (1/4 inch for jams, 1/2 inch for fruits and pickles), remove air bubbles, wipe rims clean, and tighten bands fingertip-tight before processing.
- Processing requires a true rolling boil maintained for the full time, with jars submerged 1-2 inches under water and extra minutes added at higher altitudes to compensate for lower boiling temperatures.
- After processing, jars need 12-24 hours to cool and seal properly, and any lid that flexes or pops when pressed means the seal failed and that jar should go straight into the fridge.
What is Water Bath Canning
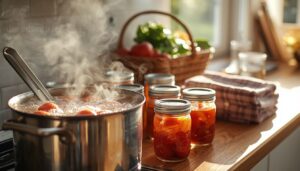
Water bath canning might sound intimidating, but it’s actually one of the easiest ways to start preserving food at home. Before you grab a single jar, though, you’ll want to know exactly what this method is and why it works. Here’s what makes it tick, starting with the basics every beginner needs.
If you’re eager to put those canning skills to work right away, try starting with easy homemade fruit preserves recipes that walk you through the whole process.
Beginner-friendly Preservation Method
Grab a pot, some jars, and boiling water—that’s really all this method asks of you. Water bath canning skips the pressure canner entirely, relying on a steady boil to seal jars shut. This technique is specifically suitable for high-acid foods like fruits and pickles.
It’s forgiving for first-timers, too. Start with tested recipes, follow the steps in order, and you’ll build real confidence in home canning safety before ever touching fancier equipment.
Best for High-acid Foods
Here’s the catch: not every food is safe for this method. Water bath canning works only for high-acid foods, meaning a pH of 4.6 or below.
- Fruits and fruit preserves
- Jams and jellies
- Pickles (vinegar-based)
- Acidified tomato sauce
Low-acid foods, like meat or plain vegetables, need pressure canning instead. Without that acidity, dangerous bacteria can survive the boiling water bath.
How Boiling Water Preserves
So how does that boiling water actually do its job? At 212°F, the heat causes cellular membrane disruption in bacteria, wiping out microbial contamination fast. It also halts enzyme activity that would otherwise spoil your food over time.
As jars cool, a vacuum seal forms, locking out air and keeping recontamination from creeping back in.
Garden-to-pantry Benefits
Once that vacuum seal locks in, your garden harvest turns into pantry gold. That August tomato glut? Preserved instead of wasted. This is where seasonal harvest planning pays off:
- Reduces food waste from overripe produce
- Lowers grocery costs through homemade jam and pickled vegetables
- Boosts food security with shelf-stable meals ready anytime
Small jars, big impact for your household and community ties.
Water Bath Versus Pressure Canning
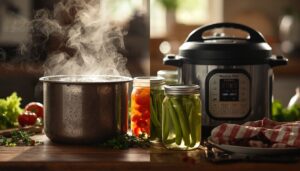
Not every food is safe for a water bath, and knowing the difference could save you a serious headache. Some foods need a pressure canner instead, and understanding why comes down to basic food science. Let’s break down what separates these two methods, and when you need to switch gears.
High-acid Versus Low-acid Foods
Every food falls into one of two camps: high-acid or low-acid, and that single distinction decides which canning method keeps you safe.
The magic number is a pH of 4.6. Berries, apples, and vinegar pickles fall below it naturally. Vegetables, meats, and seafood sit above it, which means they need pressure canning, not a water bath, to prevent botulism from taking hold.
Why Pressure Canning Differs
Why does plain boiling water top out where a sealed pot doesn’t? Because steam trapped under pressure climbs past 240°F, hot enough to destroy botulism spores that survive at boiling point.
That gap matters for low-acid safety:
- Locking lid builds pressure
- Gauge or weight regulates psi
- Steam replaces open water
- Temperature exceeds 240°F
- Spores, not just bacteria, die
Botulism Safety Basics
Why should a sealed jar ever worry you? Because Clostridium botulinum thrives in low-oxygen environments, growing quietly inside jars where no toxin recognition is possible by taste or smell.
Clostridium botulinum grows silently in low-oxygen jars, undetectable by taste or smell until it’s too late
Spore survival is the real danger since boiling won’t kill spores, only toxin. That’s why waterbath canning stays limited to high-acid foods.
Watch for symptom awareness: blurred vision or weakness means urgent care. Recipe reliability and food safety start with tested guidelines, not guesswork.
When Not to Water Bath
Some foods simply weren’t built for a boiling water bath, no matter how long you process them.
Low-acid foods like meat, poultry, seafood, and most vegetables can’t reach the temperature needed to destroy Clostridium botulinum spores—only pressure canning gets hot enough. Skip water bath for:
- Oil-based sauces (they shield bacteria from heat)
- Foods above 4.6 pH
- Damaged lids or seals
Always test pH and follow tested recipes for real food safety.
Foods Safe for Water Bath Canning
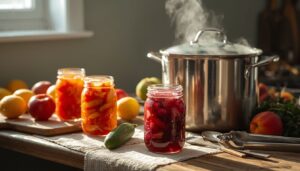
Now that you know why acidity matters, let’s get specific about what belongs in your canner. Some foods are naturals for this method, while others need a little help to qualify. Here’s your rundown of what’s safe to can, and what to leave for another day.
Fruits and Fruit Preserves
Fruit really is the friendliest place to start canning—it’s naturally high-acid, which makes a boiling water bath safe and simple. Apples, berries, and peaches all fit here.
Berries even bring their own natural pectin sources, no packets needed. Gentle simmering helps fruit texture maintenance and keeps anthocyanin color stability vibrant in red fruit preserves.
Jams, Jellies, and Marmalades
Jam, jelly, and marmalade all rely on the same trio: fruit, sugar, and pectin. Jam uses crushed fruit (45-70% fruit content), jelly relies on strained juice, and marmalade suspends citrus peel in a tangy gel.
Sugar (60-70%) concentrates pectin for setting, while acidity near pH 3.0-3.5 locks the gel. Watch for off odors or mold—early spoilage signs.
Pickles and Relishes
Sweet spreads aren’t the only pantry stars—your cucumber patch deserves a spot too. Vinegar brines (5-7% acidity) make pickles and relishes water bath safe, unlike fermented versions relying on lactic acid.
Picture:
- Crisp dill spears
- Golden bread-and-butter chips
- Chunky pepper relish
- Spiced peach pickles
- Tangy onion relish
Texture preservation depends on quick processing, while mustard seeds and turmeric build classic spice profiles.
Acidified Tomato Recipes
Tomatoes sit right on the pH borderline, so don’t trust your garden variety alone. Always add acid before filling: 2 tablespoons bottled lemon juice or ½ teaspoon citric acid per quart. This holds true for marinara, spiced sauces, or herb-flavored batches—low sugar doesn’t mean lower risk.
| Product | Acid Needed |
|---|---|
| Quart tomatoes | 2 tbsp lemon juice |
| Pint tomatoes | 1 tbsp lemon juice |
| Quart sauce | ½ tsp citric acid |
| Pint sauce | ¼ tsp citric acid |
| Spiced variants | Same as above |
Foods Beginners Should Avoid
Once your acid levels are handled, know where the hard line sits.
Low-acid vegetables like green beans and corn, plus all meat, need pressure canning—never water bath.
Dairy preservation dangers rule out milk or cream soups entirely.
Skip vinegar-only fixes or sugar for improper acidification mistakes.
This is real botulism prevention, not caution for caution’s sake.
Top 4 Water Bath Canning Tools
The right gear makes water bath canning safer and a lot less stressful. You don’t need a huge collection, just a few reliable pieces that do their job well. Here are four tools worth having on your counter before you start your first batch.
1. Granite Ware Enamelware Water Bath Canning Kit
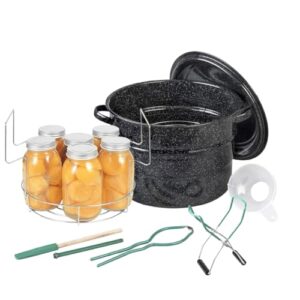
Everything you need lives inside one pot with this Granite Ware kit. The 21.5-quart enamelware canner comes with a rust-proof chromed rack sized for 7 quarts, 9 pints, or 12 half-pints, plus a five-piece toolset: bubble remover, ruler, jar lifter, magnetic lid lifter, and funnel.
That funnel fits both standard and wide-mouth jars, so filling stays mess-free. Just skip glass or induction stovetops, and hand-wash the enamel promptly to avoid rust.
| Best For | Home cooks who want a complete, all-in-one water bath canning setup for making jams, jellies, pickles, and preserved fruit without buying separate tools. |
|---|---|
| Material | Enameled Steel |
| Primary Use | Water Bath Canning |
| Jar Compatibility | Quart, Pint, Half-Pint |
| Color | Speckled Black |
| Unit Count | 1 Set |
| Home Canning Use | Yes |
| Additional Features |
|
- Comes with everything needed to start canning right away, including a five-piece toolset and jar rack
- Funnel works for both standard and wide-mouth jars, making filling quick and mess-free
- Tools and rack store neatly inside the pot, saving space in the kitchen
- Won’t work on glass or induction cooktops, limiting stove compatibility
- Needs hand washing and prompt drying to prevent rust, so it’s higher maintenance than dishwasher-safe cookware
- Built for water bath canning only, not suitable for pressure canning low-acid vegetables
2. Dalzom regular mouth canning lids
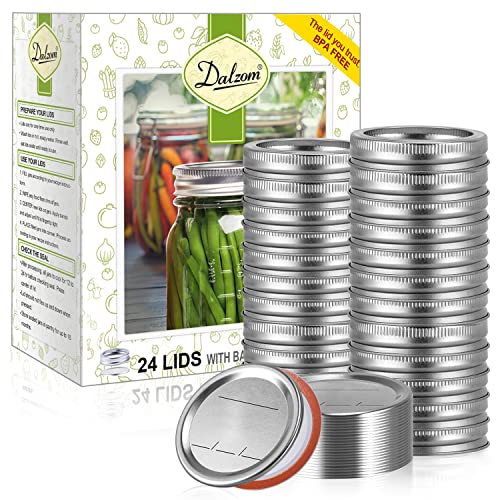
Forty-eight pieces per box, and every seal counts. Dalzom’s regular mouth lids fit Ball, Kerr, and Bernadin jars, using BPA-free silicone for airtight results.
They’re built for one-time use, with 24 reusable bands filling in for future batches. Tinplate construction keeps things sturdy without adding bulk.
Before buying, check your jar mouth size, since these only fit regular mouth openings, not wide mouth. That small detail saves you a frustrating trip back to the store.
| Best For | Home canners who regularly preserve jams, fruits, and other foods in standard regular mouth Ball, Kerr, or Bernadin jars and want a reliable, airtight seal for every batch. |
|---|---|
| Material | Tinplate and Silicone |
| Primary Use | Jar Sealing |
| Jar Compatibility | Regular Mouth Only |
| Color | Silver |
| Unit Count | 48 Pieces |
| Home Canning Use | Yes |
| Additional Features |
|
- BPA-free silicone seals deliver a dependable, airtight seal for safe home canning
- Generous 48-piece set includes 24 lids and 24 reusable rings, offering great value
- Compatible with multiple popular jar brands, including Ball, Kerr, and Bernadin
- Lids are single-use only, so you’ll need to restock them over time
- Only fits regular mouth jars, not compatible with wide mouth openings
- Rings are the sole reusable component, limiting overall reusability of the set
3. Ball Secure Grip Jar Lifter
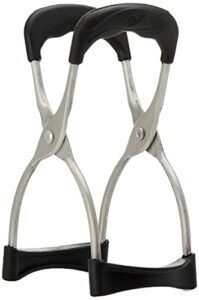
Hot jars straight from boiling water can slip fast, and that’s where a good lifter earns its keep. Ball’s Secure Grip Jar Lifter uses molded, non-slip grips and a spring-loaded hinge that opens automatically, so you’re not fighting the tool while your hands stay clear of steam.
It works with both regular and wide mouth jars, from quarter-pint to quart. Stainless steel construction means it’ll outlast plenty of canning seasons with just a quick wash and thorough drying after each use.
| Best For | Home canners and food preservers who want a secure, comfortable grip on hot regular-sized jars during canning and kitchen prep. |
|---|---|
| Material | Stainless Steel |
| Primary Use | Jar Lifting |
| Jar Compatibility | Regular Sized Jars |
| Color | Clear |
| Unit Count | 1 Count |
| Home Canning Use | Yes |
| Additional Features |
|
- Molded grip design increases surface contact for a more secure hold on jars
- Spring hinge mechanism opens automatically, simplifying jar handling
- Durable stainless steel construction built for repeated canning use
- Designed only for regular sized jars, limiting compatibility with other sizes
- Still requires manual operation to grip jars properly
- Single-unit count means no extras if one is lost or damaged
4. PrepWorks Canning Funnel for Jars
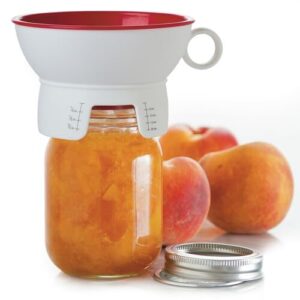
Grab a funnel and you’ll wonder how you ever canned without one. The PrepWorks Canning Funnel fits both regular and wide mouth jars, with a double-wall design that keeps drips off your counter and jar rim alike.
Built-in headspace markings, in inches and millimeters, take the guesswork out of filling. Made from high-heat polypropylene, it resists staining and experiences hot sauces without warping. It’s dishwasher safe, too, so cleanup takes seconds, not scrubbing.
| Best For | Home cooks and canning enthusiasts who want a mess-free, accurate way to fill jars for both small batches and large-scale preserving projects. |
|---|---|
| Material | PP Plastic |
| Primary Use | Jar Filling |
| Jar Compatibility | Wide and Regular Mouth |
| Color | White |
| Unit Count | 1 Unit |
| Home Canning Use | Yes |
| Additional Features |
|
- Fits both regular and wide mouth jars, so you don’t need multiple funnels
- Printed headspace markings take the guesswork out of proper filling
- Raised collar and outer edge design keep drips off countertops and jar rims
- Made of plastic, so it has temperature limits to keep in mind with very hot contents
- Only one funnel included per package
- Not a metal or heavy-duty option, which some heavy canners may prefer
Prepare Jars and Ingredients
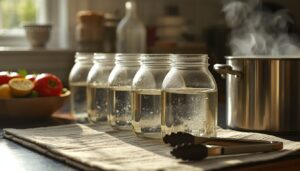
Before any food goes into a jar, your prep work sets the stage for a safe seal. This part isn’t glamorous, but skipping it is where most beginners run into trouble. Here’s exactly what to check and do before you start filling.
Wash Jars and Tools
A clean jar isn’t just tidy, it’s your first line of defense against contamination. Wash in hot, soapy water using mild detergent, gently scrubbing to avoid scratches on glass. Rinse thoroughly, then dry with a lint-free towel or let air dry. This step preps your equipment before sterilizing jars in boiling water, setting the stage for safe canning.
Check Jars for Damage
Even a spotless jar can betray you if the glass itself is compromised. Run your fingers slowly around the rim, feeling for hairline cracks or chips before they cause seal failure.
Check the bottom for pitting or cracks that spread under pressure. Any nick, crack, or cloudiness means one thing: discard it.
Damaged canning jars simply aren’t worth the risk.
Use New Lids
Here’s a rule with zero exceptions: every new canning session gets new lids. Once that flat disc seals once, its gasket has already done its one job—reusing it invites seal failure.
New lids arrive with a pre-formed gasket ready to create the perfect seal against clean rims. Store your lids and rings somewhere dry, away from rust, so they’re ready when your jars are.
Sterilize When Needed
Not every jar needs a boil-first step, but if you’re canning low-sugar jams or working with reused jars, sterilize them in boiling water for 10 minutes first.
This mirrors real sterilization validation methods—confirming heat actually reached kill parameters.
Three reasons this matters:
- Prevents spoilage before sealing even begins
- Reduces contamination risk in delicate recipes
- Builds confidence in your kitchen sterilization habits
Prepare Tested Recipes
Once your jars are clean, grab a tested recipe—not a random one from a blog comment. Tested recipes come from real testing logs: multiple trial runs, measured ingredients, and confirmed processing times.
Never freelance with acidity levels or swap ingredients without checking substitution impacts first. Stick to recipes proven safe for high-acid foods like jams, jellies, and pickles.
Fill and Seal Jars Correctly
Your jars are clean and your recipe is ready, so now comes the part where precision really counts. Filling and sealing isn’t hard, but small details make the difference between a safe seal and a wasted batch. Here’s exactly how to do it, step by step.
Add Food With Funnel
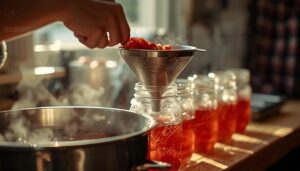
Grab a canning funnel before you start pouring — it’s the difference between a clean jar rim and a failed seal.
Choose silicone versus metal based on preference; both wipe clean easily. Center it over each jar to prevent rim contamination, pouring slowly.
Rinse residue immediately after use, since dried food invites bacteria into your next batch.
Leave Proper Headspace
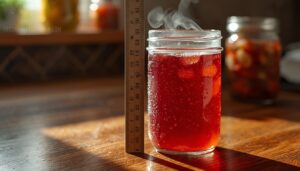
That gap between your food and the lid isn’t wasted space — it’s your expansion buffer during processing.
Too little, and food pushes against the lid, risking a failed vacuum seal. Too much invites extra oxygen exposure, weakening seals over time.
Measure with a ruler: 1/4 inch for jams and jellies, 1/2 inch for fruits, pickles, and relishes. Accuracy here prevents siphoning later.
Remove Trapped Bubbles
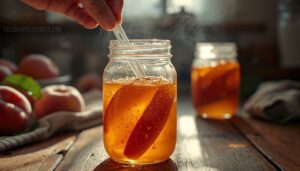
Sneaky air pockets love to hide along jar walls, and if you skip this step, you risk weak seals or floating fruit later.
Run a bubble freer or plastic knife between food and glass, working around the jar. Gentle agitation breaks surface tension holding bubbles in place. Avoid metal utensils — they create nucleation sites, inviting more bubbles. Recheck headspace afterward, since released air often lowers your fill line slightly.
Wipe Jar Rims Clean
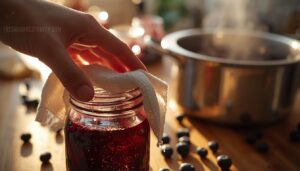
Wiping the rim takes five seconds but saves your whole batch. A sticky drip of jam or a smear of tomato sauce can wreck sealing integrity before the lid even goes on.
- Use a clean, lint-free cloth
- Dampen with warm water
- Wipe in one smooth motion
- Inspect for grease or sugar film
- Confirm rim is dry before lidding
Tighten Bands Fingertip-tight
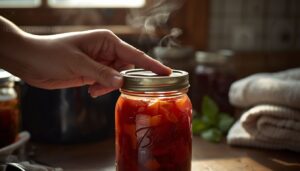
Twist the band until you feel gentle resistance, then stop. That’s fingertip tight — no wrenches, no forearm muscle, just your fingertips.
Overtightening risks lid buckling and a false seal that fails later. Too loose, and rings shift during processing. Aim for a snug quarter-turn past resistance so air vents properly, letting your jars form a true vacuum seal as they cool.
Process Jars Safely
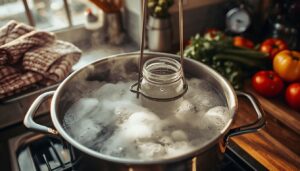
Your jars are filled, sealed, and ready, so now comes the step that actually makes them shelf-stable: processing. This is where heat does its real work, killing off anything that could spoil your food or make you sick. Here’s exactly how to get the timing and technique right.
Submerge Jars Fully
Think of your jars as little islands that need to be completely surrounded by water — no dry peaks allowed. Water depth matters: keep 1 to 2 inches above the jar tops for uniform heat transfer and no air pockets around lids.
Don’t overcrowd your canner; capacity limits are real. Full submersion means even processing, jar to jar, every time.
Start Timing at Boiling
When does the clock actually start? Not when you light the burner. You need a true rolling boil — steady, big bubbles across the whole surface — before timing begins.
Add your jars, wait for that boil to return, then start counting. At elevations above 1,000 feet, tack on extra minutes per standard altitude tables, since water boils cooler up there.
Maintain Rolling Boil
Getting to a boil is easy. Keeping one alive for the full processing time is where beginners stumble.
Sustain a steady rolling boil—big bubbles across the whole pot, not a timid simmer. Watch closely; if bubbles fade, nudge the heat up. Too vigorous, and you risk pot overflow, so ease back slightly instead of yanking the burner off. A wide, stable pot helps manage steam and intensity evenly.
Adjust Time for Altitude
Here’s a fact that surprises most beginners: water doesn’t boil the same everywhere. Boiling point drops roughly 1°F per 500 feet of elevation, so at 3,000 feet, water boils around 203°F instead of 212°F.
That gap changes kill times. Check your altitude adjustment chart:
- 1,001–3,000 ft: add 5 minutes
- 3,001–6,000 ft: add 10 minutes
- 6,001–8,000 ft: add 15 minutes
- Above 8,000 ft: add 20 minutes
Rest Jars Before Lifting
Once your timer hits zero, don’t grab those jars yet. Turn off the heat, remove the lid, and let jars rest submerged for 5 to 10 minutes. This gradual pressure equalization prevents liquid siphoning and protects against lid buckling from sudden temperature changes. Keep them steady on the rack—no tilting. Patience here builds the strong seal your shelf stability depends on.
Cool, Test, and Store Jars
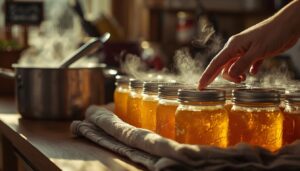
Once the jars come out of the canner, your work isn’t quite done yet. The final steps decide whether all that effort actually pays off with a safe, shelf-stable jar. Here’s what to do from this point forward.
Cool for 12–24 Hours
Once your jars come out of the canner, patience matters as much as the canning process itself. Set jars on a towel or rack, away from drafts, and let them rest undisturbed for 12 to 24 hours. This window allows full vacuum formation.
Avoid temperature swings—no cold countertops or drafty windows—since fluctuations can crack jars or weaken seals before they’ve properly set.
Check Lid Seals
After that rest, press each lid’s center. A good seal stays flat with no give—no click, no flex. If it pops back, you’ve got a false seal, and that jar needs refrigerating now, not later.
Skip the spoon-tap test if you’re unsure; the finger press tells you everything about airtight seal strength you need to know.
Label Jars With Dates
Grab a permanent marker or waterproof label before those sealed beauties hit the shelf. Write the canning date as YYYY-MM-DD, plus a quick descriptor like "Peaches 2026-07-01," near the jar’s neck.
- Use waterproof, oil-resistant labels
- Keep dates horizontal, easy to read
- Skip vague phrases like "safe since"
- Log jars in an inventory sheet
- Replace labels when refilling jars
Good labels mean no guessing games later.
Store Cool, Dark, Dry
Where you stash your jars matters as much as how you made them. Aim for 50 to 70°F, away from ovens or heating vents, in a dark, dry spot.
| Factor | Target Range |
|---|---|
| Temperature | 50–70°F |
| Light | Dark/shaded |
| Humidity | Low, dry |
| Airflow | Good |
| Pests | Sealed area |
Rotate stock oldest-first, and shelf-stable goods stay safe for 1–2 years.
Refrigerate Failed Seals
Press the lid—if it flexes or pops, that jar didn’t seal. Don’t panic, but don’t shelve it either.
Refrigerate immediately and eat within 2 weeks. This isn’t just about avoiding waste; unsealed jars lack the microbial safety that shelf-stable canning provides. Treat it like any fresh, processed food: chilled, timely, and eaten before spoilage risk creeps in.
Frequently Asked Questions (FAQs)
How long do home-canned foods actually last?
High-acid foods stay best for about 1 year; low-acid ones can last 2–5 years. Quality fades before safety does, so check seals, watch for spoilage signs, and store jars in a cool, dark pantry.
Can I reuse jars from store-bought food?
Store-bought jars often have thinner glass and lower thermal tolerance, risking cracks under heat. Their lids aren’t true canning lids, so sealing often fails. Inspect rims carefully; if reusing, stick to jams or repurpose them for storage, not processing.
Why did my jars not seal properly?
Usually it’s dirty jar rims, damaged lid compounds, or wrong headspace blocking contact. Loose bands, altitude timing errors, or a weak boil during processing can also stop the vacuum seal from forming properly.
Is it safe to can in an oven?
Skip the oven — that jar could shatter mid-bake. Thermal shock cracks glass, heat spreads unevenly, and botulism spores may survive. No tested guidelines exist for oven canning, so stick with water bath or pressure methods for real safety.
Can I double a canning recipe safely?
Don’t just double it. Uneven heat distribution and pectin balance can ruin jam texture, plus jars may not fit properly, risking underprocessing. Stick to your tested recipe, or run two separate batches instead.
Conclusion
Old habits die hard, but good habits die harder—and that’s exactly why water bath canning has survived a hundred years of kitchen trends.
This beginner guide to water bath canning gives you everything my grandmother knew by instinct: clean jars, tested recipes, and a rolling boil that never quits.
Master these fundamentals, and you’ll fill your own shelves with food that’s safe, flavorful, and yours.
That boiling pot holds more power than any gadget could.
- https://www.lehmans.com/products/our-starter-water-bath-canning-kit-1
- https://www.theseasonalhomestead.com/water-bath-canning-a-beginners-guide
- https://extension.psu.edu/checklist-for-water-bath-canning
- https://www.thespruceeats.com/high-altitude-canning-1327430
- https://extension.sdstate.edu/altitude-adjustments-home-canning