This site is supported by our readers. We may earn a commission, at no cost to you, if you purchase through links.
Your tomato harvest doesn’t wait for you to figure out canning gear on the fly. One overripe basket on the counter, and suddenly you’re googling jar sizes at 9 PM instead of enjoying the season’s work.
That scramble is exactly why the right garden canning supplies for small batch preserving matter more than any generic kitchen haul. A pint jar built for thermal shock, a lifter with rubber-coated jaws, a funnel marked with headspace lines—these aren’t extras, they’re what stands between a shelf of sealed jars and a batch of wasted produce.
Below, you’ll find ten tools worth their counter space, plus the safety details that turn a nervous first attempt into a confident yearly ritual.
Table Of Contents
- Key Takeaways
- Top 10 Small-Batch Canning Supplies
- 1. Granite Ware Enamel Canning Kit
- 2. Ball glass mason jars pint
- 3. Ball Secure Grip Jar Lifter
- 4. PrepWorks Canning Funnel for Jars
- 5. Rainbow Popper Foam Refill Balls
- 6. Cuisinart Chef’s Classic Stainless Stockpot
- 7. Norpro Magnetic Canning Lid Lifter
- 8. McSunley Induction Stainless Steel Water Bath Canner
- 9. Ball EasyCanner Electric Water Bath
- 10. Presto Induction Compatible Pressure Canner
- Choosing Small-Batch Canning Essentials
- Safe Garden Harvest Preserving
- Tools for Easier Canning Days
- Storing Your Preserved Garden Harvest
- Frequently Asked Questions (FAQs)
- How to can tomatoes small batch?
- Do the Amish use pressure canners?
- What are the common mistakes in home preserving?
- What is the best canning kit for beginners?
- Can I ferment vegetables using canning jars instead?
- How long do dehydrated garden vegetables actually last?
- Can vacuum sealing replace canning for frozen produce?
- Whats the difference between canning and fermenting crocks?
- How long can filled jars sit before processing?
- Conclusion
Key Takeaways
- A basic small-batch canning setup only needs a handful of core tools—a water bath canner, jar lifter, funnel, and magnetic lid wand—to get reliable, safe results without overspending.
- Food acidity determines the canning method: high-acid foods like tomatoes and berries can be safely processed in a water bath canner, while low-acid vegetables and meats require a pressure canner reaching 240°F to destroy botulism spores.
- Proper technique details—like sterilizing jars for at least 10 minutes, wiping rims clean, using correct headspace by food type, and checking for a firm concave seal after 12-24 hours—are what actually prevent spoilage and sealing failures.
- Storage conditions matter as much as processing: keeping sealed jars in a pantry between 50-70°F with 50-60% humidity, labeling contents and dates, and removing screw bands within 24 hours all help preserves stay safe and shelf-stable for up to a year.
Top 10 Small-Batch Canning Supplies
Standing in front of a canning aisle with a basket full of garden tomatoes can feel overwhelming when every shelf promises to be essential.
The truth is, small-batch preserving only needs a handful of reliable tools that actually earn their space in your kitchen.
A canning pot, a jar lifter, and a good set of tongs will take you further than any gadget-filled setup, and pairing your preserves with something fresh like these healthy garden salad recipes rounds out a simple, homegrown meal.
Here are the ten pieces of equipment worth bringing home first.
1. Granite Ware Enamel Canning Kit
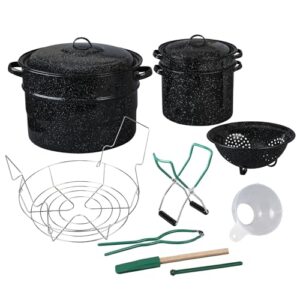
If you want one purchase that outfits your entire water bath setup, this kit delivers. The 21.5-quart porcelain-on-steel canner holds seven quarts or twelve half-pints, backed by a rust-resistant chrome rack for even heat contact.
You also get five tools: bubble remover, ruler, jar lifter, magnetic lid lifter, and funnel—plus a 7.5-quart blancher and colander. Everything’s PFOA and PTFE-free, so beginners get safe, complete gear without hunting down pieces separately.
| Best For | home cooks and canning beginners who want a complete, ready-to-go water bath canning setup without buying tools separately. |
|---|---|
| Material | Chromed steel |
| Capacity | 21.5 qt |
| Color | Chrome |
| Primary Use | Canning |
| Dimensions | 17x27x9.5 in |
| Weight | 12 lbs |
| Additional Features |
|
- Comes with a full set of essential tools, including a jar lifter, lid lifter, and jar wrench
- Large 21.5 qt capacity holds up to 7 quart jars or 12 half-pint jars at once
- Made without PFOA or PTFE, plus a rust-proof chrome rack for durability
- Requires manual assembly before first use
- Jar capacity is limited to what the rack dimensions allow
- Tool set only fits quart, pint, and half-pint lid sizes
2. Ball glass mason jars pint
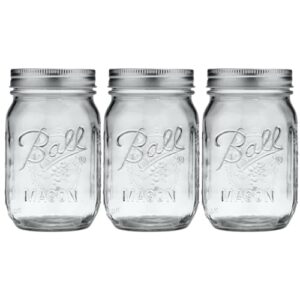
Once your canner’s ready, you’ll need actual jars, and Ball’s pint-size mason jars are the small-batch workhorse. Each holds 16 fluid ounces, perfect for single servings or limited harvests without wasting garden bounty.
The tempered glass resists thermal shock during processing, while the wide mouth (3-inch opening) makes filling chunky pickles or fruit chunks far easier than regular-mouth versions.
Sets include lids and bands, so you’re canning-ready out of the box, and the BPA-free glass is dishwasher safe for repeated seasons of use.
| Best For | These jars are best for home canners and meal preppers who want a reliable, American-made set for preserving food, prepping layered meals, or crafting decorative and gift projects. |
|---|---|
| Material | BPA-free glass |
| Capacity | 16 oz x3 |
| Color | Clear |
| Primary Use | Canning |
| Dimensions | Not specified |
| Weight | Not specified |
| Additional Features |
|
- Made in the USA with BPA-free glass construction
- Comes with lids and bands included, so you’re ready to use right away
- Versatile enough for canning, meal prep, decor, and gifting
- Regular mouth opening can make filling with larger fruit or vegetable chunks trickier
- 16 oz capacity may be too small for bulk storage or larger harvests
- Glass material means jars require careful handling to avoid breakage
3. Ball Secure Grip Jar Lifter
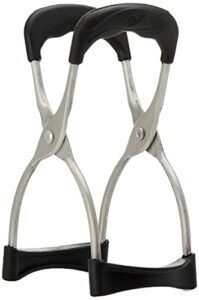
Pulling jars out of boiling water with tongs is a recipe for a shattered jar or a scalded wrist. Ball’s Secure Grip Jar Lifter solves that with rubber-coated jaws that cradle the jar’s shoulder instead of pinching the slick glass.
The angled grips keep your knuckles clear of steam, and the grip stays firm even when jars are dripping wet. For a beginner, this single tool does more for confidence than almost anything else in your kit.
| Best For | Home canners and kitchen beginners who want a secure, confident grip on hot jars during preserving and food prep. |
|---|---|
| Material | Stainless steel |
| Capacity | 1 count |
| Color | Clear |
| Primary Use | Canning |
| Dimensions | Not specified |
| Weight | Not specified |
| Additional Features |
|
- Molded grip design increases surface contact for a more secure hold on jars
- Spring hinge mechanism allows for automatic, easy opening
- Ergonomic handle makes it comfortable to use during canning sessions
- Only designed to fit regular sized jars, not wide-mouth or oversized options
- Still requires manual operation to grip and release jars
- Stainless steel construction may feel less cushioned than rubber-coated alternatives
4. PrepWorks Canning Funnel for Jars
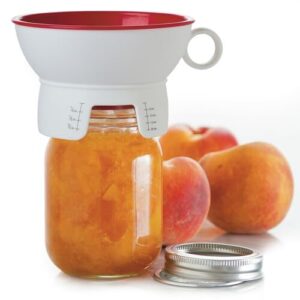
Once your jar’s out of the water, getting the filling right matters just as much. The PrepWorks Canning Funnel uses a double-wall design, with the inner wall sitting shorter than the outer collar, so hot liquids land inside the jar instead of dribbling down the rim.
Built-in headspace markings, printed right on the funnel in inches and millimeters, take the guesswork out of filling. It fits both wide and regular mouth jars, and the high-heat polypropylene shrugs off staining from tomato sauce or berry juice.
| Best For | Home cooks and canning enthusiasts who want cleaner, more accurate jar filling for both small batches and large-scale preservation projects. |
|---|---|
| Material | PP plastic |
| Capacity | 1 unit |
| Color | White |
| Primary Use | Canning |
| Dimensions | 7×5.13×3.25 in |
| Weight | 0.29 lbs |
| Additional Features |
|
- Raised collar and outer funnel edge keep spills off jar rims and countertops
- Printed headspace measurements remove the guesswork from filling jars accurately
- Fits both wide and regular mouth jars for versatile use
- Plastic construction means it has temperature limits to keep in mind
- Only one funnel comes in each package
- Made of PP plastic, which some may prefer to avoid over metal alternatives
5. Rainbow Popper Foam Refill Balls
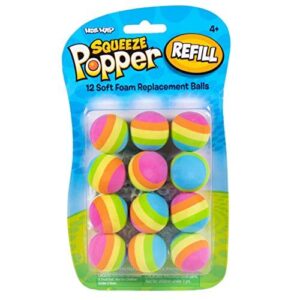
Here’s an honest confession: this one has nothing to do with jars, jams, or headspace. Rainbow Popper Foam Refill Balls are just kids’ toy ammo, not canning gear, so they don’t belong in a preserving kit.
If you’re stocking up for actual preserving, skip the foam balls and check out these tested canning recipes for preserving your harvest instead.
If they showed up in your search results, skip them entirely.
Your canning budget is better spent on jar lifters, funnels, or extra lids, since those tools directly protect your seals and your safety at the stove.
| Best For | Kids ages 4 and up who already own a Hog Wild popper toy and need fresh foam ammo to keep the fun going. |
|---|---|
| Material | Foam |
| Capacity | 12 balls |
| Color | Multi-color |
| Primary Use | Toy play |
| Dimensions | Not specified |
| Weight | Not specified |
| Additional Features |
|
- Bright, multi-color balls that are easy to spot indoors or outdoors
- Encourages active, coordination-building play
- Generous 12-pack keeps popper toys stocked for extended playtime
- Only works with compatible squeeze ball or atomic power poppers
- Not a standalone toy—requires owning a popper blaster already
- Not related to canning or food preservation, so irrelevant if that’s what you’re shopping for
6. Cuisinart Chef’s Classic Stainless Stockpot
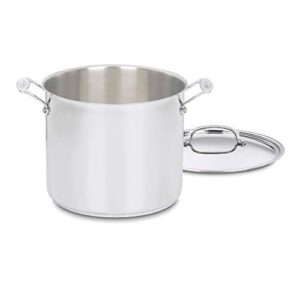
Twelve quarts of boiling water don’t leave much room for error, which is why the Cuisinart Chef’s Classic Stainless Stockpot earns its spot before you even fill a jar.
The aluminum-encapsulated base spreads heat evenly, so you won’t get scorched spots while blanching tomatoes for peeling. Its 18/10 stainless surface won’t react with acidic produce, and that tapered rim means drip-free pouring into your funnel.
Oven-safe to 550°F and dishwasher-friendly, it pulls double duty long after canning season ends.
| Best For | Home cooks and canning enthusiasts who need to boil, blanch, or simmer large batches of food evenly and without scorching. |
|---|---|
| Material | Stainless steel/aluminum |
| Capacity | 12 qt |
| Color | Mirror finish |
| Primary Use | Cooking |
| Dimensions | 14.3×10.5×10.5 in |
| Weight | 5.85 lbs |
| Additional Features |
|
- Aluminum-encapsulated base ensures even heat distribution with no hot spots
- 18/10 stainless steel surface resists discoloration and won’t react with acidic foods
- Tight-fitting lid and tapered rim make for moisture-sealed cooking and drip-free pouring
- At 5.85 pounds and 12 quarts, it can be bulky and heavy to maneuver when full
- Oven and broiler use is capped at 550°F, limiting some high-heat applications
- Lifetime warranty support requires careful adherence to the user manual’s troubleshooting steps
7. Norpro Magnetic Canning Lid Lifter
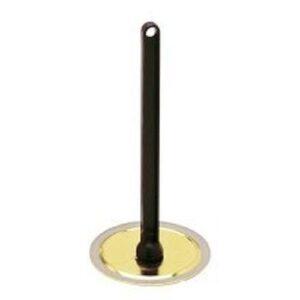
Fishing a lid out of simmering water with tongs always risks a slip, which is exactly the problem Norpro’s magnetic wand solves. The magnetic tip grabs one sterilized lid at a time, keeping your fingers away from 180°F water while preserving that sealing compound’s sterility.
At 7 inches long, it tucks into a drawer easily, and the no-touch design means less cross-contamination between lids. It’s a small tool, but on a busy canning day, it saves real fumbling.
| Best For | Home canners who want a safer, no-touch way to lift hot, sterilized lids straight out of boiling water. |
|---|---|
| Material | Metal |
| Capacity | 7 in length |
| Color | Black |
| Primary Use | Canning |
| Dimensions | 7×0.49×0.5 in |
| Weight | Not specified |
| Additional Features |
|
- Magnetic tip lifts lids without touching the water or risking a slip
- Compact 7-inch size stores easily in any kitchen drawer
- Handy for grabbing small metal items like pins and paper clips too
- Only picks up one lid at a time, which can slow down bigger batches
- Magnetic strength only works on small metal objects, so it’s limited in scope
- Not useful for non-metal lids or other canning tasks beyond lid retrieval
8. McSunley Induction Stainless Steel Water Bath Canner
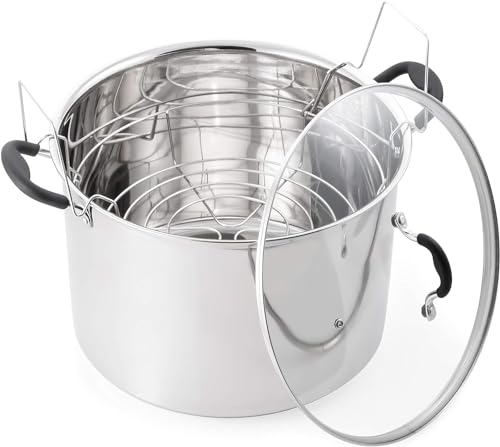
If your stove runs on induction, this canner solves a real headache: most water bath pots simply won’t heat on those coils. The flat encapsulated base bonds directly to the stainless steel body, giving you even heat transfer without hot spots that crack jars.
At 21.5 quarts, it holds seven quarts or twelve half-pints, with a tempered glass lid for watching the boil without lifting it. Silicone-wrapped grips keep your grip cool and steady throughout processing.
| Best For | Home canners with induction cooktops who want a reliable pot for both water bath preserving and everyday big-batch cooking. |
|---|---|
| Material | Stainless steel/glass |
| Capacity | 21.5 qt |
| Color | Stainless |
| Primary Use | Canning |
| Dimensions | 14.2×14.2×11.2 in |
| Weight | Not specified |
| Additional Features |
|
- Flat encapsulated base delivers even heat and works on induction stoves where most canning pots fail
- Tempered glass lid lets you monitor the boil without lifting it and losing heat
- Doubles as a large stock pot for soups, stews, or boiling seafood
- Large 14.2 x 14.2 x 11.2 inch footprint takes up significant storage space
- Only works well on induction cooktops, limiting use on other stove types
- 21.5 quart size may be more capacity than smaller households need
9. Ball EasyCanner Electric Water Bath
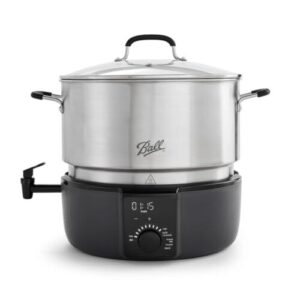
Ever wish your canner could just handle itself while you chop the next batch of tomatoes? The Ball EasyCanner does exactly that. Its Press & Forget technology automates preheating and processing, using built-in heat sensors to hold safe temperatures without your hovering over the stove.
At 21 quarts, it fits 8 pints or 7 quarts, with an easy-drain spigot for mess-free cleanup. It also doubles as a multicooker and steamer, though the main pot stays hand-wash only.
| Best For | home canners who want to batch-preserve produce without babysitting the pot, thanks to automated preheating and temperature control. |
|---|---|
| Material | Stainless steel |
| Capacity | 21 qt |
| Color | Stainless steel |
| Primary Use | Canning |
| Dimensions | 16.9×16.85×14.88 in |
| Weight | 20.3 lbs |
| Additional Features |
|
- Press & Forget technology handles preheating and processing automatically
- Doubles as a multicooker and steamer for pasta, soups, and vegetables
- Dishwasher-safe lid, rack, and steam tray make cleanup easy
- Main pot is hand-wash only, adding extra cleanup effort
- At 20.3 pounds and over 16 inches wide, it takes up significant counter and storage space
- Still requires some attention, since it shouldn’t be left completely unattended during use
10. Presto Induction Compatible Pressure Canner
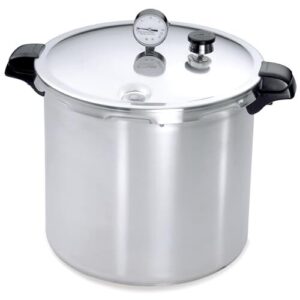
Low-acid vegetables and meats need real pressure, not just a hot water bath, and this heavy-gauge aluminum canner delivers it with a deluxe gauge for precise readings. The induction-compatible stainless steel-clad base means it heats evenly on gas, electric, or induction ranges alike.
At 23 quarts, it processes 7 quarts or 20 pints per load, doing double duty for boiling-water canning too. The cover lock system keeps the lid sealed until pressure drops safely, backed by a 12-year warranty.
| Best For | home canners who process low-acid vegetables and meats and want one large-capacity canner that also handles boiling-water canning for jams and pickles. |
|---|---|
| Material | Aluminum/stainless steel |
| Capacity | 23 qt |
| Color | Stainless steel |
| Primary Use | Canning |
| Dimensions | 13.5×17.5×15.5 in |
| Weight | Not specified |
| Additional Features |
|
- Induction-compatible stainless steel-clad base works on gas, electric, smooth-top, and induction stovetops
- Deluxe pressure gauge and cover lock system allow precise, safe monitoring
- 23-quart capacity (7 quarts, 20 pints, or 26 half-pints) backed by a 12-year limited warranty
- May not work with all portable induction ranges
- Accurate capacity relies on using regular Mason jars
- Large 23-quart size may be bulky for smaller kitchens or stovetops
Choosing Small-Batch Canning Essentials
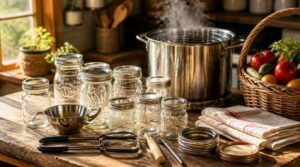
Picking the right gear starts with matching your equipment to the actual size of your harvest, not the other way around. A few key decisions, like jar size and lid type, will shape how smoothly every batch goes from stove to pantry shelf. Here’s what to think through before you buy anything.
Best Jar Sizes
Six jar sizes cover nearly every small-batch need, and picking right saves you wasted jars and awkward storage.
Half-pint jars (4 oz) suit gift basket sizing and portion control; pint jars handle daily sauces; quart jars store bulk harvests efficiently.
It is also important to maintain necessary headspace for sealing to allow for expansion.
Regular mouth pint jars work great for jams, while wide mouth jars simplify chunky food accessibility like whole pickles—giving your small batch real versatility.
Regular Versus Wide-mouth Jars
Opening diameter is the real difference: regular mouth jars measure about 70 mm across, while wide mouth jars span 76–86 mm, easing packing of chunky produce.
That wider neck improves visibility during filling and makes cleaning easier, though regular mouth canning jars stack more efficiently on tight pantry shelves.
Both mason jars seal reliably when processed correctly—your choice depends on food texture, not safety.
Two-piece Lid Systems
Once you’ve picked your jar size and mouth width, the lid matters just as much—this two-part lid system pairs a flat metal disc coated in plastisol with a reusable screw band.
As jars cool, that sealing compound contracts, pulling the lid down to form a vacuum.
Finger-tighten bands only; overtightening blocks venting and ruins your seal.
Water Bath Versus Pressure
Get the lid right, and the next question is which canning method actually earns that seal: water bath or pressure.
Water bath tops out near 212°F, enough for high-acid foods (pH 4.6 or below) like pickles and jams.
Low-acid vegetables and meats demand a pressure canner, reaching 240°F to destroy botulism spores.
Altitude pushes both processing times upward, so adjust accordingly for safety.
Beginner Kit Priorities
Five tools separate confident beginners from overwhelmed ones: a water bath canner, stockpot, jar lifter, funnel, and magnetic lid wand. Skip the pressure canner until you’ve mastered high-acid recipes.
Build your canning equipment checklist around versatility—regular-mouth pint jars handle jams and pickles alike. This modest initial equipment investment (under $100) covers real smallbatch preserving without cluttering your kitchen.
Safe Garden Harvest Preserving
Great supplies only get you halfway; safety comes from knowing how to use them correctly, jar by jar and batch by batch.
Your harvest’s acidity, your altitude, and even your headspace all play a role in whether that seal holds strong for months to come.
Here’s what you need to know before your next canning session.
High-acid Garden Foods
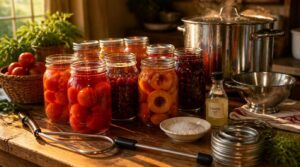
High-acid foods make small-batch preserving forgiving, since their natural pH of 4.6 to 4.9 keeps Clostridium botulinum from thriving in your canning jars. Tomatoes, berries, and stone fruits fall into this range, though tomatoes often need bottled lemon juice for consistent tomato acidity safety.
Pickles depend on a proper vinegar brine ratio, while sugar syrups help fruit color retention during water bath canner processing.
Low-acid Vegetable Safety
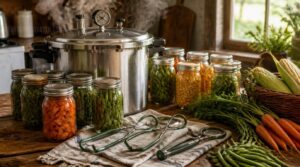
Once your green beans, carrots, or corn drop below that 4.6 pH safety limit, only a pressure canner reaching 240°F can guarantee spore destruction. Water bath heat simply can’t destroy C. botulinum spores hiding in low-acid vegetables.
That’s why botulism prevention hinges on tested pressure and time, usually 10-15 PSI, adjusted upward for altitude, since thinner air demands stronger pressure to hit safe internal temperatures.
Proper Jar Sterilization
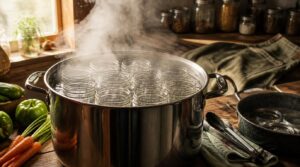
Sterilizing jars isn’t just a formality — it’s cheap insurance against spoilage.
Wash jars and lids in hot soapy water first, rinsing away soap residue, then boil jars 10 minutes minimum, keeping them submerged to avoid thermal shock. Steam sterilization works too.
Skip the dishwasher myth; it cleans but won’t sterilize. Keep lids simmering, never boiling, to protect their sealing compound.
Headspace by Food Type
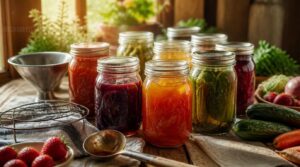
That empty gap under the lid does real work — it’s not wasted space. Fruit and jam headspace stays at 1/4 inch since sugar expands fast, while pickles need 1/2 inch.
Low-acid vegetables and meats demand a full inch for safe expansion during pressure canning. Sauces vary by thickness, and dairy needs a full inch too, since separation risks foaming over.
Altitude Processing Adjustments
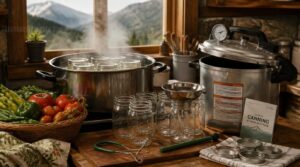
Water boils at lower temperatures as elevation climbs, since atmospheric density drops and heat transfer weakens—so your processing time shifts upward past 1,000 feet. Add 5 minutes per 1,000 feet for water bath canning; pressure canners need boosted PSI instead.
These aren’t optional tweaks—they’re elevation safety standards protecting against under-processed jars. Check your local altitude, adjust every canning recipe accordingly, and never skip this step for genuine home canning safety.
Tools for Easier Canning Days
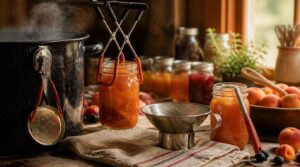
Getting your jars processed safely is only half the job, since handling hot glass, hot lids, and hot syrup takes the right tools in hand.
The little gadgets you keep by the stove make the difference between a calm canning session and a stressful, sticky one.
Here are five that earn their spot on your counter every single time.
Safe Hot Jar Handling
Pull jars straight from a rolling boil with a rubber-coated jar lifter, gripping the neck firmly to avoid tips or slips. Wear heat resistant gloves, since bare hands can’t handle 212°F glass safely.
Set jars on a towel-lined, stable workstation, never a cold counter, preventing thermal shock that cracks glass. Let jars rest undisturbed 12–24 hours during this critical cooling period.
Mess-free Jar Filling
Once your jars are cooling-ready, getting the fill right matters just as much as the pull. A PrepWorks canning funnel guides liquid straight to the jar base, cutting spills.
- Wide-mouth fit
- BPA-free plastic
- Rim hygiene
Wipe rims clean before lids go on, keeping your kitchen workflow smooth and your canning tools ready for the next jar.
Bubble Removal Tools
Trapped air pockets ruin texture and can prevent a proper seal, so a bubble popper earns its spot in your kit. The Ball Bubble Popper‘s plastic stick won’t scratch glass.
| Tool | Mechanism | Best For |
|---|---|---|
| Debubbling spoon | Flat edge guides air upward | Chunky produce |
| Bubble removal card | Smooth edge, dual-end design | Headspace checks |
| Integrated funnel | Vertical pressure release | Small-batch efficiency |
Magnetic Lid Lifting
Fishing lids from simmering water with tongs is a good way to burn your fingertips, which is where a magnetic lid wand earns its place among your canning tools.
- Magnet Strength: neodymium tips lift one lid cleanly
- Telescoping Shafts: reach deep pots safely
- Ergonomic Grip Safety: cool handle, confident control
- Preventing Magnet Corrosion: dry thoroughly after each session
Rim Cleaning Supplies
A clean rim is the difference between a sealed jar and a spoiled batch, so don’t skip this step. Wipe threads and edges with a damp lint-free cloth before sealing—any residue blocks the vacuum seal your canning lids and rings need to hold.
Keep a nonabrasive sponge nearby for stubborn drips. This small habit protects months of careful food safety work in one wipe.
Storing Your Preserved Garden Harvest
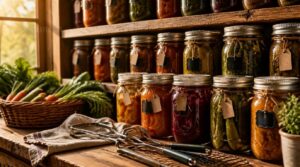
Getting the jars sealed and processed is only half the job, since how you store them afterward decides whether that harvest actually lasts.
A few simple habits, done consistently, protect your seals and keep every jar easy to identify months from now.
Here’s exactly what to check and do once your jars come out of the canner.
Checking Vacuum Seals
How do you know your jars truly sealed? Give them a full 12 to 24 hours of cooling time, then press each lid’s center.
Check for:
- No flex or click
- Concave shape
- No give when pressed
- Consistent look across jars
- No bulging
A failed seal means refrigerate and eat soon, or reprocess with a fresh lid for safe, airtight storage.
Removing Screw Bands
Once your jars pass the seal check, peel off those screw bands within 24 hours — lingering moisture underneath causes rust fast. Twist counterclockwise, lifting gently without disturbing the two-part lid system beneath.
Wash bands in hot soapy water, dry completely, then store separately from mason jar lids in a dry container. This prevents corrosion and keeps your canning supplies ready for next season’s harvest.
Labeling Jars Clearly
Six months from now, will you remember which jar holds strawberry jam versus tomato sauce?
Label every jar immediately with contents, date, and processing method. Use waterproof, solvent-resistant labels with high-contrast, sans-serif fonts (at least 8-point) for pantry-shelf readability. Note allergens clearly, and record batch numbers—this traceability standard matters if ingredients or equipment ever need troubleshooting later.
Ideal Pantry Conditions
Where you store those jars matters just as much as how you sealed them.
Keep your pantry between 50°F and 70°F, with humidity around 50-60%, away from direct light. Good air circulation on open shelving prevents moisture buildup, while consistent temperature protects flavor and nutrients.
Stable conditions keep high-acid preserves shelf-stable for a full year.
Handling Unsealed Jars
Not every jar seals on the first try, and that’s not a failure, it’s a checkpoint. Press the lid: if it flexes, you’ve got roughly 24 hours to reprocess.
A jar that doesn’t seal on the first try isn’t a failure, it’s just a checkpoint
Inspect rims for nicks, swap in a fresh lid (reuse only if undamaged), and adjust headspace to 1–1½ inches. No time? Refrigerate and eat within days, or freeze instead.
Frequently Asked Questions (FAQs)
How to can tomatoes small batch?
Peel, acidify, pack, seal, process — small-batch tomato canning is simple acidified foods work: blanch skins off, add lemon juice, pack jars with proper headspace, then process in a water bath canner for safe, shelf-stable results.
Do the Amish use pressure canners?
Yes — many Amish families rely on pressure canners for meats and low-acid vegetables, reaching 240°F to destroy botulism spores safely. It’s a trusted homesteading tool, passed through generations alongside water bath methods for high-acid fruits and preserves.
What are the common mistakes in home preserving?
Funny how the same mistake trips up nearly every beginner: skipping proper sterilization techniques, guessing at headspace instead of measuring, and ignoring temperature errors—all of which invite bacterial growth and compromise the food safety standards your jars depend on.
What is the best canning kit for beginners?
A Granite Ware Enamel canning kit paired with pint jars, a jar lifter, and a funnel gives beginners everything needed for water bath canning.
This budget starter kit costs 30-40 USD, covering essential beginner tools without overwhelming your first small-batch setup.
Can I ferment vegetables using canning jars instead?
Your mason jars work great for fermenting, not just canning: pack vegetables, submerge in a 2–3 tablespoon brine, add a weight, and use a loose or airlocked lid for gas release until sauerkraut turns tangy.
How long do dehydrated garden vegetables actually last?
Most dehydrated vegetables stay shelf-stable for 6 to 12 months in airtight, cool, dark storage; proper moisture removal matters most. Vacuum sealing or freezing pushes longevity further, sometimes 2 to 5 years, depending on the vegetable type.
Can vacuum sealing replace canning for frozen produce?
Not even close — vacuum sealers preserve texture and nutrient retention beautifully with zero electricity dependency risks during storage.
They can’t match true shelf stability; frozen produce still needs blanching and a freezer, unlike shelf-stable canned goods sitting safely in your pantry.
Whats the difference between canning and fermenting crocks?
Fermentation crocks rely on lactic acid fermentation, using brine submersion and a water seal to keep oxygen out, while canning crocks depend on heat processing and airtight lids—heat vs bacteria control, not living cultures, drives their preservation power.
How long can filled jars sit before processing?
Patience now prevents disappointment later. Let jars sit 12 to 24 hours before processing—shorter for high-acid foods, longer for low-acid ones—so seals set properly and internal temperatures stabilize before you commit to water bath canning.
Conclusion
The smallest jar on your shelf holds the biggest lesson: shrinking your batch actually grows your confidence, one sealed lid at a time. That’s the quiet paradox behind garden canning supplies for small batch preserving—less produce, less pressure, more precision.
A rubber-jawed lifter, a headspace-marked funnel, a magnetic wand for lids: small tools, outsized results. Stock your counter once, and every August scramble turns into a ritual you actually look forward to.
- https://www.milkglasshome.com/canning-equipment-list
- https://lifeandwork.blog/best-canning-jar-sizes-small-batch-preserving
- https://foodinjars.com/blog/gift-guide-gear-small-batch-canner
- http:///goto?url=CAESewHuR6pN9SH1Pl_5f9SJb_o-BMZ7TmHorue87Lerara7fCfBTLldNAQilyVmwzJiNpa_tkV_MfujBSM-QUr0yRmyizPRCy8tAkN8fXgS0-DWVd_mJj7ciRtd8rxOl8Ns-yTCmkhGStl8KRiA-eb3UEuR5ihgFPBd0kIaOQ%3D%3D
- https://www.simplycanning.com/small-batch-canning