This site is supported by our readers. We may earn a commission, at no cost to you, if you purchase through links.
That bundle of rosemary tied above your kitchen window isn’t just pretty. It’s doing real work, pulling moisture out slow enough to lock in oils that give dried herbs their punch.
Most people cut herbs, toss them in a drawer, and wonder why they taste like grass clippings by winter. The truth is, hanging herbs to dry rewards patience and a few small details: the right stem thickness, good airflow, the right moment to harvest.
Get those pieces right, and you’ll open a jar in January that smells like your garden in July.
Table Of Contents
- Key Takeaways
- Best Herbs for Hanging Dry
- Harvest Herbs for Drying
- Hang Herb Bundles Correctly
- Top 8 Herb-Drying Tools
- 1. KitchenAid All Purpose Kitchen Shears
- 2. Natural Cotton Butcher Twine String
- 3. Collapsible Accordion Style Wood Wine Rack
- 4. Collapsible Bamboo Clothes Drying Rack
- 5. ComSaf Mini Mason Glass Jars
- 6. Airtight Square Glass Spice Jars
- 7. KitchenAid 3.5 Cup Food Chopper
- 8. Electric Mason Jar Vacuum Sealer Kit
- Store Dried Herbs Fresh
- Frequently Asked Questions (FAQs)
- How long should I hang herbs to dry?
- What herbs can be hung to dry?
- Why hang herbs upside down to dry?
- What herbs should you not dry?
- How long does it take herbs to dry?
- Can you hang herbs to dry outside?
- Why did my hanging herbs turn moldy?
- Can you dry herbs with flowers attached?
- How do you know if dried herbs went bad?
- Conclusion
Key Takeaways
- Woody herbs like rosemary, thyme, oregano, sage, and marjoram hang-dry best, while moisture-heavy herbs like basil, mint, cilantro, and dill need gentler handling or a different drying method altogether.
- Harvest herbs after morning dew dries but before peak heat, cutting no more than a third of the plant with sharp, clean shears to protect flavor and plant health.
- Bundle five to ten stems of even thickness, tie them snugly with twine, and hang them upside down with a breathable paper bag cover and space between bundles to prevent mold.
- Once herbs snap clean and crumble easily, strip and store them whole in airtight glass jars labeled with harvest dates to preserve flavor for up to two years.
Best Herbs for Hanging Dry
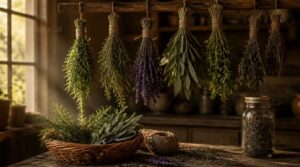
Not every herb dries the same way, and knowing which ones to hang saves you time and disappointment. Some hold their flavor beautifully on a string, while others turn brittle or bland if you try it. Here’s how to tell which herbs belong in a bundle, and which ones need a different approach.
For a full rundown of which varieties thrive this way, this guide to air-drying herbs indoors breaks down the best bundling methods for sturdy, aromatic herbs like rosemary and thyme.
Woody Herbs That Dry Well
Five herbs stand above the rest for hang drying, thanks to their sturdy, woody stems that hold up well over weeks on the rack. Rosemary keeps its oils best over 7-14 days, while thyme dries brittle in under two weeks. Oregano’s stiff branches and sage’s thick stems strip cleanly. Marjoram dries fast, keeping its aromatic punch.
You can also try various herb drying methods like dehydrators or low-heat ovens for different results.
Soft Herbs to Handle Carefully
Basil, mint, cilantro, and dill can still hang dry, but they need gentle handling since their leaves bruise easily. Bundle just 3-5 stems loosely with kitchen twine, giving each leaf breathing room. Skip the tight squeeze—crushed leaves turn dark and lose flavor.
Good airflow ventilation matters even more here, since delicate leaves trap moisture faster than woody stems do.
Herbs Better Used Fresh
Not every herb belongs on kitchen twine. Some lose their magic the moment they dry, trading bright, volatile oils for a dull shadow of themselves.
Skip hang drying these:
- Cilantro – citrusy notes vanish, leaving behind grassy dust
- Chives – that oniony bite disappears entirely once dried
- Tarragon – anise aroma fades fast, weakening dressings and sauces
Use them fresh, within days of harvest, for peak flavor.
When to Choose Dehydration
Fresh isn’t always practical, and neither is patient waiting for air-drying.
When your kitchen runs humid or you’re working with thick, moisture-heavy herbs, a dehydrator speeds things along safely. Choose dehydration when hang-drying risks mold, or when you need herbs ready fast.
It’s a reliable backup, not a replacement for tradition.
Harvest Herbs for Drying
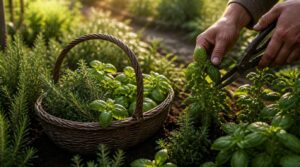
Good drying starts long before your herbs ever hit the twine. How and when you pick them shapes the flavor and aroma you’ll end up with later. Here’s what to keep in mind as you head out to harvest.
Pick After Dew Dries
Timing is everything when you harvest fresh herbs. Wait until morning dew has fully evaporated, but pick before the sun’s heat sets in, this best time to harvest protects essential oils and prevents wilting.
- Reduces surface moisture that invites mold
- Preserves aroma and flavor intensity
- Prevents heat stress on leaves
- Leaves firmer, less bruising
- Speeds up hang drying herbs later
Cut Only One-third
A good rule of thumb: never cut more than a third of the plant’s height in one go. On a 6-inch stem, that’s just 2 inches. This protects photosynthesis and eases plant recovery stress.
| Plant Height | Max Cut | Left Growing |
|---|---|---|
| 6 in | 2 in | 4 in |
| 9 in | 3 in | 6 in |
| 12 in | 4 in | 8 in |
Use Sharp Kitchen Shears
Snip smart, not hard. Sharp kitchen shears cut cleanly through stems, so you won’t crush the plant or slip and nick a finger.
For woodier stems like rosemary, though, swap the shears for pruning snips, as outlined in this guide to growing culinary herbs in small spaces.
Quick checks before you harvest your herbs:
- Blades free of nicks
- Grips feel comfortable
- Pivot moves smoothly
- Edge feels sharp to touch
- Blades are clean and dry
Good blade maintenance keeps every cut precise for your herb bundles.
Remove Damaged Leaves
Not every leaf deserves a spot in your bundle. Before you harvest your herbs, walk the plant and pull anything yellow, brown, or spotted with fungal patches.
| Sign | Action | Why |
|---|---|---|
| Fully brown, dead tissue | Remove now | Necrotic tissue drains resources |
| Fungal spots | Remove now | Halts pathogen spread |
| Cosmetic brown tips | Leave alone | Not true damage |
Cut at the leaf node, and wipe blades with alcohol between plants to keep your dried stem pathogen-free.
Rinse and Dry Thoroughly
Should you rinse your herbs? That depends on how dirty they’re. If soil splashed up during watering, a quick rinse under cool water for 15-30 seconds removes grit without bruising leaves. Never soak—it leaches essential oils. Pat dry with a towel, then spread on a rack with good air circulation. Skip rinsing if your herbs are already clean.
Hang Herb Bundles Correctly
Once your herbs are harvested and clean, how you bundle and hang them makes all the difference. A few simple choices about tying, positioning, and spacing will protect your hard work from mold and dust. Here’s exactly how to set your bundles up for the best possible dry.
Bundle Five to Ten Stems
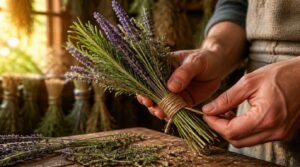
Five to ten stems make the perfect bundle, small enough for air to move through, big enough to be worth the hang.
Match stem thickness and length so every piece dries at the same rate.
Trim excess leaves off the lower third first, this cuts down on moisture pockets that invite mold and keeps bundle integrity solid all the way through drying.
Tie With Twine or Bands
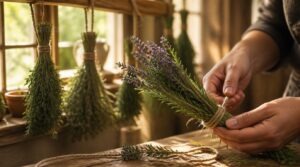
Once your bundles are trimmed and even, it’s time to secure them. Natural cotton twine works best for delicate leaves, while jute holds heavier bundles without snapping.
Wrap two to three times around the stems, snug but not crushing, then finish with a simple overhand knot. Rubber bands work too, tightening naturally as stems shrink. Leave 1.5 to 2 inches between bundles for airflow.
Hang Upside Down
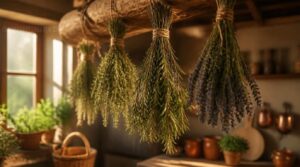
With your bundles tied and tension checked, find a hook, rafter, or drying rack and hang each one upside down.
Gravity’s fluid pull draws plant juices toward the leaf tips, concentrating flavor and oils as they dry. This orientation ensures even herb dehydration and helps prevent leaf mold in dense bundles.
Hanging herbs upside down lets gravity pull juices into the leaf tips, concentrating flavor as they dry
Cover With Paper Bags
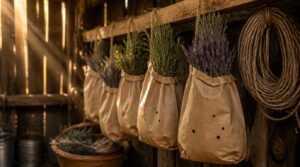
Once your bundles are hanging, slip a paper bag over each one to catch falling seeds and dust. Poke a few holes for air circulation, then cinch the open end loosely around the stems.
Grab plain kraft bags with a glued bottom seam, they open flat and resize easily if you need a smaller cover. Skip waxy or glossy bags; they trap moisture instead of letting herbs breathe.
Space Bundles for Airflow
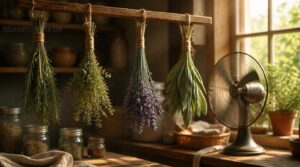
Once bagged, give each bundle room to breathe. Crowded herb bundles trap moisture and invite mold, so leave a few inches between them on your drying rack or line.
Good air circulation keeps the hang drying process moving evenly, drawing oils toward the leaf tips without dampness settling in. A small fan nearby helps, especially in humid rooms.
Top 8 Herb-Drying Tools
You don’t need a fancy setup to dry herbs well, but the right tools sure make it easier. From snipping stems to sealing up your finished harvest, a handful of simple items can save you time and hassle. Here are eight worth having on hand.
1. KitchenAid All Purpose Kitchen Shears
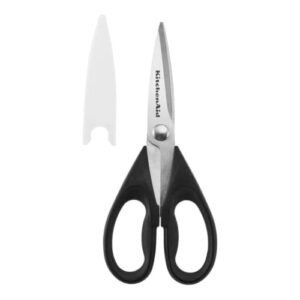
Good shears make or break your harvest. The KitchenAid All Purpose Kitchen Shears use stainless steel blades with micro-serrated edges, giving you a secure grip on woody stems like rosemary and thyme.
Extra thick blade construction controls tougher cuts without bending, while soft-grip grips reduce hand fatigue during long harvesting sessions.
The included sheath keeps blades protected between uses. Though dishwasher safe, I personally hand wash mine to keep the edges sharp longer, since blades dull faster with repeated dishwasher cycles.
| Best For | Home gardeners and cooks who want one sturdy tool for harvesting herbs and handling everyday kitchen cutting tasks. |
|---|---|
| Material | Stainless steel |
| Primary Use | Cutting herbs and food |
| Herb Compatibility | Cutting fresh herbs |
| Care Instructions | Hand wash recommended |
| Color | Black |
| Storage Footprint | Compact with sheath |
| Additional Features |
|
- Micro-serrated stainless steel blades grip woody stems and slippery foods securely
- Extra thick blade construction resists bending during tougher cuts
- Soft-grip handles reduce hand fatigue during long sessions
- Best long-term blade quality requires hand washing instead of the dishwasher
- Must be stored in the included sheath to avoid blade damage
- Thicker blade construction may feel bulkier for delicate, precision cuts
2. Natural Cotton Butcher Twine String
Twine matters more than folks think. This natural cotton twine gives you food-grade security for bundling stems without worrying about synthetic fibers touching your herbs. At 2mm thick and 600 feet per roll, one spool lasts through an entire drying season with room to spare.
The soft texture won’t cut into stems, and it’s neatly rolled for quick cutting. Since it’s oven-safe too, I keep a roll in the kitchen for trussing alongside my drying bundles.
| Best For | Home cooks and herb-drying enthusiasts who want a food-safe, natural twine for trussing, bundling, and everyday kitchen projects. |
|---|---|
| Material | Natural cotton |
| Primary Use | Trussing and tying herbs |
| Herb Compatibility | Bundling herb stems |
| Care Instructions | One-time use |
| Color | Natural white |
| Storage Footprint | Rolled compact spool |
| Additional Features |
|
- Food-grade natural cotton is safe for direct contact with meat and herbs
- Long 600-foot roll at 2mm thickness lasts through extended use
- Soft, oven-safe construction that’s neatly rolled for easy cutting
- Recommended for one-time use only, which means more frequent repurchasing
- Must be kept away from open flames, limiting some cooking applications
- Natural cotton may be less durable than synthetic alternatives for heavy-duty tasks
3. Collapsible Accordion Style Wood Wine Rack
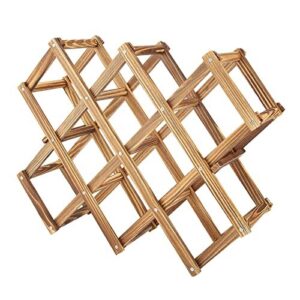
Repurposing a wine rack for herbs might sound odd, but the accordion fold gives you multiple horizontal slots at once, perfect for small-batch bundles. This solid wood rack expands to hold up to 10 spots, then collapses flat when you’re done, so storage between harvests takes almost no space.
The brass hinges keep bundles steady while air moves freely around each stem. It’s a clever stand-in for a proper drying rack, especially in tight kitchens.
| Best For | This rack is best for wine enthusiasts and small-space dwellers who want a decorative, space-saving way to store bottles in a kitchen, dining room, or bar area. |
|---|---|
| Material | Wood |
| Primary Use | Storing bottles |
| Herb Compatibility | Not herb-specific |
| Care Instructions | Wipe clean only |
| Color | Natural wood tone |
| Storage Footprint | Folds flat |
| Additional Features |
|
- Accordion-style design holds up to 10 bottles horizontally while folding flat for compact storage
- Freestanding construction allows for flexible placement anywhere in the home
- Solid wood build doubles as an attractive decorative display
- Bottles are not included, so you’ll need to supply your own
- Actual color may differ slightly from images due to lighting and monitor settings
- Manual measurements may be off by 1–3 cm, which could affect fit in tight spaces
4. Collapsible Bamboo Clothes Drying Rack
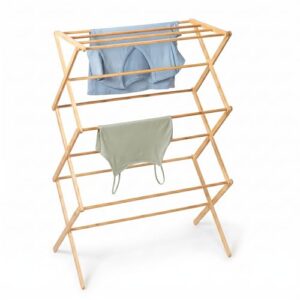
Ever run out of hanging space halfway through harvest season? A bamboo drying rack built for laundry works just as well for herbs, giving you 25 linear feet across multiple tiers. It folds flat for storage between uses, so it won’t hog closet space.
At 40 pounds, it’s sturdy but not the most portable option. Drape your bundles over the bamboo bars for a makeshift multi-tier rack, ideal for big harvests when your usual hooks and hangers just aren’t enough.
| Best For | Herb growers and small-space dwellers who need a lot of drying capacity without dedicating permanent room to it. |
|---|---|
| Material | Bamboo |
| Primary Use | Air-drying herbs |
| Herb Compatibility | Hanging herb bundles |
| Care Instructions | Wipe clean only |
| Color | Natural |
| Storage Footprint | Folds flat |
| Additional Features |
|
- Offers 25 linear feet of drying space across multiple tiers, great for big harvests
- Folds flat for compact, out-of-the-way storage between uses
- Made from sustainable bamboo, a natural and eco-friendly material
- At 40 pounds, it’s not easy to move around once assembled
- Bamboo requires extra care and isn’t ideal for constant outdoor exposure
- Not a purpose-built herb rack, so bundles are simply draped over bars rather than secured
5. ComSaf Mini Mason Glass Jars
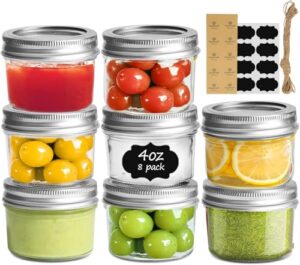
Once your herbs finish drying, tiny jars become the perfect next home for them. These 4-ounce glass jars come 8 to a pack, with clear soda-lime glass that lets you see exactly what’s inside, no guessing whether that’s oregano or thyme.
The two-piece metal lids seal tight for freshness, though I’d hand wash them rather than risk rust in the dishwasher. With matching labels and twine included, they’re ready for gifting or simply organizing your pantry shelf.
| Best For | home cooks and hobbyists who dry their own herbs, make small-batch jams, or want charming little jars for gifting and party favors. |
|---|---|
| Material | Glass and metal |
| Primary Use | Storing dried herbs |
| Herb Compatibility | Storing dried herbs |
| Care Instructions | Hand wash lids |
| Color | Clear |
| Storage Footprint | Stackable jars |
| Additional Features |
|
- Clear glass makes it easy to identify contents at a glance
- Comes with matching labels and twine, ready for gifting right out of the pack
- Standard mouth size works with universal canning accessories
- Metal lids must be hand washed and dried right away to avoid rust
- Not safe for microwave or oven use due to thermal shock risk
- Small 4 oz capacity means frequent refilling for larger storage needs
6. Airtight Square Glass Spice Jars
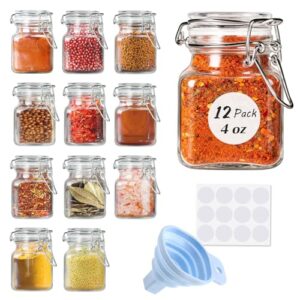
For everyday spice storage, square glass jars earn their keep on the shelf. Their airtight lids with silicone gaskets lock out moisture and air, so ground herbs stay potent instead of clumping. That tight seal also guards those precious volatile oils, the compounds giving your dried basil or rosemary their aroma.
The square shape isn’t just looks, either. It maximizes cabinet space and stacks tight, keeping your kitchen organized without wasted room. Clear glass lets you check contents at a glance.
| Best For | Home cooks and gift-givers who want a tidy, airtight way to organize spices, teas, or small craft and bath items. |
|---|---|
| Material | Glass and metal |
| Primary Use | Storing dried herbs |
| Herb Compatibility | Storing dried herbs |
| Care Instructions | Hand wash lids |
| Color | Clear with silver lids |
| Storage Footprint | Stackable jars |
| Additional Features |
|
- Airtight hinged lids with silicone gaskets keep contents fresh and aromatic
- Durable, dishwasher-safe glass that’s easy to clean and see through
- Comes complete with 12 labels and silicone funnels for easy filling and organizing
- Small 4 oz capacity only works for spices or other minor items
- Silver lids need hand washing separately, adding extra care
- Narrow 1.375" opening width may make filling bulkier ingredients tricky
7. KitchenAid 3.5 Cup Food Chopper
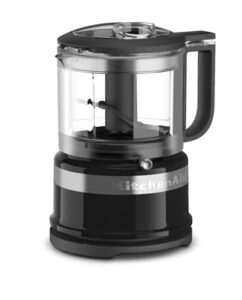
Once your leaves are stripped and crumbly-dry, a food chopper turns them into usable seasoning fast. The KitchenAid 3.5 Cup Chopper’s stainless blade and reverse spiral design pulverize brittle rosemary or thyme leaves evenly, no clumps of half-crushed bits.
Pulse mode gives you control, coarse and rustic for one batch, finer for another. The 3.5 cup bowl suits small herb harvests perfectly, and dishwasher-safe parts mean quick cleanup between different herbs, so flavors stay true.
| Best For | Home cooks who want to quickly chop and prepare dried herbs, fresh produce, or small-batch sauces without pulling out a full-size processor. |
|---|---|
| Material | Plastic and metal |
| Primary Use | Chopping fresh herbs |
| Herb Compatibility | Chopping fresh herbs |
| Care Instructions | Hand wash blade unit |
| Color | Onyx Black |
| Storage Footprint | Compact countertop unit |
| Additional Features |
|
- Compact 3.5 cup bowl with integrated handle and pour spout makes it easy to portion out chopped herbs or ingredients
- Locking blade system keeps operation secure during use
- Drizzle basin allows for smooth liquid integration when making dressings, mayonnaise, or sauces
- Small 3.5 cup capacity isn’t ideal for processing large batches
- Compact size limits the volume of ingredients you can work with at once
- Best suited for light tasks, so heavier-duty chopping may require a larger appliance
8. Electric Mason Jar Vacuum Sealer Kit
Once your ground herbs are ready for the long haul, storage becomes the real test. This handheld sealer works on both wide and regular mouth jars, pulling air out in about 40 seconds with one button press. That airtight seal matters more than people realize, oxygen is what turns vibrant dried herbs dull and flavorless over time.
It’s cordless, USB-C rechargeable, and genuinely portable. Just remember: jars aren’t included, so grab your own before sealing day.
| Best For | Home cooks and herb enthusiasts who want to keep dried herbs, spices, and other pantry staples fresher for longer without a bulky or complicated setup. |
|---|---|
| Material | ABS plastic |
| Primary Use | Sealing herb jars |
| Herb Compatibility | Preserving dried herbs |
| Care Instructions | Wipe clean only |
| Color | Black |
| Storage Footprint | Compact handheld unit |
| Additional Features |
|
- Works with both wide and regular mouth mason jars for flexible use
- Cordless, USB-C rechargeable design makes it easy to use anywhere
- One-button operation seals jars in about 40 seconds with no manual effort
- Mason jars are sold separately, so you’ll need your own on hand
- Battery requires periodic recharging to stay ready for use
- Liquids need at least 1 inch of headspace, which takes a bit of planning
Store Dried Herbs Fresh
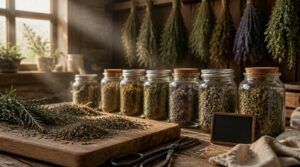
Once your herbs are fully dry, the real work of protecting that flavor begins. All those weeks of patient hanging deserve a proper finish. Here’s how to test, strip, and store them the right way.
Test for Full Dryness
How do you know your herbs are truly ready? Grab a stem and try the stem snap technique — it should crack cleanly, not bend. Leaves should crumble easily, releasing a faint aroma, not a damp smell.
For peace of mind, run a 24-hour jar condensation test before storing your bundles away.
Strip Leaves From Stems
Once your bundles pass the jar test, it’s time to separate leaf from stem. Grip close to the leaf node and pull down in one smooth motion for soft herbs, or use short, steady strokes for woody stems like rosemary and thyme.
- Work in small sections to avoid tearing
- Strip toward the stem base
- Use gloves for large batches
- Compost the bare stalks
- Keep leaves whole when possible
Keep Leaves Mostly Whole
Whole leaves hold more flavor, so handle them gently. Preserving leaf margins matters here: crumbled bits lose oils fast and taste flat sitting in storage.
Slide leaves off with light pressure, not a hard yank. This keeps edges from tearing and protects delicate blades. That’s postharvest handling done right, giving you better flavor retention for months down the road.
Store in Airtight Glass
Once dry, transfer herbs into airtight glass jars, not plastic. Glass won’t leach flavors or absorb odors, so your basil won’t taste like last week’s oregano.
Amber jars add a bonus: they block light that degrades essential oils. A tight seal keeps air out, preserving aroma and potency for months. It’s simple kitchen storage that actually works.
Label Harvest Dates
Grab a permanent marker and jot the picking date right on each jar, using a simple YYYY-MM-DD format so nothing gets misread months later.
This small habit is the backbone of good inventory management and quality control—you’ll know exactly which batch is oldest and use it first. For multiple harvests, note the herb, date, and batch number for full traceability, protecting your dried herbs for up to two years.
Frequently Asked Questions (FAQs)
How long should I hang herbs to dry?
Some folks think herbs dry overnight—not even close. Really, expect 5 to 14 days, depending on humidity impact factors. Low humidity? Just 5 to 7 days. High humidity? Up to three weeks before the crumble test confirms full dryness.
What herbs can be hung to dry?
Woody garden herbs shine here: rosemary (2-4 weeks), thyme in small bundles, oregano with good airflow, and sage, which keeps its earthy flavor. Lavender adds floral charm. Save basil for fresh use—it browns fast when hung.
Why hang herbs upside down to dry?
Think of gravity as nature’s gentle drain: it pulls moisture down and out through the stems, leaving leaves dry and fragrant. This vertical airflow locks in essential oils, prevents puddling, and keeps your hang drying process wonderfully even.
What herbs should you not dry?
Skip air-drying moisture-heavy leaves like basil, mint, parsley, and cilantro—they mold or darken easily. Their essential oils degrade slowly, so quick dehydration or freezing works better.
Delicate flowers such as chamomile fare best with gentle heat, not hanging.
How long does it take herbs to dry?
Ever wonder why some herbs dry fast while others linger? Hang drying takes 1 to 2 weeks with good airflow; humidity slows things down. Dehydrators finish in 1 to 4 hours, ovens 2 to 4 — leaves ready when crisp and crumbly.
Can you hang herbs to dry outside?
Yes, in dry, warm climates with low humidity and steady air movement. Choose a shaded, wind-protected spot to prevent pest issues and color loss. Aim for 60–75°F with humidity below 60 percent for the best natural preservation.
Why did my hanging herbs turn moldy?
Grandma’s icebox trick applies here too: excessive surface moisture and poor airflow circulation invite mold.
Bundles hung in high humidity or incomplete drying stages trap condensation. Fix it with better moisture control, low humidity spaces, and steady air circulation until stems snap dry.
Can you dry herbs with flowers attached?
Absolutely — lavender, sage, chamomile, and calendula dry beautifully with blooms intact, boosting aroma retention and creating decorative clusters perfect for tea blends.
Keeping flowers attached helps botanical preservation and gives your dried bundles a lovely, natural floral aesthetic.
How do you know if dried herbs went bad?
The strongest herbs can turn weakest without warning. Trust your senses: faded color, dull aroma, or crumbly-turned-tacky texture all signal decline. Musty smells or mold growth mean toss it immediately—no exceptions when food preservation and safety are on the line.
Conclusion
Think of your rafter of bundles as old sailors reading the wind: they know exactly when to let go of moisture and hold onto what matters. That’s the quiet lesson behind hanging herbs to dry, patience turns a green stem into something that outlasts the season.
Trust the process you’ve built here, sharp cuts, steady air, snug jars, and you’ll keep pulling summer off the shelf all winter long. Your kitchen, your harvest, your small ritual worth repeating.
- https://extension.psu.edu/lets-preserve-drying-herbs
- https://www.thetakeout.com/2029883/correct-method-hang-drying-herbs-old-fashioned-way
- https://gardenerbible.com/how-long-to-dry-herbs-hanging
- https://extension.oregonstate.edu/food/preservation/drying-herbs
- https://mamaonthehomestead.com/how-to-air-dry-herbs