This site is supported by our readers. We may earn a commission, at no cost to you, if you purchase through links.
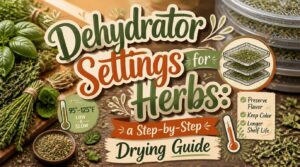
Crank your dehydrator too high, and basil turns into flavorless green hay. That’s the mistake most home cooks make. They figure hotter means faster, so they blast herbs at 135°F and wonder why the jar tastes like nothing.
Here’s the truth: dehydrator settings for herbs work best low and slow, somewhere between 95°F and 115°F. That narrow window protects the essential oils giving basil, thyme, and mint their punch. Push past 125°F, and those compounds break down fast.
Get the temperature right, and you’ll pull trays of herbs that taste like they were picked five minutes ago, not five months.
Table Of Contents
- Key Takeaways
- Why Dehydrator Settings Matter for Herbs
- Choose and Prepare Herbs for Drying
- Set The Best Dehydrator Temperature
- Follow Herb-Specific Time and Settings
- Arrange Herbs for Consistent Airflow
- Adjust Settings for Drying Conditions
- Monitor Herb Drying Time Carefully
- Test Herbs for Complete Dryness
- Troubleshoot Common Dehydrating Problems
- Cool and Store Dehydrated Herbs
- Frequently Asked Questions (FAQs)
- What temperature do you dry herbs in a dehydrator?
- What setting do you dehydrate herbs on?
- Can I over dehydrate herbs?
- What herbs should you not dry?
- Can you dry multiple herb varieties together simultaneously?
- How do dried herbs compare nutritionally to fresh herbs?
- Can frozen herbs be dehydrated instead of fresh ones?
- Can herb stems be dried and used too?
- Conclusion
Key Takeaways
- Keep your dehydrator between 95°F and 115°F, since anything above 125°F breaks down the essential oils that give herbs their flavor.
- Prep matters as much as temperature: harvest after dew dries, rinse without soaking, dry off surface moisture, and keep leaves whole until you’re ready to use them.
- Good airflow makes or breaks a batch, so load trays in single layers with breathing room and rotate them every hour or two to dodge hot spots.
- Confirm herbs are truly done with the crumble test, stem snap test, and an overnight jar check for condensation before sealing them away for storage.
Why Dehydrator Settings Matter for Herbs
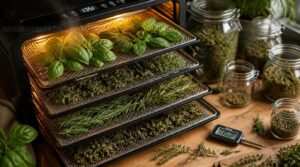
Your dehydrator settings can make or break your herb harvest. Get the temperature wrong, and you’ll trade good flavor for brittle, tasteless leaves. Here’s what those settings actually do for your herbs.
Before your herbs even reach the dehydrator, though, avoiding common daily herb harvesting mistakes sets you up for better flavor from the start.
Preserve Essential Oils and Flavor
Crank the heat too high, and you cook off the good stuff. Essential oils carry all the aroma and flavor in your herbs, and they’re fragile.
Crank the heat too high, and you cook away the fragile essential oils that give herbs their aroma and flavor
Low temperature drying between 95°F and 115°F protects compounds like linalool and thymol. This is your top flavor preservation method — go above 125°F, and you’re left with flat, hay-tasting leaves. Proper storage after drying requires maintaining the ideal moisture level to preserve herb quality.
Prevent Browning and Toughness
Flavor isn’t the only thing at stake. Heat and rough handling turn leaves brown and brittle fast.
Low temperature drying slows enzymatic browning, while gentle patting removes surface moisture that feeds it. Keep leaves whole, handle them gently, and skip the squeeze test. Bruised leaves brown quicker and dry tougher. Texture testing later tells you if this stage went right.
Extend Homegrown Herb Shelf Life
Good drying habits pay off later. Herbs dried right and sealed in airtight jars last up to 12 months in a cool dark dry spot.
Add desiccant packets, keep containers upright, and check monthly for moisture. Rotate older jars forward, keep light exposure low, and your dehydrator work keeps paying you back all year.
Choose and Prepare Herbs for Drying
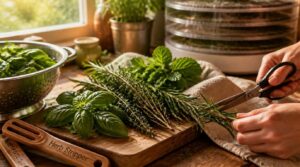
Good drying starts long before you touch the dehydrator. What you do to your herbs in the kitchen matters just as much as the settings you pick. Here’s how to get them ready, step by step.
Harvest After Morning Dew Dries
Timing is everything. Snip your herbs once the dew has dried, usually mid-morning. Wet leaves dilute essential oils and invite mold during drying.
Pat any stubborn droplets away before cutting. That small pause preserves flavor, color, and aroma, setting you up for a clean, even dehydrator run from the start.
Remove Damaged Leaves and Stems
Grab your basket and sort before anything hits the dehydrator. Pull leaves with heavy browning, cut damaged petioles at the stem, and toss slimy or bruised bits.
- Prune damaged foliage first
- Trim stem bases cleanly
- Sanitize tools between cuts
- Discard diseased sections whole
Skip half-measures. Whole removal beats partial trimming, and it keeps healthy tissue doing its job.
Rinse Without Soaking Herbs
Once herbs are sorted, resist the urge to soak them. Soaking pulls flavor compounds right out into the water.
Clean gently under cool running water instead. Cold temps limit browning; a quick pass removes grit without bruising leaves.
| Do | Don’t |
|---|---|
| Rinse briefly | Soak in a bowl |
| Use cool water | Use hot water |
| Handle gently | Scrub or agitate |
Remove All Surface Moisture
Water left sitting on leaves invites dark spots and mold later. Dry the surface completely with a salad spinner or clean towel—gentle blotting, not rubbing.
Air drying works too: spread herbs on a rack for a few minutes. Roll delicate leaves between your fingers to catch stray droplets.
Skip this step and drying takes longer, unevenly.
Leave Leaves Whole
Why chop before drying? Don’t. Whole leaf benefits start with oils staying locked inside, not spread across a cutting board.
Whole leaves also lie flat in a single layer, so air moves evenly through your dehydrator trays. That’s your airflow optimization technique, simply put.
Come storage time, whole leaves resist crumbling and keep flavor longer—crush them fresh, right before cooking.
Set The Best Dehydrator Temperature
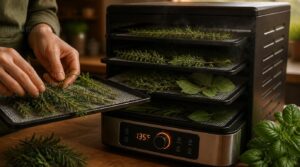
Temperature makes or breaks your dried herbs. Set it too high, and you’ll cook out the flavor instead of preserving it. Here’s how to dial in the right setting for your climate and your machine.
Ideal 95°F to 115°F Range
Think of 95°F to 115°F as your herb-drying sweet spot. This range protects essential oils, so basil still smells like basil, not hay.
Go lower and moisture lingers too long. Go higher and you risk browning and brittle, crumbly leaves. Staying in range keeps leaf structure intact while pulling moisture out gradually, no scorched edges, no weak flavor later.
Settings for Dry Climates
Dry air pulls moisture fast, which tempts you to crank the heat. Don’t. Stick to 95°F on the low end, letting airflow do the heavy lifting instead of temperature.
Boost fan speed if your dehydrator allows it, and skip walls when placing the unit, restricted intake causes uneven drying.
Check trays every 20-30 minutes your first run, arid conditions dry herbs quicker than you’d expect.
Settings for Humid Climates
Sticky air changes the game. Start at 115°F instead of 95°F, giving moisture less room to linger on leaf surfaces.
Run a quick preheat cycle before loading trays, this stabilizes chamber conditions fast. Bump fan speed to your highest stable setting, and space trays evenly, blocked vents trap humidity. Keep the unit away from steamy kitchens or damp basements.
Avoid Temperatures Above 125°F
Even in humid climates, 115°F is your ceiling, not a starting point to climb from. Push past 125°F and flavor degrades fast, leaving herbs tasting like hay.
That heat also stresses your dehydrator’s motor and heating element over time.
Worse, 125°F sits at the extreme danger threshold for heat-related risk. Keep drying spaces cooler, and watch for buildup.
Fixed-Temperature Dehydrator Options
Not every dehydrator gives you a dial. Some run on fixed temp settings, usually parked right in that 95F to 115F sweet spot, which takes guesswork off your plate.
That’s not a downgrade. You get consistent airflow, smart tray design, and solid power efficiency, plus safety features like overheat shutoff. Good news for beginners tackling this step-by-step drying guide.
Follow Herb-Specific Time and Settings
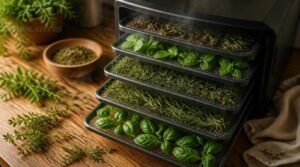
Not every herb dries the same way. Leaf thickness and moisture content change the timing, sometimes by hours. Here’s what to set for five popular herbs.
Basil and Mint Settings
Basil and mint are forgiving, but not identical. Keep your Temperature Range at 95F to 115F for both.
- Basil: dries in 1–4 hours, watch thin leaves at 45–60 minutes
- Mint: dries faster, thinner leaves
- Leaf Preparation: whole leaves, single layer
- Airflow Management: rotate trays halfway
- Storage Conditions: cool fully, seal airtight
Crumbly, not bendy, means done.
Parsley and Cilantro Settings
Delicate leaves like these punish sloppy settings fast. Keep temperature settings at 95°F–115°F for both.
| Herb | Dry Time |
|---|---|
| Parsley | 2–4 hrs |
| Cilantro | 2–4 hrs |
| Thin leaves | check early |
Prep matters: rinse gently, pat dry, leave whole. Single-layer trays with steady airflow circulation prevent moisture pockets. Crumbly leaves mean you’re done.
Thyme and Oregano Settings
Because thyme leaves are smaller and lighter than oregano, they dry faster—check both by the 1.5 to 2 hour mark.
Keep temperature settings between 95°F and 115°F. Leave thyme’s woody stems attached for stronger aroma; keep oregano leaves whole.
Arrange sprigs stem-aligned, single layer. Full dryness usually hits 2–4 hours. Crumble test confirms it’s done.
Rosemary and Sage Settings
Woody stems set these two apart. Rosemary needs 95°F to 115°F; keep needles on the stem for oil retention. Sage dries best at 105–115°F, leaves stripped and laid flat.
Use mesh liners so needles don’t slip through. Single-layer trays, rotated every 30–60 minutes, keep airflow even. Both finish in 2–4 hours—crumble test tells you when.
Chives and Dill Settings
Fine and floppy, chives and dill dry fast—don’t blink.
Set your dehydrator to 95°F to 110°F. Fixed models? Use 105°F. Dill’s thin fronds finish in about an hour; chives take slightly longer.
- Single-layer tray arrangement, no crowding
- Calm fan setting for even airflow
- Rotate trays halfway through
- Crumble test at 30 minutes
- Amber storage containers, away from light
Watch closely. Overheating kills their delicate flavor fast.
Arrange Herbs for Consistent Airflow
Good airflow makes or breaks your drying batch. Air needs room to move around every single leaf, not just across the top of the pile. Here’s how to set up your trays so warm air does its job right.
Load Trays in Single Layers
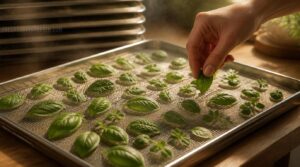
Crowded trays choke off airflow fast. Give each leaf its own space, laid flat, not touching its neighbors.
Use shallow trays for uniform layer thickness, and handle leaves gently to protect their surfaces. Skip dividers — they block air.
Consistent spacing means consistent drying. Rushed loading now means uneven, patchy herbs later.
Prevent Leaves From Overlapping
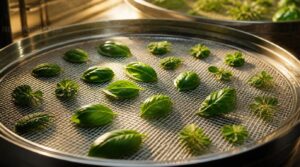
Touching leaves trap moisture between them, slowing everything down.
- Keep half an inch of clearance between neighboring leaves
- Lay leaves blade-side down for even exposure
- Avoid stacking herbs in overlapping clusters
- Trim oversized leaves to fit a single layer
Good tray spacing means dry air reaches every surface. Skip this step, and you’ll fight patchy, sticky spots for hours.
Use Mesh Tray Liners
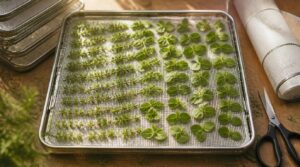
Small leaves like thyme and oregano slip through tray gaps fast. Mesh liners solve that, while boosting airflow underneath each leaf.
Pick liners sized to your dehydrator, 12 to 15 inches usually fits. Trim with scissors for odd trays.
Silicone washes in the dishwasher; plastic rinses clean. Dry liners fully before storing flat, away from sunlight.
Rotate Trays Around Hot Spots
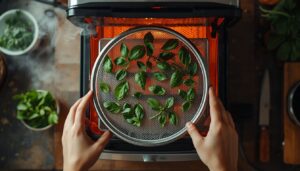
Mesh liners keep leaves in place, but every dehydrator has hot spots, zones that run warmer than the rest. Give trays a 180-degree turn every hour or two.
This simple habit balances heat exposure across all trays. You’ll get consistent moisture loss, even color, and no scorched edges near the back wall.
Separate Strong-Smelling Foods
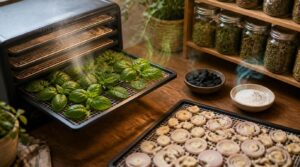
While your trays spin, think about what’s riding next to your basil. Onions and garlic release sulfur compounds that hitch a ride onto delicate herb oils fast.
- Keep alliums off basil trays entirely
- Use perforated vented containers for onions
- Store extras on separate storage shelves
- Add odor absorbing materials nearby
- Label by aroma category for quick sorting
Prevention beats a ruined batch every time.
Adjust Settings for Drying Conditions
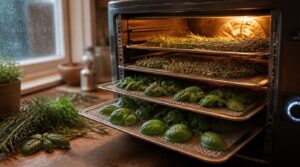
No two drying days look the same. Your kitchen’s humidity, the herbs on your tray, even your dehydrator’s airflow all play a part. Here’s what to watch for before you hit start.
Account for Room Humidity
Humidity is the silent variable in herb drying. Keep relative humidity between 40-60%, and use a thermo-hygrometer for monitoring.
| Room Humidity | Setting |
|---|---|
| Above 60% | Start at 115°F |
| Below 40% | 95°F works fine |
| Moderate | Adjust incrementally |
Improve dehydrator airflow, rotate trays, and control temperature accordingly. This humidity adjustment prevents mold and preserves flavor.
Consider Leaf Size and Thickness
Not all leaves dry at the same speed. Thicker leaves hold more internal moisture and take longer, while thin ones lose water fast. Broad basil leaves need more time than delicate cilantro.
For uniform leaf selection, sort by size before loading trays. Trim oversized leaves in half. This shortens drying distance and keeps single layer drying even, without babying one tray while another burns.
Increase Airflow When Needed
Kick things up when your batch just won’t cooperate. Sticky, moisture-heavy herbs need a stronger push.
- Activate burst mode to clear moisture pockets fast
- Adjust fan speed for stubborn hot spots
- Sync supplemental fans for even coverage
Good dehydrator airflow optimization boosts humidity response before mold sneaks in. Watch tray rotation closely—it’s your cheapest fix.
Avoid Overcrowding Dehydrator Trays
More isn’t better here. Piling herbs on a tray traps moisture and blocks airflow, so even herb distribution matters more than speed.
Give each leaf breathing room. Proper tray spacing keeps air moving freely, preventing damp spots and cross-contamination between batches.
Got a big harvest? Dry it in stages. Smart batch sizing beats cramming everything in at once.
Whether you’re air drying, dehydrating, or using an oven, this step-by-step guide to drying and storing homegrown herbs breaks down the right batch sizes for each method.
Preheat Before Loading Herbs
Cold air is the enemy of even drying. Run your dehydrator 5 to 10 minutes before loading, letting temps stabilize (100°F takes about 3 minutes).
This locks in:
- Up to 85% of essential oils
- 30% less moisture loss that first hour
- Tray-to-tray variance under 2°F
Skip it, and your top tray runs 5°F cooler—uneven results guaranteed.
Monitor Herb Drying Time Carefully
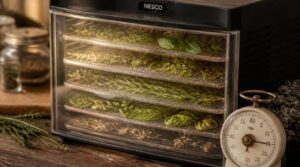
Getting the temperature right is only half the job. Timing matters just as much, and it changes with every batch. Here’s what to watch for while your herbs dry.
Expect One to Four Hours
Dehydrating herbs isn’t a fixed science. Drying time factors like leaf thickness and humidity mean you’ll wait 1 to 4 hours, not the 180°F to 200°F blast reserved for jerky.
Thick rosemary sprigs take longer than delicate basil. Humidity adjustment tips: run longer in damp air.
Start checking with the crumble test once the first hour passes.
Check Thin Leaves Early
Thin leaves fool people. Mint, lemon balm, and dill sprigs feel dry on top while hiding moisture pockets underneath.
Start your crumble test thin-leaf check at the one-hour mark. If leaves crush to powder but stems still bend, they’re close, not done. Watch for color shift toward pale olive; that’s your cue to look closer, not pull the tray.
Rotate Trays During Drying
Once those thin leaves pass inspection, don’t just let the tray sit. Every dehydrator has hot spots, and yours is no different.
Turn each tray 180 degrees every 2 to 4 hours. This tray rotation schedule balances airflow, redistributes moisture, and stops one batch from drying faster than the rest. Think of it as hot spot compensation — simple, but it saves your whole batch.
Avoid Unnecessary Over-Drying
More time isn’t always better. Once herbs pass the snap test, pull them — extra minutes just cook away flavor.
Keep tabs on progress with these habits:
- Monitor drying time with a timer, not guesswork
- Check leaf texture every hour near the finish
- Adjust heat settings if edges darken early
Herb moisture content varies by batch, so checking beats assuming.
Record Successful Time Settings
Once you nail a batch, write it down. Log the set temperature and time, herb type, and results — that’s your reference for next time.
| Herb | Time/Temp |
|---|---|
| Basil | 2 hrs, 100°F |
| Thyme | 1.5 hrs, 95°F |
| Mint | 3 hrs, 105°F |
Confirm with three consistent repeats before trusting the setting.
Test Herbs for Complete Dryness
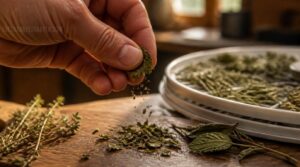
Timers get you close, but your eyes and hands tell the real story. Guessing leads to mold, so you need proof your herbs are truly dry. Here are four simple checks to confirm you’re done.
Perform The Leaf Crumble Test
Your fingers are the best dryness gauge you own. Grab a leaf and give it gentle pressure — it should crumble, not bend.
- Test leaf flexibility — no give means it’s ready
- Check crumb consistency across the tray
- Assess moisture absence — no tackiness
- Recheck after a short rest if unsure
Uneven crumbs? Retest another section before moving on.
Try The Stem Snap Test
Grab a stem and bend it. A properly dried one won’t flex — it snaps clean, with a crisp crack.
Basil stem snap breaks near the base. Mint stem snap sounds sharp and audible. Parsley stem snap fractures at the center.
Test several stems per tray. Consistent snapping means reliable, even drying throughout your dehydrator load.
Conduct an Overnight Jar Test
Once your stems snap clean, double-check with a cool then jar test. Seal cooled herbs in an airtight jar overnight.
Check for condensation the next morning. Fogged glass means leftover moisture — back to the dehydrator they go. A clear, dry jar means storage-ready herbs with a shelf life up to three years.
Redry Herbs Showing Condensation
Fogged jars mean trapped moisture, not failure. Uneven airflow or thick leaves often cause it.
Spread herbs back in a single layer and reset temperature to 100°F–115°F. Skip rehydration — just redry 30–60 minutes, then repeat the jar test. Clear glass confirms herbs are ready for airtight storage.
Troubleshoot Common Dehydrating Problems

Even with careful settings, things can still go sideways. Maybe your leaves turned brown, or one tray dried faster than the rest. Here’s how to spot the problem and fix it fast.
Brown or Darkened Leaves
Brown leaves usually mean heat damage, not spoilage. Temperature control is your fix: stay under 125°F.
Causes include:
- Overheated trays
- Overcrowded airflow
- Pre-harvest sun stress
- Nutrient deficiency in the plant
- Natural leaf aging
Rotate trays for even color retention, and don’t panic over a few dark edges from field stress.
Unevenly Dried Herb Trays
Why does one tray finish drying while another still feels damp? Blame tray temperature variability — centers run 2-5°F warmer, edges lag behind.
| Cause | Fix |
|---|---|
| Hot spots | Rotate trays |
| Overcrowding | Improve spacing |
| Leaf size mix | Sort by thickness |
Uneven loading and moisture content differences compound the problem. Improve airflow, and drying evens out fast.
Weak Flavor and Aroma
Dull, hay-like herbs usually mean heat or air did the damage, not your growing skills.
Flavor loss causes include:
- High heat breaking down oils
- Oxidation during drying
- Light exposure fading aroma
- Strong-smelling neighbors on trays
- Rough handling before drying
Stick to low-temperature drying, 95°F to 115°F, for real essential oil retention.
Excessively Long Drying Times
Weak flavor is one problem. Dragging drying times is another headache entirely.
Check for vent blockage first — clogged ducts cut airflow and stretch cycles by 20-40%. Overcrowded trays trap moisture, so give leaves breathing room. Thick-stemmed herbs like rosemary just take longer. High humidity slows evaporation too. Bump your temperature settings slightly, boost fan speed, and rearrange trays for better airflow.
Lingering Moisture or Mold
Slow drying invites a worse problem: mold.
Run the overnight jar test — seal cooled herbs, check for condensation next morning. Any fogging means moisture’s still hiding. Redry immediately.
Spot white, green, or black fuzz? Discard the entire batch. Don’t gamble.
For storage, use airtight containers, add silica packets, and keep humidity below 60%. Weekly jar checks catch trouble early.
Cool and Store Dehydrated Herbs
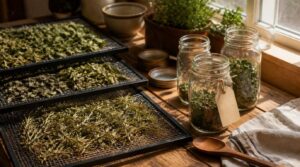
Your dehydrator did its job, so don’t blow it now. The last few steps matter just as much as the drying itself. Here’s what you need to know before those herbs hit the shelf.
Cool Completely Before Sealing
Right when your dehydrator shuts off, don’t reach for the jars yet. Cooling herbs matters as much as drying them.
Give trays a minimum 10-minute ambient temperature wait. Check surface dryness—leaves should crumble easily, no condensation forming.
- Feel leaves for lingering warmth
- Inspect for surface moisture
- Wait longer in humid rooms
Skip this, and sealed airtight containers trap steam, inviting mold.
Choose Airtight Storage Containers
Once herbs cool, jar them fast. Airtight containers with rubber gaskets stop moisture creep and mold. Glass jars resist odors best; BPA-free plastic saves weight.
| Material | Best For | Watch For |
|---|---|---|
| Glass | Long-term flavor | Breakage |
| Plastic | Light storage | Odor buildup |
| Steel | Strong herbs | Cost |
Stackable, snap-lid designs keep cool dark storage organized and dishwasher-safe for easy upkeep.
Protect Herbs From Light
Once your herbs go into glass jars, get them out of the sun. Light breaks down volatile oils fast, especially in light sensitive herbs like basil and parsley.
Choose amber or opaque containers for real UV protection, then tuck jars in a dark cabinet or pantry. Cool storage plus darkness keeps flavor locked in for months.
Keep Leaves Whole Longer
Once dry, whole leaves guard flavor way better than crumbled ones. Keep that structure intact from the start.
- Rinse gently, never scrub
- Dry at 95°F to 115°F (dehydrator) or 180F to 200F (oven), 1 to 4 hours
- Handle leaves like eggshells, not confetti
- Store whole, crush only before cooking
Stable temps and good airflow prevent tearing. Crush later, not now.
Label Dates and Drying Settings
A quick label saves future headaches. Write the date labeling format as month-day-year, plus herb name and batch number.
Record drying temp, humidity notes, and actual time to dry.
| Log This | Why It Matters | |
|---|---|---|
| Date + batch | Temp + humidity | Reproducible results |
This settings verification log turns guesswork into real herb preservation technique.
Frequently Asked Questions (FAQs)
What temperature do you dry herbs in a dehydrator?
Picture a batch of basil turning into hay-scented confetti — that’s what happens above 125°F. Stick to 95°F to 115°F for herb-specific settings. Delicate leaves like mint prefer the low end; sturdy oregano and thyme handle the high end fine.
What setting do you dehydrate herbs on?
The low setting, somewhere between 95°F and 115°F, works best. Go warmer in humid climates, cooler in dry ones. Watch herb trays closely, since drying time and dryness testing matter more than the exact dial number.
Can I over dehydrate herbs?
Yes, easily. Past the moisture content target of 5-10%, leaves turn brittle and crumble to dust, stripping away aroma and oils. That gray, hay-like flavor loss means pulling herbs the moment they crumble gently, not crunch hard.
What herbs should you not dry?
Some herbs fade like perfume left in sunlight. Basil, parsley, chives, dill, and cilantro lose their punch when dried, turning bland or bitter. Freezing keeps their brightness intact, so skip the dehydrator for these five and save your trays for hardier herbs.
Can you dry multiple herb varieties together simultaneously?
Absolutely, with smart tray arrangement. Keep strong smellers like mint separate to avoid aroma transfer, group similar leaf sizes for even airflow optimization, and watch varying dry times so quicker herbs don’t overcook while others finish.
How do dried herbs compare nutritionally to fresh herbs?
Water loss changes the math entirely. Dried herbs pack a higher nutrient density per gram, though vitamin C drops. Minerals and antioxidants concentrate, boosting herb potency, while flavor intensifies right alongside it.
Can frozen herbs be dehydrated instead of fresh ones?
Frozen herbs work fine in a dehydrator. Skip thawing—it just adds moisture and drying time. Blot off ice crystals, keep temps at 95°F to 115°F, and expect a slightly longer cycle. Store cooled batches airtight for best herb preservation.
Can herb stems be dried and used too?
Don’t toss those stems in the compost just yet. Dry them at 95°F to 115°F, then crumble to test dryness. Use them in stocks, teas, or blends for extra flavor with less waste.
Conclusion
Picture a jar of basil, crumbling green and fragrant, still smelling like the garden months later. That’s what proper dehydrator settings for herbs give you: flavor locked in, not baked out.
You’ve learned the range, the timing, the tests. Now it’s just practice. Trust the low heat. Watch your trays, not the clock. Every batch teaches you something new about your kitchen’s quirks. Dial it in once, and you’ll dry herbs like a pro for years.