This site is supported by our readers. We may earn a commission, at no cost to you, if you purchase through links.

Basil has a short memory. Miss the harvest window by a few days, and those lush green leaves turn bitter, flower out, and signal the plant to stop producing altogether.
Most herb gardeners lose their best harvests not from neglect, but from waiting just a little too long.
The good news: harvesting fresh basil is a skill that clicks fast once you know what to look for. Get the timing, the cut, and the aftercare right, and one plant can feed your kitchen all summer long.
Table Of Contents
- Key Takeaways
- When to Harvest Fresh Basil
- How to Cut Basil Properly
- Encourage Bushy Basil Growth
- Store and Preserve Harvested Basil
- Top 4 Basil Harvesting Items
- Frequently Asked Questions (FAQs)
- What is the best way to pick basil?
- How do you harvest basil without killing the plant?
- How do you cut fresh basil?
- Is it better to dry or freeze basil leaves?
- What are common basil harvesting mistakes?
- Can basil reduce cortisol?
- Can you eat basil on blood thinners?
- How do you pick basil so it keeps growing?
- How do you store fresh basil after picking?
- Is it better to freeze basil or dry it?
- Conclusion
Key Takeaways
- Harvest basil in the morning when it’s 6–8 inches tall and has 4–6 sets of leaves — that’s when flavor is at its peak and the plant is ready to harvest.
- Always cut ¼ inch above a leaf node with sharp, clean scissors, and never remove more than one-third of the plant at once, or it won’t bounce back.
- Pinch off flower buds the moment you see them, because once basil starts to bolt, the leaves turn bitter and the plant stops producing.
- Come back every 7–10 days to harvest, and store fresh stems upright in room-temperature water — or freeze purée cubes for flavor that lasts up to six months.
When to Harvest Fresh Basil

Timing your basil harvest right makes all the difference between a thriving plant and one that struggles to bounce back.
Snipping just above a leaf node—rather than pulling whole stems—is one of those basil harvesting techniques that encourage regrowth and keep your plant bushy all season long.
Picking too early or too late risks missing the sweet spot where flavor and plant health peak together. This delicate balance ensures both optimal taste and the plant’s ability to recover.
Before making your first cut, watch for key signs that indicate the ideal harvest window.
Harvest When Plants Reach 6–8 Inches Tall
Before you reach for those scissors, wait until your basil stands 6–8 inches tall — that’s your green light. At this height, the plant has found its rhythm, balancing growth hormones and building real leaf density.
Consistent sunlight exposure and steady soil moisture levels got it here. Now it’s ready to give generously, and your first basil harvest timing couldn’t be better. Follow the principles to harvest leafy greens at the ideal stage for flavor and productivity.
Look for 4–6 Sets of Mature Leaves
Height tells you the plant is ready — but the leaves confirm it. Look for 4–6 sets of mature leaves with deep, vibrant color, well-defined veins, and petioles that feel slightly thick between your fingers.
Sturdy stems and flat, uncurled leaf surfaces signal strong vascular flow. This structural integrity ensures the plant is fully primed for leaf node identification and clean, confident cuts.
That’s your harvest timing based on leaf development: the plant’s maturity guarantees optimal conditions for precise harvesting.
Pick Basil in The Early Morning
Once you’ve confirmed those sturdy, mature leaves, timing your cut matters just as much as technique.
Early morning harvest — after the dew has finished drying but before strong sunlight hits — captures basil at its essential oil peak. Cool temperatures slow morning metabolism just enough to lock in that bright, peppery aroma.
- Leaves glistening as the last dew evaporates
- Air still cool and fragrant before midday heat
- Stems crisp and firm under your fingertips
Harvest Before Flower Buds Appear
That morning freshness you capture disappears quickly once flower buds form. Watch the top of each stem closely — the moment you spot tiny bud clusters, snip them off. Buds signal the plant to shift energy away from leaf production, which reduces both Essential Oil Retention and Flavor Preservation. Keeping your basil in Vegetative Growth Focus through smart Pruning and pinching basil stems is how you practice real Bitter Taste Prevention.
| Stage | What’s Happening | Your Move |
|---|---|---|
| No buds visible | Peak essential oils, tender leaves | Harvest freely |
| Tiny buds forming | Energy shifting away from leaves | Pinch buds immediately |
| Buds fully open | Flavor turns bitter, decline begins | Harvest entire plant |
| Seeds setting | Plant life cycle ending | Compost and replant |
Timing of basil leaf cuts before any bud opens is the heart of Energy Allocation Control — and the secret behind Harvesting basil throughout the growing season without losing that punchy, aromatic bite.
Repeat Harvesting Every 7–10 Days
Once you start, keep a steady rhythm — come back every 7 to 10 days. That consistent Pruning Schedule is the backbone of Harvest Cycle Scheduling and Labor Planning.
In hot weather, shorter cycles boost yield by up to 20 percent per round, making Temperature Impact real and measurable.
Regularly harvesting on this rhythm locks in Market Supply Consistency and maximizes your Yield Optimization all season long.
How to Cut Basil Properly
The way you cut basil makes a bigger difference than most people expect. A clean, precise cut keeps your plant healthy and productive all season long.
Here’s exactly how to do it right.
Use Clean, Sharp Scissors or Pruning Shears

Your tools matter more than you’d think. Dull blades crush basil stems instead of slicing them cleanly, and that damage stresses the plant. Before you cut, make sure your sharp, clean snipping shears or scissors are ready to go.
- Blade Material — Choose stainless steel pruners; they resist rust and stay sharp longer.
- Tool Sanitization — Wipe the blades between plants to stop disease from spreading.
- Ergonomic Handgrips — Padded grips reduce fatigue during extended harvesting sessions.
Safe tool storage between uses keeps edges protected and ready.
Cut ¼ Inch Above a Leaf Node
Place your cut exactly ¼ inch above a leaf node — that small buffer is everything. It protects the node from direct wound stress, promotes faster healing, and keeps the plant’s vascular preservation intact. A slightly angled cut also aids in water shedding.
This leaf node cut is one of the smartest pruning methods for basil, as it minimizes node stress and reduces disease risks immediately.
Trim Stems From The Top Down

Always prune your basil plants from the top down — this is apical dominance control in action. By trimming the uppermost growth first, you trigger lateral shoot stimulation lower on the stem.
Use incremental cut intervals across several branches, making each cut at a 45-degree angle above a node. This technique ensures precise canopy shaping.
The result is a fuller, more productive plant with every session, as the trim-induced growth pattern maximizes foliage density and yield.
Avoid Cutting The Central Stem Too Low

Think of your basil’s central stem as its backbone — cut it too low, and the whole plant wobbles. Low cuts threaten stem stability, trigger sap loss, and increase disease susceptibility by exposing fresh wounds to pathogens.
For pruning methods that support lateral branching and energy conservation, follow these rules:
- Prune above the second set of leaves — never at the base
- Pinch off the center shoot just above a node for ideal pruning height above nodes
- Spread cuts outward to encourage pruning for continuous basil production
Remove No More Than One-third of Foliage

Every cut you make is a trade-off — take too much, and you rob the plant of its ability to feed itself. Keeping at least two-thirds of the leaves intact protects photosynthesis retention and prevents shock mitigation issues like wilting or yellowing. Stick to the one-third rule every time you’re harvesting basil correctly.
Never harvest more than one-third of your basil, or you rob the plant of its power to regrow
| Foliage Removed | Plant Response | Risk Level |
|---|---|---|
| Under 33% | Healthy regrowth, canopy balance maintained | Low |
| 33–50% | Slowed recovery, pest entry prevention compromised | Medium |
| Over 50% | Wilting, yellowing, rapid decline | High |
This leaf pruning discipline, combined with smart recovery scheduling every 7–10 days, keeps your pruning methods for basil sustainable all season — and maximizes harvest frequency for peak flavor.
Encourage Bushy Basil Growth

The secret to a full, leafy basil plant isn’t luck — it’s how you prune it. A few simple habits keep your plant producing fresh growth all season long.
Here’s what to do.
Prune Regularly for Side-shoot Development
Regular basil pruning methods work like a hormonal reset — each cut above a node disrupts apical dominance, pushing side shoots outward within 7–14 days. This cut-and-come-again pruning approach improves light penetration through the canopy, stimulating dormant lower buds.
For best results, practice pruning on warm days every 7–10 days, spacing cuts evenly across the branches. This method ensures consistent growth and structural balance.
Monitoring growth after each session indicates when the plant is thriving, allowing adjustments to maintain optimal health and yield.
Pinch Flower Buds Before They Open
Spot a flower bud forming at the top of a stem? Pinch it off right away — before it opens. This removes apical dominance, reducing auxin levels and triggering side-shoot stimulation within days. Timing pinch intervals every 7–14 days is your best bolting-delay strategy.
Preventing basil bolting and flowering keeps leaves flavorful, because once seeds form, the rich aroma fades fast.
Spread Cuts Across Multiple Branches
Don’t harvest the same branch twice in a row. Instead, rotate your cuts across multiple stems — this cut-and-come-again pruning approach is the secret to balanced canopy growth.
Here’s why this leaf harvesting technique works:
- Improved light penetration reaches lower leaves
- Reduced stem stress on any single branch
- Faster overall recovery at each cut site
- Rotating branch cuts keeps shape even
- Pinch off leaves from different stems each session
Water After Harvesting to Support Regrowth
After rotating your cuts, give your basil a good drink. Use room-temperature water — cold water shocks the roots and slows basil regrowth.
Water slowly for 15–30 minutes until moisture reaches 2–4 inches deep. A thin layer of straw mulch helps with soil moisture management and keeps roots cool.
Stick to your watering schedule: twice daily for the first 2–3 days ensures strong basil plant health after harvest.
Maintain Airflow to Reduce Disease Risk
Good airflow is one of the easiest ways to keep fungal disease off your basil. Think of it as free pest control.
Maintain airflow to prevent fungal disease with these five simple garden solutions:
- Position a small fan to move air gently across leaves.
- Space plants 10–12 inches apart for air circulation in garden beds.
- Open windows daily for natural ventilation design.
- Use a dehumidifier to keep humidity management below 65%.
- Check vents weekly as basic airflow monitoring.
Target 40–60% humidity, and you’re set.
Store and Preserve Harvested Basil

You’ve done the hard work — now let’s make sure that basil doesn’t go to waste. How you store it makes a real difference in flavor, whether you’re using it tomorrow or three months from now.
Here are five simple ways to keep your harvest fresh and ready to use.
Keep Fresh Stems in Water at Room Temperature
Cut your basil stems at a 45-degree angle and stand them upright in a clean glass vessel filled with room-temperature water — think of it like a bouquet for your kitchen.
Daily water changes keep bacteria from clogging the stems. Place the glass in indirect light, away from drafts and fruit bowls.
Good airflow management around the container helps prevent surface mold, keeping your basil fresh for up to seven days.
Avoid Refrigerating Basil in Sealed Containers
Sealed refrigerator containers are one of the fastest ways to ruin fresh basil. Ethylene buildup and poor airflow control trap moisture against the leaves, turning them black within hours.
For smarter basil storage, try these instead:
- Stand stems in a mason jar with water
- Use breathable packaging with a paper towel inside
- Control light exposure by keeping it away from direct sun
- Allow moisture regulation through slightly open containers
Flash-freeze Whole Basil Leaves
Flash freezing locks in that just-picked flavor before it fades. Begin by patting your basil leaves dry with paper towels, then spread them in a single layer on a parchment-lined tray. Freeze until solid—this typically takes 2–4 hours.
Small ice crystal size is key; rapid freezing protects aromatic compounds like linalool, significantly boosting flavor retention.
Once frozen, transfer the basil to vacuum-seal bags for convenient portion control and up to 12 months of vibrant basil storage.
| Step | Tool | Time |
|---|---|---|
| Dry leaves | Paper towels | 5 minutes |
| Single-layer freeze | Parchment tray | 2–4 hours |
| Seal and store | Vacuum seal bags | Ongoing |
| Use from frozen | Any hot dish | Instant |
Freeze Basil Puree in Ice Cube Trays
Pureed basil frozen in ice cube trays might be the smartest kitchen move you make all season. Blend your basil with olive oil — use roughly 1 tablespoon per cup — because that oil ratio locks in color and prevents browning.
Each cube delivers a consistent portion size, perfect for soups or sauces.
Freeze basil flat for easy cube removal, then seal in an airtight container.
Don’t forget shelf-life labeling — frozen basil stays flavorful for six months.
Dry Basil for Long-term Storage
Drying basil is your ticket to year-round flavor — and it’s simpler than you think. Air drying thrives in low-humidity conditions, while dehydrator drying at 95–110°F ensures even moisture removal for faster results. Freeze-drying excels at preserving maximum aroma and color. Proper storage is critical: airtight containers in dark spaces maintain potency for up to 12 months.
Here are the key methods and storage solutions:
- Air drying: Hang small bundles in a warm, dry spot for about one week.
- Dehydrator drying: Set the temperature between 95–110°F for uniform basil leaf drying.
- Microwave method: A quick fix — use 30-second bursts in a microwave, with a dehydrator as a backup option.
- Freeze-dry preservation: Best for preserving basil flavor and aroma long-term.
- Airtight containers: Glass jars in light-free storage are your best long-term herb storage solutions.
Top 4 Basil Harvesting Items
Having the right tools makes harvesting and storing basil so much easier than going in empty-handed. A few simple items can help you wash, preserve, and freeze your leaves without the extra hassle.
Here are four worth keeping close by.
1. PriorityChef Stainless Steel Kitchen Strainer
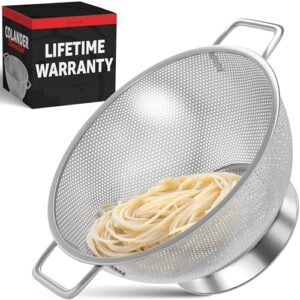
When you’re rinsing a fresh basil harvest, the last thing you want is tender leaves slipping through the drain. The PriorityChef Stainless Steel Colander solves that.
Its micro-perforated 18/8 stainless steel mesh holds onto small leaves while draining water fast. The raised base keeps your countertop dry, and the sturdy riveted grips give you a confident grip when lifting a full load.
At 3.5 quarts, it’s roomy enough for generous harvests and goes straight into the dishwasher after.
| Best For | Home cooks who regularly drain pasta, rinse produce, or steam vegetables and want a durable, easy-to-clean colander that won’t let small foods slip through. |
|---|---|
| Material | 18/8 stainless steel |
| Dishwasher Safe | Yes |
| Food Grade | Yes, 18/8 steel |
| Primary Use | Draining & rinsing |
| Chemical Safety | Rust-resistant steel |
| Storage Friendly | Nests with cookware |
| Additional Features |
|
- Micro-perforated mesh keeps small foods like rice, pasta, and leafy herbs from falling through while draining water fast.
- The raised base lifts food off wet surfaces, keeping your counter dry and giving you a stable spot for rinsing or light steaming.
- Heavy-gauge 18/8 stainless steel means it won’t bend, rust, or wear out — and it’s fully dishwasher-safe.
- The holes are too large for quinoa, couscous, or super-fine grains, so some will pass right through.
- The solid base has no drainage holes, which can slow down the last bit of water draining out.
- The dense mesh can trap small food particles, so it may need a good scrub even after a dishwasher run.
2. Newness Stainless Steel Skimmer Spoon
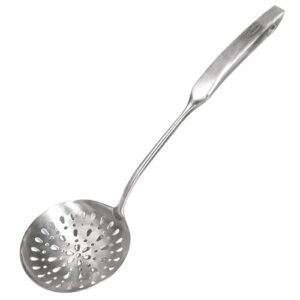
Once your colander’s done the rinsing work, the Newness Stainless Steel Skimmer Spoon takes over when heat enters the picture. Blanching basil stems or skimming hot broth? This tool tackles both without fuss.
Its food-grade 304 stainless steel won’t melt or leach chemicals near high heat, and the fine-mesh slots drain liquid fast while keeping delicate leaves right where you want them.
At just 0.44 lb and 15 inches long, it’s light enough for extended use without wearing out your wrist.
| Best For | Home cooks and food enthusiasts who regularly deep-fry, blanch, or skim hot liquids and want a durable, chemical-free tool that holds up over time. |
|---|---|
| Material | 304 stainless steel |
| Dishwasher Safe | Yes |
| Food Grade | Yes, 304 steel |
| Primary Use | Draining & scooping |
| Chemical Safety | No plastic, no leaching |
| Storage Friendly | Fits utensil holders |
| Additional Features |
|
- Built from solid 304 stainless steel — no plastic means no melting or weird chemical leaching near high heat
- Fine-mesh slots drain oil, water, or broth fast while keeping your food right in the bowl
- Light at 0.44 lb with an ergonomic handle, so extended stirring or skimming won’t tire out your wrist
- At 15 inches, it can be a bit awkward to store in a packed utensil drawer or countertop crock
- The rigid handle doesn’t flex, which can make it tricky to maneuver in smaller or deeper pans
- Fine mesh slots can trap larger foods like whole dumplings and take a little extra effort to clean out
3. FoodSaver 8×10 Vacuum Seal Bags
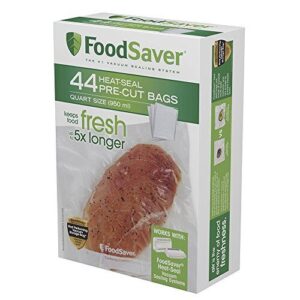
Now that your basil is blanched and ready, FoodSaver 8×10 Vacuum Seal Bags prove their worth in keeping it fresh long-term. These BPA-free, multilayer bags lock out air and moisture, ensuring your frozen basil avoids becoming a sad, freezer-burned mess.
Each bag holds about a quart, ideal for portioned puree cubes or whole leaves. The 44 bags per box offer ample storage, and their design guarantees a tight, reliable seal every time when used with any FoodSaver sealer.
| Best For | Home cooks and meal preppers who want to keep food fresh longer and already own a FoodSaver vacuum sealer. |
|---|---|
| Material | BPA-free multilayer plastic |
| Dishwasher Safe | Yes |
| Food Grade | Yes, BPA-free |
| Primary Use | Food storage & sealing |
| Chemical Safety | BPA-free construction |
| Storage Friendly | Boxed, stackable bags |
| Additional Features |
|
- BPA-free multilayer bags create a solid airtight seal that fights freezer burn and keeps food fresh for weeks.
- Pre-cut quart-size bags are ready to go — no measuring or cutting needed, great for portioning meats, veggies, or purees.
- Safe for the freezer, microwave, and even boiling, so you can reheat straight from the bag.
- These only work reliably with FoodSaver sealers — other brands may not get a proper seal.
- Single-use only, so the cost adds up over time if you’re sealing frequently.
- The packaging doesn’t always match online photos, which can be a little confusing when your order arrives.
4. Greater Goods Silicone Ice Cube Tray

Greater Goods Silicone Ice Cube Tray earns its spot as a reliable solution for freezing puree cubes. Once your puree cubes are sealed and stacked, this tray ensures efficient freezing.
Each pack includes two BPA-free trays with 15 wells each — totaling 30 cubes. The flexible silicone construction allows cubes to pop out effortlessly, eliminating the need for wrestling or twisting.
Snap-on lids prevent freezer odors and enable clean, stable stacking. This design accommodates herb purées, olive oil blends, and basil cubes without hassle.
The tray’s versatility and durability make it ideal for managing various frozen ingredients, ensuring fuss-free preparation and storage.
| Best For | Home cooks and parents who want a simple, space-saving way to freeze purees, herb blends, or specialty ice cubes in small batches. |
|---|---|
| Material | BPA-free silicone & plastic |
| Dishwasher Safe | Yes |
| Food Grade | Yes, BPA-free silicone |
| Primary Use | Freezing & molding |
| Chemical Safety | BPA-free silicone |
| Storage Friendly | Stackable with lids |
| Additional Features |
|
- Cubes pop out with a single press — no twisting, no struggle, easy on your hands.
- Snap-on lids stack cleanly and block freezer odors from creeping in.
- Two trays, 30 cubes total — a solid amount without hogging freezer space.
- The silicone flexes a lot, so carrying a full tray to the freezer without spilling takes some care.
- Lids don’t always latch securely and can pop open if you tilt the tray.
- Cubes run smaller than standard size, and the silicone can pick up odors over time if left in the freezer too long.
Frequently Asked Questions (FAQs)
What is the best way to pick basil?
The secret most gardeners miss? Timing. Cut stems ¼ inch above a leaf node using sharp, clean scissors — always in the morning.
That one habit keeps your plant lush, productive, and bursting with flavor.
How do you harvest basil without killing the plant?
Cut stems just above a leaf node, never stripping more than one-third of the plant at once.
This keeps growth active, encourages bushy regrowth, and prevents the stress that causes yellowing or decline.
How do you cut fresh basil?
Straight from the horse’s mouth: always cut about ¼ inch above a leaf node using sharp, clean scissors. That single cut triggers two new shoots, keeping your plant full and productive.
Is it better to dry or freeze basil leaves?
Both work, but for different purposes. Freeze basil when you want fresh-tasting flavor in cooked dishes. Dry it when you need long shelf life — dried basil keeps up to 12 months.
What are common basil harvesting mistakes?
Even green thumbs slip up sometimes.
The biggest basil mistakes are harvesting too early, cutting too low, removing too much at once, and skipping flower bud pinching — all of which weaken the plant fast.
Can basil reduce cortisol?
Technically, yes — but it’s holy basil (tulsi), not the sweet basil in your garden, that gets credit here.
Tulsi contains stress-modulating compounds and may help some people as part of a calm-down routine.
Can you eat basil on blood thinners?
Yes, but go easy. Small culinary amounts are generally fine, but if you’re on warfarin or other blood thinners, basil can add to bleeding risk.
Check with your doctor before using it daily.
How do you pick basil so it keeps growing?
Want basil that never quits? Cut stems ¼ inch above a leaf node using sharp scissors, trim from the top down, and harvest every 7–10 days.
This approach ensures the plant remains bushy, productive, and bolt-free.
How do you store fresh basil after picking?
Stand fresh-cut stems upright in a jar with 2–3 inches of water, just like flowers.
Keep it on the counter, away from direct sunlight, and change the water every day or two.
Is it better to freeze basil or dry it?
Freezing locks in that bright, garden-fresh flavor far better than drying does. Dry basil works for long-term storage, but if taste matters most, freeze it.
Conclusion
Picture two gardeners side by side. One waits, watching perfect leaves yellow and bolt. The other snips confidently every ten days, and her plant explodes into a dense, fragrant bush that just keeps giving.
Harvesting fresh basil isn’t complicated—it rewards the gardener who shows up consistently, cuts with intention, and pays attention to what the plant is telling them. Start now, stay regular, and your basil will feed your kitchen far longer than you’d expect.
- https://phsonline.org/for-gardeners/gardeners-blog/how-to-harvest-basil
- https://www.therusticelk.com/how-to-harvest-and-dry-basil/
- https://www.gorillagrowtent.com/blogs/news/how-to-harvest-basil?srsltid=AfmBOorV6zpGKWvrA15p3kVk4j4ZpddNK2pHv6-zShHPNhG_xGnXFEOW
- https://melissaknorris.com/how-to-prune-basil/?srsltid=AfmBOoqDLq-x_-RPUWE9i3xtBIi1z7tkZ2n5xbAtBQIHTcmg3LjwAfMk
- https://savvygardening.com/harvesting_basil/