This site is supported by our readers. We may earn a commission, at no cost to you, if you purchase through links.

Summer squash can produce 6 to 10 pounds of fruit per plant in a single season—but only if you give it what it needs when it needs it.
Most gardeners who struggle with squash aren’t dealing with bad luck. They’re dealing with small, fixable mistakes: soil that’s too cold at planting, watering that’s too shallow, or pests that moved in before anyone noticed.
The good news? Summer squash rewards attentive care fast, often going from flower to table-ready fruit in under a week.
Get the basics right, and this is one of the most satisfying plants you’ll grow.
Table Of Contents
- Key Takeaways
- Essential Summer Squash Plant Care Tips
- Soil Preparation and Planting Techniques
- Watering, Mulching, and Fertilizing Summer Squash
- Preventing Pests, Diseases, and Plant Stress
- Top 4 Seeds for Growing Summer Squash
- Frequently Asked Questions (FAQs)
- What are the 5 tips to grow lots of squash?
- Are coffee grounds good for summer squash plants?
- Should I cut the bottom leaves off my squash plant?
- Is Miracle-Gro good for squash?
- What is the secret to growing squash?
- How do you take care of summer squash plants?
- Should I cut the yellow leaves off my squash plant?
- What does an overwatered squash plant look like?
- How do you harvest summer squash correctly?
- Can summer squash grow well in containers?
- Conclusion
Key Takeaways
- Warm soil above 60°F, full sun for 6–8 hours, and consistent deep watering once a week are the three non-negotiables that separate a struggling squash plant from one that produces 6–10 pounds per season.
- Most squash problems trace back to a handful of fixable mistakes — planting too early, watering too shallow, or missing pests before they take hold.
- Mulching with 2–3 inches of straw or wood chips cuts soil moisture loss by up to 70% and keeps weeds from competing with your plants all season.
- Harvest fruit at 4–6 inches every one to two days — the more you pick, the more the plant produces, so don’t let squash sit on the vine.
Essential Summer Squash Plant Care Tips

Summer squash is one of those plants that rewards you fast — but only if you start on the right foot.
It’s actually one of the best vegetables for beginner gardeners — forgiving, fast-growing, and almost offensively productive once it gets going.
A few key decisions early on make all the difference between a scraggly plant and a heavy producer.
Here’s what you need to know before you put a single seed in the ground.
Why Summer Squash Thrives in Warm Seasons
Summer squash is a true warm season crop built to perform when temperatures rise. Warm temperatures between 70–85°F trigger three key growth advantages:
- Heat Driven Metabolism accelerates root nutrient uptake
- Extended Daylength boosts photosynthesis and Accelerated Fruit Set
- Increased Pollinator Activity improves bloom-to-fruit conversion
Soil temperature above 60°F also drives Enhanced Nutrient Uptake, while mulching provides heat stress mitigation naturally.
Choosing The Right Variety of Summer Squash
Once you understand what makes squash thrive, picking the right variety becomes your next big decision. Flavor profile, yield potential, maturity speed, and color appeal all matter.
Hybrids ripen 7–14 days earlier and resist common pests. Heirlooms and open-pollinated seeds offer unique taste.
Choosing zucchini varieties like dark green or striped types and selecting appropriate squash varieties — crookneck, pattypan — shape your culinary applications all season.
Best Time to Plant Summer Squash
Once you’ve picked your variety, timing is everything. Don’t plant summer squash until frost danger has passed and soil hits at least 15°C (59°F) — though 21°C gives you the best seed germination. Regional planting windows vary widely, so check your last frost date first.
A 1–2 week hardening off period helps transplants settle in, and 12–14 hours of daylight keeps growth strong.
Soil Preparation and Planting Techniques
Getting your soil right before you plant makes everything easier down the line. Summer squash is forgiving, but it rewards a little upfront effort with faster growth and bigger harvests.
Here’s what you need to know before you put a single seed in the ground.
Soil PH and Organic Matter Requirements

Think of your soil as the foundation of your entire harvest. Summer squash demands a soil pH between 6.0 and 6.8 — test yours annually and adjust with lime or sulfur as needed.
Work in 2–3 inches of compost to boost organic matter benefits: better drainage, stronger roots, and steady nutrients. That one compost amendment rate pays dividends all season.
Planting Depth and Proper Spacing

Get this wrong and your plants will fight each other all season. Seed planting depth sits at 1 inch — no deeper. Depth Guidelines and Spacing Guidelines work together: bush types need spacing 2 to 3 feet apart, while vining varieties on a Vining Trellis need spacing 3 to 4 feet between plants.
Use a Row Marker System to stay consistent:
- Press seeds exactly 1 inch deep using your finger or a dibber
- Space markers every 2–3 feet for bush varieties
- Allow 3–4 feet between vining plants along trellises
- Practice Seedling Thinning once plants reach 3 inches tall
- Cut weaker seedlings at soil level — never yank them out
Direct Sowing Vs. Starting Transplants Indoors

Direct sowing wins for summer squash — almost every time. Seeds planted 1 inch deep germinate in 7–10 days and skip transplant shock entirely, building stronger root development from day one. Direct sowing also delivers real labor efficiency and cost savings.
| Method | Key Benefit |
|---|---|
| Direct sowing | Better germination rate, stronger taproots |
| Transplanting seedlings | Earlier start in short seasons |
| Indoor starts | Control over early conditions |
| Hardening off required | Reduces transplant shock risk |
Full Sun, Temperature, and Site Selection

Summer squash doesn’t negotiate regarding sunlight exposure — it needs at least 6 to 8 hours of full sun daily to thrive. Choose a site with solid wind protection, good site drainage, and well draining soil with a soil pH between 6.0 and 6.8. Smart microclimate management really pays off here.
- Warm temperatures between 70–85°F fuel steady fruit production
- Temperature requirements drop below 60°F and your harvest stalls fast
- Temperature range matters: avoid spots with afternoon shade or frost pockets
Watering, Mulching, and Fertilizing Summer Squash

Getting water, mulch, and fertilizer right makes the difference between a plant that just survives and one that actually produces. Summer squash is thirsty and hungry, so a little consistency goes a long way.
Here’s what you need to know to keep your plants fed, moist, and thriving all season.
Maintaining Consistent Soil Moisture
Squash is thirsty — and inconsistent watering is the fastest way to ruin a crop. Aim for 1 inch of water weekly, bumping to 2 inches when heat climbs above 90°F. Use drip irrigation or soaker hoses to deliver moisture directly to roots. Soil moisture sensors take the guesswork out of your watering schedule, alerting you before plants become stressed.
| Condition | Weekly Water Need | Recommended Method |
|---|---|---|
| Normal temps | 1 inch | Drip irrigation |
| Heat above 90°F | 2 inches | Soaker hoses |
| Sandy soil | More frequent | Soil moisture monitoring |
Organic mulch and smart soil amendment timing support capillary action enhancement, keeping roots evenly hydrated between sessions. Weather-driven watering adjustments — scaling back after rain, increasing during dry spells — make all the difference.
Deep Watering Vs. Frequent Shallow Watering
Deep watering beats frequent shallow watering every time. When you water deeply, moisture reaches 6–12 inches down, supporting root zone aeration and real drought tolerance.
Deep watering reaches roots 6–12 inches down, building drought tolerance that shallow watering never can
Shallow watering just wets the surface — roots chase it upward and stress quickly.
Water deeply once a week, let drip irrigation handle water penetration depth, and lean on soil moisture monitoring to sharpen your water use efficiency.
Mulching to Retain Moisture and Suppress Weeds
Think of mulch as your garden’s best defense system. Spread 2–3 inches of straw, wood chips, or grass clippings around your summer squash, keeping it a few inches from the stem.
This simple mulching technique cuts soil evaporation by up to 70% and blocks weeds from taking hold. Refresh your mulch layer every season to keep moisture locked in.
Selecting and Applying The Right Fertilizers
Mulch protects the soil — but plants also need steady nutrition to produce well. Start with a balanced 10-10-10 NPK ratio balance before planting, then shift strategy as the season builds:
Understanding the soil testing importance helps you tailor nutrition to your squash.
- Use slow release granules to cut burn risk and reduce reapplication
- Organic fertilizer benefits include improved soil structure over time
- Follow timing split applications every 3–4 weeks during fruiting
- Run a soil test interpretation to fine-tune your fertilizer schedule
Preventing Pests, Diseases, and Plant Stress

Even the healthiest squash plants can run into trouble once pests and diseases move in. Knowing what to watch for — and how to respond — makes all the difference between a struggling plant and a productive one.
Here’s what you need to stay ahead of the most common threats.
Identifying Common Summer Squash Pests
Your summer squash plants can host a surprising number of unwanted visitors.
Start with aphid identification — look for small, pear-shaped clusters on new growth, causing leaf curl.
Watch for vine borer signs like wilting stems and frass.
Whitefly damage shows as yellowed leaves underneath.
Leaf miner tunnels create silvery trails, while spider mite stippling leaves bronzed, speckled surfaces.
Squash bugs and cucumber beetles round out your watchlist.
Disease Prevention and Improving Air Circulation
Pests aren’t your only worry — disease can spread just as fast. Good airflow management is your first defense. Space plants 18–24 inches apart, orient rows east to west for maximum drying wind, and use trellis design to lift vines off the ground.
- Apply pruning techniques to improve airflow by removing crowded stems
- Practice staggered planting to break dense canopy zones
- Use sanitation practices — clear debris and disinfect tools regularly
- Treat powdery mildew with fungicide alternatives like neem oil or a baking soda solution
- Maintain disease prevention through air circulation by trimming leaves touching the soil
Organic Pest Control Methods
Once the disease is under control, you’ve got to stay ahead of bugs too.
Organic pest control methods work better than most people expect.
Lay row covers early, scatter diatomaceous earth around stems, and hang sticky traps nearby. Spray garlic pepper spray after rain. Release beneficial insects like lacewings or use beneficial nematodes in soil. Companion planting with basil naturally repels common squash pests. Organic insecticides like neem oil handle the rest.
Pruning and Supporting Summer Squash Plants
Think of pruning and trellising as your plant’s personal space plan.
Start light pruning once your squash has 4 to 6 true leaves. Remove every third crowded leaf, cut suckers between the main stem and fruiting branches, and clip anything touching the ground.
For vine training, tie stems to support stakes every 8 to 12 inches, adjusting support height weekly as vines climb.
Top 4 Seeds for Growing Summer Squash
Starting with quality seeds is half the battle for growing summer squash. Not all seeds are created equal — the right variety can mean the difference between a so-so harvest and more zucchini than you know what to do with.
Here are four top picks worth planting this season.
1. Old Farmers Almanac Heirloom Zucchini Seeds
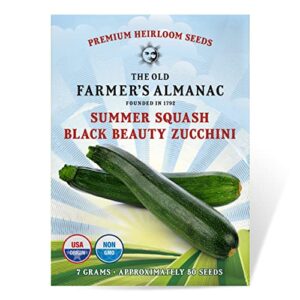
The Old Farmer’s Almanac Heirloom Zucchini Seeds are a solid starting point for any home garden. Each $5.99 packet holds around 50–60 non-GMO Black Beauty seeds, packaged fresh for the current season.
You’ll get glossy, dark-green fruits ready to harvest in just 50–60 days. Sow them 1 inch deep after your last frost, and don’t overlook the edible yellow blossoms — they’re a bonus at the table. Because these are open-pollinated heirlooms, you can save seeds year after year.
| Best For | Home gardeners and small-scale growers who want a reliable heirloom zucchini they can save seeds from season after season. |
|---|---|
| Seed Type | Heirloom, Non-GMO |
| Packet Weight | 7g (~50-60 seeds) |
| Price | $5.99 |
| Squash Variety | Black Beauty Zucchini |
| Edible Blossoms | Yes |
| Brand | The Old Farmer’s Almanac |
| Additional Features |
|
- Non-GMO, open-pollinated seeds you can save and replant every year
- Edible yellow blossoms give you extra culinary options beyond the fruit
- Fresh-packed for the current season, so germination rates tend to be solid
- Germination can be hit or miss — some growers report rates as low as 50%
- Fruit production may be lighter than expected, especially with late-season planting
- Seed count sometimes falls short of the advertised 50–60 per packet
2. Old Farmers Almanac Crookneck Squash Seeds
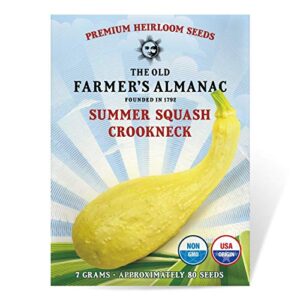
If you want a squash that’s as classic as it gets, the Old Farmer’s Almanac Crookneck Squash Seeds deserve a spot in your garden. At $5.69 for roughly 80 non-GMO, open-pollinated seeds, you’re getting real value.
These bushy plants produce bumpy, light-yellow fruits with creamy, buttery flesh — ready to pick in just 50–60 days. Harvest at around 6 inches for the best texture.
Like all heirlooms, you can save the seeds and grow them again next year.
| Best For | Home gardeners who want a fast-growing, reliable summer squash they can harvest all season and save seeds from year to year. |
|---|---|
| Seed Type | Heirloom, Non-GMO |
| Packet Weight | 7g (~80 seeds) |
| Price | $5.69 |
| Squash Variety | Crookneck Squash |
| Edible Blossoms | Yes |
| Brand | The Old Farmer’s Almanac |
| Additional Features |
|
- About 80 heirloom seeds for $5.69 — solid value, and you can save seeds each season so the packet basically pays for itself over time.
- Ready to harvest in 50–60 days, so you’re not waiting long before you’re pulling squash off the vine.
- Super versatile in the kitchen — eat it raw, roasted, in soups, or even toss the flowers into a salad.
- Needs warm weather to thrive, so if you’re in a cooler or frost-prone climate, these won’t do well for you.
- Bushy plants take up real space — you’ll want to plan your layout before you plant.
- For the best yields, you’ll likely want to pair it with their recommended fertilizer, which adds to the overall cost.
3. Seeds of Change Dark Star Zucchini
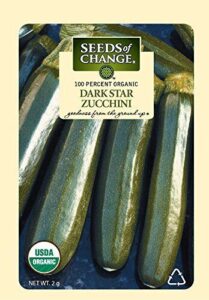
Seeds of Change Dark Star Zucchini is a standout pick for gardeners working with tight space. Each certified organic, non-GMO packet holds about 13 heirloom seeds — sealed to stay viable for up to 5 years. The compact bush habit means no sprawling vines taking over your beds.
Plants produce glossy, dark-green fruits steadily all summer, and they need less water than most varieties. That’s a real win if you’re gardening through a dry stretch or watching your water bill.
| Best For | Home and urban gardeners with limited space who want a steady supply of fresh zucchini all summer long. |
|---|---|
| Seed Type | Heirloom, Organic, Non-GMO |
| Packet Weight | 4.54g (~13 seeds) |
| Price | Not listed |
| Squash Variety | Bush Zucchini |
| Edible Blossoms | Not specified |
| Brand | Seeds of Change |
| Additional Features |
|
- Compact bush habit keeps plants tidy — no sprawling vines stealing space from the rest of your garden
- Certified organic, non-GMO heirloom seeds sealed for up to 5 years, so you’re not rushed to use them all at once
- Lower water needs make it a solid choice if you’re in a dry climate or just trying to cut back on irrigation
- Only about 13 seeds per packet, which can feel pricey if you need to plant in volume
- No built-in disease resistance — powdery mildew and blight can be an issue, so you’ll want to stay on top of prevention
- Germination has been hit or miss for some growers, even when conditions seemed right
4. Black Beauty Heirloom Zucchini Seeds
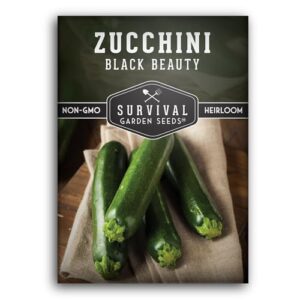
Black Beauty has earned its reputation the old-fashioned way — through decades of reliable harvests. This All-America Selections winner from 1957 produces glossy, dark-green zucchini in just 45–55 days.
Each packet from Survival Garden Seeds contains 21–27 non-GMO, heirloom seeds at just $4.84. Sow 1 inch deep once soil hits 65–75°F, and space plants 18–24 inches apart.
The blossoms are edible too — stuff them or toss them in a salad. A true garden classic worth growing every season.
| Best For | Home gardeners, homesteaders, and beginner growers who want a reliable, prolific zucchini that’s stood the test of time. |
|---|---|
| Seed Type | Heirloom, Non-GMO |
| Packet Weight | ~21-27 seeds |
| Price | $4.84 |
| Squash Variety | Black Zucchini |
| Edible Blossoms | Yes |
| Brand | Survival Garden Seeds |
| Additional Features |
|
- Matures fast — you’re harvesting in as little as 45 days, and the plants keep producing all season long.
- Heirloom and non-GMO, so you can save seeds year after year and never buy another packet.
- Edible blossoms are a nice bonus — stuff them, fry them, or toss them fresh into a salad.
- Germination can be hit or miss — some growers report only about 50% of seeds sprouting.
- The paper packet isn’t moisture-resistant, so you’ll want to store it somewhere dry right away.
- With only 21–27 seeds per packet, it’s not a great fit if you’re planting on a larger scale.
Frequently Asked Questions (FAQs)
What are the 5 tips to grow lots of squash?
Feed the soil, water deep, give full sun, control pests early, and harvest often. Those five habits keep your plants productive all season long.
Are coffee grounds good for summer squash plants?
Yes, coffee grounds can help summer squash when used sparingly. Mix them into compost rather than applying them directly.
They add nitrogen and improve soil structure, but too much can make your soil too acidic.
Should I cut the bottom leaves off my squash plant?
Cutting bottom leaves off your squash plant can help — but only the yellowing or dead ones.
Remove no more than a a third of total leaves at once to avoid stressing the plant.
Is Miracle-Gro good for squash?
Miracle-Gro works well for squash when used as directed. Stick to the label rates — too much nitrogen pushes leafy growth over fruit.
A balanced formula keeps your plants strong and productive.
What is the secret to growing squash?
The secret to growing squash comes down to three things: warm soil, full sun, and consistent moisture. Get those right, and squash practically grows itself.
How do you take care of summer squash plants?
Think of summer squash as a sun-chaser — give it warmth, steady water, healthy soil, and room to breathe.
Do those four things consistently, and you’ll harvest more than you expect all season long.
Should I cut the yellow leaves off my squash plant?
Yes, go ahead and remove leaves that are clearly yellow or dead. It improves airflow and reduces disease risk.
Just don’t remove more than one-third of the plant’s leaves at once.
What does an overwatered squash plant look like?
An overwatered squash plant has yellowing leaves, limp stems, and a mushy base near the soil. Roots turn dark and slimy.
Fruit drops early, and growth stalls even in warm weather.
How do you harvest summer squash correctly?
Harvest summer squash when fruit reaches 4 to 6 inches long. Use sharp shears, leave a 1-inch stem, and pick every one to two days to keep plants producing steadily.
Can summer squash grow well in containers?
Summer squash grows well in containers.
Use a 5- to 7-gallon pot with drainage holes, a quality potting mix, and a compact bush variety.
Give it full sun and water consistently.
Conclusion
The irony isn’t lost on us: the very thing that can make summer squash care seem challenging – its sensitivity to small mistakes – is what makes it so rewarding when done right. By mastering a few key details, like consistent watering and warm soil, you’ll reveal a bounty of delicious fruit.
With these summer squash plant care tips, you’ll be on your way to harvesting 6 to 10 pounds of fruit per plant, and savoring the satisfaction of a job well done.
- https://horticulture.oregonstate.edu/oregon-vegetables/squash-zucchini-and-summer
- https://edis.ifas.ufl.edu/publication/HS398
- https://ag.arizona.edu/maricopa/garden/html/pubs/0403/zucchini.html
- https://hort.extension.wisc.edu/articles/using-crop-rotation-home-vegetable-garden-0/
- https://x.com/intent/tweet?url=https%3A%2F%2Fthegardeningcook.com%2F%3Fp%3D53708&text=Master%20the%20art%20of%20growing%20summer%20squash%20with%20our%20step%20by%20step%20tutorial%21%20Get%20practical%20tips%20from%20planting%20to%20pest%20control%20on%20The%20Gardening%20Cook.%20%23SummerSquash%20%23GardeningTips%20%23HomeGrown%20%23VegetableGarden&via=agardeningcook&related=agardeningcook