This site is supported by our readers. We may earn a commission, at no cost to you, if you purchase through links.

Ground-grown tomatoes battle nematodes, poor drainage, and soil-borne blight every season. Raise that root zone 18 inches, though, and you sidestep most of those problems before a single seed goes in. Soil warms faster in spring, water drains instead of pooling, and you control the exact mix of loam, compost, and nutrients your plants sit in.
That control matters more than most gardeners realize. Growing tomatoes in raised beds turns a fight against your native dirt into a system you build on purpose, from pH to plant spacing to support structures. Get the fundamentals right, and the payoff shows up in fewer cracked stems, less blossom end rot, and a harvest that keeps producing well past what a ground bed usually delivers.
Table Of Contents
- Key Takeaways
- Choose and Prepare The Raised Bed
- Select The Best Tomato Varieties
- Plant Tomatoes at Proper Spacing
- Water, Feed, and Support Plants
- Protect Plants and Maximize Harvests
- Frequently Asked Questions (FAQs)
- How deep should a raised bed be for tomatoes?
- What are the most common mistakes when growing tomatoes?
- What are three mistakes to avoid when gardening with raised beds?
- Why put baking soda around tomato plants?
- Why put an egg in the hole when planting tomatoes?
- What fertilizer schedule works best for tomatoes?
- How do you harvest tomatoes at peak ripeness?
- Can you grow tomatoes year-round in beds?
- What companion plants boost tomato growth naturally?
- How do you preserve tomato seeds properly?
- Conclusion
Key Takeaways
- Building your raised bed at least 18 inches deep gives roots room to grow down instead of sideways, warming soil faster and draining better than ground-level plots.
- Getting the basics dialed in—full sun, 6.0–6.8 pH, and soil enriched with compost and manure—sets up healthy growth before you even plant a seedling.
- Matching spacing to plant type matters a lot: determinate tomatoes need 18–24 inches while indeterminate vines need a full three feet to stay healthy and productive.
- Staying on top of watering, feeding, and pest checks after transplanting—plus mulching and prompt disease removal—keeps small problems from turning into lost harvests.
Choose and Prepare The Raised Bed
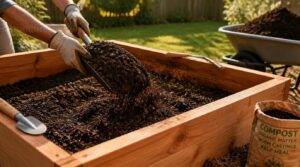
Every strong tomato harvest starts with the bed itself, not the seedling. Location, depth, and soil composition all work together to decide how well your plants perform. Here’s what you need to get the foundation right.
For a deeper dive into soil pH, drainage, and sun exposure requirements, this guide on preparing your garden bed for summer tomatoes walks through each step in detail.
Select Full Sun and Drainage
Before you sink a single board into the ground, walk your yard and watch where the sun lands. Tomatoes demand six to eight hours of direct Sunlight Exposure daily for solid fruit set. Morning sun dries dew fast, cutting disease risk.
Confirm Soil Drainage by flooding the site—water should clear within two hours, keeping roots healthy through the growing season.
Understanding that tomatoes need six to eight hours helps make sure proper growth.
Build Beds at Least 18 Inches
Once you’ve picked your sunny spot, turn to depth. Build your frame at least 18 inches tall—12-inch beds choke root growth and stunt maturation. That extra depth speeds soil warming, boosts heat retention, and improves drainage, giving roots room to grow deep instead of sideways.
Taller beds also mean less bending during cultivating and harvest.
Create Fertile, Well-Draining Soil
Depth gives roots room, but fertility gives them reason to grow. Aim for loam-like soil texture—sand, silt, and clay balanced so water drains without draining nutrients along with it.
Mix in organic matter until it makes up 3 to 6 percent of your bed. That’s what builds stable aggregates, holds moisture, and keeps air pockets open for healthy root development.
Adjust Soil PH to 6.0–6.8
Fertile soil means little if roots can’t access it. Test pH at planting depth, sampling several spots for an honest average, and aim for 6.0 to 6.8.
- Watch fruit set falter in soil that’s too acidic
- Feel confident knowing your amendments are working
- Avoid nutrient lockout that stunts vigorous growth
- Trust rainwater over lime-heavy tap water
- Build a testing habit that pays off for years
Lime raises pH; sulfur lowers it gradually. Recheck in 4-6 weeks.
Mix in Compost and Manure
Once pH is dialed in, mix compost and manure at a 1:3 ratio into the top 6-8 inches of soil. Use only well-composted manure from cows or horses—fresh sources burn tender roots.
Apply 4-6 weeks before transplanting, letting nutrients release gradually. This combo fuels steady growth, development, and maturation, giving your tomatoes real organic growth momentum.
Once seedlings are in the ground, pairing this feeding routine with the right plant choices makes a big difference, so check out this guide to best vegetables for beginner gardeners for varieties that thrive alongside tomatoes.
Select The Best Tomato Varieties
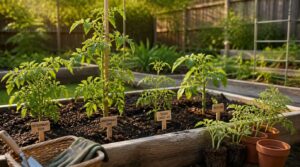
Your raised bed is ready, but its success still hinges on what you plant in it. Not every tomato variety performs the same way in a confined space, and the wrong choice can mean fighting the plant all season. Here’s what to weigh before you pick your seedlings.
Compare Determinate and Indeterminate Tomatoes
Everything about your tomato’s future traces back to one label: determinate or indeterminate. Determinate types stay bushy, finish fruiting in two to three weeks, and suit small spaces. Indeterminate vines climb past 6 feet, fruiting steadily until frost, demanding sturdier support.
Cooler climates favor determinates; long warm seasons reward indeterminate growth and extended harvests.
Choose Compact Raised Bed Varieties
Small footprint, big yield: that’s the promise of compact raised bed varieties. Compact determinate tomatoes, Bush type determinate plants, and Patio type options fit 12–24 inch beds without sprawling.
- Patio types for tight beds
- Dwarf cherry varieties for snacking
- Bush determinates for dense planting
- Hybrid compact varieties with resistance traits
- Mini beefsteaks for classic flavor
Choose these when space, not ambition, limits your growing plans.
Prioritize Disease-Resistant Plant Labels
Ever squint at a plant tag full of letters like VFN and wonder what code you just cracked? That’s your disease resistance shorthand. V means Verticillium wilt protection, F targets Fusarium wilt, and N signals nematode resistance.
Compare codes across varieties before buying; stacked resistances mean fewer losses during humid growing seasons and steadier fruit development without leaning hard on chemical treatments.
Try Beginner-Friendly Cherry Tomatoes
Nervous about your first season? Start small: cherry tomato varieties forgive mistakes larger fruits won’t. Most run indeterminate, cranking out bite-sized harvests all summer, and they shrug off early blight and fusarium wilt better than beefsteaks.
Give them full sun, steady watering, and basic support systems—a stake or small cage works. Reliable growth builds confidence before you tackle finicky slicers.
Match Varieties to Harvest Goals
What’s your endgame—jars of sauce or salads all summer? Let that answer guide your picks.
For canning suitability, determinate paste types ripen together in one tidy window. Want continuous yield for fresh eating? Indeterminate slicers and cherries keep producing until frost, trading processing efficiency for steady harvest timing straight through cultivation and maturation.
Plant Tomatoes at Proper Spacing
With your varieties picked out, it’s time to get them in the ground the right way. Spacing isn’t just about tidiness—it determines how much light, air, and root room each plant gets all season. Here’s what you need to know before you start digging holes.
Harden Off Seedlings Before Transplanting
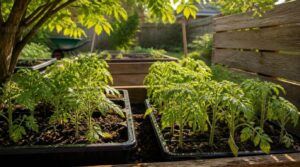
Toughen seedlings gradually: start with 2-3 hours outdoors, building to 6-8 hours by day seven.
Begin one week before transplanting, using bright indirect light first, then increasing sun exposure by an hour daily. Shield seedlings from harsh wind and skip outdoor time below 50°F. Watch for curling leaves or purple stems—these signal stress, meaning it’s time to scale back.
Plant Deeply for Strong Roots

Once your seedlings pass the hardening-off test, it’s time to get them in the ground the right way.
Bury two-thirds of the stem at transplant—this stem burial technique triggers adventitious root development along the buried section. The result: a stronger, deeper root system that anchors plants securely and helps steady growing through the season ahead.
Bury two-thirds of the stem at transplant to trigger adventitious roots and anchor a stronger, deeper tomato plant
Space Determinate Tomatoes 18–24 Inches
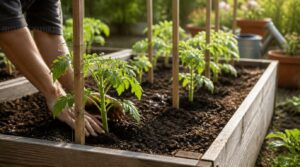
With roots settled deep, give each plant room to breathe. Determinate varieties want 18 to 24 inches of spacing, center to center, supporting airflow and even ripening.
- Reduces fungal disease pressure
- Speeds foliage drying after rain
- Aligns harvest timing across plants
In a 4×8 bed, that’s 6 to 8 plants, staggered for maximum growing efficiency without crowding roots.
Space Indeterminate Tomatoes Three Feet
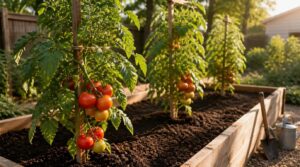
Indeterminate varieties play a different game entirely. These vines keep growing and setting fruit until frost, so three feet of spacing gives each plant real room for vine growth management and root space utilization.
That gap also boosts airflow disease prevention and sunlight access optimization, while leaving space for support structure placement without crowding your trellis or cage system.
Calculate Plants for 4×8 Beds
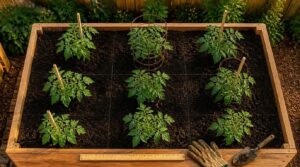
A 4×8 bed gives you 32 square feet to work with, and that number drives every spacing decision you’ll make.
Fit 6 to 9 determinate plants using 18 to 24 inch spacing, or 4 to 6 indeterminate vines with trellises.
Best plant density beats cramming more in—respect the numbers, and your harvest planning stays realistic all season.
Water, Feed, and Support Plants
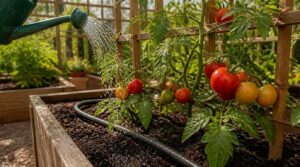
Once your tomatoes are in the ground, your job shifts to keeping them upright, hydrated, and fed. Get these three systems right, and you’ll spend less time troubleshooting problems later in the season. Here’s what you need to set up from day one.
Install Supports at Planting Time
Waiting until vines sprawl means fighting roots you’ve already grown. Drive stakes or posts at transplant time, anchor depth 12 to 18 inches, positioned 6 to 8 inches from the stem for support placement that won’t crowd young growth.
Check for buried lines first (utility check), then add early bracing with soft tie materials—this small step protects root development throughout the plant’s maturation.
Use Plastic-Coated Metal Trellis Towers
Skip the stakes-and-string routine and give vines a permanent climbing frame. Plastic-coated metal towers, standing 5 to 7 feet, snap together tool-free and resist rust for seasons.
Base collars anchor firmly in raised bed soil, while the smooth coating protects tender stems from abrasion during rapid growth. Lattice grids offer multiple tie points, supporting fruit clusters evenly through full maturation.
Set Up KORAM Drip Irrigation
Hand-watering wastes time and water alike. A KORAM drip irrigation kit solves both, using quick connects for tool-free assembly, color-coded tubing runs along each row, and pressure regulation to keep flow steady end to end.
Match emitter spacing to your plant spacing, check the filter monthly, and you’ve got consistent moisture supporting healthy growth and development all season.
Water Deeply During Morning Hours
Timing matters as much as volume. Water early, before the sun climbs high, so roots soak deeply while evaporation losses stay low.
Aim to saturate the top 12 to 18 inches of soil using your drip system on slow, even cycles. This encourages roots to grow downward, and steady moisture wards off blossom end rot during fruit maturation.
Feed Plants After Fruit Set
Once fruit sets, your tomatoes shift into heavy feeding mode. Side dress with a potassium and phosphorus-rich fertilizer—about 1-2 tablespoons per plant—every two weeks, cutting nitrogen to curb leafy growth. Phosphorus fuels fruit development; potassium builds cell wall strength. Pair both with calcium to prevent blossom end rot.
Consistent moisture keeps nutrient uptake steady, so don’t let feeding outpace watering.
Protect Plants and Maximize Harvests

Your tomatoes are watered, fed, and staked, but the job isn’t finished yet. Disease and pests can undo months of work in a matter of days if you’re not paying attention. Here’s what it takes to protect your plants and bring in the harvest you’ve earned.
Mulch to Prevent Soil Splash
Rain splashing on bare soil flings fungal spores onto lower leaves, so mulch acts as a shield. Apply straw, bark, or shredded leaves 2 to 3 inches deep, keeping it clear of stems.
It also conserves moisture, moderates soil temperature, and pairs well with drip irrigation—place emitters underneath for efficient, splash-free watering all season.
Monitor Pests and Fungal Diseases
A tidy mulch layer only helps if you’re watching what grows beneath it. Walk your beds twice weekly, checking leaf undersides for mites and scale. Watch for white powdery patches, dark lesions, or fuzzy gray growth—classic fungal disease signs. Use a magnifying lens and sticky traps for confirmation. Once symptoms hit 5% of plants, act promptly.
Remove Infected Leaves Promptly
Spot a lesion? Don’t wait. Snip infected leaves within 24-48 hours using disinfected shears—10% bleach solution between cuts—and bag them for trash, never compost. Target only diseased tissue to limit plant stress.
| Action | Tool | Disposal |
|---|---|---|
| Remove spotted leaves | Sanitized shears | Trash bag |
| Disinfect blades | Bleach solution | N/A |
| Inspect lower canopy | Gloved hands | Outdoor bin |
Harvest Tomatoes at Peak Ripeness
Once shears go quiet, your eyes and nose take over. Check for even color with no green shoulders, then press gently—ripe flesh yields without going mushy. A sweet fragrance at the blossom end and an easy stem twist confirm peak maturity.
That’s your bountiful harvest moment; don’t let growth rate outpace your picking schedule.
Clear Debris and Rotate Crops
Once the last fruit is in, your work isn’t done—debris removal protects next year’s crop. Rake beds clean, wash stakes, and till in compost for soil health renewal.
- Pull every root
- Bag diseased leaves
- Rotate away from nightshades two years
- Log the bed’s history
Crop rotation planning now means healthier cultivation ahead, syncing perfectly with next season’s planting schedule.
Frequently Asked Questions (FAQs)
How deep should a raised bed be for tomatoes?
Go at least 18 inches deep. That depth gives roots real room to spread, retains water better through hot spells, and lets you bury stems for extra root development—key advantages true cultivation success depends on.
What are the most common mistakes when growing tomatoes?
Skilled cultivation and careless habit often grow side by side. The biggest culprits: poor sunlight drainage, weak soil preparation, cramped planting spacing, uneven watering fertilizing, and ignored pests harvest signs—each stalling healthy development, maturation, and steady progression toward a full harvest.
What are three mistakes to avoid when gardening with raised beds?
Three costly errors: shallow bed depth that chokes root growth, poor drainage sites that drown roots after rain, and untreated lumber leaching chemicals into soil—each undermines cultivation, watering efficiency, and healthy maturation before plants even mature.
Why put baking soda around tomato plants?
Like Goldilocks’ porridge, baking soda works best in modest doses: it aids soil pH adjustment, helps fungal disease prevention, and acts as a pest barrier, when used as a diluted foliar spray for healthier fruit development.
Why put an egg in the hole when planting tomatoes?
A whole egg creates a nutrient hotspot at the root zone, releasing calcium slowly as it decomposes. This helps blossom end rot prevention, improves soil structure, and fuels steady early growth during transplanting and maturation.
What fertilizer schedule works best for tomatoes?
Feeding tomatoes right is no small potatoes. Follow Planting Stage Schedule with balanced 10-10-10, shift to nitrogen-rich mixes during Early Growth Feeding, then phosphorus-potassium blends through Flowering Stage Boost and Fruit Set and Development, finishing with light End of Season Maintenance nutrients.
How do you harvest tomatoes at peak ripeness?
Watch for full color development, slight give under gentle pressure, and a sweet stem-end aroma. Cut or twist the fruit cleanly at peak ripeness—these cues signal ideal flavor, texture, and maturity for harvesting.
Can you grow tomatoes year-round in beds?
The paradox: continuous harvest demands a season that never truly ends. Outdoors, winter dormancy interrupts things—so season extension techniques like greenhouses or high tunnels, plus indoor growing with temperature control, keep beds producing nearly year-round.
What companion plants boost tomato growth naturally?
Companion plants work like a support crew. French marigolds suppress nematodes, basil boosts leaf growth, nasturtiums trap aphids, borage draws pollinators, and alliums repel beetles—together they boost cultivation naturally, cutting pest pressure without chemicals.
How do you preserve tomato seeds properly?
Think of each seed as a tiny time capsule. Ferment ripe seeds in water 3–5 days, rinse, then air-dry fully. Store in labeled airtight containers—cool, dark, below 40°F—for 4–6 years of viability. Stick to heirlooms.
Conclusion
Dirt never asked permission to breed nematodes or drown roots—your raised bed refuses both. That’s the trade you’ve made: eighteen inches of lumber and soil for a season where you call the shots.
Growing tomatoes in raised beds rewards attention, not luck. Stake them early, water deep, rotate your crops, and watch the vines outgrow expectations. You didn’t just build a bed. You built a system that works because you designed it to.
- https://growtomatoeseasily.com/raised-beds
- https://my100yearoldhome.com/how-to-grow-the-best-tomato-plants-ever
- https://bonnieplants.com/blogs/how-to-grow/growing-tomatoes
- https://livlig.com/en/blogs/garden-blog/raised-bed-watering
- https://www.growingagreenerworld.com/tips-for-growing-great-tomatoes-starting-off-right