This site is supported by our readers. We may earn a commission, at no cost to you, if you purchase through links.
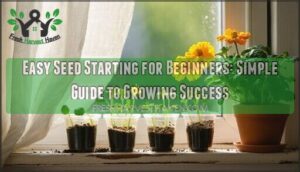
Most vegetables and flowers germinate within 7-14 days when kept consistently moist and warm. Skip the intimidation factor – radishes, lettuce, and marigolds practically grow themselves!
Focus on timing: start seeds 6-8 weeks before your last frost date for transplants. The secret isn’t fancy gear but understanding each seed’s simple needs: moisture, warmth, and light.
Even experienced gardeners started with basic supplies and learned through trial and error. Success comes from consistency, not complexity – and there’s a foolproof method that guarantees germination every time.
Table Of Contents
- Key Takeaways
- Seed Starting Basics
- Essential Equipment Needed
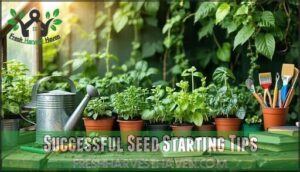
- Successful Seed Starting Tips
- Transplanting and Seed Care
- Easy Seeds for Beginners
- Frequently Asked Questions (FAQs)
- What is the best homemade seed starting mix?
- How to start seedlings for beginners?
- When should I start seeds before last frost?
- How deep should I plant different seed sizes?
- What causes seeds to fail germinating completely?
- Can I reuse seed starting trays next year?
- How do I know when seedlings need fertilizer?
- Conclusion
Key Takeaways
- Start seeds 6-8 weeks before your last frost using a quality, lightweight seed starting mix and simple containers like yogurt cups.
- Keep seeds consistently moist, warm, and well-lit—use affordable LED grow lights or a bright windowsill for best results.
- Focus on easy, fast-germinating seeds like lettuce, radishes, and marigolds to build confidence and see quick success.
- Label everything, avoid overwatering, and clean trays before reuse to prevent disease and boost your chances of healthy seedlings.
Seed Starting Basics
Starting seeds successfully requires the right foundation and timing to set your garden up for success.
You’ll need quality seed starting mix, proper containers, and an understanding of when to plant each variety based on your local growing season.
Choosing Seed Starting Mix
With soil-less seed starting mix, you’ll discover the secret to stronger seedlings.
Unlike garden soil, these specialized blends provide superior drainage and disease resistance. Choose quality over convenience—your future harvest depends on it.
Your seedlings deserve the best start—invest in quality growing medium for healthier, stronger plants.
Understanding the best soil mix is vital for achieving maximum growth.
- Seed Mix Quality: Look for sterile, pre-moistened blends containing vermiculite and perlite for superior aeration
- Organic Options: Select peat moss-based mixes or coconut coir alternatives for sustainable, nutrient-rich foundations
- Mix Composition: Avoid heavy soils; prioritize lightweight, well-draining formulations designed specifically for easy seed germination
Setting Up Seed Trays
Your seed starting trays need proper prep for success. Fill clean containers with pre-moistened seed starting mix, leaving quarter-inch headspace.
Place trays in warm locations away from drafts. Follow seed packet guidelines for proper seed depth – typically twice the seed’s diameter.
Water gently using bottom-watering or fine mist to prevent disturbing seeds. Maintain consistent moisture through daily tray maintenance checks to ensure proper seed depth.
Timing for Seed Starting
Getting your timing right can make or break your seed starting success.
Check seed packets for specific planting dates based on your last frost date and desired harvest calendars.
Most vegetables need 6-8 weeks indoors before transplanting, while flowers vary in their growth stages.
Plan your seed schedules backward from your target planting date to master germination times perfectly, ensuring you have the right timing and follow the correct schedules.
Essential Equipment Needed
You’ll need four key pieces of equipment to start seeds successfully indoors. The right lighting, containers, space, and budget-friendly tools make the difference between thriving seedlings and disappointing failures.
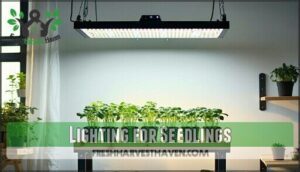
Lighting for Seedlings
Proper illumination transforms your indoor seed starting setup from struggling seedlings to thriving plants. You’ll need adequate light intensity and spectrum for ideal growth.
- LED Lighting – Full-spectrum LEDs provide 25,000-35,000 lux intensity at 2-4 inches above seedlings, consuming 50% less energy than fluorescents
- Grow Lights – Position adjustable fixtures with timers for consistent 18-24 hour photoperiods, raising lights 1-2 inches weekly as plants develop
- Natural Light – South-facing windows rarely provide sufficient intensity; supplement with artificial lighting for robust seedling development
- Lamp Options – Choose timer-equipped, adjustable systems with red-blue spectrum combinations that outperform monochromatic sources by 25-30%
- Shade Management – Use reflective surfaces like white walls or Mylar to increase effective light exposure by 30% without additional energy costs
Understanding the correct grow light distance is vital for healthy seedling growth and development.
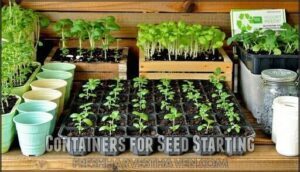
Containers for Seed Starting
Three container types will kickstart your growing journey: seed trays with individual cells prevent root tangling, biodegradable pots decompose directly in soil, and recycled containers like yogurt cups offer budget-friendly alternatives.
Cell packs from seed starting kits provide perfect portion control, while wooden planters add rustic charm to container gardening.
Choose seedling pots with drainage holes for healthy root development.
Using proper seed tray systems can substantially improve seedling growth rates with the help of proper systems.
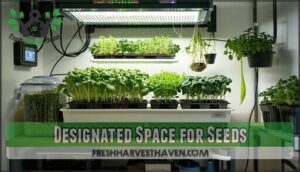
Designated Space for Seeds
Your dedicated workspace doesn’t need to be fancy—just consistent. Choose a spot with stable temperatures between 65-75°F and easy access to grow lights.
A spare bedroom, basement corner, or even a closet works perfectly. Set up seed shelves near electrical outlets for your humidity dome and lighting system.
Good workspace organization keeps your seed tray collection tidy and your seed starting mix within reach. Effective use of seed trays helps maintain a clean and organized workspace, which is crucial for successful seed starting and having a clean environment.
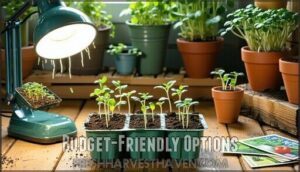
Budget-Friendly Options
You don’t need to break the bank to start seeds successfully.
Frugal seeds from dollar stores or seed swaps work just as well as expensive varieties.
Create cheap mix by combining peat moss with vermiculite instead of buying premium blends.
DIY equipment like yogurt containers make affordable trays, while low cost lighting from basic LED shop lights provides adequate illumination.
Smart budgetfriendly choices keep your seed starting adventure accessible and with frugal seeds, you can have a successful experience.
Successful Seed Starting Tips
Starting seeds successfully requires understanding the basics and avoiding common mistakes that trip up beginners.
You’ll transform from overwhelmed novice to confident gardener by following proven techniques that eliminate guesswork and focus on what actually works.
Simplifying Seed Starting Process
You don’t need a PhD in botany to master seed starting 101. Start small with just three varieties your first season – this prevents overwhelm and builds confidence.
Focus on beginner seed starting basics: choose seeds that germinate quickly, prepare your soil preparation mix properly, and maintain consistent water management.
These seed starting tips transform what feels complicated into manageable steps. Master germination tips and seedling care fundamentals first.
Indoor and Outdoor Methods
You’ve got two pathways for starting seeds indoors versus outdoors, each with distinct advantages.
Indoor seed starting provides climate control and grow lights for precise germination conditions, while outdoor methods harness natural sunlight and soil warmth.
Your seed selection and soil prep remain consistent, but indoor setups require artificial lighting and temperature management.
Outdoor starting eliminates transplant shock for many varieties.
Understanding the seed starting methods is essential for a successful harvest and requires considering the benefits of both indoor and outdoor seed starting.
Actionable Tips for Beginners
Start small with three varieties you’re excited about—overwhelming yourself won’t help germination rates. Choose quick-sprouting seeds like beans or lettuce for instant gratification.
Pre-moisten your seed starting mix before sowing, ensuring proper water management without drowning seeds. Label everything immediately; trust me, mystery seedlings become gardening nightmares.
Focus on consistent lighting options and temperature control for reliable seed germination tips.
Growing Vegetables and Herbs
Vegetable gardening and herb cultivation become rewarding when you select fast-germinating varieties.
Tomatoes, peppers, and basil thrive with consistent 65-75°F temperatures and adequate lighting.
Plan your garden by choosing beginner-friendly crops like lettuce, spinach, and cilantro that adapt well to indoor seed starting conditions and forgive rookie mistakes, making the experience more enjoyable with consistent results.
Transplanting and Seed Care
You’ve successfully grown your seedlings, but they can’t stay in their starter trays forever.
Transplanting your young plants to their permanent homes requires careful timing and technique to guarantee they thrive in their new environment, which is a process that demands technique.
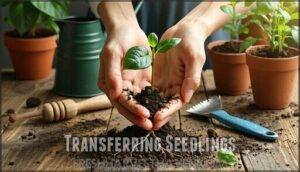
Transferring Seedlings
When should you transplant your seedlings? Once they develop their second set of true leaves and sturdy root systems, it’s time for the big move.
Handle seedlings gently by their leaves, never the delicate stems.
Dig holes slightly larger than root balls to prevent transplant shock.
Water thoroughly after transplanting to encourage soil acclimation and healthy root development, ensuring a successful move with sturdy root systems.
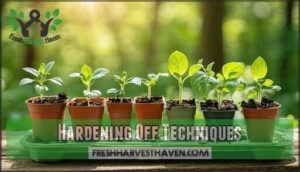
Hardening Off Techniques
Before transplanting your precious seedlings, they’ll need toughening up through hardening off techniques.
This acclimation process prevents transplant shock by gradually introducing outdoor exposure through systematic conditioning.
Gradual Introduction Schedule:
- Days 1-3: Place seedlings in shaded, protected areas for 1-2 hours daily
- Days 4-6: Introduce morning sunlight while extending outdoor time to 6 hours
- Days 7-10: Allow full sun exposure and overnight stays above 45°F
- Reduce watering frequency to slow growth without causing wilting
- Monitor weather conditions and postpone during frost or strong winds
These hardening tips guarantee your seedling care routine builds resilience before the final seedling transplant.
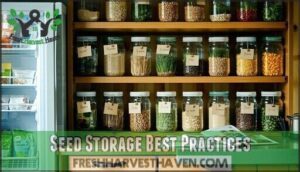
Seed Storage Best Practices
Once you’ve mastered transplanting, proper seed storage helps your leftover seeds remain viable for future seasons. You’ll save money and maintain genetic diversity by storing seeds correctly.
| Storage Method | Container Type | Shelf Life |
|---|---|---|
| Cool, dry pantry | Airtight jars with silica packets | 2-3 years |
| Refrigerator storage | Sealed containers with desiccant | 3-5 years |
| Freezer preservation | Vacuum-sealed bags | 5-10 years |
| Paper envelope filing | Breathable storage boxes | 1-2 years |
| Original seed packets | Plastic storage bins | Variable by species |
Understanding cold stratification processes is vital for maximum seed viability. Keep humidity below 50% and temperatures between 32-41°F for maximum seed viability.
Label everything with variety names and harvest dates—you’ll thank yourself next spring when organization prevents the annual "mystery seed" guessing game.
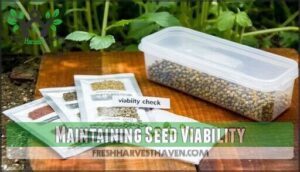
Maintaining Seed Viability
Proper seed storage and humidity control determine whether you’ll have successful germination next season.
Seeds stored correctly maintain viability for years, while neglected packets turn into expensive disappointments.
Follow these preservation methods:
- Store seeds in airtight containers with silica gel packets to control moisture
- Label each packet with variety name and harvest year for easy identification
- Conduct annual viability checks by testing germination rates on paper towels
Your seed packets become your garden’s insurance policy when stored properly.
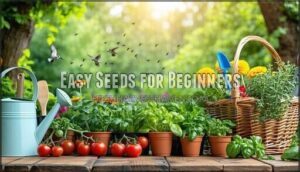
Easy Seeds for Beginners
Starting with easy seeds builds your confidence and guarantees early success in your gardening journey.
You’ll want to choose varieties that germinate quickly and tolerate beginner mistakes while you’re learning proper watering and lighting techniques, which is crucial for early success.
Choosing Right Seeds
Success starts with smart seed selection—your foundation for thriving plants.
Choose varieties with germination rates above 80% and match them to your growing zone. Prioritize beginner-friendly options like determinate tomatoes for compact growth or quick-harvest radishes for instant gratification.
Select non-GMO, heirloom seed types from reputable suppliers, ensuring fresh packaging dates for superior seed quality and reliable variety choices.
When selecting seeds, understanding heirloom seed types is vital for achieving genetic diversity in your garden.
Easy-to-Grow Flowers
Flowers offer beginner gardeners instant gratification with quick germination and stunning blooms.
These easy-to-grow plants transform your garden into a colorful paradise with minimal fuss:
- Zinnias – germinate in 5-7 days with vibrant colors
- Marigolds – pest-resistant with foolproof growth patterns
- Cosmos – drought-tolerant blooms that self-seed readily
- Calendula – edible petals and cool-weather tolerance
- Sunflowers – impressive height gains kids love watching
Beginner-Friendly Vegetables
Vegetables offer reliable germination rates that build confidence in new gardeners.
Tomato care begins with seeds that sprout in 5-10 days, making them perfect for beginner gardening. Bean growing requires minimal fuss—simply plant and watch them emerge quickly.
Pepper tips include starting indoors for best results, while cucumber advice centers on their fast germination. Spinach basics involve cool-weather sowing for easy seed starting success, which is a key factor in easy seed starting.
Simple Herbs to Start
Herbs offer the perfect gateway into seed starting for beginners, delivering quick germination and continuous harvests throughout the growing season.
- Basil – Germinates in 5-7 days with warm soil temperatures above 70°F
- Cilantro – Thrives in cool conditions and self-seeds readily for succession planting
- Dill – Direct sow capability makes it forgiving for new gardeners
- Chamomile – Tiny seeds require surface sowing with gentle misting for ideal germination
- Lemon balm – Hardy perennial that establishes quickly from seed with minimal care requirements
Frequently Asked Questions (FAQs)
What is the best homemade seed starting mix?
Good roots grow from good soil, as they say.
You’ll create an excellent homemade seed starting mix by combining one part peat moss, one part vermiculite, and one part compost for ideal drainage and nutrients.
How to start seedlings for beginners?
Start with quality potting mix and containers, then sow seeds at proper depth.
Keep soil moist, provide warmth (70-75°F), and add grow lights once seedlings emerge.
Water daily and transplant when ready, ensuring a complete process from start to finish is maintained for optimal growth.
When should I start seeds before last frost?
Coincidentally, timing’s everything in seed starting.
Count backward 4-12 weeks from your last frost date based on each plant’s requirements.
Cool-season crops like lettuce need 4-6 weeks, while warm-season tomatoes require 6-8 weeks indoors.
How deep should I plant different seed sizes?
Plant seeds at twice their diameter’s depth.
Large seeds like beans go 1-2 inches deep, medium seeds like tomatoes need ¼ inch, while tiny seeds like lettuce barely get covered with soil.
What causes seeds to fail germinating completely?
Unfortunately, your precious seeds aren’t magic beans—they’ll fail completely when you overwater them.
They’ll also fail when you plant them too deep, expose them to extreme temperatures, use old seeds.
Or create poor air circulation that invites fungal diseases.
Can I reuse seed starting trays next year?
You can reuse seed starting trays for multiple seasons with proper cleaning. Wash them thoroughly with a bleach solution to eliminate pathogens, then rinse and dry completely before storage.
How do I know when seedlings need fertilizer?
It’s funny how seedlings look fine—until they don’t.
When your true leaves appear and growth stalls, that’s your cue.
Science says they’ve used up their seed reserves and crave nutrients.
Time to introduce diluted fertilizer.
Conclusion
Seed starting success stems from simple steps: select suitable seeds, supply steady moisture, and secure sufficient light.
You don’t need fancy equipment—just follow research-backed basics for easy seed starting for beginners.
Monitor temperature and humidity, use sterile mix, and practice patience as your seedlings sprout.
Remember, even professional botanists started small, and with consistency and care, you’ll nurture healthy transplants.
Soon, you’ll see firsthand how science and simplicity combine for a flourishing garden—no green thumb required!
- https://underatinroof.com/blog/how-and-when-to-start-seeds-a-beginners-guide-to-seed-starting
- https://www.thompsonfamilyfarmmn.com/blog/the-3-most-important-parts-of-seed-starting
- https://extension.unh.edu/blog/2018/03/seed-starting-basics
- https://melissaknorris.com/podcast/seed-starting-guide-planning-starting-mistakes-to-avoid/
- https://www.theseasonalhomestead.com/indoor-seed-starting-guide-what-no-one-tells-you/

