This site is supported by our readers. We may earn a commission, at no cost to you, if you purchase through links.
Most seeds don’t fail because of bad technique—they fail because of the wrong growing medium. A seedling’s first roots are so fine they can barely push through dense, clay-heavy soil, and by the time you notice the problem, it’s already too late.
Seed starting mix isn’t just a lighter version of potting soil. It’s a precisely engineered environment: sterile, fast-draining, moisture-retentive, and fine enough to cradle a root barely thicker than a thread. Get the composition right, and germination rates climb sharply. Get it wrong, and even perfect watering and light can’t compensate.
The ingredients, ratios, DIY recipes, and top supplies ahead give you everything to build that environment from scratch—or choose one that’s already there.
Table Of Contents
- Key Takeaways
- Best Seed Starting Mix Basics
- Key Ingredients for Strong Germination
- Choose The Right Mix Type
- DIY Seed Starting Mix Recipe
- Prepare Mix Before Planting
- Top 9 Seed Starting Supplies
- 1. Coconut Coir Seed Starting Pellets
- 2. Premier Sphagnum Peat Moss
- 3. Premium Buffered Coco Coir Medium
- 4. Espoma Organic Perlite Soil Amendment
- 5. Espoma Organic Vermiculite Soil Amendment
- 6. Dr Earth Natural Compost Mix
- 7. Jobes Organic Garden Lime Amendment
- 8. Wiggle Worm Organic Fertilizer Castings
- 9. Espoma Organic Kelp Meal Fertilizer
- Water and Feed Seedlings Properly
- Store and Reuse Seed Mix
- Frequently Asked Questions (FAQs)
- What type of soil is best for seed germination?
- What is the best soil to sow seeds in?
- What medium is best for starting seeds?
- What potting mix to use for seeds?
- How long does homemade seed starting mix last?
- Can you reuse seed starting mix multiple times?
- Whats the ideal pH for seed starting mix?
- How do you sterilize homemade seed starting mix?
- When should you fertilize seedlings in starting mix?
- Can I start seeds directly in garden beds?
- Conclusion
Key Takeaways
- Your growing medium is the single most critical variable in germination success — fine-textured, sterile, soilless mixes outperform garden soil by delivering simultaneous aeration, drainage, and pathogen-free conditions that dense soil physically cannot replicate.
- A reliable DIY seed starting mix requires equal parts peat moss (or coconut coir), perlite, and vermiculite, with dolomitic lime added to correct peat’s naturally acidic pH toward the seedling-optimal range of 6.0–6.5.
- Seeds carry their own energy reserves through germination, so nutrients only become necessary after true leaves emerge — introducing diluted fertilizer too early risks salt burn and root damage at the most vulnerable growth stage.
- Damping-off and pathogen contamination are largely preventable through bottom watering, sanitized trays, adequate seedling spacing, and fresh sterile mix each season — reusing old or improperly stored media is where germination rates quietly collapse.
Best Seed Starting Mix Basics
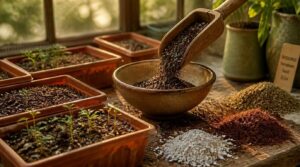
Getting seed starting right begins long before you sow a single seed. The medium you choose shapes everything from germination rates to root development, and the differences between your options matter more than most gardeners realize. Here’s what you need to understand before you fill a single tray.
Choosing the right seed-starting medium is just one piece of the puzzle — dig into these spring gardening tips for beginners to see how early decisions like this ripple all the way through to harvest.
Why Soilless Mixes Work
Soilless mixes succeed where garden soil consistently fails seedlings — by delivering root zone aeration, steady moisture retention, and a pathogen-free environment simultaneously. Their light, porous structure prevents waterlogging while keeping roots well oxygenated, and because they’re largely inert, you control nutrient delivery precisely from day one.
Soilless mixes outperform garden soil by delivering aeration, sterile conditions, and precise moisture control in one lightweight medium
That combination of drainage, sterility, and temperature stability creates conditions where germination becomes genuinely predictable. Using a sterile soilless mix helps eliminate various soil-borne diseases.
Seed Starting Versus Potting Soil
That sterile, controlled environment is exactly what separates a seed starting mix from standard potting soil — and the distinction matters more than most gardeners expect.
Potting soil’s dense organic matter can trigger nutrient burn before true leaves even form, while its heavier texture resists the radicle emergence that fragile seedlings depend on. Start seeds in a dedicated germination mix, then move them to potting soil after transplanting.
Ideal Texture for Seedlings
Texture is where germination succeeds or fails. Your growing medium needs fine granulation — small, uniform particles that maintain capillary water flow to seeds without crusting on top after watering.
- Loose structure ensures root expansion space
- Open pores supply oxygen continuously
- Fine particles reduce compaction risk
Think wrung-out sponge: moist, airy, never waterlogged.
Sterility and Disease Prevention
Even the finest texture won’t save seedlings from damping-off disease if your mix harbors fungal pathogens. A sterile composition eliminates those threats before germination begins.
Disinfect trays, tools, and work surfaces before use, since pathogen transfer happens faster than most growers expect. Use fresh media each season — reusing old mix is where seedling survival rates quietly collapse.
When Nutrients Matter
Seeds carry their own energy reserves through germination — nutrient timing only becomes critical after true leaves emerge, when those reserves deplete.
- Macronutrient balance helps root branching and early stem strength
- Phosphorus drives root expansion within the first 14 days
- Micronutrient availability sustains chlorophyll synthesis and cell wall integrity
- Diluted organic fertilizers prevent salt buildup in vulnerable trays
- Substrate nutrient density directly influences uptake speed and stress toughness
Key Ingredients for Strong Germination
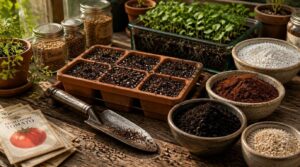
Getting the right germination comes down to what’s actually in your mix, not just how you use it. Each ingredient plays a specific role in creating the conditions seeds need to sprout and establish strong roots. Here are the key components worth understanding before you mix your first batch.
Sphagnum Peat Moss Base
Sphagnum peat moss is the backbone of most seed starting mixes — and for good reason. Its natural pH of 3.5 to 4.5 demands lime amendment before use, but once balanced toward 6.0–7.0, it delivers astonishing moisture retention while maintaining enough air porosity to keep roots breathing.
Its near-sterile, low-nutrient composition means seedlings draw on their own reserves during germination, reducing pathogen pressure and nutrient burn risk simultaneously.
Coconut Coir Alternative
When peat moss isn’t your preferred base, coconut coir functions as a reliable potting soil alternative.
- Expands to 2 gallons per compressed brick
- Capillary action efficiency keeps roots moist between waterings
- Offers renewable fiber benefits through sustainable substrate sourcing
- Rinse before use — coir salt removal protects young roots
Its near-neutral pH suits most peat-free formula blends as a growing medium.
Perlite for Aeration
Think of perlite as your mix’s built-in breathing system. Those rigid, porous granules create air pockets throughout the substrate, allowing continuous gas exchange around developing roots — which is exactly what prevents root suffocation in compact seed trays.
Using 10–30% perlite by volume keeps soil porosity high, drainage rapid, and waterlogging risks minimal without sacrificing the moisture balance young seedlings need.
Vermiculite for Moisture
Where perlite opens airways, vermiculite seals in water. Its layered, mineral structure absorbs moisture and releases it gradually — acting as a slow-release moisture reservoir that prevents seed desiccation between waterings.
That buffering capacity also moderates root-zone temperature swings, supporting steadier seed germination conditions. Just watch for overwatering; consistently damp media elevates damping-off risk if airflow is insufficient.
Lime for PH Balance
Peat moss is notoriously acidic, often sitting at pH 3.5–4.5 — well below the ideal range of 6.0–7.0 most seedlings need.
Lime corrects this by neutralizing hydrogen ions, releasing calcium that displaces soil acids and unlocking phosphorus and manganese uptake.
Key distinctions when choosing lime:
- Calcitic limestone raises pH via calcium carbonate
- Dolomitic lime adds magnesium alongside calcium
- Pelletized forms distribute more evenly
- Over-liming triggers micronutrient deficiencies — measure carefully
Choose The Right Mix Type
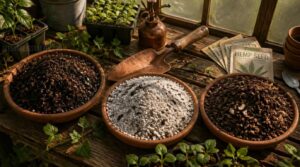
Not every seed starting mix is built the same, and the one you choose will shape how your seedlings perform from day one.
Your decision comes down to a few key factors — ingredient source, convenience, and how much control you want over the final composition. Here’s a breakdown of the main mix types worth knowing before you commit to one.
Organic Versus Synthetic Ingredients
When choosing an organic seed starter, the distinction between organic and synthetic ingredients runs deeper than labeling. Organic ingredients follow certified farming practices — think USDA Organic standards — limiting synthetic pesticides and GMOs, while supporting soil microbiology and reduced chemical runoff.
Synthetic mixes offer consistency but carry higher chemical exposure risk for vulnerable seedlings. Organic gardening supplies tend to cost more, reflecting certification overhead.
Peat-based Seed Mixes
Sphagnum peat moss dominates commercial seed starting mixes for good reason. Its fibrous structure creates natural capillary action, drawing moisture upward to keep germination zones consistently damp without waterlogging.
Peat-based mixes usually deliver:
- pH of 5.5–6.5, adjustable toward neutral with lime
- A sterile, fine-textured base protecting delicate seedlings
- Mycorrhizal fungi to accelerate early root establishment
- Reliable moisture retention through critical seedling establishment stages
Peat-free Coir Blends
Coconut coir offers a compelling peat-free formula — a coconut industry byproduct repurposed from waste rather than extracted from fragile bogs. Its coir moisture recovery is strong, rewetting quickly after drying episodes.
| Trait | Performance |
|---|---|
| pH | Near neutral |
| Salt risk | Monitor EC; flush regularly |
Tropical transport emissions vary by supplier. Use this growing medium confidently for seed germination across herbs and vegetables.
Commercial Ready-made Mixes
When you don’t want to source individual ingredients, a commercial seed starting mix delivers reliable batch consistency across every tray. These pre-blended options undergo sterilization, pH adjustment to roughly 5.5–6.5, and batch testing before packaging — traceability standards that matter in high-volume propagation.
Starter fertilizer levels are calibrated to avoid salt burn, while sealed packaging integrity preserves shelf life between six and twelve months.
DIY Homemade Mixes
Mixing your own gives you something no commercial bag can — precise control over every variable. With a 1:1:1 ratio of peat moss, perlite, and vermiculite, you’re building a homemade seed starting mix calibrated to your seeds, your water quality, and your space.
Sourcing ingredients in bulk cuts costs by more than 50% compared to branded alternatives.
DIY Seed Starting Mix Recipe
Making your own seed starting mix is more straightforward than most gardeners expect, and the control it gives you over texture, sterility, and moisture retention is hard to match with any off-the-shelf bag.
The recipes below range from a simple three-part mixture to enriched formulas with worm castings, so you can choose what fits your setup and budget. Here’s what works.
Basic Three-part Formula
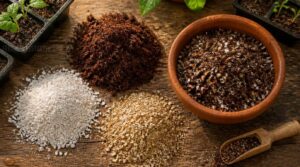
The simplest formula that actually works: equal parts peat moss, perlite, and vermiculite.
- Peat moss anchors moisture retention throughout germination
- Perlite ensures consistent drainage and aeration
- Vermiculite locks in nutrients during early root development
Each ingredient plays a distinct role, which means skipping even one compromises germination. Pre-moisten the mixture to a wrung-out sponge consistency before carefully filling your trays.
Coir-based Organic Blend
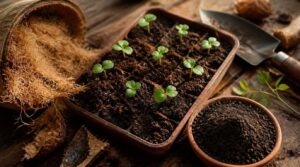
Replacing peat with coconut coir shifts your mix toward a genuinely sustainable, peat-free formula. Coir’s fibrous structure creates natural microchannels that improve aeration while releasing moisture more slowly than peat, keeping seedling roots steadily hydrated between waterings.
Since coir carries minimal nutrients, mix in worm castings to support early seedling development without overwhelming delicate roots with salt buildup.
Peat Mix With Lime
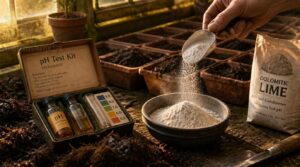
Peat moss starts life brutally acidic — often sitting between pH 3.5 and 4.5 — which is why dolomitic lime is non-negotiable. Unlike hydrated lime, which reacts aggressively and risks overshooting your target, dolomite releases calcium and magnesium gradually, buffering against pH drift during those critical first weeks.
Aim for pH 5.5 to 6.5, mix lime dry before moistening, then test a small batch first.
Optional Worm Castings
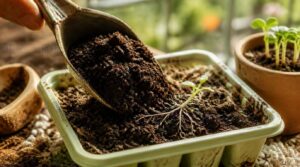
Worm castings won’t transform your germination overnight, but they quietly do a lot of work beneath the surface. At 10–15% by volume, they introduce microbial activity that improves nutrient uptake without risking salt burn in tender roots.
They bring:
- Slow-release macro and micronutrients
- Beneficial microbes that suppress pathogens
- Improved soil structure and root penetration
- pH buffering in acidic media
- Gradual organic matter cycling
Source dark, odor-free castings from reputable suppliers for best results.
Cost-saving Preparation Tips
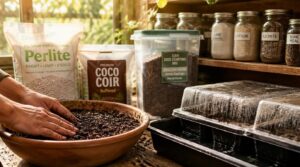
Buying perlite and coco coir in bulk cuts per-unit costs by more than 50%, storing what you don’t use in a dry, sealed container. Refresh leftover potting medium from previous seasons with fresh lime and soil amendments rather than discarding it entirely.
Pre-moistening your homemade seed starting mix before filling trays reduces water waste and improves germination consistency. Bottom watering further limits evaporation.
Prepare Mix Before Planting
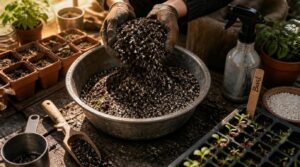
Getting your mix ready before a single seed goes in makes more difference than most gardeners expect. The preparation process follows a short sequence of steps that set the conditions for strong, even germination. Here’s what to do before your trays ever touch a seed:
Pre-moisten Before Filling Trays
Dampening your seed starting mix before filling trays isn’t optional — it’s foundational. Dry media is often hydrophobic, resisting water capillary action and creating uneven moisture distribution that leaves seeds stranded in dry pockets.
- Pre-moistening eliminates air pockets that displace seeds from intended depth
- Even hydration helps consistent seed germination across every cell
- Dampening reduces dust inhalation risks during tray filling
Squeeze a handful to test: no dripping means it’s ready.
Aim for Sponge Consistency
Once the mix is pre-moistened, sponge consistency becomes your goal. Squeeze a handful — it should hold its shape, release no free water, and rebound slowly. That rebound confirms aeration and moisture retention working in balance. Target 60–75% saturation for uniform seed germination without surface crusting or a waterlogged growing substrate, maintaining reliable seed-to-soil contact across every tray cell.
| Test Method | What to Look For | What It Means |
|---|---|---|
| Squeeze test | 1–2 drops, no stream | Correct saturation level |
| Rebound test | Slow spring-back after compression | Good aeration structure |
| Surface check | Moist but not shiny | No crusting risk |
| Visual scan | Separate granules visible | Balanced growing substrate |
| Smell check | Earthy, not sour | No anaerobic pockets |
Fill Cells Without Compacting
With your mix at the right saturation, filling each cell becomes a matter of restraint. Scoop loosely, let the substrate settle by gravity, and resist pressing down.
Compaction collapses the perlite and vermiculite structure you’ve built, cutting off the aeration and drainage those particles create. Think of each cell like a non-contiguous data range — fill it without overwriting what’s already working underneath.
Level The Surface Gently
Once cells are filled, run a wide, flat trowel lightly across the surface at a shallow angle, gliding in one direction without pressing down. You’re skimming high spots, not flattening the structure beneath.
Uniform surface height ensures every seed sits at consistent depth, which directly affects germination timing. A straightedge can confirm evenness before you sow.
Label Seed Trays Clearly
Swap trays without notes, and you’ll lose weeks of progress chasing half-remembered variety names.
- Write variety and sow date in uppercase permanent marker
- Place labels at the tray edge, not over seeds
- Use color coding to tell plant families apart instantly
- Pair physical labels with a digital tracking log
- Choose weatherproof plastic labels for greenhouse humidity
Top 9 Seed Starting Supplies
Building your own seed starting mix doesn’t require hunting down a dozen obscure ingredients — the right supplies are more accessible than you’d think.
Whether you’re working with peat, coir, or amendments like perlite and lime, each item on this list pulls its own weight in the germination process. Here are the nine supplies worth keeping on your shelf.
1. Coconut Coir Seed Starting Pellets
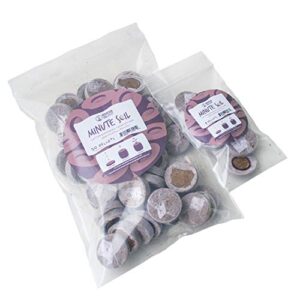
Coconut coir seed starting pellets are one of the most practical innovations for clean, controlled germination. Each compressed disc expands to roughly 2 inches tall when soaked, forming a ready-to-plant plug without any separate pots.
The neutral pH and low salt content protect tender emerging roots, while the integrated netting holds the plug intact during transplanting, dramatically reducing shock. Since the entire plug goes directly into soil, you’re not disturbing the root ball at a critical growth stage.
| Best For | Home gardeners, professional nurseries, and urban microgreen growers who want a clean, low-mess way to start seeds and minimize transplant shock. |
|---|---|
| Organic Status | Natural & Sustainable |
| Primary Material | Coconut Coir |
| Physical Form | Compressed Pellets |
| Main Application | Seed Starting & Propagation |
| pH Effect | Neutral |
| Moisture Retention | Very High (up to 9x weight) |
| Additional Features |
|
- Expands to a full 2-inch plug with just water, giving you an instant pot-and-soil combo with zero extra setup
- Neutral pH and low salt content create a gentle environment for delicate seedling roots right from the start
- The whole plug transplants directly into soil, so you never disturb the root ball at its most vulnerable stage
- Can dry out quickly depending on your environment, so you’ll need to keep a close eye on moisture levels
- The netting’s biodegradation rate gets mixed reviews — some gardeners find it breaks down too slowly in soil
- Pricing can be inconsistent, which makes it harder to count on as a cost-effective long-term option
2. Premier Sphagnum Peat Moss
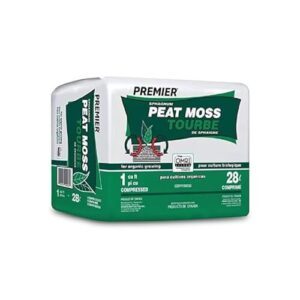
Top-quality Sphagnum Peat Moss from Canadian bogs is a seed-starting staple for good reason. Its fibrous, moisture-retaining structure absorbs up to 26 times its own weight in water, releasing it gradually so roots never dry out between waterings.
Since it’s odorless, insect-free, and naturally sterile, you get a clean base without introducing pathogens. Pre-wet it thoroughly before filling trays — the compressed bale expands a lot, yielding far more usable volume than the package suggests.
| Best For | Gardeners and seed starters who need a reliable, moisture-retaining growing medium for everything from seed trays to worm bins and lawn overseeding. |
|---|---|
| Organic Status | 100% Natural |
| Primary Material | Peat Moss |
| Physical Form | Loose Fluffy Fiber |
| Main Application | Soil Amendment & Mulch |
| pH Effect | Slightly Acidic |
| Moisture Retention | High |
| Additional Features |
|
- Holds moisture exceptionally well — absorbs up to 26x its weight in water, keeping roots consistently hydrated between waterings
- Naturally sterile and odorless, so it won’t introduce pests or pathogens into your garden or seed-starting setup
- Incredibly versatile — works for seed germination, soil amendment, bulb storage, and protecting newly seeded lawns from birds
- Priced higher than many comparable peat moss options on the market
- Can be tricky to find in stock, with some users reporting supply shortages
- Requires pre-wetting before use, which adds a step compared to ready-to-use growing mixes
3. Premium Buffered Coco Coir Medium
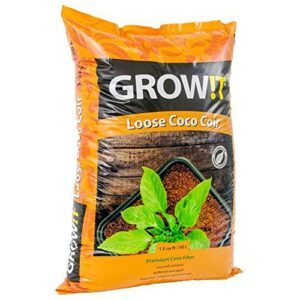
If you’ve wrestled with plain coco coir’s unpredictable pH swings, a buffered coco coir medium solves that problem before it starts. The calcium-nitrate treatment flushes excess sodium and potassium salts while stabilizing pH within a range where nutrients stay consistently available to germinating seeds.
Unlike compressed bricks that need soaking and breaking apart, this loose coir format is ready to fill trays immediately. Its naturally airy texture keeps oxygen moving around delicate roots while retaining enough moisture to reduce watering frequency during those critical early days.
| Best For | Hydroponic growers, clone starters, and aroid enthusiasts who want a reliable, ready-to-use growing medium without the hassle of prepping compressed coco bricks. |
|---|---|
| Organic Status | 100% Natural |
| Primary Material | Buffered Coconut Coir |
| Physical Form | Loose Coir Fiber |
| Main Application | Hydroponic & Soilless Growing |
| pH Effect | Stable & Neutral |
| Moisture Retention | High |
| Additional Features |
|
- Buffered with calcium and magnesium, so pH stays stable and nutrients remain consistently available from the start
- Loose format means no soaking or breaking apart — just open the bag and fill your trays
- Airy texture promotes healthy root development while still retaining enough moisture to cut down on watering frequency
- International shipping costs can add up quickly, making it less economical for overseas buyers
- Not a standalone fertilizer — you’ll likely need to supplement with slow-release nutrients for best results
- Requires extra monitoring when used in Deep Water Culture (DWC) systems to avoid potential issues
4. Espoma Organic Perlite Soil Amendment
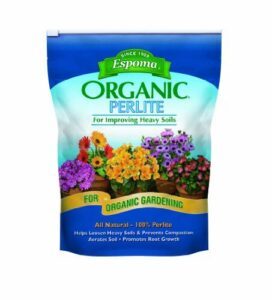
Perlite is the unsung workhorse of any seed starting mix. Espoma’s 100% natural, chemical-free perlite creates porous gaps in your growing medium, keeping oxygen moving around roots that would otherwise suffocate in compacted soil. Since it’s sterile and inert, it won’t introduce pathogens or break down over time.
One practical note: the fine dust requires a mask during mixing, and its lightweight nature means it can float to the surface in wetter blends — worth anticipating before you fill your trays.
| Best For | Gardeners building custom soil mixes for containers, seed starting, or epiphytes who want a natural, chemical-free way to boost drainage and root aeration. |
|---|---|
| Organic Status | Certified Organic |
| Primary Material | Perlite |
| Physical Form | Coarse Granules |
| Main Application | Drainage & Aeration |
| pH Effect | Neutral |
| Moisture Retention | Low (promotes drainage) |
| Additional Features |
|
- 100% natural and organic-certified, so it works safely in any organic growing setup
- Improves both drainage and aeration, making it versatile across containers, raised beds, and seed trays
- Inert and sterile — it won’t break down, introduce pathogens, or alter your soil chemistry over time
- Produces fine dust during mixing, so a mask is recommended
- Lightweight enough to float to the surface of wetter mixes or blow away in wind
- Packaging isn’t resealable, which makes storing leftover perlite a bit inconvenient
5. Espoma Organic Vermiculite Soil Amendment
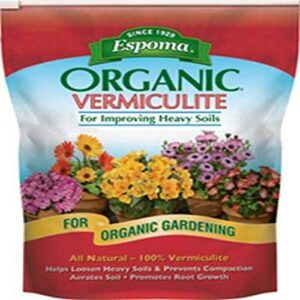
Where perlite drains, vermiculite holds — and that balance is what separates a thriving seedling from a stressed one. Espoma’s 100% pure vermiculite contains no fillers, just hydrated magnesium aluminum silicate that absorbs moisture and releases it gradually as roots demand it.
That slow-release hydration is especially valuable during germination, when consistent moisture means the difference between uniform emergence and patchy, uneven sprouting. At a 20% vermiculite to 80% peat ratio, you get a mix that breathes without drying out too fast.
| Best For | Gardeners focused on seed-starting, container growing, or organic raised beds who want a clean, natural amendment that keeps moisture consistent without waterlogging roots. |
|---|---|
| Organic Status | 100% All-Natural Organic |
| Primary Material | Vermiculite |
| Physical Form | Coarse Granules |
| Main Application | Seed Starting & Aeration |
| pH Effect | Neutral |
| Moisture Retention | High |
| Additional Features |
|
- 100% pure organic vermiculite with no fillers — great for growers who want to keep things natural
- Excellent water retention that releases moisture gradually, reducing how often you need to water
- Loosens compacted soil and improves aeration, giving roots more room to spread
- Lightweight particles can blow away in wind, so outdoor application takes a little care
- Pricier than perlite or store-brand alternatives, which adds up if you’re amending large areas
- Particle size can vary between orders, which may affect consistency in your mixes
6. Dr Earth Natural Compost Mix
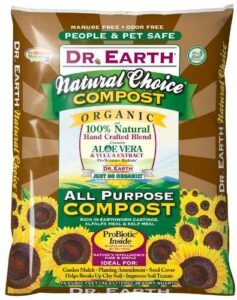
Vermiculite is great at moisture retention, but once seedlings emerge and roots begin actively foraging, a biologically rich amendment starts to matter.
Dr. Earth’s compost mix earns its place here because it goes beyond basic nutrition — worm castings, alfalfa meal, kelp meal, and fish meal work together to supply slow-release organic nitrogen without burning sensitive roots. The TruBiotic microbial inoculants actively support nutrient cycling, while dolomite lime and oyster shell keep pH in a seedling-friendly range. Clean, organic, and genuinely functional.
| Best For | Gardeners who want a premium, biologically active compost to enrich soil for trees, shrubs, vegetables, or lawns without relying on synthetic inputs. |
|---|---|
| Organic Status | 100% Natural Ingredients |
| Primary Material | Earthworm Castings Blend |
| Physical Form | Loose Blend |
| Main Application | Soil Amendment & Compost |
| pH Effect | Neutral to Slightly Alkaline |
| Moisture Retention | Moderate to High |
| Additional Features |
|
- Rich blend of worm castings, alfalfa meal, and kelp meal delivers slow-release organic nutrition that feeds plants without burning roots
- Versatile enough to use as a soil amendment, mulch, potting medium, or base for compost tea
- Made in the USA with 100% natural ingredients, making it a trustworthy choice for organic growing
- Priced higher than most standard compost options, which can add up if you need large quantities
- Quality can vary between bags, with some users reporting debris like pebbles or twigs
- Batch inconsistency means you may not always get the same results from bag to bag
7. Jobes Organic Garden Lime Amendment
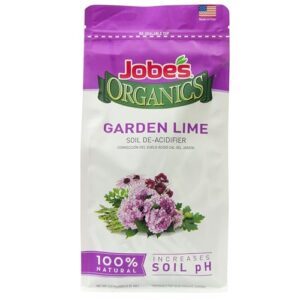
Once your mix has biological richness covered, pH balance becomes the quiet variable that determines whether nutrients actually reach your seedlings.
Jobe’s Organic Garden Lime takes care of that job cleanly — its granular calcium carbonate raises soil pH gradually without synthetic chemicals, and its OMRI-listed formula keeps everything compliant with organic standards. At 6 pounds, it’s practical for small to medium batches.
Test your soil first, though; overliming locks out micronutrients just as effectively as excess acidity does.
| Best For | Organic gardeners and lawn care enthusiasts who need to raise soil pH and improve nutrient availability without synthetic chemicals. |
|---|---|
| Organic Status | OMRI Listed Organic |
| Primary Material | Lime Granules |
| Physical Form | Pelletized Granules |
| Main Application | Soil pH Adjustment |
| pH Effect | Raises pH (Alkalizing) |
| Moisture Retention | Minimal |
| Additional Features |
|
- OMRI-listed and free of synthetic chemicals, making it fully compliant with USDA organic gardening standards
- Pelletized granules minimize dust and runoff, making application cleaner and more controlled than powder forms
- Versatile beyond pH correction — useful for preventing blossom end rot, shifting hydrangea colors to pink, and balancing worm composting bins
- Requires soil testing before use, since overliming can lock out micronutrients just as easily as excess acidity
- Needs reapplication two to three times per year to maintain ideal pH levels, adding ongoing maintenance
- Not suitable for paste-style applications (such as treating tree trunks), limiting its versatility for certain gardening methods
8. Wiggle Worm Organic Fertilizer Castings
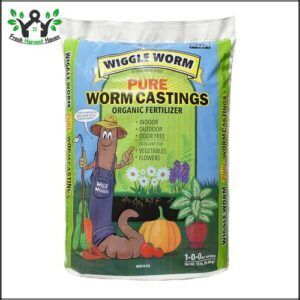
Where Jobe’s lime covers chemistry, Wiggle Worm takes care of biology. These 100% pure earthworm castings — OMRI listed and multi-screened to remove stones, straw, and worm eggs — deliver water-soluble nutrients that seedling roots can absorb almost immediately, without the risk of fertilizer burn that synthetic options carry.
A handful per cell is genuinely enough. Mix them into a peat or coir base to improve microbial activity, soil aeration, and moisture retention in a single amendment.
| Best For | Gardeners who want a fully organic, low-risk soil amendment that supports healthy microbial life and steady root development for both indoor and outdoor plants. |
|---|---|
| Organic Status | OMRI Listed Organic |
| Primary Material | Pure Earthworm Castings |
| Physical Form | Screened Fine Castings |
| Main Application | Soil Amendment & Fertilizing |
| pH Effect | Neutral |
| Moisture Retention | Moderate to High |
| Additional Features |
|
- 100% pure, OMRI-certified organic castings that are safe for seedlings with zero risk of fertilizer burn
- Multi-screened for quality and delivers water-soluble nutrients that plants can absorb almost immediately
- Improves soil structure, aeration, and moisture retention all in one amendment — and can double as a top dressing or brewed into a casting tea
- Higher cost per bag than conventional fertilizers, which adds up quickly for large gardens
- Shouldn’t be relied on as a sole nitrogen source, so you’ll likely need a complementary fertilizer
- Timing matters — avoid applying near water sources or right before heavy rain to prevent nutrient runoff
9. Espoma Organic Kelp Meal Fertilizer
Wiggle Worm takes care of the microbial side; kelp meal works the trace mineral angle. Espoma Organic Kelp Meal — harvested from cold Atlantic waters and low-temperature processed to preserve nutrient integrity — delivers a mild 1-0-2 NPK alongside iodine and seaweed-derived compounds that support root formation without overwhelming young seedlings.
Sprinkle it into your peat or coir base as a gentle starter amendment, or brew it into a diluted compost tea. Its concentrated formula means a little goes a long way — measure carefully.
| Best For | Gardeners who want to boost trace minerals and root development in organic setups, especially those working with depleted soils or finicky ornamentals. |
|---|---|
| Organic Status | Registered Organic Input |
| Primary Material | Atlantic Kelp Meal |
| Physical Form | Dried Ground Meal |
| Main Application | Soil Conditioning & Fertilizing |
| pH Effect | Neutral to Slightly Acidic |
| Moisture Retention | Low (dry amendment) |
| Additional Features |
|
- Harvested and low-temperature processed to keep nutrients intact, so you’re getting the real deal from the seaweed
- Incredibly versatile — mix it into soil, brew a compost tea, or use it as a foliar spray depending on what your plants need
- Registered as an Organic Input Material, so it fits cleanly into certified organic growing routines
- The concentrated formula leaves little room for error — overapplication can stress or damage sensitive plants
- Carries a noticeable ocean scent that some gardeners find off-putting, especially indoors or in enclosed spaces
- At 4 pounds, it’s a modest quantity for larger gardens where soil replenishment is a bigger need
Water and Feed Seedlings Properly
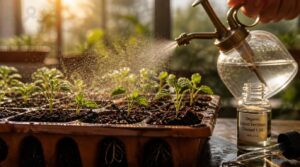
Getting your watering and feeding approach right can mean the difference between seedlings that thrive and ones that struggle before they ever have a chance.
Even with a perfect starting mix, too much moisture or fertilizer at the wrong time will undo all that careful preparation. Here’s what you need to know about keeping your seedlings healthy from the moment they sprout.
Watering From The Bottom
Bottom watering works by letting capillary action draw moisture upward through your seed starting mix, pulling roots downward and building a stronger foundation from the start.
Set your trays over a shallow reservoir — roughly 1–2 cm deep — and let the mix wick moisture at its own pace. Watch for slight weight increase between sessions; that’s your moisture monitoring cue.
Avoiding Soggy Seed Trays
Soggy trays are less a watering problem than a drainage problem in disguise. Once water pools visibly on the surface or lingers in the catch tray beyond 15 minutes, stop watering immediately and let the mix breathe.
Pair effective drainage solutions — holes, raised racks, a perlite underlayer — with airflow humidity control using a gentle fan to keep conditions balanced without tipping into excess moisture.
Preventing Damping-off Disease
Damping-off strikes fast — a healthy seedling collapses overnight from fungal rot at the stem base. Pathogen control starts before seeds touch the mix: sanitize trays with 70% alcohol, space seedlings to improve airflow management, and water from below to keep crowns dry.
- Sanitize containers between uses with 70% alcohol
- Bottom watering limits surface moisture and fungal splash
- Seedling spacing reduces humid microclimates that favor disease
First Feeding After Sprouting
Once your seedling’s true leaves emerge — not the rounded seed leaves, but the first real foliage — its internal reserves are spent.
That’s when you introduce a diluted organic fertilizer at quarter to half strength, fed to moist, never waterlogged, medium twice daily. Watch leaf tips carefully; tip scorch or darkened edges signal nutrient burn, so pull back concentration immediately.
Diluted Organic Fertilizer Options
Your choices range widely: worm castings tea at 1:5 to 1:10 delivers slow-release nitrogen without osmotic shock, while kelp extract — diluted 1:100 to 1:200 — supplies growth hormones and trace minerals that sharpen nutrient uptake.
Fish emulsion works at 1:10 to 1:15, though its higher salt content demands careful dilution. Even coconut water at 1:100 offers gentle nourishment for sensitive organic seed starters.
Store and Reuse Seed Mix
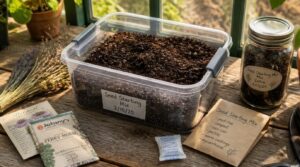
Leftover seed starting mix doesn’t have to go to waste between seasons — stored correctly, it can stay viable and ready for your next round of sowing. That said, how you handle it makes all the difference between a mix that performs and one that’s become a liability. Here’s what you need to know to store and reuse it safely.
Safe Storage Conditions
Store your seed starting mix in a cool, dark space where temperatures stay between 15 and 25°C — fluctuations accelerate organic breakdown. Use opaque, sealed containers to block light exposure and humidity ingress, targeting 40–60% relative humidity. Practice storage rotation using FIFO to cycle older stock first.
- Airtight bins block moisture and pests
- Opaque lids prevent light-induced degradation
- Elevated shelving improves airflow beneath containers
Keeping Mixes Dry
Once your containers are sealed and shelved, moisture remains the real threat. Tuck silica gel desiccants inside each bin and replace them when color indicators shift — they maintain internal RH near 0–20%.
A small humidity gauge in your storage area catches rising levels before damage occurs. Place moisture barrier liners beneath bins to block ground transfer entirely.
Reusing Unused Dry Mix
Dry mix that’s stayed sealed and desiccant-protected is worth reviving, not discarding. Start by sifting out clumps and debris to restore uniform texture before refilling trays. Work in a small measure of fresh perlite or vermiculite to restore soil aeration where the original structure has settled.
If you spot any musty odor or discoloration, pull that portion — don’t risk your seed germination on compromised material.
Avoiding Contaminated Old Mix
Even sealed mix isn’t automatically safe — fungal spores, nematodes, and damping-off pathogens can persist through storage. Before reusing anything older than one season, check for unusual clumping, strong odor, or visible mold.
- Residual salts from prior fertilizers burn tender roots
- High humidity during storage accelerates pathogen development
- Weed seeds and pesticide residues survive longer than expected
When in doubt, discard it.
Refreshing With Fresh Amendments
Discarding contaminated mix is the right call, but salvageable mix just needs reconditioning. Mix in a handful of fresh perlite per gallon to restore soil porosity, then work in one tablespoon of dolomitic lime per quart to correct pH drift.
A top dressing of earthworm castings reintroduces microbial activity, while a light kelp meal application replenishes trace minerals without risking nutrient lockout.
Frequently Asked Questions (FAQs)
What type of soil is best for seed germination?
Think of a germinating seed as a self-contained capsule — it carries its own energy reserves, so it doesn’t need rich soil. What it needs is a light, sterile, soilless mix with a pH of 0–0 and reliable moisture retention.
What is the best soil to sow seeds in?
A sterile, soilless seed starting mix is your best option — light, fine-textured, and low in nutrients to prevent seedling nutrient burn while supporting strong seed germination without compaction or pathogens.
What medium is best for starting seeds?
Oddly enough, the best medium for starting seeds contains almost no nutrients at all. Soilless seed starting mix — light, sterile, and finely textured — protects delicate roots while maintaining the moisture balance seedlings need to germinate reliably.
What potting mix to use for seeds?
Don’t reach for regular potting soil — its dense organic matter triggers seedling nutrient burn in fragile roots. A sterile seed starting mix with fine texture and controlled moisture gives germination the clean, consistent environment it needs.
How long does homemade seed starting mix last?
Homemade seed starting mix usually lasts 6 to 24 months, depending on ingredients. Coir-based blends outlast peat. Discard if you notice clumping, sour odors, or visible mold — those signal degraded structure and compromised sterility.
Can you reuse seed starting mix multiple times?
Yes, you can reuse seed starting mix, though disease risk and compaction make it conditional. Inspect for mold, odor, and depletion signs before committing to another round.
Whats the ideal pH for seed starting mix?
Even a fraction off can doom an entire tray of seedlings. The ideal pH for seed starting sits between 0 and 5 — tight enough that micronutrient availability stays reliable and seedlings absorb what they need without stress.
How do you sterilize homemade seed starting mix?
Oven sterilization works well — bake your mix at 180–200°F for 30 minutes, or microwave damp mix on high for 2–3 minutes per pound. Steam sterilization for 45–60 minutes offers the most thorough pathogen kill.
When should you fertilize seedlings in starting mix?
Wait for true leaves to appear — usually 2–3 weeks after germination — then apply a quarter-strength liquid fertilizer every 7–14 days to support seedling vigor without risking nutrient burn.
Can I start seeds directly in garden beds?
For crops like beans, radishes, and lettuce, direct sowing works well once soil temperatures exceed 60°F. Slow-germinators like tomatoes and peppers, though, need indoor starts to thrive.
Conclusion
The theory that any seed can thrive given enough water and light collapses the moment you examine root behavior under compaction stress—roots don’t push through dense media, they stop.
The best soil mix for seed starting is the variable most gardeners underestimate until germination rates tell the truth. Get the texture, sterility, and drainage right, and seeds do exactly what they’re designed to do. The medium isn’t background noise. It’s the whole conversation.
- https://www.stonesthrowmicrofarm.com/blog/make-your-own-seed-starting-mix
- https://reencle.co/blogs/news/seed-starting-mix-vs-potting-soil
- https://www.greenwaybiotech.com/blogs/gardening-articles/mastering-indoor-gardening-crafting-the-best-diy-seed-starting-mix-with-perlite
- https://brownthumbmama.com/seed-starting-mix
- https://joegardener.com/podcast/challenge-and-solution-for-coconut-coir-as-seed-starting-and-growing-medium