This site is supported by our readers. We may earn a commission, at no cost to you, if you purchase through links.

Most gardeners lose first tray of seedlings to something invisible—a soil temperature two degrees too cold, a watering schedule that looked right but wasn’t, seeds buried a fraction too deep. The plants never had a chance, and nothing on the seed packet warned you.
Seed starting problems and solutions rarely come as dramatic failures. They creep in quietly: a flat that never sprouts, stems that collapse overnight, seedlings that stretch toward the light like they’re desperate for something you forgot to give them.
The fixes are specific, and once you know them, they’re repeatable.
Table Of Contents
- Key Takeaways
- Why Seeds Fail to Germinate
- Pick Seeds and Timing Wisely
- Use The Right Seed-Starting Mix
- Fix Watering and Humidity Problems
- Correct Light and Temperature Issues
- Prevent Damping-Off and Mold
- Stop Fungus Gnats and Pests
- Fix Weak, Leggy, or Wilting Seedlings
- Feed, Thin, and Transplant Correctly
- Top 5 Seed-Starting Essentials
- Frequently Asked Questions (FAQs)
- What happens if you start seeds too early?
- Are your seed-starting mistakes a symptom of overenthusiasm?
- Why are my seedlings not sprouting?
- What if my seeds fail germination?
- Why is seed saving illegal in the United States?
- What do overwatered seedlings look like?
- What are 10 factors that affect seed germination?
- What is wrong with my seedlings?
- What are five factors that may cause poor germination?
- Is it better to germinate seeds in soil or paper towel?
- Conclusion
Key Takeaways
- Most seed failures trace back to just a handful of fixable problems — cold soil, wrong planting depth, uneven moisture, or old seeds — so test one variable at a time and you’ll find the culprit fast.
- Your growing medium is your foundation, so skip garden soil entirely and use a sterile, soilless mix with good drainage to give roots the air and moisture balance they actually need.
- Light, airflow, and temperature aren’t optional extras — seedlings need 14–16 hours of light daily, a gentle fan to build strong stems, and consistent soil warmth between 70–85°F depending on the crop.
- Damping-off and fungus gnats both thrive in the same conditions — wet, still, warm air — so keeping soil surfaces dry between waterings and running a fan cuts off both problems at the source.
Why Seeds Fail to Germinate

Most seeds don’t fail by accident — something specific went wrong. Knowing what to look for puts you back in control fast.
A solid grasp of common seed starting mistakes beginners make helps you spot the problem quickly and fix it before you lose the whole batch.
Here are the most common reasons your seeds aren’t sprouting.
Old Seeds and Low Viability
Old seeds are often the quiet culprit behind empty trays. Age-Related Decline cuts germination rates by 20–50% yearly, and Seed Coat Damage lets pathogens in.
Hybrid Viability Loss hits fast — peppers and onions fade quickest. Use the paper towel test to check seed vigor assessment before sowing.
Vacuum-Seal Extension and Humidity-Controlled Storage buy extra time, but nothing beats seed freshness importance.
Incorrect Planting Depth
Depth matters more than most gardeners realize. Tiny seeds like lettuce need just 1/8 inch — bury them deeper and you cut oxygen availability, stalling germination.
Large seeds need 1.5–2 inches for proper moisture retention. Always follow seed packet instructions for accurate depth measurement.
- Fine seeds: surface-sow or barely cover
- Large seeds: 1.5–2 inches deep
- Soil compaction impact blocks emergence
- Seed size guidelines prevent depth errors
Soil Too Cold for Sprouting
Cold soil is just as problematic as wrong depth.
When temperatures drop below 23°C, enzyme activity slows and seeds stall.
Soil temperature monitoring helps you catch this early.
Use a seedling heat mat to hold a steady seed germination temperature, try pre-warming seeds before sowing, and consider insulated seed trays, mulch buffering, or row cover timing to protect against cold snaps.
Uneven Moisture During Germination
Even after nailing soil temperature, uneven moisture can quietly sabotage germination. Capillary Action Variability means water doesn’t travel uniformly through your mix — Media Density Inconsistency creates dry pockets that leave some seeds starved while others drown. Tray Leveling Errors shift moisture to one side. Water Hardness Effects alter how moist soil holds hydration. Surface Crusting Issues block absorption entirely.
Watch for these warning signs:
- Patchy germination across a single tray
- Crusty, cracked surface despite recent watering
- Soggy corners alongside bone-dry cells
Light-sensitive Seeds Planted Incorrectly
Some seeds don’t just prefer light — they need it. Lettuce, petunia, and impatiens rely on Light Dependent Germination, meaning light deprivation symptoms show up fast: zero sprouting, even in perfect conditions.
Surface Sowing Depth matters here. Bury these seeds past 1–2mm and you’ve blocked the Red Light Cues that trigger sprouting.
Skip the opaque dome too — Shade Avoidance Risk is real.
Time your Light Exposure Timing to 12–16 hours daily.
How to Test Seed Viability
Before you waste a whole season on dead seeds, run a quick seed viability test. The Paper Towel Method is your easiest option — dampen a towel, fold in 10 seeds, wait 7–14 days, then calculate your Germination Percentage.
Try a Float Test for quick Seed Coat Evaluation. For deeper confirmation, a Tetrazolium Assay stains living tissue.
Always check your seed packet for species-specific windows.
Pick Seeds and Timing Wisely

Picking the right seeds at the right time is half the battle before you ever touch the soil. A few smart decisions upfront can save you weeks of frustration later.
Here’s what to get right from the start.
Starting Seeds Before The Last Frost
Timing indoor seed sowing relative to frost dates is the single biggest factor most gardeners get wrong. Start warm-season crops 4–6 weeks before your last frost date, and cool-season crops 6–8 weeks out. Use local frost charts and Temperature Monitoring Tools for Microclimate Adjustments.
- Check your last frost date first
- Use a seedling heat mat for consistent bottom heat
- Apply Cold Frame Utilization and Daylength Extension to harden early starts
- Confirm seed viability before committing to Frost Date Planning
Matching Varieties to Your USDA Zone
Picking the wrong variety for your region is one of the most common seed starting problems gardeners overlook. Always check the hardiness rating on your seed packet before buying.
A seed starting guide matched to your USDA hardiness zone saves you from wasted effort. Zone 6b central Germany needs cold tolerant varieties, while Zone 8 summers demand heat tolerant varieties.
Factor in microclimate suitability and regional soil match when selecting seeds appropriate to USDA hardiness zones.
Choosing Indoor-start Vs Direct-sow Crops
Not every crop belongs under a grow light. Heat-loving plants like tomatoes and peppers have Crop Temperature Needs that cold spring soil simply can’t meet — that’s why indoor seed starting gives them a 4–6‑week head start. Hardy crops, like beans, don’t need it.
- Seasonal Light Availability shapes your indoor seed starting setup
- Equipment Requirements rise with more trays and grow lights
- Space Constraints limit how many seedlings you can start indoors
- Yield Expectation guides whether transplanting effort is worth it
- Direct-sow crops skip the seedling transplant step entirely
Avoiding Seeds With Short Viability
Some seeds age out faster than you’d expect. Onions and parsnips, for example, lose viability within a year.
Store seeds using Cool Storage Conditions — around 34–41°F — with Silica Gel Desiccants inside Vacuum Sealed Packaging to protect Seed Coat Preservation.
Precise Labeling System tracking species and harvest date keeps seed freshness reliable.
Poor seed longevity quietly causes seed starting problems before you even sow.
Use The Right Seed-Starting Mix

What you put your seeds in matters just as much as the seeds themselves. The wrong mix can stall germination before it even starts.
Here’s what you need to know about building the right foundation.
Why Garden Soil Causes Seedling Problems
Garden soil looks fine in your raised bed, but it’s a trap for seedlings.
Compacted soil and heavy clay block roots and choke drainage. Excess salts pull moisture away from tender embryos. Soil crusting stops cotyledons from pushing through.
Herbicide residues linger and stunt growth. Weed seeds carry damping off pathogens and fungus gnats.
Garden soil simply isn’t built for seed starting.
Benefits of Sterile Soilless Mixes
Sterile soilless mixes fix what garden soil can’t. Their Reduced Pathogen Load means damping-off disease rarely gets a foothold.
You get Consistent Moisture Retention without compaction, Faster Root Growth thanks to an airy structure, and Uniform Seedling Size across every cell.
A quality seed starting mix also enables Precise Nutrient Delivery — roots absorb only what you give them.
Peat Moss, Coco Coir, Perlite, and Vermiculite
Each ingredient in your seed starting mix pulls its own weight. Peat moss offers impressive Water Retention Capacity — up to 700% of its weight — but raises pH Balance concerns and carries Sustainability Considerations since it’s harvested from slow-renewing bogs.
Coco coir is the greener swap, nearly pH-neutral and naturally sterile. Perlite supports Aeration Optimization. Vermiculite locks in moisture.
Together, they’re solid Cost Efficiency.
Drainage and Aeration for Healthy Roots
Good drainage starts with your mix’s structure. Aim for 50–70% void space so roots can breathe between waterings. That’s where Pore Space Management and Air Space Optimization matter most.
Coarse Aggregate Use — perlite and vermiculite — keeps channels open after each watering cycle.
For Container Drainage Design, small pots need just a 1–2% drainage layer depth.
Solid Root Zone Aeration prevents rot before it starts.
Cleaning Trays and Tools Before Sowing
Dirty trays carry last season’s pathogens straight to your new seedlings. Wash each seed tray with warm soapy water, then apply bleach sanitization — a 10‑minute soak in a 10% bleach solution.
For tools, alcohol tool wiping with 70% isopropyl keeps blades and dibbers clean. Follow dry storage practices to prevent mold between uses.
Run a equipment inspection checklist before every sowing cycle.
Fix Watering and Humidity Problems

Water is the one thing seedlings can’t live without — but it’s also the fastest way to kill them if you get it wrong. Too much, too little, or trapped humidity can stop germination, cold, or wipe out a whole tray overnight.
Here’s how to get the balance right.
Keeping Mix Moist but Not Soggy
Think of your seed mix like a wrung-out sponge — damp throughout, never dripping. Proper capillary action management keeps moisture rising evenly without pooling.
Check soil moisture with a finger test or moisture sensor placement at 1–2 inches deep.
A surface fluffing routine prevents compaction, supporting mix aeration balance.
Right-sized drainage hole sizing stops soggy centers that trigger overwatering damage and underwatering confusion.
Bottom Watering Seed Trays Correctly
Pour water into the tray and let your seed tray soak for 15 to 20 minutes — no longer. Proper drainage hole size (2–4 mm) and a slight tray slope angle guide excess moisture away from roots.
Keep your water reservoir capacity shallow to avoid oversaturation. Watering from below keeps foliage dry and helps steady soil moisture management without disturbing seeds.
Drain fully before repositioning.
Preventing Dry Pockets in Seed Cells
Dry pockets are silent killers — seeds in affected cells simply never sprout.
Capillary Action Design in your tray matters here.
A fine, uniform mix enables even moisture travel, so dry soil doesn’t hide in corners.
- Run Mix Uniformity Checks before sowing; break up clumps
- Tray Leveling Methods to prevent uneven water pooling
- Rely on watering from below for consistent Sensor Watering results
Using Humidity Domes Without Trapping Disease
A humidity dome is a double-edged tool — it speeds germination beautifully but turns hostile if you ignore Condensation Control. Clear domes with Adjustable Vents Design allow Light Transmission while letting you manage airflow.
Wipe the interior regularly as part of your Dome Hygiene Routine. Use sterile mix and clean trays to support fungal disease prevention.
Microclimate Monitoring keeps conditions balanced, protecting air circulation for seedlings without inviting damping off disease.
When to Vent or Remove Covers
Knowing when to crack that humidity dome is half the battle. Follow these Vent Timing Guidelines to stay ahead of damping off disease and mold growth on soil:
- Start small — vent 5–15 minutes daily once the cotyledons appear
- Temperature-Driven Venting — open covers when temps exceed 26°C
- Day-Night Venting — close covers below 16°C overnight
- Cover Removal Signs — remove completely if leaves curl from heat
Controlling humidity and airflow to avoid mold means dropping relative humidity to roughly 70% during warm hours. Strong air circulation for seedlings prevents the stagnant pockets that invite disease. Watch Humidity Thresholds carefully — below 40% risk desiccation too.
Signs of Overwatering and Underwatering
Once you’ve got your dome venting routine down, pay close attention to what your seedlings are actually telling you. Overwatering and underwatering look different — and both will stall your progress quickly.
| Sign | Overwatering | Underwatering |
|---|---|---|
| Leaves | Leaf yellowing, seedling leaves curling | Brown, crispy edges |
| Stems | Stem drooping despite wet soil | Compact, stunted growth |
| Roots | Root sliminess, fungal odor | Pale, dry, snap easily |
| Soil | Heavy, cool, soil surface crust | Powdery, pulls from tray edges |
Seedling wilting with soggy soil means roots can’t breathe. Dry soil means they’re starving for water. Both break down your soil moisture and air circulation balance quickly. Nail your water management techniques for seed trays, and your seedlings stay steady.
Correct Light and Temperature Issues

Light and temperature are two things seedlings won’t forgive you for getting wrong. Too little of one or too much of the other, and your seedlings will either stretch, stall, or give up entirely.
Here’s what you need to know to get both right.
How Much Light Seedlings Need Daily
Most seedlings need 14 to 16 hours of light each day. That’s your photoperiod guideline for strong, compact growth.
Light duration matters as much as light intensity for seedlings — too few hours, and stems stretch fast.
With LED grow lights, aim for 150 to 200 micromoles per square meter per second.
A timer removes the guesswork entirely.
Positioning Grow Lights to Prevent Legginess
Light duration sets the stage — but mount height settings determine whether your seedlings grow compact or collapse into leggy seedlings overnight.
Start with your LED grow lights 2 to 4 inches above the canopy. Use adjustable hanging systems so you can raise them as plants grow. Light angle alignment matters too — position lights directly overhead for spotlight uniformity.
Insufficient light intensity for seedlings causes stretching. Keep distance to canopy tight.
Using Heat Mats for Steady Germination
A heating mat does what a cold countertop never can — it holds steady warmth right where seeds need it most. Place yours flat, no folds, on a non-wood surface for mat placement safety.
Connect it to a thermostat, calibrate with a soil thermometer, and set it between 70–75°F. Dual-zone control helps if you’re germinating multiple crops.
As sprouts appear, practice gradual heat removal to avoid leggy growth. Check moisture daily — bottom heat speeds evaporation fast.
Best Temperature Range for Common Vegetables
Not every vegetable plays by the same rules.
cool-season crops like spinach, peas, and kale germinate reliably with a soil temperature range of 45–65°F. warm-season crops — tomatoes, peppers, basil — need rootzone temperature closer to 75–85°F.
temperature swing impacts root formation fast. Keep nighttime temperature limits in mind too; consistent warmth drives heat stress thresholds down and gives every seedling a fair start.
Avoiding Cold Windowsills and Heat Stress
Windowsills look like the perfect spot — free light, no setup. But cold temperatures near exterior glass and sudden heat from direct sun create temperature fluctuations that stall germination fast.
For solid temperature control in seed propagation, keep trays off cold glass using a thermal barrier like a folded towel. Pair a heat mat with a temperature sensor placement nearby to catch drops below 23°C before they do damage.
Prevent Damping-Off and Mold

Damping-off can wipe out an entire tray of seedlings overnight, and mold follows close behind when conditions stay wet and still. Both problems share the same root causes, which means fixing one usually helps prevent the other.
Damping-off and mold share the same root causes — fix one, and you’re already preventing the other
Here’s what to watch for and how to stop it before it spreads.
Early Signs of Damping-off Disease
Damping off disease moves fast — sometimes overnight.
The first thing you’ll notice is a water-soaked stem at the soil line, soft and pinched like it’s been strangled. Root blackening follows quickly.
Pull a seedling gently and you may catch a sour soil odor rising from the mix. V-shaped stem cut reveals collapsed tissue inside.
Fuzzy fungal surface growth on the soil confirms it.
Why Stagnant Air Causes Fungal Problems
Still air is your seedlings’ silent enemy.
Without movement, moisture clings to stems, trays, and soil surfaces — creating a stagnant microclimate where fungal pressure builds fast.
Spore suspension in motionless air means those particles settle directly onto your seedlings rather than dispersing.
Ventilation deficiency lets humidity control slip away.
Poor airflow improvement for seedlings invites damping-off, and fungal mold management becomes a losing battle.
One effective preventive measure is to use sterile seed compost.
Reducing Moisture That Feeds Mold
Mold doesn’t appear out of nowhere — it follows moisture. Check tray weep hole design to confirm drainage clears within ten minutes.
Use moisture barrier liners under trays to catch overflow without letting cells sit wet.
Run daily surface drying checks and calibrate your humidity sensor to stay between 50 and 70 percent.
Overwatering invites damping off fast. Tray moisture traps and excess moisture effects compound quickly if you ignore early warning signs.
Sterile Media and Sanitation Best Practices
Your growing environment is only as clean as what you bring into it. Start with sterile potting soil — it’s your first line of defense.
Soak trays in a bleach tray soak solution for ten minutes, rinse well, then dry completely.
Handwashing standards matter too: scrub for 20 seconds before handling anything.
For serious setups, autoclave media treatment or UV sterilization setup eliminates what bleach misses.
When to Discard Infected Seedlings
Once your trays are sanitized, watch seedlings closely. Your infection symptom checklist starts at the soil line — dark, pinched stems and water-soaked bases are your cue to act.
Follow an immediate removal protocol: pull affected seedlings within 24 hours. Use tray isolation guidelines — discard the whole tray if two cells collapse.
Seal old soil, never compost it. Log everything; record keeping practices help you spot patterns fast.
Airflow Tips for Healthier Starts
After discarding infected seedlings, your next defense is airflow. Stagnant air is where damping-off thrives.
- Fan Placement and Cross Breeze: Set a small fan 12–18 inches away. Aim for a cross breeze over the tray, not directly at stems.
- Airflow Timing: Run it in short bursts using a timer to protect moisture levels.
- Humidity Dome Venting: Crack or remove covers daily, and keep up a fan cleaning routine to avoid spreading pathogens.
Stop Fungus Gnats and Pests

Fungus gnats and spider mites don’t show up by accident — they move in when conditions are just right for them. A few targeted changes can shut that door fast.
Here’s what actually works.
Why Fungus Gnats Target Seed Trays
Fungus gnats don’t find your seed trays by accident. Moisture rich substrate mimics their natural breeding zones, while organic matter food in your mix feeds larvae after hatching.
Add a warm microclimate beneath the tray and a dark sheltered interior, and you’ve built their ideal home. Fine particle soil holds just enough moisture and oxygen to make egg-laying irresistible.
Drying The Soil Surface Safely
Once you’ve cut off their welcome mat, keep it unwelcome.
Let the soil surface dry between waterings — Controlled Top Drying discourages egg-laying without stressing roots below. Use Gentle Fan Circulation to speed surface drying naturally. Surface Dryness Indicators like a lightweight feel or pale color tell you it’s ready. Bottom-water to maintain moisture consistency, and overwatering stops being a problem.
Using Yellow Sticky Traps Effectively
Yellow sticky traps are one of the simplest tools for managing fungus gnats infestations and broader pest control in seed trays. Position them 12–18 inches above the soil — your ideal Trap Placement Height.
Check every few days; Adhesive Longevity drops quickly near dust or sunlight. Follow a Rotation Schedule every week or two, and keep traps away from pets for Non-target Safety.
Storing Potting Mix to Prevent Infestations
Open bags are an open invitation. Fungus gnats lay eggs in stored mix just as readily as in your seed trays.
Keep infestations out before they start:
- Move mix into Airtight Containers with tight-fitting lids
- Add Desiccant Packs to absorb moisture and discourage mold
- Practice Shelf Elevation to improve airflow beneath storage bins
- Use Batch Labeling with purchase dates for Regular Inspection rotation
- Keep storage away from fertilizers and organic amendments that attract pests
Spotting Spider Mites on Seedlings
Spider mites are sneaky. By the time you notice leaf stippling signs — those tiny yellow or bronze specks scattered across upper leaf surfaces — colonies are already growing. Check leaf undersides weekly using magnifier inspection at 10x.
Look for fine webbing detection between stems and pale eggs during egg sac identification. Sticky trap monitoring near trays confirms rising activity before damage spreads.
Safe Treatments for Early Pest Outbreaks
Caught early, most pest outbreaks are easy to manage without harsh chemicals.
For fungus gnats, a Hydrogen Peroxide Drench — one part 3% peroxide to four parts water — kills larvae fast and breaks down cleanly.
Insecticidal Soap controls aphids and thrips on contact.
Bt Israelensis and Biological Nematodes disrupt gnat life cycles naturally.
Organic Neem Oil and diatomaceous earth round out your organic pest management toolkit.
Fix Weak, Leggy, or Wilting Seedlings
Weak and leggy seedlings are usually telling you something specific is off — and the fix is simpler than you’d think.
Before give up on a struggling tray, it helps to know exactly what’s causing the problem.
Here’s what to look for and how to get your seedlings back on track.
Why Seedlings Stretch and Fall Over

Leggy seedling growth almost always comes down to two culprits: unbalanced light spectrum and inconsistent root zone temperature. When the light skews red-heavy or sits too far away, stems stretch desperately upward. Meanwhile, warm canopy over cool roots accelerates elongation further.
Poor stem lignin development leaves those stretched stems unable to support themselves. Fix the light and temperature requirements for seedlings first.
Low Light and Crowded Tray Problems

Crowded trays are a double problem. Poor light distribution means outer seedlings steal from inner ones, while tray density traps heat accumulation near stems — accelerating leggy seedling growth without you noticing. Insufficient light drops photosynthesis and weakens stem strength fast.
Watch for these warning signs:
- Seedlings leaning or reaching unevenly
- Pale leaves from leaf bleaching under shared light
- Overcrowding seedlings showing thin, floppy stems
Thinning seedlings to one per cell fixes light requirements for seedling growth immediately.
Wilting From Root Stress or Dry Mix

Wilting isn’t always about too little water — sometimes the mix itself is the problem.
Peat-based blends go hydrophobic when they dry out, causing root zone shrinkage that pulls media away from cell edges.
Water runs straight past the roots instead of soaking in.
Fix it with full-cell soaking from below.
That rewets dry pockets and restores proper root pressure management fast.
Weak Stems Caused by Poor Airflow

Still air is quietly sabotaging your stems. Without airflow, seedlings skip the thigmomorphogenesis response — the mechanical reinforcement training that builds stem stiffness enhancement through gentle movement.
Run an oscillating fan on low, so stems sway slightly. This fan speed calibration reduces the leaf boundary layer, improves gas exchange, and turns soft, weak leggy seedlings into sturdy transplants ready for real conditions.
When to Repot Struggling Seedlings

Once your stems start moving in the breeze, watch the roots next. Root Bound Signs show up fast — roots circling the pot, poking out drainage holes, or growth that stalls for a week despite steady light and water. That’s your transplant timing signal.
Move up to a pot two to three times larger, keep Post-Repot Moisture light, and give Post-Repot Light that’s bright but indirect.
How to Strengthen Seedlings Before Transplant

Once the roots look healthy, it’s time to toughen the whole plant. Think of it as boot camp before the real world.
- Gentle Airflow builds Stem Thickening — run a fan 30 minutes daily
- Controlled Sun Exposure starts with morning light, then increases gradually during hardening off
- Root Ball Density improves with consistent, moderate watering
- Nutrient Pre‑feed helps root development enhancement before transplant
Feed, Thin, and Transplant Correctly

Getting seedlings to this stage is a win, but the next few steps can make or break your results.
How you feed, thin, and move your plants matters more than most growers expect.
Here’s what to get right before your seedlings ever touch garden soil.
When Seedlings Need Their First Fertilizer
Your seeds have their own built-in lunch box — but it doesn’t last forever. True leaf emergence is your signal to start feeding.
The cotyledons handle early growth, but once you notice a cotyledon color shift toward pale green, that’s seed reserve depletion talking.
Start dilute fertilizer timing at a 25–50 ppm nitrogen range to support seedling nutrition without risking fertilizer burn.
Avoiding Fertilizer Burn on Young Roots
Young roots burn fast — even well-meaning feeding can set seedlings back days.
Follow three rules for safe nutrient timing:
- Dilute to half-strength; fertilizer burn starts above 100 ppm nitrogen.
- Check water conductivity — keep it below 0.7 dS/m.
- Maintain root zone pH between 5.5–6.5 for clean uptake.
Flush trays with plain water every two sessions to prevent salt buildup.
Thinning Seedlings Without Disturbing Neighbors
Thin seedlings once they show true leaves — that’s your signal that the timing is right.
Snip at soil level using precision cutting tools; clean blade protocol keeps disease from spreading cell to cell. Check your soil moisture level first — lightly moist mix protects nearby roots. Remove cut tops immediately. Good airflow after thinning dries the area fast and prevents overcrowding from creeping back.
Potting Up Before Roots Become Crowded
Don’t wait until your seedlings look stressed. Root crowding indicators — like roots circling the bottom or poking through drainage holes — mean you’ve already waited too long.
Pre-emptive potting keeps growth steady. Use a gentle transplant method: water first, then ease the root ball out intact.
Scale up just one size. Root ball preservation and good root-zone contact speed recovery fast.
Hardening Off to Prevent Transplant Shock
Moving seedlings outside overnight without preparation invites shock. Hardening off seedlings before outdoor transplant means gradual acclimation over 7–14 days.
Start with 1–2 hours of sheltered light exposure, then build toward full wind conditioning and sun. Temperature management matters too — keep nights above 50°F.
Moisture adjustment helps roots adapt. Respect the process, and transplant shock stays manageable.
What to Do With Extra Seedlings
Extra seedlings don’t have to go to waste.
Pot up the strongest ones to grow bigger before planting outside. Thin them out in crowded cells by snipping extras at the base.
Transplant them into beds or share them through a community seed swap or seedling donation.
Disease-free extras can go into composting healthy seedlings.
excess seedlings for microgreens is another smart move — harvest them young and eat them fresh.
Top 5 Seed-Starting Essentials
You’ve worked through the hard parts—now it’s time to make sure you have the right tools backing you up. A few key products can take the guesswork out of moisture, light, nutrition, and airflow all at once.
Here are five essentials worth keeping in your seed-starting setup.
1. Espoma Organic Seed Starter Potting Soil
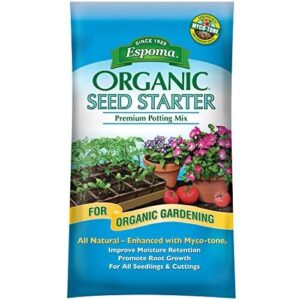
If you want seeds to get off to a strong start, the medium you choose matters more than most people realize.
Espoma Organic Seed Starter gives you a fine, airy blend of sphagnum peat moss and perlite — light enough for delicate roots but structured enough to hold moisture evenly. The added yucca extract helps water spread through the mix without dry pockets.
Mycorrhizal inoculants support early root development naturally. No synthetic fertilizers, no guesswork.
One 16-quart bag manages a full tray setup cleanly.
| Best For | Home gardeners and hobbyists who want a clean, organic way to start seeds or root cuttings without dealing with synthetic additives. |
|---|---|
| Brand | Espoma |
| Primary Use | Seed starting mix |
| Indoor Use | Yes |
| Outdoor Use | Yes |
| Approx. Price | $20.75 |
| Beginner Friendly | Yes |
| Additional Features |
|
- Fine, airy texture makes it great for delicate seedlings and works well with standard tray setups
- Mycorrhizal inoculants give roots a natural boost right from the start
- No synthetic fertilizers or fillers — straightforward and organic
- Can dry out fast if you’re not keeping a close eye on watering
- May need a light sift when working with very fine seeds due to occasional small clumps or sticks
- First watering can be slow to absorb — the mix tends to float a bit before it fully wets through
2. Root Naturally Peat Pellets
Peat pellets take a different approach. Root Naturally’s 50-count bag gives you compressed discs that expand to nearly 1.75 inches once soaked — no mixing, no measuring.
Drop in a seed, keep them moist, and roots grow right through the netting when it’s time to transplant. That intact root ball means less shock moving to a bigger container or garden bed.
They store flat until you need them, which makes off-season prep genuinely simple.
| Best For | Gardeners and hobbyists who want a simple, mess-free way to start seeds at home without dealing with soil mixing or specialty trays. |
|---|---|
| Brand | Root Naturally |
| Primary Use | Seed starting pellets |
| Indoor Use | Yes |
| Outdoor Use | Yes |
| Approx. Price | Included in pack |
| Beginner Friendly | Yes |
| Additional Features |
|
- Roots grow straight through the netting, so transplanting is easy and doesn’t stress the plant
- Pellets store flat and dry until you need them — great for keeping extras on hand
- No measuring or mixing required; just soak and plant
- Need to soak for over an hour before use, so you can’t just grab and go
- Expanded pellets can be too wide for standard starter tray holes
- Peat harvesting has known environmental downsides if that’s a concern for you
3. Lasko Adjustable Pedestal Fan

Good airflow matters just as much as good soil. Lasko 1646 Pedestal Fan gives you that steady, gentle circulation seedlings need to build strong stems and fend off damping-off.
It adjusts from 32 to 47 inches, so you can aim airflow right at your trays without blasting them. Three speed settings let you dial it down to a soft breeze.
At $39.98, it pulls double duty — healthier seedlings now, room cooling later.
| Best For | Gardeners and hobbyists who want affordable, adjustable airflow for seedlings, small grow spaces, or everyday room cooling. |
|---|---|
| Brand | Lasko |
| Primary Use | Air circulation fan |
| Indoor Use | Yes |
| Outdoor Use | No |
| Approx. Price | $39.98 |
| Beginner Friendly | Yes |
| Additional Features |
|
- Adjusts from 32 to 47 inches, so you can aim the breeze right where your plants (or you) need it
- Comes with a remote and built-in timer — handy for late-night use without getting up
- At $39.98, it’s an easy buy that pulls double duty beyond the grow season
- Plastic build feels flimsy; a light bump can tip it over
- Sleeve bearings wear out faster than you’d hope — some users see issues within a year or two
- High speed gets noticeably loud, and the remote can’t control oscillation
4. Indoor Outdoor Moisture Sensor Meter
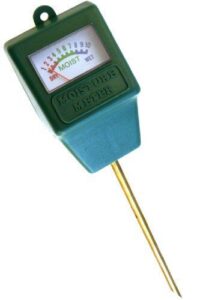
Knowing when to water is half the battle. The Indoor Outdoor Moisture Sensor Meter takes the guesswork out with a simple needle dial — dry, moist, or wet. No batteries needed. Just push the probe into your seed tray and read it instantly.
At around $12.73, it’s one of the cheapest tools that earns its keep. Just insert gently — the thin probe snaps in compacted soil. Clean the tip between uses to keep readings accurate.
| Best For | Beginner gardeners and houseplant owners who want a quick, no-fuss way to know when to water without spending much money. |
|---|---|
| Brand | New Resources Group |
| Primary Use | Soil moisture monitoring |
| Indoor Use | Yes |
| Outdoor Use | Yes |
| Approx. Price | $12.73 |
| Beginner Friendly | Yes |
| Additional Features |
|
- No batteries needed — it just works the moment you stick it in the soil
- Color-coded dial makes readings instant and easy to understand at a glance
- At around $12.73, it’s an easy buy that can save plants (and water) all season
- The thin probe is fragile and can snap if you push too hard into dense or compacted soil
- The tip corrodes over time, so you’ll need to scrub it clean to keep readings reliable
- It only gives you a rough range — dry, moist, or wet — not any real precision
5. Espoma Organic Start Fertilizer

Once seedlings push out their first true leaves, they’re ready for a nutrient boost.
Espoma Organic Start Fertilizer delivers a balanced 4-3-3 formula — nitrogen, phosphate, and potash — plus calcium, magnesium, and sulfur.
What sets it apart is the microbial package: 9 million CFU per gram of bacillus and seven species of mycorrhizal fungi.
That combination builds stronger root systems fast.
It’s organic, safe around edibles, and comes in a 24 oz concentrate bottle with a measured dosing cap to prevent overfeeding.
| Best For | Home gardeners who want a safe, organic option for starting seedlings, herbs, or edibles without worrying about synthetic chemicals or overfeeding. |
|---|---|
| Brand | Espoma |
| Primary Use | Liquid plant fertilizer |
| Indoor Use | Yes |
| Outdoor Use | Yes |
| Approx. Price | Varies |
| Beginner Friendly | Yes |
| Additional Features |
|
- The measured dosing cap makes it easy to get the dilution right every time, no guesswork needed
- Organic formula means you can use it on herbs, fruits, and veggies without stressing about chemical residues
- Works across a wide range of plants — seedlings, potted trees, shrubs, herbs — so one bottle covers a lot of ground
- The 24 oz bottle runs out fast if you have a larger garden, so you may end up buying multiple
- It costs more upfront than most synthetic fertilizers, which might sting if you’re on a tight budget
- You have to get the dilution right — too strong and you risk nutrient burn, too weak and you’re not getting much benefit
Frequently Asked Questions (FAQs)
What happens if you start seeds too early?
Starting too early sounds smart, but it backfires fast.
Seedlings outgrow their trays before outdoor soil warms, roots circle and tangle, and weak winter light leaves stems pale and stretched before transplant day arrives.
Are your seed-starting mistakes a symptom of overenthusiasm?
Probably. Overenthusiasm is the quiet culprit behind most seed-starting slip-ups — too many seeds, too soon, with too little patience. Slow down, and your germination rate will thank you.
Why are my seedlings not sprouting?
Most seeds fail to sprout because of old seed stock, wrong planting depth, cold soil, or uneven moisture.
Fix one variable at a time, and you’ll usually find the culprit fast.
What if my seeds fail germination?
Failed germination usually points to one of five fixable problems.
Check seed age, planting depth, soil temperature, moisture consistency, and light needs. Fixing even one of these often gets things moving.
Why is seed saving illegal in the United States?
Seed saving isn’t actually illegal in the U.S. It’s only restricted when seeds are patented or covered by a contract.
Open-pollinated and unprotected varieties are yours to save, store, and replant freely.
What do overwatered seedlings look like?
Overwatered seedlings look pale, soft, and waterlogged. Stems turn rubbery and may collapse at the soil line. Leaves appear limp and translucent.
You might also notice a foul smell rising from the mix.
What are 10 factors that affect seed germination?
Ten factors affect germination: soil temperature, moisture levels, oxygen availability, light exposure, seed age, planting depth, soil composition, humidity, air circulation, and seed viability.
Each one can make or break your seedlings before they ever break the surface.
What is wrong with my seedlings?
Your seedlings are trying to tell you something. Most problems trace back to light, water, temperature, or soil. Spot the right clue and the fix is usually simple and fast.
What are five factors that may cause poor germination?
Most seeds fail for five quiet reasons: old stock, wrong depth, cold soil, uneven moisture, and incorrect light exposure.
Fix any one of these, and your germination rate can improve dramatically overnight.
Is it better to germinate seeds in soil or paper towel?
Both methods work. Soil gives roots a natural start with less handling.
Paper towels let you spot sprouting faster. Choose based on your seed type and how closely you want to monitor progress.
Conclusion
Imagine your seedlings thriving, strong and resilient. You’ve tackled the common pitfalls and equipped yourself with the know-how to overcome seed starting problems and solutions.
With these fixes, your garden will flourish. You’ve gained the confidence to nurture life from the very beginning.
Your green thumb will thank you as you watch your hard work bloom into a vibrant, healthy garden.
Now, get growing and enjoy the fruits of your labor.
- https://bit.ly/4iypi42
- https://learn.gardeningknowhow.com/courses/seed-starting-with-geoffrey-johnson
- https://me-tra.link/c/7403d73b982eb518b653c6fdeaf4dd65/ba91bbae-1c66-4310-b72e-1b0f49b1522f
- https://shegrowsveg.com/hub/how-to-prevent-damping-off-and-protect-your-seedlings/
- https://pubmed.ncbi.nlm.nih.gov/9641573/