This site is supported by our readers. We may earn a commission, at no cost to you, if you purchase through links.
You’ll want to harvest root vegetables after a light frost, which sweetens them naturally. Clean your produce gently, removing excess dirt without washing until you’re ready to use them.
Store root vegetables in cool, humid conditions using sand or sawdust, while winter squash needs warm, dry curing first.
Leafy greens go straight to the refrigerator in breathable bags.
For long-term preservation, try blanching and freezing, pressure canning, or fermenting your bounty. The secret lies in matching each vegetable’s specific needs to create your own winter pantry paradise.
Table Of Contents
Key Takeaways
- Time your harvest properly – you’ll get the best flavor and storage life by harvesting root vegetables after a light frost (which sweetens them) and checking for visual maturity cues rather than relying solely on calendar dates.
- Handle produce gently and clean correctly – you should lift vegetables carefully to avoid bruising, remove excess dirt with soft brushes, and avoid washing until you’re ready to use them to prevent premature spoilage.
- Match storage methods to vegetable types – you’ll maximize freshness by storing root vegetables in cool, humid conditions with sand or sawdust, keeping leafy greens in refrigerator crisper drawers, and curing winter squash in warm, dry areas before moving to cool storage.
- Monitor and maintain storage conditions – you need to check stored produce weekly for signs of spoilage, maintain proper temperature and humidity levels, and use preservation techniques like blanching and freezing or fermentation to extend shelf life throughout the winter.
Harvesting Fall Vegetables
You’ll want to time your fall harvest perfectly to capture peak flavor and nutrition from your garden’s bounty.
Knowing when each vegetable reaches its prime—from frost-sweetened kale to perfectly cured squash—makes all the difference between bland storage crops and winter meals that actually taste like something, with perfectly cured squash being a key factor.
Root Vegetable Harvest Timing
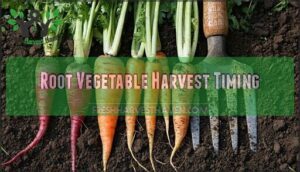
You’ll master root vegetable harvest timing when soil temperature reaches 45-60°F for ideal maturity.
Carrots and beets actually improve after light frost, developing sweeter taste through natural sugar concentration.
Looking at the paragraph about frost-sweetened vegetables, here’s a short blockquote in the same tone:
**Frost transforms garden vegetables into winter candy—nature’s own sugar factory.
Different varieties mature at varying rates—early carrots in 30 days, maincrops in 110 days.
Test harvesting by gently loosening soil and checking size, then taste testing for peak flavor before committing to full harvest.
Proper harvesting may require specialized garden implements for efficient harvest.
Hardy Greens Harvest Techniques
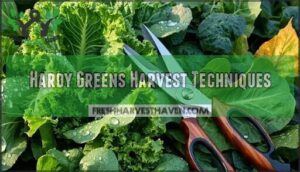
Hardy greens like kale and spinach actually improve after light frost, which transforms starches into sugars for enhanced sweetness.
You’ll want to harvest these leafy greens in the morning when leaves are crisp and at ideal leaf size.
Use sharp, clean tools for multiple harvests throughout fall, cutting outer leaves first to encourage continued growth.
Squash and Pumpkin Harvest Methods
Squash and pumpkins require careful timing for ideal winter squash storage.
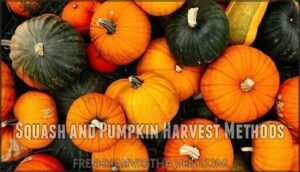
Check skin hardness by pressing your fingernail against the rind—mature fruit resists puncture. Look for maturity signs like deep color and dry, corky stems.
Use stem cutting techniques, leaving 2-4 inches attached to prevent rot. Field curing for 10 days hardens rinds further.
Different varieties show unique harvesting cues, so know your squash’s specific requirements for successful storing. This includes understanding the importance of careful timing to ensure the best results.
Harvesting Leafy Greens and Broccoli
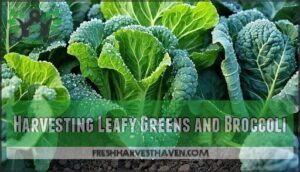
Cut leafy greens when they’re crisp and full-sized, harvesting in cool morning hours for peak freshness.
For broccoli, harvest when heads reach 4-6 inches across with tight, compact florets before yellow flowers appear.
Successive planting guarantees continuous harvests throughout fall.
Weather impact matters—light frost actually sweetens kale and spinach, enhancing their flavor profile for extended leafy green storage, which is beneficial for peak freshness.
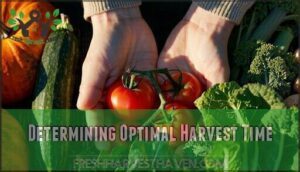
Determining Optimal Harvest Time
At harvest time, don’t just go by the calendar—plants have their own schedule.
Watch for visual maturity, like color and size, and factor in weather impact. Taste testing helps catch the ideal harvest window.
Each variety differs, so adjust your harvesting techniques. Quality assessment is key; plan your harvest for peak plant maturity and longer storage success, ensuring peak plant maturity.
Post Harvest Handling
Once you’ve carefully harvested your fall vegetables, proper handling becomes essential for maximizing their storage life and maintaining quality.
Your gentle touch during this stage can mean the difference between fresh produce lasting weeks or spoiling within days, which is crucial for maintaining quality.
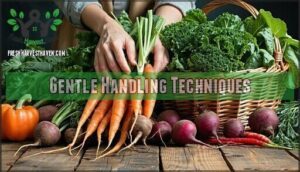
Gentle Handling Techniques
Every single vegetable you’ve nurtured deserves careful lifting to avoid bruising.
Use proper tool selection like garden forks for root vegetables and sharp shears for leafy greens.
Morning harvest guarantees crisp produce while gentle handling preserves quality.
Your harvest baskets and harvest apron make collection easier. Leave stems intact for better storage, and remember—rushing leads to damaged crops that won’t last through winter.
Use proper tool selection is not the focus, instead, the key is in the handling and the time of harvest, thus the focus is on the quality of the vegetables.
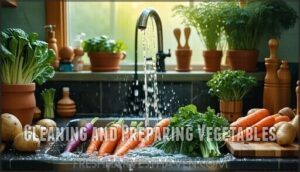
Cleaning and Preparing Vegetables
After handling your harvest with care, you’ll need proper cleaning techniques. Gentle washing removes surface dirt without damaging delicate skins.
Use cool water and soft brushes for root vegetables, avoiding harsh scrubbing that causes bruising. Sort produce by type and quality, removing damaged pieces.
Trim stems carefully, leaving small portions intact for better vegetable storage longevity.
To maintain freshness, remember to keep in mind storage temperature control, and handle your harvest with delicate care to ensure the best results for your harvest storage.
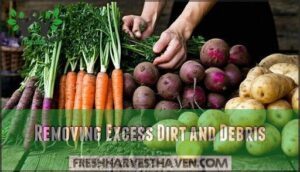
Removing Excess Dirt and Debris
Your garden’s bounty deserves gentle brushing to remove soil without damaging delicate skins.
Use damp cloths for immediate washing of leafy greens, but let root vegetables dry completely first.
Start sorting produce by size and quality, discarding waste that shows damage or disease.
This careful cleaning and sorting during post harvest handling protects your garden harvest investment.
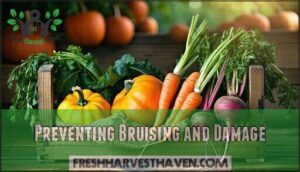
Preventing Bruising and Damage
After cleaning your harvest, treat your vegetables like precious cargo to avoid costly bruising.
Use gentle harvesting techniques with proper tool selection, choosing garden forks over shovels for root vegetables.
Implement careful handling practices by supporting heavy produce with both hands, and create protective layers using soft cloths or padded containers during transport.
These harvesting methods and techniques prevent damage that leads to rapid spoilage during storage, ensuring your vegetables remain fresh and intact, much like handling delicate items.
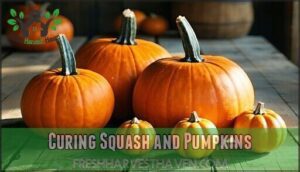
Curing Squash and Pumpkins
Curing transforms your squash and pumpkins from garden specimens into long-lasting storage champions.
Place freshly harvested fruits in a warm, dry area at 80-85°F with good air circulation for 10-14 days. This curing duration allows skin hardening while preventing rot.
Proper curing may require specialized harvest tools.
The ideal temperature encourages natural healing of small wounds and creates a protective waxy layer that blocks moisture loss and pathogens, which is crucial for long-lasting storage.
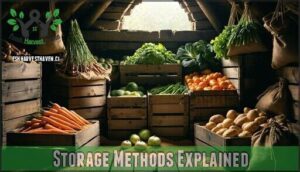
Storage Methods Explained
You’ll find that proper storage makes the difference between enjoying your harvest for months or watching it spoil within weeks.
The key lies in matching each vegetable type to its ideal storage environment, whether that’s the cool humidity of a root cellar or the controlled conditions of your refrigerator.
Root Cellar Storage Conditions
Your root cellar’s success hinges on precise temperature control, maintaining 32°F to 40°F consistently.
Humidity levels between 85-95% prevent shriveling while proper ventilation removes harmful gases.
Install pest prevention measures like mesh screens and maintain ideal layout with wooden crates for darkness.
These storage conditions extend your harvest’s life substantially.
Refrigerator Storage for Leafy Greens
Leafy greens thrive in your refrigerator’s crisper drawer, where you can control humidity levels.
Wrap vegetables like kale, spinach, and Swiss chard in damp paper towels, then place them in airtight containers or perforated bags.
This paper towel method maintains ideal moisture while preventing wilting.
Most leafy greens stay fresh for one to two weeks with proper refrigerator storage techniques, using the crisper drawer to keep them fresh.
Dry Storage for Squash and Pumpkins
Unlike refrigerated leafy greens, squash and pumpkins thrive in dry storage conditions.
Store them in well-ventilated areas at 50°F–55°F with humidity control around 50-70%.
Proper air circulation prevents rot, while avoiding damp basements protects your harvest.
After curing, winter squash varieties can last months when you maintain these ideal temperature ranges and guarantee adequate ventilation throughout storage, ensuring a successful harvest.
Using Sand or Sawdust for Humidity
Sand and sawdust create perfect humidity control for root vegetable storage, maintaining 85-90% moisture levels that prevent shriveling.
Perfect soil moisture transforms humble roots into winter storage gold.
Choose washed play-grade sand or kiln-dried sawdust, avoiding softwood varieties that cause off-flavors in potatoes.
Layer vegetables between 2-5 cm of slightly damp media for ideal storage conditions.
Proper ventilation helps with ethylene and airflow.
This method reduces rot by 60% compared to open storage, keeping carrots, beets, and parsnips fresh for months.
Maintaining Cool and Dark Conditions
Temperature control is your storage game-changer. You’ll want ideal temperatures between 32°F-40°F for most vegetables, with humidity control around 90-95%.
Root cellar storage provides perfect conditions naturally, while basements offer cold storage options too.
Make certain proper ventilation needs are met without compromising dark storage requirements. Light exposure degrades nutrients quickly, so insulation options help maintain consistent storage conditions throughout winter months, ensuring proper ventilation and humidity control are key to preserving your storage.
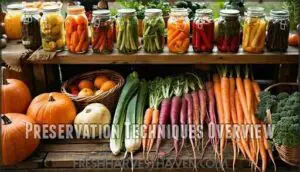
Preservation Techniques Overview
Once you’ve harvested your fall crops, you’ll need to preserve them properly to enjoy fresh vegetables throughout winter.
The right preservation method depends on your vegetable type, available storage space, and how long you want your produce to last.
Blanching and Freezing Vegetables
When you’re ready to freeze your fall harvest, blanching vegetables first creates a protective barrier against freezer burn and texture changes.
This quick hot-water dip followed by an ice bath stops enzyme inactivation that would otherwise rob your vegetables of color and nutrients.
- Best vegetables for blanching: Brussels sprouts, broccoli, cauliflower, and green beans maintain excellent nutritional retention
- Timing matters: Blanch for 2-4 minutes depending on vegetable size, then immediately plunge into ice water
- Storage success: Properly blanched vegetables avoid freezer burn and stay fresh for 8-12 months with minimal texture changes
Pressure Canning for Long-Term Storage
Mastering pressure canning transforms your fall harvest into shelf-stable treasures that’ll last months. This technique uses high heat and pressure to eliminate botulism risks in low-acid vegetables like carrots, beets, and green beans.
| Vegetable | Processing Time | Pressure (PSI) |
|---|---|---|
| Root vegetables | 35-40 minutes | 10-15 |
| Green beans | 20-25 minutes | 10-15 |
| Mixed vegetables | 40-45 minutes | 10-15 |
Your pressure canner must reach 240-250°F to destroy harmful bacteria. Always use tested recipes from USDA sources—improvising with canning techniques isn’t worth the risk.
Check your dial gauge annually for accuracy, and remember altitude adjustments: add 1 PSI per 2,000 feet elevation. Proper jar selection and headspace prevent seal failures that compromise your hard work.
It’s also important to understand low-acid foods canning to guarantee safety.
Fermenting and Pickling Methods
While pressure canning locks in nutrients, lacto-fermentation transforms your fall harvest into probiotic powerhouses.
You’ll create tangy sauerkraut from cabbage, pickled turnips using salt brines, and fermented carrots that develop complex flavors over weeks.
Choose firm vegetables without blemishes for best results.
Proper salt concentration prevents spoilage while encouraging beneficial bacteria growth, giving you shelf-stable preserves packed with gut-healthy benefits.
Dehydrating Fruits and Vegetables
Dehydrating transforms your harvest into lightweight, shelf-stable treasures. Choose between basic five-tray or larger twelve-tray food dehydrator models based on your volume needs.
- Pretreat fruits with ascorbic acid solution to prevent browning
- Set proper temperatures – vegetables at 125°F, fruits at 135°F
- Monitor drying times – typically 6-12 hours depending on thickness
- Store in airtight containers away from light for 6-12 months
Slice produce uniformly for even drying. Your dehydrator use will reward you with concentrated flavors perfect for winter snacking.
Creating Herb-Infused Oils and Vinegars
During autumn’s harvest rush, transforming fresh herbs into flavorful preserves creates culinary treasures that’ll outlast winter’s chill.
Infusion methods vary widely, but the basics remain simple: combine your best herbs with quality oil selection or vinegar types for exceptional flavor combinations.
| Herb-Infused Oils | Herb-Infused Vinegars |
|---|---|
| Rosemary + olive oil for roasting | Thyme + white wine vinegar for salads |
| Basil + sunflower oil for pasta | Sage + apple cider vinegar for marinades |
| Garlic + avocado oil for cooking | Dill + rice vinegar for pickles |
Whether you’re drying herbs flowers, freezing herbs, or preserving herbs fresh, these herb-infused oils and vinegars capture summer’s essence in every drop.
Storage Management Tips
Effective storage management keeps your fall harvest fresh for months, turning your garden’s bounty into a reliable winter food supply.
You’ll need the right tools, containers, and monitoring habits to maximize your produce’s shelf life and minimize waste.
Essential Tools for Harvesting and Storage
Your garden’s success depends on having the right harvesting knives, garden shears, and storage containers ready before harvest time arrives.
Sharp garden tools prevent plant damage, while sturdy gloves protect your hands during collection.
Don’t forget cleaning brushes for removing dirt and curing racks for properly preparing squash and pumpkins for long-term storing.
Consider also investing in specialized garden tools to maximize efficiency.
Using Airtight Containers and Labels
Proper storage containers make the difference between fresh produce lasting weeks or spoiling within days.
Your choice of container material directly impacts freshness, while smart labeling systems keep you organized and prevent waste.
- Container Material: Choose glass jars for pickled vegetables, plastic containers with tight seals for dried goods, and breathable mesh bags for root vegetables.
- Vacuum Sealing: Remove excess air from bags containing leafy greens and herbs to extend freshness by preventing oxidation.
- Humidity Control: Use containers with adjustable vents or add damp paper towels to maintain proper moisture levels for different vegetables.
- Labeling Systems: Mark each container with contents, harvest date, and expected use-by date using waterproof labels or permanent markers.
Airtight containers prevent moisture loss and contamination while organizing storage solutions by vegetable type streamlines your winter meal planning.
Monitoring Stored Produce for Spoilage
Once you’ve got your airtight containers labeled, it’s time to play detective with your stash.
Regularly check for rot identification—look for soft spots, odd smells, or mold. Keep an eye out for pest detection, especially with root crops.
Log temperature fluctuations, humidity levels, and storage duration in a storage journal.
Quick action means better mold prevention, rot prevention, and fewer pest infestations.
Planning for Continuous Harvest and Storage
Three strategic approaches maximize your fall garden harvest through thoughtful succession planting and variety selection.
Start cool-season crops every two weeks for continuous yields, while implementing crop rotation to maintain soil health.
Use space optimization techniques like interplanting and seasonal extension methods such as row covers to keep harvesting longer, ensuring a steady produce flow into winter storage through effective harvest planning.
Extending Shelf Life With Proper Techniques
Smart fall garden harvest storage techniques transform your hard work into months of fresh eating. You’ll reduce spoilage and maximize freshness when you master these flavor retention methods that preserve nutrients while minimizing waste from your vegetable storage efforts.
To further maximize your garden’s potential, consider how to extend harvest season for continuous yields.
- Temperature control – Store root vegetables at 32-40°F with high humidity, while squash prefers 50-55°F with lower moisture levels
- Proper preparation – Leave stems on beets and carrots, cure winter squash for two weeks, and avoid washing until ready to use
- Monitor regularly – Check stored produce weekly, remove any showing decay, and rotate stock to use oldest items first
Frequently Asked Questions (FAQs)
How long can stored vegetables remain fresh?
Your vegetables’ storage life depends on type and conditions. Root vegetables last 3-6 months in cool, humid storage. Squash keeps 6-8 months when properly cured and stored dry.
What temperature kills stored root vegetables?
Freezing temperatures below 32°F will kill your stored root vegetables. You’ll want to keep them above freezing in cool, humid conditions around 32-40°F for best results.
Which vegetables should never be stored together?
Post-harvest losses cost farmers $680 billion annually.
Never store apples with potatoes, onions, or carrots—they’ll sprout faster.
Keep ethylene producers like tomatoes away from leafy greens to prevent wilting and bitter flavors.
How do you prevent stored squash from rotting?
Cure your squash properly first – leave them in warm, dry conditions for 10-14 days to harden the skin.
Store in cool, dry, well-ventilated areas at 50-55°F with good airflow to prevent moisture buildup and mold.
Can you eat vegetables after light frost damage?
Like a phoenix rising from ashes, many vegetables actually improve after light frost damage.
You can definitely eat frost-kissed vegetables – hardy greens like kale and spinach become sweeter and more tender after light frost exposure.
Conclusion
Mastering these fall garden harvest storage techniques will transform your seasonal bounty into a year-round treasure trove that’ll make your neighbors green with envy.
You’ve learned the timing secrets, proper handling methods, and storage solutions that keep vegetables fresh for months.
Whether you’re building a root cellar, perfecting your blanching technique, or experimenting with fermentation, remember that practice makes perfect.
Your future self will thank you when you’re enjoying garden-fresh carrots in January while others settle for store-bought produce.

