This site is supported by our readers. We may earn a commission, at no cost to you, if you purchase through links.
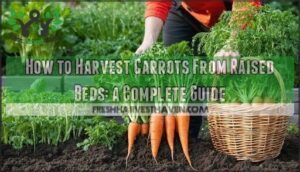
Pull too early and you’ll miss peak sweetness; wait too long and you risk woody, split roots. Even perfect timing won’t help if you yank carelessly and snap half your carrots at the crown, leaving the root buried in compacted soil.
The good news? Harvesting carrots from raised beds is far easier than from traditional garden plots, and with the right approach, you’ll extract every root intact and ready for storage.
Table Of Contents
- Key Takeaways
- Preparing Raised Beds for Carrots
- Selecting and Planting Carrot Seeds
- Caring for Carrots Until Harvest
- Identifying The Right Harvest Time
- Harvesting Carrots From Raised Beds
- Storing and Preserving Harvested Carrots
- Frequently Asked Questions (FAQs)
- What happens if I leave carrots in the ground too long?
- What precautions should be taken when harvesting carrots?
- Can carrots be harvested in winter months?
- What tools work best for carrot harvesting?
- How do you know carrots are overripe?
- Can carrot greens be eaten or composted?
- Should carrots be washed immediately after harvesting?
- Can carrots survive frost in raised beds?
- How do you prevent carrot fly infestations?
- What causes forked or twisted carrot roots?
- Conclusion
Key Takeaways
- Raised bed carrots require at least 12 inches of loose, sandy loam with pH 6.0-7.0 and consistent moisture—soil preparation and proper drainage directly determine whether you’ll harvest straight, sweet roots or stunted, forked disappointments.
- Harvest timing depends on visual cues (foliage tipping over, orange crowns visible at soil surface) and days to maturity (65-80 days for standard varieties), but you must water the bed thoroughly the night before pulling to soften soil and prevent root breakage.
- Gentle extraction technique matters more than timing—use a garden fork to loosen soil 4-6 inches from the crown, grasp greens near the soil line, and apply steady upward pressure rather than yanking or twisting, which snaps roots at the crown.
- Post-harvest storage extends your yield for months when done correctly—store unwashed carrots in damp paper towels or submerged in water jars for weeks in the refrigerator, or blanch for 2-5 minutes before freezing at -18°C to preserve quality for up to a year.
Preparing Raised Beds for Carrots
Raised beds give you a head start on growing carrots, but the right setup makes all the difference.
Your soil depth, drainage, and sun exposure will determine whether you pull up perfect roots or disappointing stubs.
Let’s walk through the three essentials that set your carrot bed up for success.
Soil Depth and Composition
For carrots to develop their classic long, straight shape, your raised bed needs at least 12 inches of loose, sandy loam that’s free of rocks and clumps.
Amend heavy soils with compost to improve soil structure and organic matter content. Loamy soil with balanced nutrient levels and proper moisture content gives you the best results.
Mix in aged compost before planting to boost fertility without creating excess nitrogen that encourages leafy growth over root development.
Drainage and PH Requirements
Once you’ve built up that perfect loose soil, you need to make sure water moves through it freely—carrots sitting in soggy ground will rot or split before they ever reach your kitchen. Good drainage protects your crop and maintains proper soil aeration. Target these key parameters:
- Soil pH between 6.0 and 7.0 for ideal nutrient uptake
- Drainage systems that prevent water pooling above the water table
- Soil moisture that stays consistent without becoming waterlogged
- Loose soil structure that allows excess water to escape quickly
Test pH levels before planting and adjust with lime or sulfur as needed.
Sunlight and Bed Placement
Your carrots won’t thrive in the shade, no matter how perfect your drainage—these sun-loving roots need at least six to eight hours of direct light each day to develop their signature sweetness and vibrant color.
Position your raised bed where full sun exposure is guaranteed, ideally with a north-south orientation to make the most of sunlight distribution. This bed placement also helps maintain ideal soil temperature throughout the growing season, giving your carrots the warmth they need to flourish.
Selecting and Planting Carrot Seeds
Getting your carrot seeds in the ground properly sets the stage for a successful harvest down the line. You’ll need to make a few key decisions before you sow—variety selection, planting depth, and moisture management all play vital roles in germination success.
Let’s walk through each of these fundamentals so your carrots get off to a strong start.
Choosing The Right Carrot Varieties
Picking the right variety is like choosing the perfect tool for the job—match it to your raised bed and you’ll harvest more marketable roots with less waste. Start by evaluating bed depth, soil type, disease pressure, and your preferred harvest window.
Consider these options:
- Nantes varieties – blunt, 6–7 inch roots ideal for heavy or shallow soils; mature in 58–75 days
- Globe types (e.g., ‘Thumbelina’) – compact roots for beds as shallow as 8–10 inches; minimize forking in clay-heavy soil
- Hybrids like ‘Yaya’ – fast-maturing (55 days), high yield (5.4 lbs marketable per plot), disease-resistant genetics
- Colored cultivars – purple, red, or yellow types offer anthocyanins, lycopene, and extended post-harvest longevity
- Long-rooted Imperator or Danvers – require 12–18 inch depth but deliver excellent storage and uniform shape in loose soil
Seed quality and climate tolerance matter, too—hybrids generally outperform heirlooms under disease pressure and variable conditions. For best results, understanding raised bed basics is essential to boost carrot yields.
Sowing Depth and Seed Spacing
Plant carrot seeds at a shallow depth of just ¼ to ½ inch—any deeper and you’ll delay germination by days or risk uneven emergence altogether.
Space seeds 1–2 inches apart in rows 2–3 inches wide to prevent soil compaction and crowding.
Sowing carrots too densely in your raised bed forces thinning later, which disturbs roots and reduces germination rates—precision at planting saves you work at harvest.
Soil Moisture for Germination
Keeping the soil consistently moist—but never waterlogged makes the difference between patchy germination and a thriving row of seedlings that push through in seven to fourteen days.
Soil temperature between 45–85°F paired with proper water retention ensures ideal germination rates.
Light, frequent watering prevents soil compaction and erosion while maintaining the moisture levels and aeration carrot seeds need to break dormancy and establish strong taproots.
Caring for Carrots Until Harvest
Once your carrot seeds sprout and push through the soil, consistent care becomes your main job until harvest day. The way you manage water, nutrients, spacing, and potential threats will directly determine the size and quality of your crop.
Here’s what you need to focus on as your carrots grow.
Watering and Moisture Levels
Consistent moisture is the secret to growing sweet, crack-free carrots—let the soil dry out, and you’ll end up with woody, bitter roots that split at the slightest touch. Your raised bed offers excellent drainage, but that means you’ll need to stay on top of watering:
- Check soil moisture 2-3 inches deep daily during germination
- Water deeply once or twice weekly once seedlings establish
- Apply 1-2 inches of water per week through irrigation systems or hand watering
- Mulch to prevent soil compaction and aid drought management while maintaining ideal humidity control for carrot cultivation
Fertilizing and Nutrient Management
Carrots are light feeders that thrive on balance—too much nitrogen sends energy into leafy tops instead of the sweet, firm roots you’re after. Fertilizing and mulching carrots properly maintains soil requirements for carrots while preventing the bitter, forked roots that come from nutrient imbalances. Apply organic fertilizers rich in phosphorus and potassium at planting, then rely on nutrient cycling through compost tea applications every 3-4 weeks. Soil testing guides your microbial management strategy, ensuring nutrients bolster carrot cultivation without overstimulating foliage growth.
| Nutrient | Role in Carrot Cultivation |
|---|---|
| Nitrogen (N) | Moderate levels for leaf development; excess reduces root quality |
| Phosphorus (P) | Essential for strong root formation and sweetness |
| Potassium (K) | Improves flavor, disease resistance, and storage quality |
| Calcium (Ca) | Prevents tip burn and bolsters cell wall structure |
| Boron (B) | Critical for root elongation and uniform growth |
Thinning Seedlings for Optimal Growth
Crowded seedlings compete like runners in too narrow a lane—each one stunted, fighting for light, water, and nutrients that none will win in adequate measure. Thin carrots to 2-3 inches apart once they reach 2 inches tall, pinching unwanted seedlings at soil level rather than pulling to avoid disturbing root development of neighboring plants.
Thinning Guidelines for Raised Bed Success:
- Seedling spacing of 2-3 inches allows proper root development and prevents forked, misshapen carrots
- Growth patterns improve dramatically when soil aeration reaches roots without competition
- Seedling pruning by pinching at soil level protects remaining carrots from transplant shock
- Proper vegetable gardening practices guarantee your raised bed produces uniform, market-quality roots ready for harvesting carrots at peak maturity
Pest and Disease Monitoring
Vigilant scouting from seedling emergence through harvest protects your raised bed investment—carrot pests like aphids and carrot rust fly can slash yields by 50% if left unchecked.
Walk your beds weekly, inspecting foliage for Alternaria Leaf Blight lesions and checking soil-level crowns for early cavity spot symptoms, employing Integrated Pest Management principles and Disease Forecasting models to time interventions precisely. Smart Monitoring Tools and floating row covers form your frontline Crop Protection Strategies, while proper weed control eliminates fungal disease reservoirs and competing hosts for carrot diseases.
Effective carrot fly management involves understanding the carrot fly life cycle to prevent infestations.
Identifying The Right Harvest Time
Knowing when your carrots are ready to pull makes all the difference between sweet, tender roots and woody, overgrown disappointments. You’ll want to watch for three key indicators that signal harvest time has arrived.
Let’s look at the signs that tell you your carrots have reached their peak.
Visual Signs of Maturity
When your carrot greens stand tall and begin tipping over at the shoulders, you’re looking at nature’s way of saying they’re ready to come out of the ground.
Look for these key maturity stages before you harvest carrots:
- Top Growth: Foliage reaches 8-10 inches with a slight collapse at the base
- Root Exposure: Orange carrot roots peek through the soil surface
- Color Indicators: Bright, vibrant orange shows full maturity
- Harvesting Guide: Gently brush soil away to verify diameter before pulling
These harvest tips help you time your harvesting carrots perfectly.
Checking Carrot Size and Color
Once you’ve confirmed the telltale signs above ground, gently brush away some soil at the crown to gauge the diameter and check that your carrots have reached their full, rich orange hue.
For ideal root quality, aim for 1 to 1-1/2 inches in diameter—this size measurement ensures sweetness and tender texture.
Color variations from pale to deep orange indicate harvest timing, with darker shades signaling peak maturity and flavor in your carrot harvesting.
Reference to Days to Maturity
Beyond visual cues, you can track days to maturity printed on your carrot seeds packet—most standard varieties reach harvest timing between 65 and 80 days after sowing, while baby types mature faster. Understanding maturation rates helps you plan crop yield and adjust vegetable gardening schedules:
- Early varieties (36–55 days) deliver tender baby carrots ideal for quick harvests.
- Standard cultivars (65–80 days) produce full-sized roots with peak sweetness.
- Regional growth factors (temperature, soil, sunlight) can extend or shorten these maturity standards by several weeks.
Harvesting Carrots From Raised Beds
Once you’ve confirmed your carrots are ready, it’s time to get them out of the ground without causing damage. The right technique makes all the difference between perfect roots and broken ones.
Here’s how to harvest your carrots properly from raised beds.
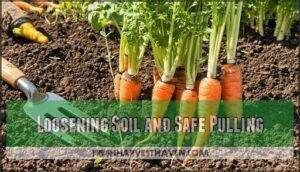
Loosening Soil and Safe Pulling
The secret to pulling carrots without snapping them in half starts with giving those roots some breathing room before you tug. Water your raised bed the night before harvest—proper soil moisture softens the ground and eases carrot extraction. Use a garden fork to gently loosen soil around the carrot roots, working 4-6 inches from the crown.
Grasp the greens near the soil line and apply steady, gentle pulling pressure while the soil releases its grip on the roots.
| Step | Tool/Method | Purpose |
|---|---|---|
| Pre-watering | Deep irrigation 12-24 hours prior | Ensures soil aeration and reduces resistance |
| Loosening soil | Garden fork inserted 4-6 inches away | Protects root structure during extraction |
| Gentle pulling | Steady upward pressure at base of greens | Prevents breakage through controlled force |
Avoiding Root Breakage and Damage
Three common mistakes ruin more carrot harvests than drought, pests, and poor soil combined—and each one happens in the seconds between grasping the greens and lifting the root. Master these damage prevention strategies to protect your carrot roots:
- Never yank by the greens alone—the foliage detaches from root vegetables before the soil releases its hold
- Avoid twisting during extraction—rotation stresses the taproot and causes microscopic fractures in carrot manipulation
- Don’t rush harvest timing—pulling from compacted, dry soil increases breakage risk exponentially
- Skip the aggressive tugging—gentle harvesting with steady pressure prevents snapping at the crown
- Reject force when resistance appears—proper soil conditioning means carrots slide free with minimal effort
When harvesting carrots from raised beds, patience wins every time.
Techniques for Harvesting Baby Carrots
Baby carrots don’t require a special harvest window—you can pull them anytime between 30 and 50 days after germination, depending on how small you want them. Start with soil loosening around the roots, then use gentle pulling with steady upward pressure.
Harvest carrots at smaller diameters for a tender texture—baby carrots usually measure half an inch across.
Fall carrots often develop a sweeter flavor, making late-season baby carrot care particularly rewarding for root extraction timing.
Storing and Preserving Harvested Carrots
Once you’ve pulled your carrots from the raised bed, proper storage becomes the key to keeping them fresh and flavorful for weeks or even months. The right method depends on how soon you’ll use them and whether you want to preserve that just-harvested crunch.
Let’s look at the most effective techniques for refrigeration, long-term storage, and putting your harvest to delicious use.
Preparing Carrots for Refrigeration
Proper post-harvest management starts the moment you pull your carrots from the soil, and those first few steps will determine how long they stay crisp in your fridge. Start by gently brushing off excess dirt—don’t wash yet if you’re storing long-term. For immediate refrigeration, rinse thoroughly and trim the greens about an inch above the crown to prevent moisture loss.
Here’s what fresh keeping looks like in practice:
- Cool, wrapped roots: Store washed carrots in damp paper towels inside perforated bags, maintaining humidity control without trapped condensation
- Water jar method: Submerged carrots standing upright in a sealed container stay crunchy for up to two weeks
- Unwashed advantage: Dirt-covered roots in ventilated bags last longer than pre-washed ones, giving you flexibility after harvest time
Your refrigerator’s crisper drawer provides ideal conditions for root storage—just keep them away from ethylene-producing fruits.
Long-Term Storage and Freezing Methods
Freezing carrots properly can stretch your harvest for up to a year, but you’ll need to blanch them first. Blanching for 2–5 minutes stops enzymatic browning and keeps that vibrant orange color locked in. Skip this step, and you’ll face mushy, off-color carrots after thawing. After blanching, freeze quickly at −18°C in airtight bags to minimize ice crystal damage.
When thawing frozen carrots, use your refrigerator overnight or cold water to maintain firmness—these work perfectly in soups and stews.
| Storage Method | Quality Duration |
|---|---|
| Freezer (blanched) | 12 months |
| Freezer (unblanched) | Poor quality after thawing |
| Cold storage (0–1°C, 95% humidity) | 5–6 months |
| Refrigerator (above 4°C) | 2–4 weeks before shriveling |
| Bunched carrots (with greens) | 2 weeks maximum |
Using Harvested Carrots in Recipes
Your freshly harvested carrots aren’t just roots—they’re ingredients waiting to shine in dishes ranging from weeknight soups to roasted side plates that’ll steal the show. Fresh carrots enhance everything:
- Carrot soups gain natural sweetness and velvety texture
- Roasted carrots caramelize beautifully with olive oil and herbs
- Carrot salads offer crisp, raw nutrition with citrus dressings
- Vegetable stews benefit from carrots’ earthy depth
- Carrot cakes transform root vegetables into moist desserts
Using fresh produce maximizes flavor and nutrition your raised bed worked hard to deliver.
Frequently Asked Questions (FAQs)
What happens if I leave carrots in the ground too long?
Leaving carrots too long invites trouble—like fruit left on the vine past its prime.
Overly mature carrots develop woody texture, lose their sweetness, and may begin flowering, signaling root spoilage and nutrient decline that compromises your harvest.
What precautions should be taken when harvesting carrots?
Harvesting carrots requires gentle care to prevent root breakage. Loosen soil around carrot greens before pulling to avoid compaction damage.
Monitor crop maturity and harvest timing carefully, pulling when roots reach ideal size without excessive force that damages neighboring plants.
Can carrots be harvested in winter months?
While many gardeners think winter spells the end of harvest, carrots are actually one of the few vegetables that thrive in cold climates. With proper frost protection and season extension techniques like mulching, you can keep harvesting carrots well into winter months—some varieties even sweeten after exposure to light frosts, making winter storage completely optional.
What tools work best for carrot harvesting?
A garden fork loosens soil gently, while a hand trowel works well for smaller harvests. Specialized carrot lifters minimize root damage during vegetable harvesting.
For efficient harvesting techniques, soil rakes and hand cultivators prepare beds between harvest cycles.
How do you know carrots are overripe?
Overripe carrots develop cracks, turn woody or fibrous, and may start flowering—all carrot spoilage signs indicating harvest timing mistakes. Root decay factors include prolonged ground exposure.
Test carrot freshness by checking for brittleness. Proper vegetable harvesting ensures maximum yield and prevents these overripe indicators.
Can carrot greens be eaten or composted?
Carrot greens are nature’s dual-purpose gift—toss them into your compost bin to enrich future soil, or bring them to the kitchen table.
You can sauté the tender leaves like spinach, blend them into pesto, or steep them for a unique herbal tea that adds a subtle earthy note to your afternoon.
Should carrots be washed immediately after harvesting?
Wait to wash carrots until you’re ready to use them. Post-harvest processing works best when you brush off excess soil and remove the greens first.
Storing carrots unwashed with soil removal keeps them fresher longer in the refrigerator.
Can carrots survive frost in raised beds?
Yes, carrots can tolerate frost in raised beds—they’re remarkably cold-hardy. Light frost actually sweetens them.
For frost protection and winter harvesting, mulch your raised bed heavily. This raised bed insulation prevents frost damage and extends your harvest.
Growing carrots in raised beds through cold weather works beautifully with proper care.
How do you prevent carrot fly infestations?
To prevent carrot fly infestations, use crop rotation, companion planting with onions or leeks, and cover crops with insect netting.
Practice soil sanitation by removing debris, and time plantings to avoid peak carrot rust fly activity for effective pest management.
What causes forked or twisted carrot roots?
Excellence seems out of reach, yet Root Deformity often stems from preventable issues.
Soil Compaction, rocks, or Nutrient Imbalance cause forked Carrots. Water Stress and poor Carrot Genetics also contribute to twisted Root vegetable gardening outcomes in your Vegetable garden Soil.
Conclusion
Think of harvesting carrots from raised beds as conducting an orchestra—every element must synchronize perfectly for a perfect finale. You’ve prepared the soil, nurtured the roots, and monitored their growth, but the harvest itself demands precision and patience.
Water the bed thoroughly before pulling, loosen surrounding soil gently, and grasp each carrot by its crown while supporting the base. With proper technique, you’ll extract every root intact, maximizing your yield and ensuring months of crisp, sweet flavor ahead.
- https://store.almanac.com/pages/most-popular-club?utm_campaign=OFAEdit&utm_content=when-harvest
- https://www.freethesaurus.com/harvesting
- https://medical-dictionary.thefreedictionary.com/harvesting
- https://idioms.thefreedictionary.com/harvesting
- https://www.gingerwithroots.com/recipes/recipe/89c0cb0e-130b-4928-b819-7baafd0ba14a

