This site is supported by our readers. We may earn a commission, at no cost to you, if you purchase through links.

Most gardeners don’t fail because they chose the wrong seeds.
They fail because they’re fighting their soil instead of feeding it.
Healthy organic gardening starts underground, with a living community of bacteria, fungi, and earthworms doing work no synthetic fertilizer can replicate.
Give them what they need, and your plants practically grow themselves.
That’s the foundation behind every organic gardening technique worth learning—work with nature’s systems, not around them.
From picking the right site and building rich soil to managing pests without chemicals, the steps ahead will walk you through a complete, grounded approach to growing food the way it was meant to be grown.
Table Of Contents
- Key Takeaways
- Organic Garden Planning Basics
- Build Healthy Organic Soil
- Design Efficient Garden Beds
- Compare Raised Beds, In-ground Beds, and Containers
- Build Raised Beds for Easier Maintenance
- Use Untreated Lumber, Logs, or Galvanized Steel
- Divide Beds by Crop Family and Growth Habit
- Apply Organic Mulch for Moisture Retention
- Use Living Mulch as Edible Ground Cover
- Install Drip Irrigation or Soaker Hoses
- Collect Rainwater for Sustainable Irrigation
- Grow With Organic Techniques
- Choose Untreated, Non-GMO, Organic Seeds
- Start With Healthy Transplants When Needed
- Rotate Crops by Plant Family Each Year
- Follow Leafy Greens With Nitrogen-fixing Legumes
- Use Companion Planting for Pest Reduction
- Pair Deep-rooted and Shallow-rooted Crops
- Succession Plant for Continuous Harvests
- Attract Beneficial Insects With Diverse Plantings
- Manage Pests With Barriers, Traps, and Hand-picking
- Use Neem Oil or Insecticidal Soap Carefully
- Top 3 Organic Gardening Products
- Frequently Asked Questions (FAQs)
- Is gardening good for high blood pressure?
- How to start an organic garden for beginners?
- What is the 70/30 rule in gardening?
- What is the 3-hour gardening rule?
- What is a disadvantage of organic gardening?
- What is the 3 year rule in gardening?
- How much water do organic vegetables need?
- What organic fertilizers work best for tomatoes?
- When should I start my organic seedlings indoors?
- How do I transition from conventional to organic?
- Conclusion
Key Takeaways
- Healthy soil teeming with bacteria, fungi, and earthworms is the real engine behind organic gardening — feed it first, and your plants will largely take care of themselves.
- Testing your soil for pH, texture, and nutrient levels before planting saves you from guessing all season and helps you apply the right amendments in the right amounts.
- Rotating crops by plant family each year, pairing deep- and shallow-rooted plants together, and using companion planting are three low-cost moves that cut pests, balance nutrients, and boost yields naturally.
- Simple physical barriers like netting, row covers, and drip irrigation protect your garden more effectively than chemicals ever could — and they keep working season after season.
Organic Garden Planning Basics

Good planning is the real secret behind a thriving organic garden. Before you plant a single seed, few key decisions will shape everything — from what you grow to how easily you maintain it.
If you’re starting with warm-season crops, warm-season vegetable gardening tips can help you make smarter choices from day one.
Here’s what to sort out first.
Define Organic Gardening and Chemical-free Growing Goals
Organic gardening is a commitment — not just a method. Fundamentally, it means growing food using only natural inputs, zero synthetic pesticides, and no GMOs. Your chemical-free vision rests on three integrated garden goals:
- Feed your soil microbes first
- Manage pests organically through biological controls
- Source only sustainable, natural amendments
That’s the whole organic philosophy, right there.
Choose a Sunny, Well-draining Garden Location
Your garden’s address matters more than you think. Aim for 6–8 hours of direct sunlight daily — south-facing beds warm fastest in spring.
Check your slope: a 2–5% grade keeps water moving without pooling. Good soil percolation means puddles clear within 48 hours.
| Factor | What to Look For | Why It Matters |
|---|---|---|
| Sunlight Timing | Late morning to afternoon sun | Drives consistent vegetable growth |
| Slope Orientation | 2–5% grade away from beds | Prevents root rot and waterlogging |
| Windbreak Placement | Natural barriers upwind | Protects seedlings and holds warmth |
Check USDA Hardiness Zone and Frost Dates
Once you’ve nailed your site’s sun and drainage, it’s time to know your zone. Your USDA Hardiness Zone tells you what winters look like — and that shapes everything.
Use zone mapping tools at planthardiness.ars.usda.gov, then pull a frost calendar for your exact area. Remember, microclimates matter: a low-lying spot or hillside can shift your last frost prediction by weeks.
The updated USDA map shows many regions have shifted up one to two zones in the past decade.
Plan Crops Around Climate, Rainfall, and Season
Your zone tells you when to plant — but climate, rainfall, and temperature together tell you what to plant. Rainfall Window Mapping: match your crops to months when rain does the heavy lifting. Temperature Rain Interplay matters too — cool-season greens thrive in wet, mild spells, while tomatoes want warm, drier stretches.
- Track your frost-free periods and target a 10–14 day buffer around typical rain onset.
- Use Seasonal Crop Pairing — leafy greens before legumes, deep-rooted beside shallow.
- Build simple seasonal planting schedules and frost dates into a wall calendar you’ll actually check.
Place Beds Near an Accessible Water Source
Within 10 feet of a water source is where your beds belong. Good Water Proximity Planning saves time and keeps plants from stress during dry spells.
Map your Hose Routing Layout before you build — straight lines mean better Drip Line Efficiency and less hassle.
Add Rain Barrel Integration for smart rainwater harvesting and storage.
Access Ergonomics matter too: easy reach means you’ll actually water consistently.
Map Garden Zones for Vegetables, Herbs, and Pollinators
Think of your space as a living map. Microclimate Mapping helps you see where Sunlight Zones peak and where Soil Moisture Zones stay damp.
Group vegetables in the warmest spots, tuck herbs along cooler edges, and weave Pollinator Pathways through flowering beds.
A simple Crop Zone Matrix ties your garden zoning together, making companion planting strategies and pollinator habitat feel simple from day one.
Build Healthy Organic Soil
Good soil isn’t just dirt — it’s the foundation everything else depends on. Before you plant a single seed, it’s worth understanding what your soil actually needs.
Good soil isn’t just dirt — it’s the living foundation your entire garden depends on
Here’s how to build it up the right way, step by step.
Test Soil Texture, PH, and Nutrients First

Before you plant a single seed, your soil has a story to tell. A solid Soil Test Protocol reveals that story fast.
Start with a Texture Ribbon Test — pinch moist soil and press it into a ribbon. Clay holds long; sand crumbles. Then run a pH Baseline Check and Macronutrient Profile using a soil test kit.
Here’s what to screen for:
- Soil texture — determines drainage speed and nutrient retention
- pH level — most veggies thrive between 6.0 and 7.0
- NPK levels — your core macronutrient profile for feeding decisions
- Micronutrient Screening — catches iron, zinc, or calcium gaps early
- Overall soil nutrient balance — guides smart, targeted amendments
Soil testing and nutrient balancing upfront save you from guesswork all season. Good soil testing and pH management mean your crops actually absorb what you give them.
Add Compost, Vermicast, and Organic Matter

Once your soil test results are in, it’s time to feed the ground beneath your feet.
Compost Layering — spreading 1–3 inches of mature compost — kickstarts Microbial Activity Boost and improves Nutrient Release Timing across the season.
Add Vermicast Top-dressing at 1–2 inches for a balanced hit of N, P, and K.
Together, these Organic Matter Integration strategies transform tired dirt into living soil your crops will love.
Balance PH With Lime or Sulfur

soil pH is the silent gatekeeper of every nutrient your plants can access. Soil Test Interpretation tells you exactly where you stand — and whether Lime Application Timing or Sulfur Rate Calculation is your next move.
- Raise pH with Dolomitic vs Calcitic lime — dolomitic also adds magnesium
- Lower pH using elemental sulfur, guided by your pH Monitoring Schedule
- Retest after 3–6 months to confirm your soil amendment worked
Most vegetables thrive between pH 6.0–6.8. soil testing and pH management take patience, but it pays off every harvest.
Use Organic Fertilizers Based on Crop Needs

Not all crops want the same meal.
Leafy greens crave nitrogen-rich blood meal early on, while tomatoes and peppers need Nitrogen Timing early, then a Potassium Fruit boost late for a strong harvest.
Root crops love a Phosphorus Boost from bone meal.
Seaweed Extracts feed herbs and greens with trace minerals.
Slow Release Manure works beautifully for longer-season crops.
Let soil testing and nutrient balancing guide every application.
Improve Drainage and Soil Structure Naturally

Good fertility means nothing if water can’t move through your beds. Biochar Integration at just 1–2% by volume delivers a real Soil Porosity Boost, opening channels water actually follows.
Layer in compost and organic matter, then add mulching techniques for moisture retention on top.
Cover Crop Channels using daikon or rye, or a simple Gravel Swale Design to redirect pooling.
Terraced Bed Slopes help on uneven ground.
Practice No-till or Low-disturbance Soil Care

Once drainage is sorted, protect what you’ve built. No-till keeps soil structure intact — no unnecessary digging, no broken fungal networks.
Here’s what low-disturbance care looks like in practice:
- Limit soil disturbance to seed placement depth only
- Practice Cover Crop Integration with clover or vetch between seasons
- Return crop residues immediately — Residue Management feeds your microbial community
- Use Soil Moisture Monitoring monthly to catch dry spells early
- Track Microbial Health Tracking alongside organic matter gains yearly
Your no-till approach lets soil health compound quietly, season after season.
Source Local Organic Amendments When Possible

Local resources go further than you’d think.
Reach out to nearby farms for aged manure — Manure Aging for at least 90 days cuts nutrient shock and weed seeds. Community Compost Access gives you finished organic compost without the wait.
Try Leaf Mold Creation from your own yard, Spent Grain Compost from breweries, or careful Wood Ash Utilization for potassium.
Sustainable use of local resources keeps your organic garden soil management simple and close to home.
Design Efficient Garden Beds

Once your soil is in good shape, it’s time to think about how you’ll actually set up your growing space. The structure you choose — raised bed, in-ground plot, or container — shapes everything from how you water to how your back feels at the end of the day.
Here are your main options to review.
Compare Raised Beds, In-ground Beds, and Containers
Not all garden beds are created equal — and picking the right one shapes everything from root development to water efficiency.
- Raised beds: Control your soil mix, boost planting density, and improve site adaptability.
- In-ground beds: Lower construction footprint, support deep-rooted crops naturally.
- Containers: Maximum mobility, minimal space needed.
- All three: Compatible with organic fertilizers and smart garden bed construction and layout.
Build Raised Beds for Easier Maintenance
Raised beds put you in control from day one. With a Modular Frame Design, you can expand your setup as your garden grows. Adjustable Bed Height minimizes bending strain—aim for 12–24 inches—while Quick-Release Panels simplify repairs and access. Integrated Tool Storage along the frame keeps essentials within reach, and a Perimeter Weed Barrier underneath blocks grass encroachment. Fill with a rich soil mix and compost, and raised bed gardening becomes effortlessly low-maintenance.
| Feature | Benefit | Best For |
|---|---|---|
| Adjustable Bed Height | Reduces bending strain | Elderly or mobility-limited gardeners |
| Quick-Release Panels | Simplifies repairs and access | DIY gardeners |
| Perimeter Weed Barrier | Blocks grass encroachment | Low-maintenance setups |
| Modular Frame Design | Allows easy expansion | Growing gardens |
| Integrated Tool Storage | Keeps tools within reach | Efficiency-focused growers |
Use Untreated Lumber, Logs, or Galvanized Steel
Your material choice sets the tone for everything that follows. For long‑lasting raised beds, stick to untreated lumber, natural logs, or galvanized steel garden beds — each promotes sustainable soil management without leaching chemicals.
Prioritize these three for smart garden bed construction and layout:
- Wood Durability: Use kiln‑dried untreated lumber with moisture barriers underneath
- Metal Corrosion: Galvanized steel resists rust through wet seasons
- Fastener Compatibility: Match assembly safety by using corrosion‑resistant hardware throughout
Divide Beds by Crop Family and Growth Habit
Think of your beds as neighborhoods — each family of plants belongs in its own zone. Family Bed Zoning keeps brassicas, nightshades, and legumes separate, simplifying crop rotation and companion planting strategies. Growth Habit Clustering and Canopy Height Stacking prevent taller crops from shading shorter ones.
| Crop Family | Spacing & Habit |
|---|---|
| Brassicas | 18–24" rows, upright |
| Nightshades | Trellised, staked |
| Cucurbits | 5–6 ft, trailing |
| Legumes | Compact blocks |
Family Drip Alignment matches irrigation lines to bed zones, and smart Crop Row Spacing keeps airflow open — essential for solid crop planning.
Apply Organic Mulch for Moisture Retention
A 2–4 inch layer of organic mulch is one of the easiest wins in your garden. It locks in soil moisture, regulates temperature, and cuts your watering needs considerably. Here’s what each option brings to the table:
- Bark Chip Benefits: Retains soil moisture for 6–12 months
- Straw Mulch Efficiency: Reduces evaporation by 25–35% under sun
- Compost Mulch Impact: Boosts soil moisture capacity by up to 40%
- Wood Chip Cooling: Lowers surface temperature by 2–4°C
- Pine Needle Moisture: Keeps shallow roots consistently hydrated
These mulching techniques for moisture retention and water conservation in gardens make a real difference all season long.
Use Living Mulch as Edible Ground Cover
Living mulch pulls double duty in your garden. Edible Groundcover Choices like creeping thyme, purslane, and New Zealand spinach cover bare soil while staying harvest-ready.
These Living Mulch Benefits go deep — suppressing weeds, improving organic garden soil management, and releasing Nutrient-Rich Mulch as they break down. With smart Seasonal Mulch Timing and companion planting strategies, they even work as Pest-Deterrent Mulches, keeping your soil health thriving.
Install Drip Irrigation or Soaker Hoses
Drip irrigation is one of the smartest moves you can make for water conservation in gardens.
Lay lines with emitter spacing of 12–24 inches for vegetables, then add a pressure regulator and backflow preventer at the source.
Pair everything with timer automation and a soil moisture sensor, and your watering and irrigation basically run itself — delivering water right to the roots, not the leaves.
Collect Rainwater for Sustainable Irrigation
Harvest rainwater by connecting a first flush diverter and screen filters to your gutters — that’s rainwater catchment made simple.
Store it in UV-resistant tanks sized for your weekly needs.
Your gutter design matters: keep it clean and sloped.
Stick to a basic maintenance schedule — clear screens twice a year.
It’s water conservation in gardens at its most practical.
Grow With Organic Techniques

Good organic technique starts long before anything goes in the ground. The decisions you make around seeds, spacing, and planting rhythm shape how healthy — and how productive — your garden becomes.
what to put into practice from the start.
Choose Untreated, Non-GMO, Organic Seeds
Your seeds are the foundation of everything — choose wisely. Look for seed packets displaying organic certification labels and non‑GMO statements. Provenance traceability tells you exactly where your seeds came from. Always run germination testing before large sowings. Regional seed adaptation means local varieties handle your climate better.
- Verify organic seed sourcing from reputable suppliers
- Check seed packets for certification logos
- Practice smart seed storage practices in cool, dry conditions
- Prioritize regional seed adaptation for stronger germination
- Test viability through germination testing before planting season
Start With Healthy Transplants When Needed
Once your seeds are sorted, sometimes it’s just smarter to start with transplants — especially for slow-growing crops like peppers or tomatoes.
| What to Check | Healthy Sign | Warning Sign |
|---|---|---|
| Root Ball Health | Firm, white roots | Brown, mushy tips |
| Leaf Color | Dark green, uniform | Yellow or spotted |
| Stem Strength | Upright, sturdy | Leggy, weak |
| Pest Evidence | Clean foliage | Sticky or chewed leaves |
| Soil Moisture | Evenly moist | Bone dry or soggy |
After seedling transplanting, apply a mulch ring and stick to a consistent watering schedule to prevent transplant shock.
Rotate Crops by Plant Family Each Year
Now that your transplants are settled in, it’s time to think bigger — across seasons.
Rotating crops by plant family each year is one of the best crop rotation benefits you’ll get for free. A solid Family Rotation Schedule delivers Pest Cycle Disruption, Root Depth Diversity, and Soil Nitrogen Balance all at once.
Here’s a simple four-year crop rotation sequence:
- Brassicaceae (broccoli, kale) — heavy feeders that love rich soil
- Solanaceae (tomatoes, peppers) — fruiting crops that follow with deep roots
- Cucurbitaceae (squash, cucumbers) — spread wide, use different nutrients
- Fabaceae (beans, peas) — nitrogen-fixers that reset the bed
Rotate plant families annually to keep diseases guessing and yields climbing. When you combine crop diversity and rotation practices with crop rotation and companion planting strategies, Yield Optimization follows naturally.
Follow Leafy Greens With Nitrogen-fixing Legumes
After harvesting leafy greens, don’t let that bed sit idle — plant nitrogen-fixing legumes right away. Beans, peas, or hairy vetch are smart Cover Crop Selection choices that quietly rebuild Soil N Benefits through Rhizobial Inoculant Use.
Let them flower, then turn them under as Green Manure Integration. This simple crop rotation move restores soil fertility naturally, reducing your need for organic fertilizer next season.
Use Companion Planting for Pest Reduction
Companion planting is one of the simplest organic pest management practices you can start today.
A Nasturtium trap lures aphids away from brassicas, while Marigold nematodes protect roots underground.
Basil tomato defense keeps hornworms guessing, and Dill beneficial insects patrol nearby beds naturally.
Add Clover nitrogen boost between rows for soil health.
These companion planting strategies make attracting beneficial insects for pest control almost easy, biological control.
Pair Deep-rooted and Shallow-rooted Crops
Think of your garden bed as a two-story house. Deep-rooted crops like carrots reach down past 60 cm, while shallow-rooted lettuce works in the top 30 cm — that’s vertical niche sharing in action.
This root zone complementarity means less competition, better biopore formation, and natural nutrient uplift from subsoil to surface. It’s one of the smartest companion planting strategies you can use.
Succession Plant for Continuous Harvests
Staggered sowing is your secret weapon against the feast-or-famine harvest cycle. Instead of planting everything at once, use batch planting every 10–14 days to spread your yield continuity across weeks.
Sow radishes every 10 days, lettuce every two weeks.
Successive cycles keep your beds productive and your kitchen stocked. Good garden planning and a simple harvest timing log make it simple.
Attract Beneficial Insects With Diverse Plantings
Your garden becomes its own ecosystem when you mix nectar-rich borders with flowering succession — early bloomers like dill and alyssum into summer marigolds and cosmos. That’s microhabitat layering at work.
Companion planting, trap crop integration with sunflowers, and habitat complexity all support attracting beneficial insects for pest control. Stack the layers right, and pollinator support follows naturally.
Manage Pests With Barriers, Traps, and Hand-picking
Pests don’t wait — so neither should you. Layering your defenses makes all the difference in organic pest control.
- Fine Mesh Netting (0.9–1.5 mm): Blocks cabbage moths and leaf miners without blocking light.
- Row Cover Timing: Install early, remove during flowering, replace after.
- Sticky Trap Placement: Hang 18–24 inches above canopy for flying pests.
- Hand-Picking Schedule: Check undersides of leaves each morning; drop pests into soapy water.
Use Neem Oil or Insecticidal Soap Carefully
When barriers and traps aren’t enough, neem oil and insecticidal soap are your next move in organic pest control.
Spray in early morning — Application Timing matters because midday heat causes leaf burn. Dilution Accuracy is key: keep neem at 0.5–2%.
Always wear Safety Gear, check Plant Sensitivity first, and use proper Spray Technique on leaf undersides. Smart biocontrol means using natural pest controls wisely, not liberally.
Top 3 Organic Gardening Products
The right tools make organic gardening a whole lot easier.
After all the planning, soil prep, and planting, a few reliable products can protect your hard work and keep things running smoothly.
Here are three worth having in your corner.
1. MySoil Soil Test Kit
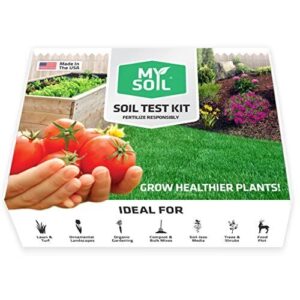
Before you spend another season guessing why your tomatoes look pale or your beans won’t take off, consider starting with a real answer.
The MySoil Soil Test Kit ($31.99) sends your sample to a professional lab and returns a full report on 13 plant-available nutrients — nitrogen, phosphorus, potassium, and more — plus pH, all within 6–8 days.
You get organic-friendly amendment recommendations telling you exactly what to apply, how much, and when.
No guesswork, just clarity.
| Best For | Home gardeners, lawn enthusiasts, and small-scale growers who want to stop guessing and start making smarter fertilizer decisions based on real lab data. |
|---|---|
| Primary Use | Soil nutrient analysis |
| Garden Application | Lawn, garden, turf, trees |
| Ease of Setup | Mail-in kit included |
| Reusability | Single-use kit |
| Weather Resistance | Sample degrades in 24hrs |
| Coverage Scope | Any soil/growing scenario |
| Additional Features |
|
- Tests 13 nutrients plus pH with a full lab report — way more thorough than cheap at-home strips
- Gives you specific amendment recommendations, organic or conventional, tailored to your actual soil
- Works for almost any growing situation: lawns, gardens, raised beds, even hydroponics
- U.S. only — Canadian and international customers can’t use it
- Results take 6–8 days, so it’s not great if you need answers fast
- Doesn’t test for soil diseases, fungi, or pathogens — just nutrients and pH
2. Solar Powered Animal Repellent Sprinkler
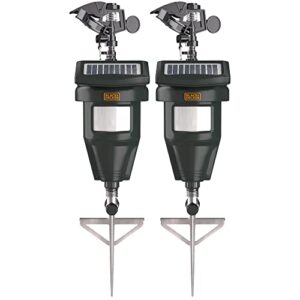
Once you know what’s in your soil, the next challenge is keeping animals out of it.
The Solar Powered Animal Repellent Sprinkler manages that without chemicals or cages.
It detects movement up to 30 feet away and fires a 5-second water burst to startle deer, rabbits, raccoons, and even curious neighborhood cats.
Solar-powered and easy to stake in place, it works day and night.
One heads-up — position it away from wind-prone foliage, or the sensor will trigger on every breeze.
| Best For | Gardeners and homeowners who want a humane, chemical-free way to keep animals out of their yard without constant upkeep. |
|---|---|
| Primary Use | Animal deterrence/watering |
| Garden Application | Garden beds, lawns, ponds |
| Ease of Setup | Stake and hose hookup |
| Reusability | Multi-season with solar |
| Weather Resistance | Solar-dependent performance |
| Coverage Scope | Up to 1,000 sq ft |
| Additional Features |
|
- Covers a solid 30-foot range and up to 1,000 sq ft, so one unit handles a decent chunk of your yard.
- Solar-powered with rechargeable batteries means you’re not constantly swapping out AAs or running extension cords.
- Doubles as a sprinkler in watering mode, so it’s pulling double duty when animals aren’t the issue.
- The sensor picks up blowing leaves and branches, which wastes water and can stress your plants with repeated soakings.
- The plastic sprinkler head is fragile and the hose connection tends to leak over time.
- No automatic day/night switch — you have to manually turn it off, or it’ll keep clicking away all day.
3. RIFNY Heavy Duty Bird Netting
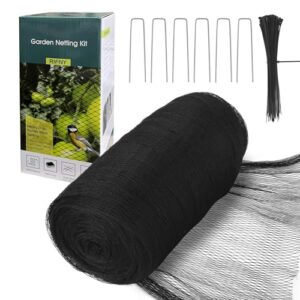
Birds can strip a berry bush bare overnight — and the RIFNY Heavy Duty Bird Netting stops that cold. Made from durable HDPE, it manages everything from frost to summer heat without cracking or rotting.
The 5/8-inch mesh blocks birds, deer, and small critters while still letting in light and airflow.
At 40 by 13 feet, one roll covers most home garden beds. Just drape, cut to fit, and secure with the included staples.
| Best For | Home gardeners who want reliable, no-fuss protection for berry bushes, fruit trees, and vegetable beds from birds and deer. |
|---|---|
| Primary Use | Crop & garden protection |
| Garden Application | Fruit trees, vegetable beds |
| Ease of Setup | Drape and stake design |
| Reusability | Reusable, compact storage |
| Weather Resistance | -58°F to 212°F range |
| Coverage Scope | 40 ft × 13 ft roll |
| Additional Features |
|
- Handles brutal temps — from deep winter to summer heat — without cracking or falling apart
- Easy to use: just drape it over what you need to cover, cut to fit, and pin it down
- Lightweight and reusable, so you can pack it away after the season and pull it out again next year
- Only comes with six staples, which won’t cut it for larger setups — you’ll likely need to grab more
- The 5/8-inch mesh might let smaller bird species slip through, so it’s not a guaranteed fix for every pest
- It blocks pollinators too, which means you may need to pull it back during bloom time to let bees do their thing
Frequently Asked Questions (FAQs)
Is gardening good for high blood pressure?
Yes, gardening is genuinely good for high blood pressure. It combines moderate movement, stress relief, and fresh air — all things that help keep readings in a healthier range over time.
How to start an organic garden for beginners?
Start small, think big. Pick a sunny spot, test your soil, and choose easy crops like lettuce or beans.
Skip synthetic inputs from day one — your future harvest depends on the foundation you build now.
What is the 70/30 rule in gardening?
The 70/30 rule means 70% of your garden stays reliable — proven crops and low‑maintenance perennials — while 30% is saved for experimenting with new varieties.
It keeps your garden productive without feeling like a gamble.
What is the 3-hour gardening rule?
The 3-hour gardening rule means skipping outdoor work between 11am and 2pm. That midday window brings peak heat and sun intensity — tough on you and your plants.
Early morning or late afternoon is your sweet spot.
What is a disadvantage of organic gardening?
Organic gardening demands a mountain of patience. Your biggest hurdle?
Yields can drop during the changeover period while soil biology adjusts — and nutrient gaps from slow-releasing amendments may temporarily stall fast-growing crops.
What is the 3 year rule in gardening?
The 3-year rule means you don’t plant the same crop family in the same bed for three years.
It breaks pest cycles, balances soil nutrients, and keeps your garden naturally healthier season after season.
How much water do organic vegetables need?
Most vegetables need about 1 inch of water per week. Water deeply so moisture reaches 6–8 cm down. That steady rhythm keeps roots strong and harvests coming.
What organic fertilizers work best for tomatoes?
Tomatoes are heavy feeders. Compost gives them a steady nutrient base, while bone meal strengthens strong roots and blossom set. Side-dress with fish emulsion every few weeks once fruiting begins.
When should I start my organic seedlings indoors?
Start most seeds indoors six to eight weeks before your last spring frost date. Tomatoes and peppers need the full eight weeks.
Fast growers like lettuce? Four to six weeks is plenty.
How do I transition from conventional to organic?
Stop synthetic inputs cold turkey. Clear out chemical fertilizers and pesticides, then focus on rebuilding your soil with compost and organic matter.
Your garden will adjust — and honestly, so will you.
Conclusion
Nature doesn’t rush, and neither should you. Every organic gardening technique you’ve learned here is really just an invitation to slow down and pay attention—to what your soil needs, what your plants are telling you, and what’s living beneath your feet.
The garden rewards patience with abundance. Start with one bed, one season, one handful of compost. Build from there.
What grows in healthy ground isn’t just food—it’s proof that working with nature actually works.
- https://planthardiness.ars.usda.gov/
- https://gaftp.epa.gov/EPADataCommons/ORD/Ecoregions/cec_na/NA_LEVEL_I.pdf
- https://www.sciencedirect.com/science/article/abs/pii/S0167880923000543
- https://www.allaboutgardening.com/collards/
- https://www.foodpolitics.com/wp-content/uploads/14-06-12-Final-Crops-Paper-BJN5552.pdf