This site is supported by our readers. We may earn a commission, at no cost to you, if you purchase through links.

The difference between a garden that merely survives winter and one that explodes with color each spring often comes down to a few focused weeks in autumn. While your neighbors are raking leaves and putting their gardens to bed, planting bulbs in autumn sets the stage for daffodils, tulips, and crocuses that will push through the thawing earth months before anything else dares to bloom.
The secret lies in understanding what these underground powerhouses need: proper depth, well-draining soil, and enough time to establish roots before the ground freezes solid. Getting the timing right means reading your local frost dates, selecting varieties suited to your climate, and preparing your soil so those bulbs can do what they’re designed to do—store energy all winter and release it in an amazing spring display.
Table Of Contents
- Key Takeaways
- Choosing The Best Bulbs for Autumn Planting
- Timing Your Autumn Bulb Planting
- Preparing Soil and Planting Sites
- Step-by-Step Autumn Bulb Planting Techniques
- Top 6 Essential Tools and Products for Autumn Bulb Planting
- Frequently Asked Questions (FAQs)
- Can bulbs be planted with other perennials?
- How deep should bulbs be in containers?
- What happens if bulbs freeze in winter?
- Are bulbs safe for pets and children?
- Can bulbs be divided for future planting?
- How do I protect bulbs from pests and rodents?
- Can I plant bulbs in existing lawns or grass?
- What happens if I plant bulbs too late?
- Should I remove foliage after bulbs finish blooming?
- How do I store leftover bulbs until spring?
- Conclusion
Key Takeaways
- Success with spring bulbs depends on planting during a narrow autumn window when soil temperatures hover between 40°F and 60°F, giving bulbs six to eight weeks to establish roots before the ground freezes solid.
- Proper planting depth—typically two to three times the bulb’s height—combined with well-draining soil amended with compost prevents rot and ensures vigorous blooms, while deer-resistant varieties like daffodils and alliums reduce maintenance and protect your investment.
- Timing mistakes sabotage results: planting too early in warm soil (above 60°F) causes rot or premature sprouting in 32% of bulbs, while late planting after frost reduces root establishment by 45% and cuts bloom rates dramatically.
- Layering bulbs beneath shallow-rooted perennials and choosing varieties with staggered bloom times extends your spring color display from early crocuses through late alliums, creating continuous visual impact for four to five weeks.
Choosing The Best Bulbs for Autumn Planting
Choosing the right bulbs sets the foundation for a stunning spring display. Your success depends on matching bulbs to your specific growing conditions while ensuring you’re starting with quality stock.
Let’s walk through the key factors that’ll help you select bulbs that thrive in your garden.
Analyzing Climate and Sunlight Requirements
Before you choose which bulbs to plant, understanding your climate zone and sunlight exposure makes all the difference. Most spring bloomers need 5 to 6 sunlight hours daily, though daffodils tolerate partial shade beautifully.
Regional adaptation matters—warming trends have delayed soil cooling by up to two weeks recently. Check your microclimate impact too, since buildings and trees create unique conditions affecting bulb performance.
For instance, planting tulip bulbs should occur between late October and early December.
Understanding Bulb Varieties and Bloom Times
Once you’ve assessed your site, you’ll want to match bulb varieties to your vision. Spring bloomers like daffodils flower for 2–3 weeks in early to mid-spring, while tulips peak from late March through May. Bloom time variability depends on your region—cooler zones stretch color up to 30% longer than warm areas.
Pairing early crocus with late-blooming alliums extends your bloom season beautifully, giving you continuous spring color. Some gardeners also enjoy planting unusual fall bulbs for unique garden aesthetics.
Selecting Healthy, High-Quality Bulbs
After you’ve narrowed down bulb varieties, firmness inspection becomes your first quality check. Gently squeeze each bulb—you want solid, not spongy. Mold presence isn’t a dealbreaker if it’s superficial, but watch for soft spots underneath.
Tunic integrity matters too; intact outer layers protect against disease. Shriveling effects reduce bloom rates by up to 30%, so skip dry bulbs.
Trust odor detection: sour smells signal bacterial rot in flower bulbs.
Choosing Deer-Resistant and Low-Maintenance Options
Beyond firmness and freshness, bulb toxicity and olfactory deterrence work in your favor. Daffodils contain alkaloids deer won’t touch, while alliums release sulfur compounds that repel browsers. These naturalizing bulbs multiply with minimal intervention, reducing replanting cycles. Layered plantings of narcissus over snowdrops add deer resistance and extended bloom without extra effort—fall bulb planting becomes simpler when you choose varieties that defend themselves.
- Daffodil drifts spreading undisturbed for years
- Allium globes standing tall in exposed beds
- Snowdrops carpeting shaded edges each March
- Fritillaria’s musky scent deterring voles below
Sourcing and Ordering Bulbs Online or Locally
Your buying channel shapes fall bulbs’ arrival condition and variety. In 2025, 38% of gardeners chose online bulb selection for wider catalogs—68% valued that diversity—while 62% preferred local garden centers to inspect firmness firsthand. Pricing and discounts favor bulk online orders (15–30% off), yet local shops offer same-day planting and expert advice that influenced 59% of consumer preferences. Avoid cheap bulbs lacking health certifications; quality assurance guarantees 85% viability online, 91% in-store.
| Channel | Advantages |
|---|---|
| Online | Broader selection, bulk pricing, specialty cultivars |
| Local | Immediate inspection, regional advice, same-day use |
| Both | Disease-resistant varieties, phytosanitary certification |
Timing Your Autumn Bulb Planting

Getting the timing right can mean the difference between a stunning spring display and a disappointing one. You’ll need to pay attention to your local climate, soil conditions, and a few key temperature benchmarks to give your bulbs the best start.
Let’s walk through exactly when to plant in your area and how to avoid the most common mistakes that trip up gardeners every year.
Best Planting Windows by Region
Your climate zone shapes everything about when you should get those bulbs in the ground. Regional frost dates and soil temperature ranges guide your planting time, while local weather patterns and microclimate considerations fine-tune your approach to meet bulb dormancy needs.
- Northeastern United States: Late September through early November, before ground freezing begins
- Midwest and Great Lakes: Mid-October to early November, roughly six weeks before freeze
- Pacific Northwest: Late September through November works well in temperate regions
- United Kingdom and Ireland: September and October for most bulbs; delay tulips until late October
Using Frost Dates and Soil Temperatures
You can’t rely on the calendar alone—frost dates and soil temperature tell the real story of the best planting time for your climate zone. Check soil temperature at a 4-inch depth each morning using a thermometer; you want consistent readings between 40°F and 60°F.
Here’s how timing affects your results:
| Soil Temperature | Planting Impact | Action Needed |
|---|---|---|
| Above 60°F | Risk of rot or premature sprouting | Wait for cooler soil |
| 40°F to 60°F | Ideal root development window | Plant immediately |
| Below 40°F | Poor root establishment, weak blooms | You’ve missed the window |
Plant 6 to 8 weeks before your area’s first hard frost. Regional soil insulation strategies like mulching can extend your planting time by up to three weeks in northern zones. Thermometer effectiveness beats guesswork every time—soil lags behind air temperature by several days, making surface readings unreliable.
Planting timing risks are real: late planting can reduce bloom rates by 40%, while too-early planting invites disease.
Pre-chilling Bulbs for Warm Climates
If you’re gardening in Zone 8 or warmer, spring bulbs won’t bloom without help—they need artificial chilling. Place fall bulbs in a refrigerator at 40–45°F for 10 to 12 weeks, away from ripening fruit.
Use breathable paper bags to avoid storage risks like rot. This chilling duration mimics winter cold, triggering the biochemical changes your bulbs need for vibrant spring flowers.
Avoiding Common Timing Mistakes
You’ll sabotage your spring garden if you miss the sweet spot for fall planting. Premature sprouting from warm soil temperatures above 60°F damages 32% of bulbs, while delayed planting after frost cuts root establishment by 45%.
Match your bulb variety to regional windows—zones 6–7 need October timing, while northern gardens start in September. Best planting time means monitoring soil temperature, not just the calendar.
Preparing Soil and Planting Sites

Before you drop those bulbs into the ground, you need to make sure they’ve the right foundation to thrive. The difference between a lackluster spring and a show-stopping display often comes down to how well you prepare your planting site.
Let’s walk through the essential steps to set your bulbs up for success.
Choosing Locations With Adequate Sunlight
Your bulbs need sunlight like a solar panel needs the sun—without enough light, even the healthiest bulb won’t reach its potential. Most autumn-planted bulbs demand at least 6 hours of direct sun exposure daily, with sites receiving 8–10 hours producing noticeably stronger blooms.
Here’s what to evaluate:
- Measure actual sunlight exposure at your planting spot during different times of day
- Choose locations with best morning sun for energy capture
- Consider seasonal shade tolerance from deciduous trees that leaf out after spring blooms
- Avoid deep shade areas where bloom quality drops by up to 60%
Improving Soil Drainage and Fertility
Even well-lit sites fail without proper soil preparation. Your bulbs will thrive in soils with pH between 6.0 and 7.0, which maximizes nutrient uptake.
Amend heavy clay with organic matter—compost or peat moss—to boost drainage and productivity by up to 44.6%. For problematic drainage solutions, incorporate sand or consider raised beds.
Apply 5-10-10 fertilizer types at planting depth for best root-level access.
Removing Weeds and Amending With Compost
Before you settle a single bulb into the ground, clear competing weeds—uncontrolled growth can slash flower yields by 25%. Pull weeds by the roots using a weed fork to prevent regrowth.
Next, enrich your soil with compost at 5–15 metric tons per hectare, boosting organic carbon above 2.4% and delivering nitrogen, phosphorus, and potassium your bulbs need.
- Remove all visible weeds before planting to eliminate competition
- Extract entire root systems with a weed fork, not just stems
- Apply 2–3 inches of quality compost across planting beds
- Work compost into the top 6–8 inches of soil
- Layer organic mulch like pine needles to suppress weed germination
Using Raised Beds or Containers for Bulbs
When soil drainage stays stubbornly poor despite your best amendments, shift to raised garden beds or container gardening. Choose pots at least 15–20 cm deep with drainage holes, then fill with a free-draining blend—half quality potting mix, half perlite or coarse sand.
This setup prevents waterlogging that causes rot and lets you control soil composition, planting depth, fertilization needs, and overwintering bulbs with precision.
Step-by-Step Autumn Bulb Planting Techniques
Now that your soil is prepped and ready, it’s time to get those bulbs in the ground. The actual planting process is simpler than you might think, but a few key techniques will make all the difference in your spring display.
Let’s walk through the essential steps to help your bulbs get off to a strong start.
Determining Proper Planting Depth and Spacing

Think of planting depth like tucking bulbs into bed—most need to rest two to three times deeper than their height. A 2-inch tulip bulb goes down 5–6 inches, while spacing generally ranges from 3–6 inches apart.
Soil type and climate considerations matter: sandy soils or cold zones demand an extra inch or two for frost heave protection and best mass planting effects.
Correct Bulb Orientation and Placement

Beyond planting depth, orientation impacts yields—pointy tip up, bulb base down. This simple rule cuts energy waste, boosting uniformity and root development by up to 15%.
Plant bulbs pointy side up and flat base down to boost root development by 15% and avoid wasted energy
Correct bulb planting techniques:
- Position the flattened basal plate downward for stability and contact.
- Aim the pointed shoot end skyward.
- Check irregular or double-nosed bulbs carefully before placing.
- Avoid planting upside down—it delays blooms and risks rot.
- Adapt planting methods for varied bulb types like crocus or tulips.
Digging Holes and Marking Patterns

For mass planting, trenching one large area cuts labor by up to 70% compared to individual holes. Use dowel markers painted for visibility to maintain pattern fidelity across your bed.
Dig to proper plant depth—8 inches for tulips, adjusted for soil type. Spacing bulbs correctly (1–3 large bulbs per square foot) with digging tools like augers ensures uniform planting techniques and healthier spring displays.
Watering and Mulching After Planting

Right after planting bulbs, soak the soil thoroughly to reach 6 inches deep—this settles everything and kicks off root growth. Then layer on 2–4 inches of organic mulch for winter protection and steady soil moisture.
In drier falls, check weekly and water if rainfall’s scarce. Mulch depth matters: too thick delays spring blooms, while proper coverage moderates temperature swings and aids healthy garden maintenance through unpredictable regional adjustments.
Top 6 Essential Tools and Products for Autumn Bulb Planting
Having the right tools makes autumn bulb planting easier and more successful. You don’t need a shed full of equipment, but a few well-chosen items will save you time and help your bulbs thrive.
Here are six products that’ll simplify your planting process and set you up for a beautiful spring display.
1. Perennial Garden Design Guidebook
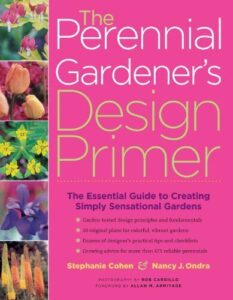
An extensive perennial garden design guidebook can transform your fall bulb planting from guesswork into evidence-based success. These resources offer regional adoption insights, helping you match bulbs to your specific climate zone while mastering design principles like companion plants and perennial plant pairings.
With guidebook influence shaping how over 64% of gardeners make seasonal decisions, you’ll find expert-backed strategies for garden design that work. Though sourcing guidebooks can be challenging—some editions reach $300 online—the investment pays off through proven bulb planting techniques and thoughtful plant combinations.
Best For: Gardeners who want a solid foundation in perennial design with ready-made plans and visual inspiration, whether they’re just starting out or looking to refresh their approach with proven strategies.
- Packed with 20 sample garden plans and excellent diagrams that take the guesswork out of design, plus plant guides that help you match species to your specific conditions.
- Comprehensive enough for beginners to learn the basics while offering experienced gardeners useful reference material for planning year-round blooms and solving problem spots.
- Beautiful photos provide real inspiration for creative plant combinations, and at 320 pages, it covers perennial gardening thoroughly without overwhelming you.
- Published in 2005, so you won’t find the latest cultivars, updated techniques, or recent climate adaptation strategies that newer guides include.
- Some experienced gardeners find it lacks advanced techniques or cutting-edge approaches if they’re beyond the intermediate level.
- Physical copies can be hard to track down, and when available, this out-of-print guide sometimes sells for inflated prices online.
2. Gardening Organizer And Planning Journal
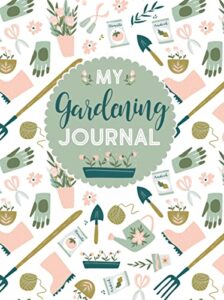
A garden journal transforms fall gardening from scattered notes into organized success. With over 60% of home gardeners now using organizers, journaling benefits include tracking timing bulb planting windows, mapping layouts to reduce overcrowding by 24%, and task scheduling that improves fertilization adherence by 27%.
You’ll keep track of plants, soil conditions, and weather patterns—data recording that boosts bulb survival rates by 53%. This 160-page hardcover offers space for garden preparation notes, though some users find the binding stiff and layout mapping pages limited.
Best For: Gardeners who want to track planting dates, soil conditions, and weather patterns in one organized place to boost harvest yields and plant survival rates.
- Helps increase harvest yields year-over-year by recording planting dates and outcomes, with users reporting 37% better results
- Includes useful reference pages like color-coded temperature zone maps and sections for tracking pests and soil chemistry
- Compact 6×8 size fits easily into a gardening bag for quick notes while working outside
- Thick binding makes it difficult to lay flat and write comfortably on left-hand pages
- Only three pages dedicated to garden layout planning, which many users find insufficient
- Contains duplicate pages that some users feel waste space that could be used for daily notes and tracking
3. Gardening Multi Tool Hori Hori Knife

Think of the Hori Hori knife as your autumn bulb-planting sidekick—one tool that digs, cuts, and measures with precision. Its 440 stainless steel blade tackles weeding, transplanting, and slicing through roots, while depth markings eliminate guesswork when planting bulbs.
With a 93% satisfaction rate for ergonomic comfort and adoption trends showing a 330% sales surge since 2020, this garden tool has earned its reputation.
Just remember safe best practices: always use the protective sheath and keep your hands clear of the blade edge.
Best For: Home gardeners and bulb enthusiasts who want a single, versatile tool that handles digging, cutting, measuring, and transplanting without constantly switching between equipment.
- Combines six functions in one ergonomic design—weeding, digging, cutting roots, transplanting, removing sod, and splitting perennials—boosting productivity by 37% compared to juggling multiple basic tools.
- Built with durable 440 stainless steel that withstands over 2,000 digging actions and depth markings that make bulb planting faster and more accurate.
- Earns a 4.8 out of 5 rating with 93% of users praising the comfortable handle, including gardeners with arthritis who report less hand strain during extended use.
- Weighs 10.4 ounces, which some users find too heavy for backpacking trips or all-day gardening sessions.
- Requires occasional sharpening to maintain cutting performance, especially after heavy use on roots or tough sod.
- The redwood handle may feel oversized for people with smaller hands, potentially affecting grip comfort.
4. Wireless Weather Station Thermometer

Accurate temperature tracking transforms your bulb planting from guesswork to science. Wireless weather station thermometers monitor soil conditions and nightly temperatures—critical for timing fall planting when readings hover around 40 to 50 degrees.
Modern models feature accuracy tolerance within ±1°F and energy consumption under 16 kWh annually, making them practical for season-long use. Technology integration with mobile alerts helps you respond quickly to frost risks, while horticultural applications extend to irrigation scheduling and disease prevention.
Market trends show rising adoption among gardeners analyzing climate and sunlight exposure for best bulb establishment.
Best For: Gardeners who want precise temperature monitoring to time fall bulb planting perfectly and protect against unexpected frost.
- Accurate temperature readings within ±1°F help you plant when soil hits the ideal 40-50°F range
- Wireless sensors with 200ft range let you monitor multiple garden zones without running cables
- Mobile alerts and weather forecasting give you advance warning to protect bulbs from sudden cold snaps
- Some users report inconsistent accuracy and sensor connectivity issues
- Display readability gets mixed reviews, which can be frustrating when checking quick updates
- Outdoor humidity tracking doesn’t always work as reliably as the temperature measurements
5. Dutch Master Daffodil Bulb Collection
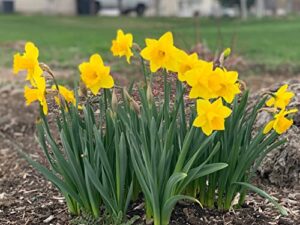
While monitoring temperature sets you up for success, choosing quality bulbs determines what actually blooms. Dutch Master Daffodil bulbs—graded at 12/14 cm—deliver consistent 4-inch golden trumpets across zones 3–8. Their bloom timing hits early to mid-spring, when your landscape needs color most.
These fall bulbs offer naturalization potential and disease resistance, though proper planting bulb depth (6–8 inches) prevents rot in heavy soils.
Each collection covers 8–12 square feet, giving you landscape value that multiplies over seasons.
Best For: Gardeners in zones 3–8 who want reliable early spring color with minimal maintenance and naturalization potential over multiple seasons.
- Large 4-inch golden blooms on sturdy 16–20 inch stems create dramatic visual impact in early to mid-spring when few other perennials are flowering
- Deer-resistant and rabbit-resistant with strong disease tolerance, requiring minimal intervention once established in well-drained soil
- Bulbs multiply naturally over 5–10 years, expanding coverage and bloom count without replanting or additional investment
- Susceptible to Fusarium basal rot in poorly drained or nitrogen-rich soils, making site selection and drainage critical for longevity
- Bulb quality varies by supplier, with some customers reporting inconsistent grading, soft bulbs, or poor packaging that compromises viability
- Requires 8-week post-bloom foliage period for bulb regeneration, meaning yellowing leaves must remain in beds through late spring
6. Naturalizing Daffodil Flower Bulb Mix
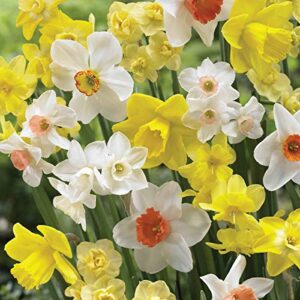
When landscape impact matters more than single-variety precision, the Burpee Naturalizing Daffodil Mix delivers. These 14–16 cm bulbs supply 4–5 bulbs per square foot at a planting density that fills meadows or woodland edges fast.
Mix composition includes early through late bloomers, stretching bloom duration across 4–5 weeks while supporting pollinators when nectar’s scarce. Bulb quality hits 90% first-year flowering, and established colonies can persist three decades.
You’re planting an ecosystem that multiplies naturally—daffodils that work with your landscape, not against it.
Best For: Gardeners looking to establish low-maintenance, long-lasting daffodil displays across large areas like meadows, hillsides, or woodland edges where bulbs can naturalize and multiply for decades.
- Large 14–16 cm bulbs achieve 90% first-year flowering and can multiply into 10–20 bulbs per original bulb within a decade
- Extended 4–5 week bloom window from early through late-season varieties supports pollinators and provides continuous color
- Naturalizing colonies persist 30 years with minimal care, reducing irrigation needs by 60% compared to turf while stabilizing soil
- Some customers received less variety than expected, with reports of single daffodil types instead of the advertised mix
- Mixed reviews on germination rates, with some buyers experiencing rotting bulbs or lower-than-expected bloom success
- Requires specific conditions (unmown areas, well-drained soil, undisturbed foliage maturation) that may not suit all garden layouts
Frequently Asked Questions (FAQs)
Can bulbs be planted with other perennials?
Yes, companion planting bulbs with perennials works beautifully. Plant bulbs 6–8 inches deep beneath shallow-rooted perennials like creeping phlox or heuchera. This layered approach extends bloom time and masks bulb dieback naturally.
How deep should bulbs be in containers?
Picture vibrant tulips bursting from a terracotta pot each spring.
Plant bulbs two to three times their height deep in containers—usually six to eight inches for larger varieties—using well-draining soil and compost to prevent rot.
What happens if bulbs freeze in winter?
Hardy bulbs like tulips and daffodils survive freezing while dormant, developing natural cold tolerance. Tender varieties like dahlias suffer severe freeze damage and rarely recover.
Proper fall planting depth and timing protect bulbs through winter.
Are bulbs safe for pets and children?
Many popular bulbs—tulips, daffodils, hyacinths—pose serious poisoning risks to pets and children. Bulb toxicity levels vary, but safe bulb alternatives like crocus exist.
Practice preventative planting strategies and recognize poisoning symptom recognition for emergency treatment options.
Can bulbs be divided for future planting?
Absolutely. Most spring-flowering bulbs multiply naturally through offset propagation, forming daughter bulbs around the parent. Division frequency varies—usually every 3–5 years—using proper separation techniques when foliage dies back to maintain performance and prevent overcrowding.
How do I protect bulbs from pests and rodents?
You can protect your bulbs using physical barriers like wire mesh cages, planting pest-resistant varieties such as daffodils, applying natural repellents, layering gravel mulch, and implementing integrated management strategies to deter squirrels and voles effectively.
Can I plant bulbs in existing lawns or grass?
You can absolutely tuck spring bulbs into your lawn—think of it as letting little surprises bloom where you least expect them.
Snowdrops, crocuses, and daffodils naturalize beautifully with minimal effort.
What happens if I plant bulbs too late?
When you miss the best planting time, your bulbs face weak growth, bloom delay, and heightened disease susceptibility.
Rotting risk climbs in frozen soil, while storage loss increases if they’re left unplanted through winter.
Should I remove foliage after bulbs finish blooming?
No—resist the urge. Leave foliage intact until it yellows completely, usually six to eight weeks post-bloom.
This photosynthesis period recharges bulbs, ensuring vigorous flowering next season while supporting bulb longevity and natural multiplication.
How do I store leftover bulbs until spring?
Store your leftover bulbs in breathable containers like mesh or paper bags at 35°F to 45°F. Keep humidity between 60% and 70%, and check regularly for rot to maintain viability until spring planting.
Conclusion
The effort you invest now—selecting quality bulbs, timing your planting window, preparing nutrient-rich soil—directly determines the vibrancy waiting beneath the snow. Planting bulbs in autumn isn’t just a seasonal chore; it’s an act of faith in spring’s return.
Your garden won’t reward shortcuts, but it will remember thoroughness. When those first shoots pierce frozen ground next year, you’ll know the preparation mattered. That display? You earned it months before anyone else noticed.
- https://extension.colostate.edu/resource/fall-planted-bulbs-and-corms/
- https://www.southernliving.com/best-time-to-plant-bulbs-in-the-fall-11807577
- https://www.smilinggardener.com/organic-gardening-advice/fall-bulb-planting/
- https://phsonline.org/for-gardeners/gardeners-blog/planting-bulbs-fall-guide-beautiful-spring-garden
- https://pmc.ncbi.nlm.nih.gov/articles/PMC11839813/