This site is supported by our readers. We may earn a commission, at no cost to you, if you purchase through links.

Most gardeners lose their best perennials not to winter cold but to what happens in those first two weeks of spring cleanup—rushing in too early, stripping protective mulch before the soil stabilizes, or cutting back plants that were quietly setting up their best bloom yet.
Spring flower garden maintenance isn’t complicated, but the sequence matters more than most people realize. Get the order right and your beds reward you all season. Get it wrong and you spend summer wondering why everything looks half-hearted.
Here’s how to work through it the right way, step by step.
Table Of Contents
- Key Takeaways
- Assess Winter Damage and Clean Beds
- Cut Back The Right Plants
- Leave Spring Bloomers Unpruned
- Refresh Soil, Mulch, and Moisture
- Top 7 Spring Garden Tools
- Frequently Asked Questions (FAQs)
- Is October too late to mulch?
- When should I clean out my flower beds in spring?
- How to care for flower beds in spring?
- Should you remove leaves from flower beds in spring?
- What plants need to be cut back in the spring?
- How often should I fertilize spring flower gardens?
- Can I plant summer bulbs in early spring?
- Should I deadhead spring flowers as they fade?
- Whats the best mulch depth for flower beds?
- How do I protect flowers from late spring frosts?
- Conclusion
Key Takeaways
- Do your assessment walk before touching a single tool — spotting frost heave, buried irrigation lines, and overwintering insects first saves you from undoing good work before you’ve even started.
- Sequence your spring cuts carefully: grasses, salvia, Russian sage, bee balm, and sedum welcome a hard cutback now, but old-wood bloomers like lilacs, forsythia, and peonies will punish you with a flowerless season if you prune before they’ve had their moment.
- Timing your mulch removal to when daytime temperatures hold above 50°F — then reapplying 2–3 inches in a donut pattern away from crowns — protects both soil health and the pollinators still waking up underneath.
- Soil prep isn’t optional busywork: testing pH, loosening compaction, and working in compost before the growing season kicks off is what separates a garden that thrives from one that just survives.
Assess Winter Damage and Clean Beds

Before you grab a single tool, take a slow walk through your garden — winter has a way of leaving surprises. You’ll want to know what you’re working with before you start pulling and cutting.
A quick read through early spring gardening tips can help you spot what needs attention before you lift a finger.
Here’s where to focus your attention first.
Do an Assessment Walk Before Cleanup
Before you pull a single weed or touch your pruners, walk your garden like you’re reading it.
Your assessment walk sets the whole season up right. Here’s what to look for:
- Winter garden damage assessment — spot frost heave, broken stems, and sunscald
- Irrigation Line Survey — flag buried drip tubing before you rake
- Pollinator Habitat Scan — note hibernating insects tucked in leaf litter
- Weed Pressure Assessment — identify where hidden seeds are already sprouting
- Microclimate Observation + Staking Needs Evaluation — find exposed spots and top-heavy plants needing support
Remove Dead Plant Material and Broken Stems
Once assessment walk is done, it’s time to act on what you found. Cut dead material back to within two inches of healthy tissue — look for firm, green stems as your guide. Always angle cutting away from the bud to help wounds seal fast and reduce pathogen load.
Perform removal in dry weather removal to limit pathogen spread. Sanitize cutting tools between plants, and bag anything diseased rather than composting it.
Garden sanitation here sets a clean foundation for everything ahead.
Clear Winter Mulch, Burlap, and Plant Covers
Now that the dead wood is cleared, it’s time to peel back winter’s armor. Those layers of winter mulch, burlap, and plant covers did their job — but leaving them too long invites mold and overheating.
Follow these Mulch Depth Guidelines and Cover Removal Timing steps for smart spring garden preparation and cleanup:
- Remove winter mulch gradually once daytime temps hold above 50°F
- Lift burlap wraps on cloudy days to avoid shocking tender growth
- Check for trapped moisture underneath — Ventilation Moisture Control prevents fungal buildup
- Keep 2 inches of organic mulch for Seasonal Insulation Benefits without smothering crowns
- Remove protective covers completely after your last frost date
Good mulch removal and soil health management starts here.
Rake Leaves and Debris Without Disturbing Pollinators
Here’s where pollinator-friendly garden cleanup practices really matter. That leaf litter isn’t just a mess — it’s shelter. Solitary bees overwinter in hollow stems, and ground beetles hide just beneath the surface.
Use gentle raking with a lightweight leaf rake, working in small patches and brushing back leaves carefully rather than clearing everything at once.
| Cleanup Action | Pollinator Impact |
|---|---|
| Leave 1–2" leaf litter | Protects overwintering insects |
| Rake only surface debris | Preserves hollow stem nesting sites |
Wait until daytime temps hit 50°F for timing safety — that’s your green light for targeted debris removal without disrupting pollinator habitat.
Edge Beds for a Neat Spring Reset
Edging your garden beds is the finishing touch that pulls the whole spring garden preparation and cleanup together.
Drive steel or stone edging 2–4 inches deep — that’s your sweet spot for Weed Barrier Integration and Border Height Adjustment without creating a trip hazard.
Loosen compacted Edge Soil along the border line, then step back.
Clean lines make every plant pop for the entire season.
Cut Back The Right Plants
Not every plant in your garden wants the same spring treatment — and cutting back the wrong one at the wrong time can cost you a whole season of blooms. The good news is, once you know which plants actually benefit from a hard cutback now, it gets pretty straightforward.
Here are the ones you can confidently tackle first.
Ornamental Grasses

Ornamental grasses are basically the low-maintenance friends every garden needs. Cut them back to a few inches above the base before new growth appears — timing matters more than you’d think.
- Height selection — feather reed grass hits 4–6 feet; blue oat grass stays compact
- Foliage texture — fine or swordlike, it shapes your garden’s personality
- Inflorescence color — golden, bronze, or silvery plumes catch winter light beautifully
- Drought tolerance — switchgrass and fountain grass handle dry spells once established
- Division schedule — split crowded clumps every 3–4 years to keep them vigorous
Sedum (Autumn Joy, Etc.)
")
Sedum ‘Autumn Joy’ is one of those perennials that practically takes care of itself — and spring cleanup is refreshingly simple. last year’s spent flower heads and tidy up any broken stems.
drought tolerance and full sun exposure make it forgiving, and those coppery blooms are a genuine pollinator magnet in fall. Divide crowded clumps every few years to keep growth strong.
Salvia (Perennial Types)
")
Perennial salvia is a spring garden maintenance dream — cut it back hard to about 6 inches before new growth takes off, and it rewards you all season. Whether you’re growing compact Salvia nemorosa or the upright Victoria White, the growth habit responds beautifully to pruning.
Deadheading keeps the flower color range coming, drought resilience kicks in once established, and pollinators never stop showing up.
Russian Sage (Perovskia)
")
Russian sage is almost suspiciously easy once you know its one rule: cut it back hard in early spring — down to 6 to 12 inches above the woody base. Perovskia regrows fast, so don’t hesitate.
Its drought tolerance is legendary, and butterfly attraction is a bonus all summer.
During soil preparation, skip heavy mulch near crowns.
For cultivar selection, Blue Spire works beautifully in companion planting with ornamental grasses.
Bee Balm (Monarda)
")
Bee balm is a true pollinator magnet — and one of the easier cuts you’ll make this spring.
In early spring, remove last season’s dead stems right down to where fresh growth is emerging.
That simple step addresses mildew prevention by improving airflow around the crowns.
Monarda’s nectar richness rewards your pollinator-friendly garden cleanup practices all summer, and if clumps look crowded, follow a three-to-four-year division schedule to keep them vigorous.
When to Prune for Stronger Growth and Blooms

Timing really is everything regarding garden pruning timing.
Most cuts belong in late winter to early spring — that dormant pruning timing window keeps sap flow considerations manageable and protects tender buds.
Follow the pruning severity guidelines: never remove more than one-third of a canopy.
Post-bloom pruning manages the rest.
Get the timing of spring pruning right, and your plants practically reward you.
Leave Spring Bloomers Unpruned

Not every plant on your spring to-do list actually wants attention right now. Some of your most beloved bloomers are quietly building up to their big moment — and pruning them early means accidentally cutting off the very buds they’ve been working on all winter.
Here are the spring bloomers worth leaving alone until after they’ve had their turn in the spotlight.
Lilacs
Lilacs are one plant you absolutely don’t want to prune in spring. Their blooms grow on old wood, so cutting now means sacrificing this year’s flowers — and that fragrance intensity you’ve been waiting all winter for.
Wait until right after bloom duration ends, then trim.
Choose your cultivar color wisely, make sure strong sunlight needs are met, and keep mulch back from the base to help with powdery mildew control.
Forsythia
Same rule applies to forsythia. Those golden blooms light up early spring on old wood — prune now, and you’ll wipe out the whole show.
Hold off until after flowering, then shape it. It’s actually a great window for hedge training techniques if you’re working with a row.
Newer cold hardiness breeding means more color variant selection too, and that early pollinator attraction makes forsythia worth every bit of patience.
Peonies
Peonies are in the same camp as forsythia — hands off until after bloom. These old-wood bloomers reward patience with flowers stretching 4 to 10 inches wide, rich in fragrance variations from lemony whispers to full rose.
- Skip pruning until after flowering — deadheading spent blooms is enough
- Honor their cold requirement; dormancy drives bloom
- Check planting depth — eyes sit 1–2 inches below soil
- Feed beds lightly with compost after flowering wraps up
Bleeding Heart (Dicentra)
Bleeding heart is a shade placement gem — tuck it under trees or along north-facing borders and let it do its thing. Those arching pink hearts appear in early spring and last several weeks, so deadheading for bloom tidiness is all you need right now.
Skip pruning and dividing perennials until after flowering wraps up. Rhizome management, mulch, and fungal disease control can wait.
Iris (Bearded Types)
Bearded types are your late-spring showstoppers — those rich beard color variations in yellow, orange, and violet make them worth every bit of patience. Don’t touch them now.
Pruning and dividing perennials, soil preparation and feeding beds, mulch removal and soil health management, staking strategies, fertilizer types, and pest management all wait until after bloom.
Division timing comes midsummer, once the foliage matures.
Why Old-wood Bloomers Should Wait Until After Flowering
Here’s the simple truth about old wood bloomers — they set next year’s flower buds on this season’s stems. Cut now, and you’re trading Future Bloom Strength for tidiness.
Old wood bloomers set next year’s buds on this season’s stems — prune now, and you’re trading future blooms for tidiness
Bud Preservation depends on leaving those stems alone until flowers fade. That patience pays off in ways early pruning never can:
- Stem Health stays intact, supporting reliable flowering wood
- Energy Allocation shifts toward new growth after bloom, not recovery
- Pollinator Support continues through the full flowering window
- Old wood carries the buds that define next spring’s display
Refresh Soil, Mulch, and Moisture

Once the pruning is done, it’s time to give your soil and beds a proper spring reset. Think of this as recharging the foundation that everything else depends on.
Here’s what to work through before the growing season really kicks into gear.
Test Soil PH and Correct Imbalances
Think of soil pH like a volume dial — too far in either direction, and your plants can’t absorb nutrients properly. Grab a soil testing kit and aim for that 6.0–7.0 sweet spot.
Here’s what to use:
| Soil Problem | Soil Amendment |
|---|---|
| Too acidic | Dolomitic lime |
| Too alkaline | Elemental sulfur |
| Needs buffering | Compost/organic matter |
| Quick fix needed | Liquid sulfur |
Recheck every four to eight weeks after applying.
Loosen Compacted Soil and Improve Drainage
Compacted soil is basically concrete for roots — nothing moves through it well. Loosen the top 6–8 inches using core aeration or spike aeration, which punches channels for air and water to flow freely.
For stubborn hardpan, subsoiling techniques break deeper layers without mixing everything up. A drainage tile system helps in chronically soggy spots.
Cover crop integration over time works wonders for long-term soil structure improvement.
Add Compost or Aged Organic Matter
Compost is your soil’s best friend — and spring is prime time for compost timing.
Spread a 2–3 inch layer of organic compost across your beds. Nutrient release is slow and steady, fueling plants without burning them.
That organic matter kickstarts microbial activity, which rebuilds soil structure and boosts moisture retention all season.
Think of compost top dressing as your soil amendment that keeps giving.
Divide and Replant Crowded Perennials
Crowded perennials are basically roommates who’ve overstayed their welcome — flowering drops off, centers go bare, and roots start hogging every drop of moisture. That’s your cue for division timing.
Dig a wide arc around the clump, prep the root ball, and split it into sections with 3–5 healthy shoots.
Label divisions before replanting, space them 12–24 inches apart, and nail aftercare watering to keep new roots happy.
Apply Mulch Without Smothering Crowns
Once your perennials are replanted and settled, mulch is your next move — but how you apply it matters just as much as what you use.
Skip the volcano mound. Instead, use the Donut Mulch Pattern: maintain Crown Ring Spacing of 2–3 inches from each stem.
Aim for 2–3 inches of Mulch Depth Control using Organic Mulch Selection like shredded bark for Mulch insulation benefits, Moisture Drainage, and weed suppression.
Water Deeply and Monitor Early Pest Pressure
With mulch in place, water is your next partner. Use Root Zone Irrigation — soaker hoses or a calibrated Drip System — to push moisture 6–12 inches deep without soaking foliage.
Soil Moisture Sensors take the guesswork out of soil moisture management. Then start your Pest Scouting Routine:
- Check leaf undersides for Early Aphid Detection weekly.
- Note sticky residue or distorted shoots.
- Apply insecticidal soap at first sign.
Top 7 Spring Garden Tools
Good tools make spring cleanup faster, less frustrating, and honestly a lot more satisfying. You don’t need a shed full of gear — just the right seven items that pull their weight all season long.
Here’s what’s worth having on hand before you get started.
1. Field Guide to Outdoor Space Design

Before you buy a single plant, it helps to have a plan — and the Field Guide to Outdoor Space Design is a solid place to start. Published by Cool Springs Press, this 208-page book walks you through translating your personal style into an actual garden layout.
It covers three core design approaches, includes before-and-after case studies, and offers budgeting and phasing tools.
At just $12.22, it’s honestly one of the cheapest decisions you’ll make all season.
| Best For | New homeowners and beginner gardeners who want a style-driven, visual approach to planning their outdoor space before hiring anyone or buying a single plant. |
|---|---|
| Material | Paper/Cardstock |
| Primary Use | Garden design reference |
| Skill Level | Beginner-friendly |
| Durability | Moderate |
| Price Range | Budget |
| Maintenance Required | None |
| Additional Features |
|
- Connects your personal aesthetic to your garden design — a genuinely fresh angle most gardening books skip
- Packed with full-color photos and before-and-after case studies that make the ideas feel real and achievable
- At $12.22, it’s a low-risk starting point with solid planning tools like budgeting guides and phasing steps
- Skips the technical stuff — don’t expect deep dives into soil, irrigation, or hardscaping
- The casual, first-person writing style is fun but can feel wandering if you want quick, direct answers
- Most photos feature large, high-end properties, which can feel a little out of reach for the average backyard
2. Gardenite Adjustable Metal Leaf Rake
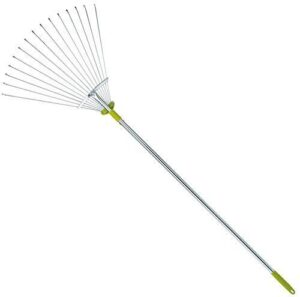
Raking might be the least glamorous spring task — but the right tool makes it almost enjoyable.
The Gardenite Adjustable Metal Leaf Rake has 15 flexible steel tines that expand from 7 to 22 inches wide, so you can sweep open lawn areas and then squeeze between perennials without switching tools.
The 63-inch zinc-plated handle keeps your back happy during longer sessions. It folds flat for storage, too.
Simple, sturdy, and genuinely useful from the first cleanup day onward.
| Best For | Homeowners who want one rake that handles both open lawn areas and tight garden spots without the back strain. |
|---|---|
| Material | Zinc-plated steel |
| Primary Use | Debris removal |
| Skill Level | All levels |
| Durability | Moderate |
| Price Range | Budget |
| Maintenance Required | Low |
| Additional Features |
|
- Adjustable width (7–22 in) means you’re not switching tools between the lawn and the flower beds
- Long 63-inch handle keeps you upright and comfortable during longer cleanups
- Folds flat, so it’s not taking up half your shed
- Skip it if you’re moving anything heavier than leaves — it’s not built for rocks or thick debris
- Tines collect wet leaves and need clearing as you go
- The handle can show rust if it stays wet, so don’t leave it out in the rain
3. Koram Drip Irrigation Kit
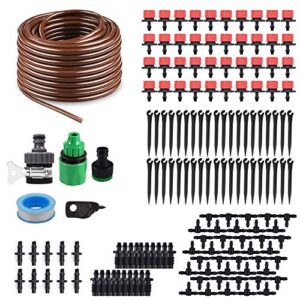
Once your beds are cleaned up, keeping them consistently watered is half the battle — and the Koram Drip Irrigation Kit makes that surprisingly easy. It covers up to 40 plants with 100 feet of tubing and adjustable drippers that let you dial in exactly how much water each plant gets.
Setup is tool-free, and it works beautifully with a hose timer for hands-off watering.
Compared to overhead sprinklers, you’ll use considerably less water while getting it right to the roots where it counts.
| Best For | Homeowners and small-scale gardeners who want a simple, affordable way to keep up to 40 plants consistently watered without daily effort. |
|---|---|
| Material | Plastic |
| Primary Use | Plant irrigation |
| Skill Level | DIY/Beginner |
| Durability | Low-Moderate |
| Price Range | Budget |
| Maintenance Required | Moderate |
| Additional Features |
|
- Adjustable drippers let you customize water flow for each plant, from 0 all the way up to 70 L/h
- Tool-free setup with 100 ft of tubing means you can get it running in an afternoon
- Saves up to 65% more water compared to manual watering or soaker hoses
- Non-pressure-compensating drippers can cause uneven flow, especially if you mix them with fixed-rate emitters
- Tubing is on the thinner side, which can mean pressure loss and a shorter lifespan than pricier alternatives
- Some users have reported missing parts or dripper heads popping off under pressure
4. GardenMate Metal Plant Labels
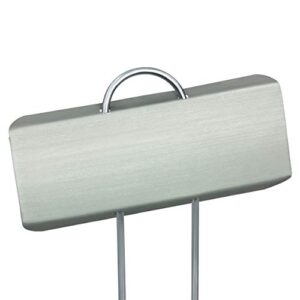
Twenty-five sturdy galvanized steel stakes — that’s what you get in a single GardenMate pack, and honestly, it’s enough to label an entire bed without running short.
Each copper-finished stake stands about 11.5 inches tall, so the label stays visible even when your hostas hit full size.
The writing surface works well with permanent marker, and a quick wipe with rubbing alcohol clears it for next season.
Just grab a pair of gloves — the edges can be surprisingly sharp.
| Best For | Gardeners who want durable, reusable plant markers that hold up through rough weather and busy growing seasons. |
|---|---|
| Material | Galvanized steel |
| Primary Use | Plant identification |
| Skill Level | All levels |
| Durability | High |
| Price Range | Mid-range |
| Maintenance Required | Low |
| Additional Features |
|
- 25 stakes per pack means you can label a whole bed in one go
- Tall enough to stay visible even next to big, bushy plants
- Wipe clean with rubbing alcohol and reuse year after year
- No marker included, and Sharpie can fade over time without a protective coating
- Edges are sharp enough to nick you if you’re not wearing gloves
- Some units arrive with minor bends or finishing inconsistencies
5. Elmers Black Acrylic Paint Marker

Once you’ve labeled your stakes, you need something that actually sticks — and that’s where the Elmer’s Black Acrylic Paint Marker earns its place in your tool kit.
The opaque black acrylic ink writes cleanly on metal, wood, ceramic, and glass, drying fast with a finish that holds up outdoors.
It’s acid-free and non-toxic, so no worries using it around plants.
Give it a good shake first to prime the nib, and you’re ready to mark clearly all season long.
| Best For | Crafters, hobbyists, and DIYers who need clean, permanent markings on wood, rock, glass, ceramic, or fabric — especially for small touch-up jobs where spray paint just isn’t practical. |
|---|---|
| Material | Acrylic/Plastic |
| Primary Use | Surface marking |
| Skill Level | All levels |
| Durability | Moderate |
| Price Range | Budget |
| Maintenance Required | Low |
| Additional Features |
|
- Opaque, glossy black finish that dries fast and looks sharp on most surfaces
- Acid-free and non-toxic, so it’s safe to use around plants and in creative spaces
- Works on a wide range of materials — wood, ceramic, glass, metal, and more
- The tip is friction-fit only, so it can pop out mid-use and needs to be pushed back in
- Doesn’t grip well on slick or non-porous plastics — adhesion can be hit or miss
- May need two coats for full coverage, and the price per pen runs a bit high for what you get
6. A M Leonard Nursery Spade

When spring cleanup gets serious, you need a spade that means business. The A.M. Leonard Nursery Spade features a heat-treated alloy steel blade that slices through compacted soil and roots without fighting you every inch.
At about 6 pounds with a 27‑inch reinforced composite handle, it’s built for real leverage — not just light scratching around.
The non‑conductive, moisture‑resistant construction also makes it genuinely safe in wet or chemically treated beds. It’s the kind of tool that makes hard soil feel almost cooperative.
| Best For | Landscapers, nursery workers, and serious home gardeners who need a heavy-duty spade that can handle compacted soil, roots, and chemically treated beds without breaking down. |
|---|---|
| Material | Alloy steel |
| Primary Use | Soil digging |
| Skill Level | Intermediate-Advanced |
| Durability | High |
| Price Range | Mid-range |
| Maintenance Required | Moderate |
| Additional Features |
|
- Heat-treated alloy steel blade slices through tough soil and roots with real ease
- Non-conductive, moisture- and chemical-resistant build keeps you safer in tricky conditions
- Reinforced composite handle with turned steps gives you solid leverage and a comfortable grip
- At ~6 lbs, it can wear you out faster than lighter spades on long jobs
- The 13-inch blade might feel a bit short if you’re tackling deeper digging or trenching work
- Composite handle, though tough, may not hold up as well as full metal in extreme impact situations
7. Flora Guard Heavy Duty Garden Tool Set
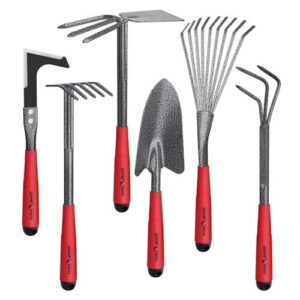
Sometimes the best tool kit is the one that just gets out of the way.
The Flora Guard Heavy Duty Garden Tool Set gives you six essentials — trowel, cultivator, rakes, hoe, and crack weeder — packed into a carry box for under $25.
High-carbon steel blades handle real soil without bending, and the ergonomic grips are genuinely kind to tired hands.
It’s compact enough for a balcony garden but tough enough for serious beds.
A solid starter kit, or an easy gift for the gardener who’s almost everything.
| Best For | Beginner gardeners, seniors, and hobbyists who want a solid, affordable set for flower beds, veggie gardens, or balcony containers. |
|---|---|
| Material | High-carbon steel |
| Primary Use | Soil cultivation |
| Skill Level | Beginner-friendly |
| Durability | High |
| Price Range | Budget |
| Maintenance Required | Moderate |
| Additional Features |
|
- Six purpose-built tools in one carry box for under $25 — hard to beat the value
- High-carbon steel blades hold up to real use without bending or rusting easily
- Ergonomic grips make longer sessions much easier on your hands
- Some customers received tools in different colors than listed — quality control is hit or miss
- No pruning shears included, so you’ll need to buy those separately
- Not built for heavy professional or large-scale landscaping work
Frequently Asked Questions (FAQs)
Is October too late to mulch?
October isn’t too late — it’s actually ideal for many regions. Mulch after the soil cools but before a hard frost, laying down 2–3 inches to insulate roots through winter.
When should I clean out my flower beds in spring?
Wait until daytime temperatures hold steady around 50°F and your soil has thawed and dried out a bit.
Jump in too early and you’ll compact the soil — undoing half your spring progress before it starts.
How to care for flower beds in spring?
Funny how garden that looked hopeless in February turns into pure potential by April.
Clear debris, cut back dead growth, refresh soil with compost, and mulch lightly. Spring rewards the ones who show up.
Should you remove leaves from flower beds in spring?
Yes, but don’t strip everything bare. Remove thick, matted layers that block air and light, but leave a light covering over dormant perennials — it still protects and helps overwintering pollinators.
What plants need to be cut back in the spring?
Spring’s your cue to cut back — but not everything on the list. Ornamental grasses, salvia, Russian sage, bee balm, and sedum are your first targets once new growth appears.
How often should I fertilize spring flower gardens?
It depends on what you’re growing. Annuals want feeding every four to six weeks; perennials usually need just one spring boost.
Always let your soil — and your plants — tell you when they’re hungry.
Can I plant summer bulbs in early spring?
Wait until after your last frost date. Summer bulbs like dahlias and cannas rot in cold, wet soil. Plant them when soil hits 60°F — usually late spring.
Should I deadhead spring flowers as they fade?
For most spring bloomers, yes — snip off faded flowers to redirect energy into roots and new buds. Skip it on plants you want to self-seed, like columbine.
Whats the best mulch depth for flower beds?
Aim for two to three inches of organic mulch in your flower beds. Keep it away from plant stems — a two-inch gap prevents rot and smothering crowns.
How do I protect flowers from late spring frosts?
A late frost can wipe out weeks of work overnight.
Drape floating row covers over tender blooms before temperatures dip below freezing, and water deeply the day before — moist soil holds heat like a battery.
Conclusion
A stitch in time saves nine, and regarding spring flower garden maintenance, getting it right from the start pays dividends all season.
By following these steps, you’ll set your garden up for success. Remember, the sequence matters—take your time and do it right.
With a little patience and planning, your garden will reward you with vibrant blooms and lush growth. Spring into action with confidence and make flower garden maintenance a breeze.
- https://greatgardenplans.com/how-often-to-fertilize-flower-garden/
- https://extension.illinois.edu/flowers/caring-annuals
- https://wardsnursery.com/ask-the-experts/how-often-should-i-fertilize-my-plants/
- https://www.plantshed.com/fertilizer-101-whats-best-for-your-spring-garden
- https://soiltesting.cahnr.uconn.edu/suggested-fertilizer-practices-for-flowers/