This site is supported by our readers. We may earn a commission, at no cost to you, if you purchase through links.
You can pinch off a basil leaf wrong and send its precious oils drifting into the air instead of your kitchen. That’s the delicate balance with soft-stemmed herbs—they hold remarkable flavor, but only when you handle them with care. A single careless cut can bruise tender leaves, invite disease, or stunt future growth.
The difference between a thriving herb garden and a struggling one often comes down to how you harvest. Your timing, tools, and technique all play a role in preserving both the plant’s vitality and the intense flavors you’re after. Get these fundamentals right, and you’ll enjoy abundant harvests that taste as vibrant as they should.
Table Of Contents
- Key Takeaways
- Best Times to Harvest Delicate Herbs
- Choosing and Preparing Harvesting Tools
- Step-by-Step Harvesting Techniques
- Harvesting Different Types of Delicate Herbs
- Handling Herbs After Harvest
- Preserving Harvested Herbs for Later
- Common Mistakes to Avoid When Harvesting
- Frequently Asked Questions (FAQs)
- Conclusion
Key Takeaways
- Harvest herbs in the early morning after dew dries but before the sun heats up, when essential oils are most concentrated and flavor peaks—this timing delivers stronger aroma and better preservation than any other time of day.
- Always cut just above a leaf node at a 45-degree angle using sharp, sanitized tools, as this precise positioning triggers dormant buds to sprout new stems and doubles your harvest potential while preventing disease.
- Follow the one-third rule by removing no more than a third of the plant’s foliage at each harvest, which preserves enough photosynthetic capacity for rapid regrowth and prevents stress or dieback across all herb varieties.
- Handle freshly cut herbs gently and rinse under cool running water for at least 20 seconds before patting dry, since rough handling bruises delicate leaves and releases precious essential oils you worked to preserve.
Best Times to Harvest Delicate Herbs
Timing is everything for harvesting herbs—get it right, and you’ll capture peak flavor in every leaf. The best moments to pick your herbs depend on a few key factors, from the time of day to the weather and where your plant is in its growing cycle.
Let’s explore the specific times that’ll give you the most flavorful harvests while keeping your plants happy and healthy.
Morning Harvesting for Maximum Flavor
Harvest your herbs in the early morning—it’s when they’re at their absolute best. After the dew dries but before the sun heats up, your plants are fully hydrated and their essential oils are at peak concentration.
This timing delivers maximum flavor intensity and nutrient content in every leaf you cut. Harvesting at this time ensures that you get the most concentrated essential oils.
You’ll notice the difference immediately: stronger aroma, deeper taste, and herbs that stay fresher longer.
Avoiding Harvests After Rain
While morning harvesting captures peak essential oils, timing matters just as much as the hour. Skip harvesting right after rain—wet leaves invite fungal disease and dilute your herbs’ flavor. Excess moisture slows drying, traps pathogens, and compromises the volatile compounds you worked to grow.
Wait until foliage dries completely before cutting. That patience pays off in cleaner harvests, better preservation, and herbs that taste authentically vibrant. To get the most flavor, it’s important to trim herbs before they flower.
Recognizing Peak Herb Maturity
Beyond the clock, your herbs tell you when they’re ready. Look for visual indicators—most culinary herbs like basil and mint hit their sweet spot around 15–20 cm of growth, before flower buds form. That’s when leaf flavor peaks and essential oils concentrate most.
Harvest just before flowering opens, and you’ll capture the plant’s full aromatic potential. Later harvests from established plants can actually boost oil content, so don’t rush young growth. Let maturity develop naturally.
Choosing and Preparing Harvesting Tools
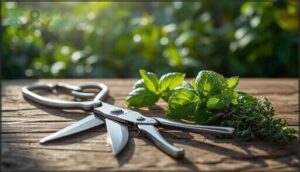
Your hands are your herb garden’s best asset, but they can’t do the job alone—the right tools make all the difference. Sharp scissors and quality pruners aren’t just nice to have; they’re what keep your plants healthy and bouncing back for more harvests.
Let’s walk through exactly what you need and how to prepare your tools so they’re ready to work for you.
Selecting Sharp Scissors or Pruners
The right herb harvesting tools make all the difference between a thriving plant and a struggling one. Sharp scissors or clean pruners with ergonomic design deliver cutting precision while protecting delicate stems. When selecting your tools, prioritize these features:
- Stainless steel blade material for excellent corrosion resistance against plant moisture
- Curved or straight blade shape suited to your garden’s layout
- Lightweight grips under 12 ounces to reduce hand fatigue
- Bypass-style blades that slice cleanly through soft tissue
- Comfortable grips for extended harvesting sessions
Sanitizing Tools to Prevent Disease
Without clean harvesting tools, you risk spreading invisible viruses and fungi between your precious herbs. Alcohol, diluted bleach (1:3 ratio), or household disinfectants work effectively for tool sterilization—just soak blades for 5 minutes between plants.
Bleach offers strong disinfectant efficacy but causes tool corrosion, so rinse afterward. This contact time prevents transmission risks while protecting plant health during every harvest.
Proper Technique for Clean Cuts
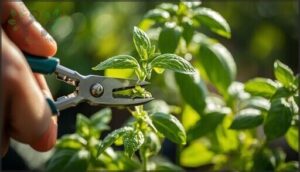
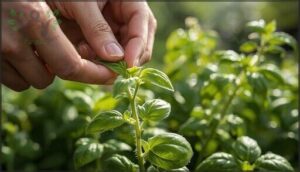
Position your sharp scissors or pruning shears at a 45-degree angle just above a leaf node, then close the blades in one smooth motion. This cutting angle promotes outward growth while letting water run off the wound.
- Apply only enough pressure to sever the stem cleanly
- Keep the sharp blade on the plant side to minimize crushing
- Avoid sawing motions that bruise delicate tissue
Clean cuts heal faster, protecting your herbs from disease.
Step-by-Step Harvesting Techniques
Once you’ve got your tools ready, it’s time to put them to work with techniques that actually protect your plants while giving you the best harvest. These methods aren’t complicated, but they make all the difference in keeping your herbs healthy and productive.
Let’s walk through three straightforward approaches that’ll have you harvesting like a pro.
Cutting Above Leaf Nodes
When you cut your delicate herbs right above a leaf node, you’re unlocking the plant’s natural branching control. This precise positioning triggers node regeneration—those dormant buds below your cut will sprout into new stems, doubling your harvest potential. Making cuts at the ideal height (around the fourth or fifth node on basil) creates structural balance while maximizing yield impact.
Here’s how different node locations affect your harvesting for continued growth:
| Node Position | Result |
|---|---|
| Second node (low cut) | Limited branching, reduced plant regrowth |
| Fourth-fifth node (higher cut) | More branches, better yield impact, ideal height for structural balance |
| Between nodes (incorrect) | Weak plant regrowth, no leaf node activation |
Your pinching back herbs technique matters—those lateral buds need the signal that comes from cutting just above their home base. This harvesting fresh herbs guide principle applies whether you’re working with basil’s tender stems or mint’s vigorous shoots, ensuring continued vitality with every snip.
Using The One-Third Rule
Think of the one-third rule as your herb regrowth after cutting insurance policy. When you remove no more than a third of foliage during each harvest, you preserve enough photosynthetic capacity for rapid recovery.
This harvesting for continued growth approach balances yield and frequency across different herb growth habits—whether you’re working with aggressive mint or slow-growing sage—while managing the risk of plant stress or dieback.
Pinching and Thinning for Bushier Growth
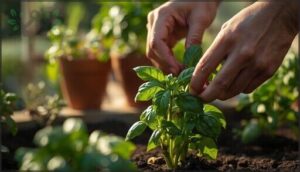
Pinching back herbs transforms spindly stems into productive powerhouses. When you remove the growing tip just above a leaf node, dormant buds at growth nodes below activate rapidly—creating two new branches where one existed.
This pruning technique for encouraging new growth works best during the early vegetative growth stage, before flowering pulls energy away from foliage. Thinning seedlings to reduce crowding amplifies the effect.
Pinch location matters: always cut soft stem tips, and adjust pinching frequency based on your herb’s vigor.
Harvesting Different Types of Delicate Herbs
Not all herbs behave the same way when it comes to harvesting. Understanding whether you’re working with annuals or perennials, tender or woody stems, makes a real difference in how you approach each plant.
Let’s look at how to adjust your technique based on the specific herbs you’re growing.
Annual Vs. Perennial Herb Harvesting
Understanding the difference between annual and perennial herb harvesting techniques helps you optimize flavor while keeping plants productive. Annuals, like basil, grow fast and handle frequent cutting—you can harvest them heavily until frost ends their single-season lifespan. Perennials, such as rosemary, need gentler treatment since they return each year, requiring lighter harvest intensity and strategic seasonal timing to build strong structural frameworks.
| Characteristic | Annual Herbs | Perennial Herbs |
|---|---|---|
| Lifespan | Complete cycle in 90-120 days; replant yearly | Return multiple years; enter winter dormancy |
| Harvest Intensity | Remove up to 1/3 weekly during peak growth | Limit to 1/3; stop 1-2 months before frost |
| Seasonal Timing | Continuous harvest until first hard frost | Major harvest early spring before flowering |
| Structural Differences | Rapid, lush vegetative growth; aggressive cutting tolerated | Woody frameworks develop; selective pruning required |
Tender Vs. Woody Stemmed Herbs
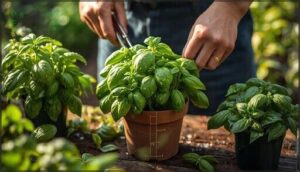
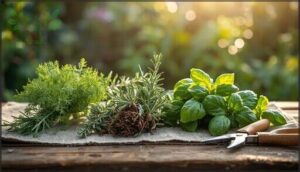
Beyond annual and perennial differences, stem structure dramatically changes your harvesting approach. Tender herbs like basil have soft, green stems with faster growth rates but bruise easily—you’ll need sharp scissors for clean cuts above leaf nodes to preserve best flavor and encourage regrowth potential.
Woody herbs such as rosemary develop fibrous stems requiring sturdy pruners, yet they retain flavor longer after harvest, making them forgiving partners in your garden.
Timing for Specific Herbs (e.g., Basil, Mint, Chives)
Each herb hits its peak at a specific moment. Basil harvest time should target early morning after dew dries—that’s when essential oils concentrate most, especially before flowers form. Mint menthol peak also comes with morning cuts, while chive cutting height of 15 cm signals readiness.
These best harvest times aren’t arbitrary; they’re rooted in how plants store flavor compounds throughout the day.
Handling Herbs After Harvest
Once you’ve clipped your herbs, how you treat them in the next few minutes makes all the difference. Rough handling or careless rinsing can turn vibrant leaves into bruised, wilted shadows of their former selves.
Let’s walk through the gentle steps that keep your harvest fresh and flavorful.
Gentle Rinsing and Drying Methods
Once you’ve brought your harvest inside, rinsing techniques matter more than you might expect. Gentle water exposure protects those precious oils while removing dirt and microbes—research shows proper washing can reduce bacterial levels by up to 99%.
Here’s your simple routine:
- Hold sprigs under cool running water for at least 20 seconds, turning gently to reach all surfaces
- Skip soaking in standing water—it spreads contamination rather than removing it
- Pat dry with paper towels or use a salad spinner for sturdier herbs like parsley
Moisture control aids both quality preservation and microbial reduction, keeping your fresh herbs safe and flavorful. Proper drying practices prevent the damp pockets that accelerate spoilage, ensuring your delicate leaves maintain their vibrant flavor profile from garden to kitchen.
Avoiding Excess Moisture and Bruising
After your careful drying, moisture control becomes your next priority. Excess water invites fungal growth and spoilage, while rough handling releases those fragile essential oils you worked so hard to preserve.
Proper harvesting techniques and handling herbs postharvest protect both flavor preservation and your plant’s future productivity—fresh herbs deserve this care.
Protection Strategy | Impact on Quality
— | —
Sharp tool sharpness | Reduces stem crushing by 50%
Loose basket storage | Decreases compression bruising by 40%
Gentle handling post-cut | Prevents 30% increase in bruising
Storing Herbs for Immediate Use
Within hours of harvest, fresh herbs begin losing essential oils—quick action protects flavor. For immediate use, proper herb storage methods maintain peak quality.
Store tender herbs stem-down in water glasses covered with plastic bags inside your refrigerator, while hardy varieties prefer damp paper towels in sealed containers. Temperature control between 32-40°F and moisture levels around 90-95% humidity make all the difference.
These herb storage techniques extend storage duration to 3-10 days, maximizing your harvest. Proper containers and careful herb preparation help extend herb freshness when storing herbs properly.
Preserving Harvested Herbs for Later
Once you’ve brought your herbs inside, you’ll want to lock in that fresh flavor and aroma for months to come. The good news is that preserving delicate herbs doesn’t require fancy equipment or complicated steps.
Let’s look at three reliable methods that keep your harvest tasting garden-fresh long after the growing season ends.
Air-Drying Techniques
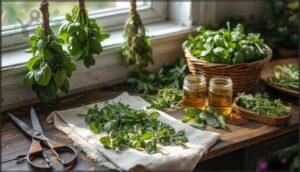
Air-drying bundles is one of the gentlest ways to preserve your harvest’s flavor and aroma. Keep bundle size small—around 5 to 8 stems—so air circulates freely.
Choose a hanging location that’s dark and well-ventilated, with humidity control below 60% for mold prevention. Drying duration usually spans 5 to 10 days.
You’ll know your herbs are ready when stems snap cleanly.
Freezing in Oil or Water
When freezing herbs, you’re choosing between two methods that handle flavor preservation differently. Oil infusions wrap leaves in a protective layer, while herb ice cubes in water offer lighter texture changes for soups and stocks.
- Mix ⅓ cup oil with 2 cups chopped herbs in ice cube trays for easy cubes usage
- Water freezing works best for chives and herbs you’ll add to broths
- Store frozen cubes 3-6 months for best flavor retention
Using Dehydrators for Delicate Herbs
Dehydrator temperature makes all the difference when drying herbs—set yours between 95°F and 115°F to lock in essential oils and vibrant color. Most delicate herbs dry in 2-4 hours with proper herb preparation.
| Step | Details |
|---|---|
| Temperature | 95°F–115°F for nutrient retention |
| Drying Times | 2–4 hours for basil, mint, parsley |
| Arrangement | Single layer, no overlapping |
| Storage Guidelines | Airtight containers, 12-month shelf life |
Common Mistakes to Avoid When Harvesting
Even experienced gardeners can accidentally harm their herb plants during harvest. A few common missteps can weaken growth, reduce flavor, or even kill your herbs over time.
Let’s look at the mistakes you’ll want to steer clear of to keep your plants thriving.
Over-Harvesting and Its Impact
Taking more than you should might seem harmless, but over-harvesting can send your herb garden into a downward spiral. Here’s what happens when you push too hard:
- Herb depletion — Removing too much at once exhausts the plant’s energy reserves and triggers slow regrowth
- Ecosystem effects — Wildlife lose food sources and pollinators struggle as plant communities shift
- Economic losses — Scarcity drives up replacement costs and reduces your harvest yields over time
- Conservation efforts — Sustainable harvesting protects future abundance and keeps herb growth cycles intact
Damaging Plant Growth Points
When your scissors slip below a leaf node, you’re not just removing stems—you’re cutting off your plant’s future. Damage to growth points triggers apical dominance loss, which reshapes branching architecture and initiates slow regrowth that can last weeks.
Here’s how harvesting techniques affect plant growth and herb flavor:
| Damage Type | Impact on Harvesting Herbs |
|---|---|
| Growth point removal | Reduces biomass up to 40%, limiting future yields |
| Deep cuts into woody stems | Creates non-regenerating stems, especially in basil |
| Multiple node removal | Increases stress susceptibility and pathogen pressure |
| Below-node cuts | Causes delayed development and sparse foliage |
| Over-aggressive pruning | Impairs canopy formation, reducing photosynthesis |
The harvesting implications are clear: cut just above healthy leaf nodes to preserve your plant’s ability to branch and bounce back strong.
Harvesting at The Wrong Growth Stage
Premature harvesting robs your herbs of essential oil development—rosemary cut at six months holds just 0.6% oils compared to 1.0% at peak maturity. Yet post-flowering harvest isn’t better; once blooms open, leaf quality plummets and phytochemical decline accelerates.
Harvest herbs just before flowering—too early and oils stay weak, too late and bitterness takes over
Timing matters: harvest too early and you’ll lose flavor intensity, wait too long and bitterness creeps in while regrowth impact compounds across future cuttings.
Frequently Asked Questions (FAQs)
Can you harvest herbs during the flowering stage?
Yes, but timing matters. Harvesting herbs during flowering depends on your goal—leaves lose their best flavor as blooms appear, while flowers themselves attract pollinators and offer unique tastes when picked at peak bloom.
What are signs of disease before harvesting herbs?
Before harvesting, check for visual symptoms like yellowing leaves, water-soaked lesions, or fungal indicators such as powdery spots. Bacterial signs include sticky ooze.
Early disease detection protects plant health and prevents crop loss.
How do you revive wilted herbs after harvesting?
To restore crispness, immerse wilted fresh herbs in cool water for 15–30 minutes. Trim stems, then refrigerate at high humidity in sealed packaging.
Temperature and humidity control maximizes herb freshness despite physiological limits.
Should different herb varieties be stored together or separately?
Store your herbs separately whenever possible. Different temperature requirements, ethylene sensitivity, and aroma cross-contamination can shorten shelf-life and compromise flavor preservation when varieties share space, even in airtight containers.
Conclusion
Long before Instagram reels and viral food trends, gardeners understood that gentle hands yield the finest flavors. These tips for harvesting delicate herbs aren’t just rules—they’re a rhythm you’ll develop with practice.
Each careful cut protects your plants while capturing those vibrant oils at their peak. Master this balance, and your kitchen will never lack fresh, aromatic herbs that taste like they were meant to: alive and unforgettable.
- https://www.yahoo.com/lifestyle/articles/best-time-day-harvest-herbs-083000287.html
- https://postharvest.ucdavis.edu/produce-facts-sheets/herbs-fresh-culinary
- https://aggie-horticulture.tamu.edu/vegetable/guides/texas-vegetable-growers-handbook/chapter-x-harvesting-handling/
- https://www.backyardboss.net/harvesting-herbs-in-june/
- https://gomayne.com/blogs/news/harvesting-and-storing-homegrown-herbs

