This site is supported by our readers. We may earn a commission, at no cost to you, if you purchase through links.
Most gardeners feed their plants. The best gardeners feed their soil. That one shift in thinking separates a garden that struggles through summer from one that practically grows itself.
Healthy soil isn’t just dirt—it’s a living system packed with microbes, fungi, and earthworms all working to deliver nutrients straight to your roots. Get foundation right, and everything else becomes easier.
These seven garden soil improvement tips cover everything from testing your soil’s texture and pH to mulching, composting, and growing cover crops that put nutrients back where they belong.
Table Of Contents
- Key Takeaways
- Test Your Garden Soil First
- Add Compost Every Season
- Improve Soil Structure Naturally
- Mulch for Moisture and Protection
- Grow Cover Crops and Rotate
- Practice No-Till Soil Care
- Feed Soil Biology Naturally
- Frequently Asked Questions (FAQs)
- What can I add to my garden soil to make it better?
- What to add to soil to make it richer?
- What is the best way to improve my garden soil?
- How can i Improve my soil?
- What makes a good garden soil?
- How do I care for my garden soil?
- How can I improve my soil’s nutrient supply?
- What is the key to healthy soil?
- When is soil improvement a good idea?
- When is the best time to test soil?
- Conclusion
Key Takeaways
- Testing your soil first—checking texture, pH, and nutrients—lets you fix real problems instead of guessing what your garden needs.
- Adding compost every season builds a living soil full of microbes, nutrients, and organic matter that keeps your plants fed naturally.
- Mulching with straw locks in moisture, steadies soil temperature, and cuts weed growth by up to 80%.
- No-till practices protect earthworm tunnels and fungal networks that quietly do the heavy lifting of nutrient cycling and root support.
Test Your Garden Soil First

Before you add anything to your garden, you need to know what you’re working with. Think of a soil test as a quick health checkup — it tells you exactly what’s missing and what’s already there. Here’s what to look at first.
A soil test for spring planting takes the guesswork out of amendments, so you’re fixing real problems instead of just hoping for the best.
Check Soil Texture
Before you reach for a single bag of fertilizer, your soil needs to tell you its story — and texture is the first chapter.
Soil texture describes the mix of sand, silt, and clay particles in your garden bed. That ratio controls everything: how fast water drains, how tightly roots grip, and how well nutrients stick around.
Here’s how to read it yourself:
- Feel Method — Moisten a small soil sample and rub it between your fingers. Gritty means high sand content. Silky points to silt. Sticky and plastic signals clay‑heavy soil.
- Ribbon Test — Squeeze moist soil into a ribbon. Ribbons longer than 2 cm confirm significant clay content. Short ribbons that crumble? You’re likely working with sandy soil or loam.
- Jar Test — Drop a soil sample into a clear jar of water and wait 24 hours. Sand sinks first, silt follows, and clay stays suspended longest. Measure each layer for an objective soil texture classification.
- Texture Triangle — Plot your sand, silt, and clay percentages on a soil texture triangle to name your exact soil type — whether that’s clay loam, sandy loam, or true loam.
The USDA system classifies soils into twelve types using the soil texture triangle.
- Sampling Tips — Collect samples from four to five spots, sieve out debris, and clean your hands between tests. One spot rarely tells the whole story.
Knowing your texture puts you in control before you even dig deeper.
Measure PH Levels
Once you know your soil’s texture, the next piece of the puzzle is soil pH — a simple scale from 0 to 14 that tells you how acidic or alkaline your soil is. Most vegetables thrive in the 6.0 to 7.0 range, where nutrients dissolve easily and roots can actually use them.
Review Nutrient Balance
So you’ve sorted texture and soil pH management — now it’s time to look at what’s actually feeding your plants. Nutrient balance means checking nitrogen, phosphorus, and potassium levels together. A soil test reveals if one is crowding out the others. Imbalance often shows up as uneven growth or off-color leaves — classic deficiency symptoms worth catching early.
Track Organic Matter
Once you know your nutrient levels, the next piece of the puzzle is soil organic matter (OM). Think of OM as your soil’s bank account — the higher the balance, the more nutrients your plants can draw on. Healthy garden soils hold 3 to 5 percent OM by weight, but many gardens fall well below that.
Use Soil Test Kits
A soil test kit makes this easy. Pick one that covers soil pH, nitrogen, phosphorus, and potassium. Mix solutions carefully with dried soil, then compare results to the color chart. Digital accuracy beats guessing every time. Here’s what a good kit helps you do:
- Kit Selection: Choose one covering pH and N-P-K
- Mix Solutions: Follow ratios precisely for clean readings
- Digital Accuracy: Use a digital reader when possible
- Track Trends: Retest each season to spot shifts
- Avoid Errors: Air-dry soil 24 hours before testing
Regular soil nutrient balance checks guide every soil amendment decision you make.
Add Compost Every Season

Compost is one of the simplest things you can do for your garden, and the payoff is real. Think of it as a seasonal reset that keeps your soil fed, balanced, and full of life. Here’s what to know about making compost work for you all year long.
Finished Compost Benefits
Think of finished compost as a slow-release multivitamin for your garden beds. It feeds your plants steadily, supplies key micronutrients like iron and zinc, and builds lasting soil fertility without synthetic inputs. Better still, it locks in carbon, diverts kitchen waste from landfills, and boosts drought resilience — all from one simple, seasonal habit.
Aged Manure Application
Adding aged manure is one of the smartest moves you can make after compost. Unlike fresh manure, aged manure has decomposed long enough to reduce ammonia and pathogens — so it feeds your soil without burning roots.
Work it 1–2 inches deep each season. It slowly releases nitrogen, phosphorus, and potassium while encouraging beneficial microorganisms that keep your soil alive and fertile.
Leaf Mold for Humus
Few gardeners realize that a humble pile of rotting leaves can quietly become one of their most powerful soil improvement tools.
Leaf mold forms when fungi slowly break down fallen leaves over 12 to 24 months, converting cellulose and lignin into rich, stable humus. This fungal breakdown creates a crumbly, sponge-like material that clings to nutrients and holds moisture beautifully.
Here’s what it brings to your beds:
- Stable organic matter that resists rapid breakdown and feeds soil for years
- Improved structure in heavy clay soils, loosening texture and boosting drainage
- Natural disease resistance by encouraging beneficial microbes that outcompete harmful pathogens
- Better moisture retention in sandy soils prone to quick drying
Think of leaf mold as a slower, humbler cousin to compost. Compost delivers a broader nutrient punch, but leaf mold for humus builds long-term soil health in ways compost alone can’t match. Combined, they’re unstoppable.
Together, leaf mold and compost mirror the deeper principles behind building healthy soil—layering organic matter over time to create a living, self-sustaining ecosystem beneath your feet.
For leaf mold application, mix it into the top 6 to 12 inches before planting, or layer it as mulch around established plants. Either way, your soil quietly improves season after season.
Compost for Raised Beds
Raised beds give you a rare advantage: total control over your soil. For new beds, mix 25–50% compost into your base soil to build a rich, fertile foundation from day one. For established beds, a 1–2 inch topdress each season keeps nutrients flowing steadily to your plants without disturbing existing roots.
Always use well-aged, finished compost — dark, earthy-smelling, and fully broken down. Immature compost can actually lock up nitrogen, slowing growth right when your plants need it most. Done right, compost can boost water retention by 20–30%, making your raised beds more resilient through dry spells.
Avoid Over-amending Soil
More isn’t always better with organic matter. Piling on compost season after season can trigger salt accumulation risks, raising soil salinity to levels that stress roots and invite nutrient burn in sensitive crops.
- Excess amendments can cause microbial imbalance, favoring harmful organisms
- Too much organic matter disrupts soil pH and locks out key minerals
- Skipping a soil health assessment means flying blind
A simple soil test each year keeps your nutrient balance in check. Watch your organic matter levels and time your amendment timing wisely — your soil will thank you.
Improve Soil Structure Naturally
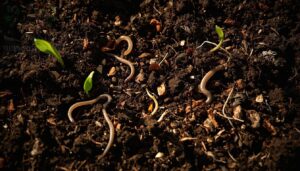
Good soil structure is the difference between roots that thrive and roots that struggle. When your soil is loose, well-drained, and full of life, everything you plant has a real shot. Here are five practical ways to improve it naturally.
Loosen Compacted Soil
Compacted soil is like a locked door — roots simply can’t push through. When soil compaction sets in, water pools on the surface instead of soaking down, and plant roots struggle to reach nutrients.
Start with a garden fork to penetrate the compacted layer. Push the tines 6–8 inches deep and gently rock the fork back and forth. This loosens the soil without fully turning it over, so you protect the living ecosystem beneath your feet.
Seasonal timing matters here. Early spring, before you plant anything, is ideal. The soil is moist enough to work but not waterlogged. After a heavy rain, wait a day or two — working wet soil makes compaction worse.
| Technique | Best Use |
|---|---|
| Garden fork aeration | Breaking shallow compacted layers |
| Core aeration | Improving porosity in dense beds |
| Subsoiling tines | Deep loosening below root zone |
| Organic matter incorporation | Long-term soil aeration support |
Once you’ve loosened things up, layer organic matter like compost over the surface. As it breaks down, microbes keep working the soil for you — a slow but powerful assist. Use a penetrometer (a simple probe tool) to track your progress over time.
Build Crumbly Texture
Once your soil is loose, the next goal is getting it to feel crumbly and alive — like moist chocolate cake that holds its shape but breaks apart easily in your hand.
That texture isn’t luck. It comes from steady organic matter additions. Work in compost each season, and the humus it creates binds particles into small, stable clumps called aggregates.
Improve Clay Drainage
Clay soil has a habit of holding water like a sponge that never quite wrings out. That’s great for moisture — but roots need air too.
- Mix in 2–4 inches of compost each season to break up dense clay and open drainage pathways.
- Apply gypsum at 1–2 kg per 10 square meters to help clay particles clump together, creating larger pores water can move through.
- Install a French drain with perforated pipe sloped at 1 percent, directing overflow to a swale or dry well.
Boost Sandy Water Retention
Sandy soil drains fast — sometimes too fast. Water slips right through before roots can use it.
Boosting organic matter is your best fix. Work in 2–3 inches of compost each season. Adding biochar at 10% volume creates tiny pockets that hold moisture between sand grains. Peat moss or vermiculite mixed in also improves water retention noticeably. A drip system with organic mulch on top keeps moisture where it belongs.
Protect Root Growth
Roots need room to breathe. Avoid foot traffic over beds — compaction squeezes out oxygen and stunts growth fast.
- Deep watering encourages roots to reach 8–12 inches down
- Mulching retains soil moisture and protects delicate root hairs
- Micronutrient support keeps root tissue strong and healthy
- Salt mitigation prevents fertilizer burn on sensitive root tips
Monitor moisture regularly and time your irrigation wisely.
Mulch for Moisture and Protection

Mulch is one of the simplest things you can add to your garden — and one of the most rewarding. A good layer works quietly in the background, keeping moisture in, weeds out, and soil temperature steady. Here are the best mulching options to help your garden thrive.
Straw and Shredded Leaves
Two mulch options stand out for home gardeners: straw and shredded leaves. Each brings something different to your beds, and knowing when to use them makes a real difference.
| Material | Decomposition Rate | Key Benefit |
|---|---|---|
| Straw | 6–12 months | Long-lasting moisture retention |
| Shredded Leaves | One growing season | Faster nutrient return to soil |
A 2–4 inch layer of straw blocks sunlight, suppresses weeds, and cuts evaporation by up to 30 percent. It also insulates roots through temperature swings. Shredded leaves decompose faster, feeding soil biology and boosting organic matter quickly. Combine both materials — straw improves airflow while leaves add nutrients. Always keep mulch away from plant stems to prevent disease.
Wood Chip Mulch
Wood chips are one of the hardest-working organic mulches you can use.
Spread 2–4 inches over your beds and they’ll:
- Slowly release carbon back into the soil as they break down
- Fire up microbial activity beneath the surface, building a healthier soil food web
- Protect slopes from erosion by absorbing rainfall impact and slowing runoff
Local arborists often give chips away free.
Reduce Soil Evaporation
Every drop of water lost to the air is a missed chance for your plants.
Organic mulches like straw and shredded leaves cut soil evaporation by 30–50%. A 3–4 inch layer acts as a shield, slowing water vapor from escaping — especially during peak afternoon heat.
| Mulch Type | Evaporation Reduction | Duration |
|---|---|---|
| Straw | 30–50% | 1 season |
| Wood Chips | 50%+ | 2–5 years |
| Leaf Mold | 30–50% | 6–12 months |
Pair drip irrigation with mulching to deliver water straight to roots with minimal loss. Add a residue cover between beds, use narrow beds to limit edge exposure, and set up a simple rainwater harvesting barrel. Even a windbreak along your garden’s border helps — less wind means less evaporation. Together, these habits lock moisture in where it belongs.
Moderate Soil Temperature
Soil temperature might seem like something only scientists track — but it directly affects whether your seeds sprout, your transplants survive, and your roots thrive.
Mulch acts like a blanket for your soil. A 3–4 inch layer of organic mulch moderates seasonal temperature shifts by 15–20°F, keeping things steady when spring warms fast or autumn cools overnight.
Here’s what that stability unlocks:
- Seed germination rates improve when soil stays in the 50–70°F sweet spot
- Transplant success rises because roots aren’t shocked by sudden heat or cold
- Microbial activity stays consistent, breaking down nutrients your plants can actually use
- Soil moisture retention holds steady, since moist soil buffers temperature swings naturally
That last point matters more than most gardeners realize. Moist soil holds heat longer on cool nights and resists overheating on hot afternoons — a quiet benefit of good mulching habits.
For ideal root growth, keep mulch pulled an inch or two back from plant stems to prevent rot. Reapply after the first winter freeze to protect microbial life underground and give your soil a strong head start come spring.
Suppress Garden Weeds
Weeds are basically squatters — and mulch is your eviction notice.
A 3–4 inch mulch layer blocks sunlight so weed seeds can’t sprout. That single step cuts weed emergence by up to 80 percent in your first season. Less weeding, more growing.
| Mulch Type | Weed Suppression Benefit |
|---|---|
| Straw | Fast coverage; great around vegetables |
| Wood chips | Long-term suppression in pathways |
| Shredded leaves | Breaks down into soil-feeding humus |
| Cardboard underlayer | Dense barrier before mulch settles |
| Cover crop residue | Green manure doubles as natural mulch |
Pair mulch with a stale seed bed technique — water bare soil, let weed seeds germinate, then lightly disturb the surface before planting. You’re tricking weeds into sprouting early so you can clear them out first.
No-till practices protect your effort too. Every time you dig, you bring buried weed seeds to the surface. Keeping soil undisturbed means fewer weeds fighting your crops.
Dense planting and cover crops shade the soil quickly, leaving no bare ground for weeds to claim. Think of it as filling every seat so gate-crashers can’t get in.
Grow Cover Crops and Rotate
Leaving a bed bare between seasons is one of the quietest ways to drain your soil. Cover crops and smart rotation give your garden a chance to rest, rebuild, and come back stronger. Here are five ways to put that strategy to work.
Clover for Nitrogen

Think of clover as your garden’s silent nitrogen factory. Through rhizobia symbiosis — a partnership between clover roots and soil bacteria — atmospheric nitrogen gets converted into plant-ready nutrients. Keeping 25–30% clover in your cover crop mix optimizes fixation. Over time, this builds soil organic matter, supporting stronger growth without relying on synthetic fertilizers.
Rye for Biomass

Winter rye pulls double duty in your garden. While clover quietly fixes nitrogen, rye gets busy building raw organic biomass — the bulk material that feeds your soil long-term.
- Rye produces 5–7 tons per hectare annually in temperate climates
- Its higher heating value reaches 19–20 MJ/kg dry matter
- Early autumn sowing maximizes total dry mass
- Rye biomass can be pelletized for fuel with minimal processing
- Co-cropping rye after corn boosts farm income diversity
Till it under as green manure before it seeds, and your soil health gets a serious upgrade.
Buckwheat for Quick Cover

Buckwheat is the sprinter of cover crops. While rye builds bulk slowly, buckwheat hits the ground running — germinating in 3–5 days and forming dense cover within two weeks.
| Benefit | Detail |
|---|---|
| Ground cover | Full canopy in 6–8 weeks |
| Nutrient release | Ready in 2–4 weeks after tillage |
That speed makes it a perfect seasonal gap filler between plantings.
Green Manure Basics

So buckwheat fills short gaps beautifully — but what about building soil fertility over a full season? That’s where green manure comes in.
Green manure crops are grown specifically to be dug back into the soil. They’re not harvested. Instead, they feed the ground beneath your feet, adding organic matter and nutrients where your next crop needs them most.
Four-year Crop Rotation

Green manure feeds one season — but four-year crop rotation builds soil health across years.
Here’s what the 4-year plan looks like:
- Legumes — nitrogen fixation rebuilds fertility
- Cereals — tap nutrients, reduce erosion
- Root vegetables — improve porosity, balance nutrient cycling
- Cover crops — restore organic matter, break pest and disease cycles
Rotate consistently, and yield stability follows naturally.
Practice No-Till Soil Care
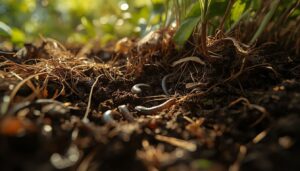
Every time you dig, till, or turn your soil, you break up something that took years to build. No-till gardening protects that hidden world beneath your feet. Here’s how to keep your soil healthy without disturbing it.
Reduce Soil Disturbance
Every time you dig, you break something. That’s the hard truth behind no-till gardening.
Minimize tillage whenever you can. Each pass of a shovel or rototiller collapses the tiny air pockets roots depend on, leading to soil compaction mitigation challenges down the road.
| Practice | Why It Matters |
|---|---|
| No-till / low-till | Preserves soil aggregates and pore space |
| Use seeding slots | Disturbs only a small planting footprint |
| Maintain residue cover | Shields soil from hard rain impact |
| Preserve soil crust | Reduces surface erosion and runoff |
| Avoid wet soil | Prevents compaction during planting |
No-till farming and no-till gardening work because they let the soil build its own strength over time. Slot-planting through mulch — rather than turning whole beds — keeps that structure intact season after season.
Preserve Earthworm Tunnels
Think of earthworms as your soil’s best construction crew. They never clock out.
Their tunnel networks act like built-in irrigation channels, pulling rainwater deep into the root zone and cutting surface runoff. That means less erosion and more moisture where your plants actually need it.
Here’s what those tunnels quietly do for your garden:
- Improve soil structure by creating crumb-like aggregates that resist compaction
- Boost seedling growth by opening pathways roots can follow easily
- Build microbial havens where beneficial bacteria thrive and cycle nutrients
- Deposit worm castings rich in nitrogen, phosphorus, and micronutrients
- Support erosion control by stabilizing soil fabric along burrow walls
No-till practices protect all of this. The moment you turn the soil, you collapse tunnels built over entire seasons. Instead, top-dress with mulch and organic matter — let earthworms pull it down naturally. They’ll do the mixing for you, deeper and more gently than any shovel can.
Protect Fungal Networks
Beneath your garden bed runs an invisible internet — and it’s alive.
Beneath your garden bed, a living internet of fungal threads quietly connects and sustains every root
Mycorrhizal fungi weave thread-thin hyphae (root-like strands) through the soil, forming what scientists call Fungal Highways. These connect plant roots directly, allowing nutrient and water sharing across your entire bed. No-till practices keep these fragile strands intact. One aggressive dig can sever connections built over an entire growing season.
Feed the network with compost and mulch. Organic matter fuels fungal growth and enhances long-term Soil Carbon Storage, making your garden genuinely resilient.
Create Permanent Pathways
Where you walk matters just as much as where you plant.
Permanent pathways protect your soil by keeping foot traffic off your beds. Compacted soils crush air pockets and block roots. A dedicated path prevents that entirely.
- Lay a compacted stone base for stability
- Use reclaimed pavers or bricks for durability
- Add a geotextile weed barrier underneath
- Build in a 2–3% drainage slope
- Edge with organic mulch borders
Top-dress Garden Beds
Top-dressing is like giving your beds a fresh blanket after every season. Spread compost mixed with worm castings in a 2–3 cm layer across your bed tops, keeping a clear gap around plant stems. Apply in early spring when soil firms up. This quietly boosts organic matter, feeds soil life, and softens crusted surfaces without any digging.
Feed Soil Biology Naturally

Your soil is alive — and the creatures living in it do more work than most gardeners realize. Billions of microbes, fungi, and earthworms are quietly breaking down nutrients and building structure beneath your feet. Here’s how to keep that underground workforce healthy and thriving.
Encourage Earthworm Activity
Earthworms are your soil’s best unpaid workers. They tunnel through the ground, creating burrow network development that improves drainage and root access. Feed them well by layering organic matter and mulch on the surface. In a no-till garden, their tunnels stay intact. Earthworm castings hold five times more nitrogen than the surrounding soil.
Support Beneficial Microbes
Just like earthworms work the soil physically, beneficial microbes do the invisible heavy lifting underground. They break down organic matter, cycle nutrients, and protect roots from disease.
- Inoculate transplants with mycorrhizal fungi to extend root reach
- Apply compost to boost microbial diversity fast
- Avoid broad-spectrum pesticides that kill your soil microbiome
- Plant diverse crops to increase root exudates
- Use biochar to stabilize beneficial microorganisms long-term
Biofilm benefits mean microbes coat roots in a protective layer, shielding plants naturally.
Use Organic Fertilizers
Microbes need fuel, and organic fertilizers deliver exactly that. Bone meal feeds roots slowly with phosphorus and calcium. Fish emulsion gives a quick nitrogen boost. Seaweed extracts add micronutrients that sharpen plant vigor. These natural sources don’t flood the soil — they release nutrients gradually, matching what your plants actually need.
Avoid Broad Pesticides
Organic fertilizers feed your soil gently — but broad-spectrum pesticides can undo that work fast. They don’t just kill pests. They wipe out beneficial insects and disrupt the microbial networks you’ve been building.
Instead, practice integrated pest management: monitor pest levels, intervene only at thresholds, and use microbial controls like Bacillus thuringiensis for targeted results without harming pollinators.
Plant Pest-fighting Companions
Think of your garden as a living ecosystem — and companion planting as your first line of defense.
Aromatic shields like basil, rosemary, and sage release volatile compounds that confuse pests and reduce egg-laying on nearby crops. French marigolds suppress harmful nematodes in tomato beds. Nasturtiums act as trap crops, drawing aphids away from beans and squash.
Plant sweet alyssum or phacelia nearby to attract beneficial insects like parasitic wasps and hoverflies — your garden’s natural pest patrol.
Frequently Asked Questions (FAQs)
What can I add to my garden soil to make it better?
Adding finished compost is the simplest first step. It feeds soil life, improves texture, and slowly releases nutrients. Tuck in aged manure, mulch the surface, and let cover crops do the rest.
What to add to soil to make it richer?
Richer soil starts with compost and manure — these feed your plants and the life beneath your feet. Add cover crops, mulch, and organic fertilizers to keep nutrients flowing all season long.
What is the best way to improve my garden soil?
Great soil isn’t magic — it’s a plan. Start with a soil test, then layer in compost, organic matter, and mulch. Cover crops, biochar, and smart rotation do the rest.
How can i Improve my soil?
Start with a soil test — it tells you exactly what’s missing. Then add compost, mulch, and cover crops to build organic matter, improve structure, and feed the biology living beneath your feet.
What makes a good garden soil?
Good garden soil is a living ecosystem. It balances soil fertility, organic matter, and soil structure so roots thrive, water flows freely through water infiltration, and the Soil Food Web drives constant nutrient cycling.
How do I care for my garden soil?
Caring for your soil starts with a simple soil test. It shows your pH, nutrients, and organic matter levels — so you fix what actually needs fixing, not what you guess needs fixing.
How can I improve my soil’s nutrient supply?
Think of your soil as a living pantry. Keep it stocked with compost and organic fertilizers, run a soil test first, and let cover crops do the heavy lifting through natural nitrogen fixation.
What is the key to healthy soil?
Healthy soil comes down to one thing: life beneath the surface. When organic matter, soil microbes, and strong soil structure work together, everything else — nutrients, water, roots — falls into place.
When is soil improvement a good idea?
Soil improvement earns its place whenever your garden struggles. New garden beds, plant health decline, post-construction rehab, erosion damage, and climate adaptation needs all signal it’s time. Regular soil testing confirms when organic matter or compacted subsoil needs attention.
When is the best time to test soil?
The best times to test your soil are early spring and early fall. Spring aligns with seedling nutrient needs. Fall lets amendments react over winter. Avoid frozen or waterlogged soil for accurate results.
Conclusion
What if the secret to a thriving garden was already beneath your feet? These garden soil improvement tips work because they treat soil as the living foundation it truly is—not just a growing medium. Test it, feed it, protect it, and let nature do the heavy lifting. Every handful of compost, every cover crop, every layer of mulch quietly builds something impressive. Tend your soil well, and your garden will return the favor—season after season.
- https://www.rhs.org.uk/soil-composts-mulches/organic-matter-how-to-use-in-garden
- https://ecoactions.homedepot.com/blog/projects/how-to-use-compost-to-improve-garden-soil
- https://extension.colostate.edu/resource/choosing-a-soil-amendment
- https://www.almanac.com/soil-preparation-how-do-you-prepare-garden-soil-planting
- https://hgic.clemson.edu/factsheet/changing-the-ph-of-your-soil