This site is supported by our readers. We may earn a commission, at no cost to you, if you purchase through links.

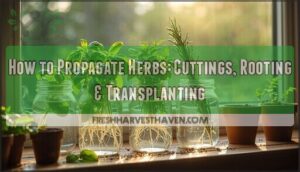
Most herb kits quietly fail not in the growing, but in the moving. The seedlings look healthy, the soil stays moist, yet something goes wrong the moment they leave the controlled comfort of their starter tray—leaves droop, roots stall, and what was thriving becomes a struggle to survive. Transplant shock is real, but it’s also almost entirely preventable when you understand what herbs actually need during that adjustment period.
Knowing how to transplant herbs from a growing kit comes down to timing, soil preparation, and a steady hand with the process—get those three right, and your herbs won’t skip a beat.
Table Of Contents
- Key Takeaways
- When Kit Herbs Are Ready
- Prepare Pots, Soil, Location
- Harden Off Kit Seedlings
- Transplant Herbs Step-by-Step
- Prevent Transplant Shock
- Top 3 Herb Growing Books
- Frequently Asked Questions (FAQs)
- Is October too late to transplant?
- Can you plant herbs with roots from a grocery store?
- What herbs should never be planted together?
- Can I transplant herbs into self-watering containers?
- How do I revive a wilting herb after transplanting?
- Which herbs grow well together in one pot?
- Should I trim roots before placing in new soil?
- Can growing kit herbs be transplanted in winter?
- Conclusion
Key Takeaways
- Transplant your herbs only after they’ve grown true leaves, show crowded roots, and the soil temperature sits reliably between 59°F and 81°F — rushing any of these signals almost guarantees stress.
- A well-draining pot mix (three parts potting soil to one part perlite) and a container with properly sized drainage holes are the two non-negotiables that protect roots from rot before problems even start.
- Hardening off isn’t optional — spend at least a week gradually extending your seedlings’ outdoor exposure, shielding them from midday sun and wind, before committing to a permanent move.
- After transplanting, hold off on fertilizer for at least two weeks, keep soil feeling like a wrung-out sponge, and scout weekly for pests or soft stems so small issues don’t spiral.
When Kit Herbs Are Ready

Knowing when your kit herbs are ready to move is half the battle. Rush it, and you risk stunting roots that haven’t had time to anchor; wait too long, and the plant gets cramped and stressed before it even reaches its new home.
Here’s what to look for before you make the move.
True Leaf Check
Before you reach for that trowel, check your seedlings for true leaves — not the first rounded pair, but the second set that mirrors the herb’s adult shape.
Your choice of seed starting containers to reuse can actually make it easier to spot those true leaves as they develop.
Look for Leaf Symmetry, healthy green color as a Chlorophyll Indicator, and increased Stem Thickness.
These signs confirm Root Maturity and Humidity Suitability, giving your seedling transplant checklist a reliable green light.
Crowded Root Signs
Once your seedlings pass the true leaf stage, flip the pot over and inspect the roots. If you observe a dense root circle visibility or a surface root mat at the top, your herb is likely rootbound. Additional signs include Pot Edge Curling and a Compacted Root Mass, indicating the need for repotting.
Uneven moisture retention after watering further confirms restricted root growth. To restore a healthy root system, consider light root pruning before transferring the plant to a larger container. This approach alleviates stress and promotes balanced development.
Safe Soil Temperatures
Once roots look crowded, soil temperature becomes your next checkpoint. Most kitchen herbs require soil temperatures above 60°F before transplanting—anything cooler slows root growth noticeably. Check ideal ranges using a thermometer placed 2–4 inches deep, and take readings in the morning for consistency.
Temperature fluctuations between day and night can stress young plants, and heat stress above 85°F is equally damaging. Maintaining soil within the ideal root temperature range (59–81 °F) promotes vigorous herb development.
Best Transplant Weather
Temperature alone doesn’t tell the whole story. The best transplant days pair stable temperatures with calm forecast conditions — no rain for at least 24 hours after moving your herbs.
Early morning is your sweet spot, when soil temperatures rise gently and moderate humidity lingers in the air. Overcast conditions work beautifully too, easing cold stress mitigation without sacrificing light.
Indoor Versus Outdoor Timing
Indoor transplants thrive with 12–16 hours of consistent light and stable warmth, making them sensitive to temperature fluctuations. Outdoor moves demand light cycle adaptation, daytime heat management, and nighttime chill buffering—particularly before the last frost date. These distinct environments require careful handling to ensure plant health.
Hardening off acts as a critical bridge between these worlds, easing transitions in humidity levels and reducing transplant shock once the danger of frost has passed. This process gradually acclimates plants to outdoor conditions, mitigating stress from environmental shifts.
By addressing indoor stability, outdoor challenges, and the hardening-off phase, gardeners can optimize transplant success while safeguarding against frost risks and abrupt changes.
Prepare Pots, Soil, Location

Before your herbs ever touch new soil, a little prep work makes all the difference. Getting the right pot, mix, and spot sorted out ahead of time is what separates a smooth transplant from a stressful one.
Here’s what you need to set up before you start.
Drainage Hole Requirements
A pot without proper drainage holes is just a slow-drowning trap for your herbs. For plastic planters, hole size guidelines start at ¼ inch minimum — larger pots need 2–3 holes following a smart hole placement strategy: spaced evenly near the base’s outer edge.
A pot without drainage holes is just a slow-drowning trap for your herbs
Keep these rules handy:
- Match holes to pot volume — one hole per gallon capacity
- Use material-specific drilling for ceramics (carbide bit, slow speed)
- Cover openings with drainage mesh usage in mind — mesh screens prevent soil clogging
- Follow a maintenance cleaning schedule — check holes quarterly for sediment
Well-draining Herb Mix
A good well-draining soil mix is your first real defense against transplant shock prevention. Start with quality potting mix, then improve soil aeration techniques by blending in a solid perlite ratio — roughly one part perlite to three parts base.
If pests move in on stressed transplants, knowing how to get rid of aphids on garden plants early keeps sooty mold from compounding the damage.
A coconut coir blend adds gentle moisture balance, while pine bark fines open up structure. Sand inclusion helps Mediterranean herbs shed excess water fast. Refresh the mix each repotting cycle for lasting soil drainage solutions.
Ideal Soil PH
Soil pH is the silent lever behind every thriving herb garden. Most culinary herbs share clear herb pH preferences, flourishing within a pH between 6.0 and 7.0 — where pH influence on nutrients keeps nitrogen, phosphorus, and potassium fully accessible to roots.
Use pH testing kits regularly to stay informed, then apply soil amendment techniques as needed. Depending on the pH level, specific adjustments can be made:
- Too acidic? Lime application raises pH gradually and gently
- Too alkaline? Sulfur adjustment brings it back down
- Drifting over time? Add organic matter to stabilize fluctuations
- Unsure where you stand? Test every 3–6 months for reliable soil pH management
Container Size Guide
Volume Recommendations start at 1.5 gallons for an 8-inch pot — enough for most culinary herbs. Depth Requirements call for at least 6–8 inches so roots breathe freely.
For Herb Size Matching, keep the Root Space Ratio simple: always go one to two inches larger in diameter than the current pot.
Premoisten the new potting mix before dropping root-bound plants into their larger container filled with well-draining potting mix.
Sunlight Needs by Herb
Not every herb wants the same slice of sky. Basil craves full sun — at least six Basil Sun Hours daily — while your Cilantro Light Preference leans toward four to six hours with afternoon shade to delay bolting.
Mint Shade Tolerance means it thrives in just two to four hours. For Thyme Light Balance and Oregano Sun Intensity, aim for three to five hours.
Smart sun exposure management keeps Rosemary thriving too.
Harden Off Kit Seedlings

Your seedlings have been cozy indoors, and tossing them straight outside is a recipe for wilting disappointment. Hardening off is the acclimatization period that bridges that gap, easing them into real-world conditions without shock.
Here’s how to do it right, step by step.
Start With Sheltered Shade
Think of sheltered shade as your seedlings’ decompression zone. During hardening off, start by positioning a 40–50 percent shade cloth on a rust-resistant aluminum frame, mounted 12–24 inches above the canopy, leaving an essential air gap to support humidity management and prevent fungal buildup.
This temporary shade dramatically reduces transplant shock by easing herbs into outdoor conditions without the sudden stress of direct sun.
Increase Outdoor Exposure
Once your seedlings settle into their sheltered shade routine, gradually extend their Sunrise Light Routine by adding 30–60 minutes of unfiltered morning light each day. Fresh Air Walks between shade sessions support healthy gas exchange and provide a natural Vitamin D Boost.
These Evening Breeze Breaks and Outdoor Mindfulness Moments build plant stress reduction steadily, making seedling hardening a calm, controlled process rather than a gamble.
Avoid Wind and Midday Sun
Wind and midday sun are two of the fastest causes of transplant shock. Windbreak Planting—a hedge, fence, or lattice screen—cuts air movement by up to 60%, while Smart Shade Cloth Placement blocks harsh UV during peak hours (11 a.m. to 3 p.m.), lowering leaf temperatures. These methods directly address environmental stressors.
Pairing Morning Transplant Timing with Microclimate Shelters and Adjustable Canopy Use ensures herbs acclimate gently. Partial shade and consistent air circulation during this period minimize additional stress.
- Block prevailing wind with a temporary screen or structure
- Drape shade cloth to reduce heat stress in herbs during peak sun
- Stick to morning hours for any moving or adjusting — partial shade and good air circulation make all the difference
Watch Wilting Closely
Even after blocking wind and shade, wilting can sneak up fast. That droop you notice at noon? It’s your herbs sending a distress signal.
Check your herbs during Early Morning Checks — older leaves show Leaf Droop Signals first. Use this Wilting Timeline for Moisture Monitoring:
| Wilting Stage | Time After Transplant | Recovery Water Response |
|---|---|---|
| Mild droop | 0–12 hours | Water gently at soil level |
| Persistent wilt | 12–24 hours | Check drainage, re-water |
| Continued stress | 24–48 hours | Inspect roots for damage |
| Leaf curl visible | 48+ hours | Improve soil aeration |
| No improvement | 72+ hours | Repot if root rot present |
Transplant shock and transplanting stress ease when plant acclimation stays steady — water the herbs promptly, and most bounce back within hours.
Move After Last Frost
Once your hardening-off seedlings have handled a week outdoors, timing the final move comes down to one thing: your local Frost Date Forecast. Check Extension Service Guidance for your exact zone — overnight temps need a Night Temperature Buffer above 40°F for several consecutive nights. A Temporary Cold Frame buys you insurance against late snaps, and smart Microclimate Site Choice keeps transplant shock minimal from day one.
- Confirm last frost has passed using local extension service data
- Wait for soil temps consistently above 55°F before transplanting
- Keep a cold frame handy for surprise cold nights
- Time your garden transplant timing for early morning on calm days
- Follow a steady transplant aftercare routine through spring and fall
Transplant Herbs Step-by-Step
This is where the real work begins. Moving your herbs from kit to container takes only a few careful steps, and getting the sequence right makes all the difference.
Here’s exactly what to do.
Water The Kit First

Before you touch the root ball, water the herb thoroughly — this is your first act of pre-transplant preparation. Aim for about 60–70% field capacity, meaning the soil clumps easily but doesn’t drip.
This consistent soil moisture prevents air pockets from forming around roots during placement. Think of it as pre-wetting the kit so roots slide into their new home without interruption.
Remove Herbs Gently

Once your kit is thoroughly watered, it’s time to remove the herb with patience and purpose. Begin by using a Scissor Stem Snip above a leaf node for any leggy growth. Then, slide a trowel underneath and perform a Gentle Trowel Lift—this is your dig and divide method in action.
Support the root ball with your free hand, keeping it intact.
Transfer the herb to a Damp Cloth Cushion immediately.
Loosen Crowded Roots

Now comes the moment that decides how well your herb settles in. If the root ball looks tightly wound—classic rootbound behavior—use Gentle Teasing with your fingers, working Bottom‑Up Unwind from base to crown. Selective Snipping loosens stubborn tangles. Spread the roots outward using Fountain Shaping for better soil aeration.
Moisture Timing matters: roots loosened after a light soak stay pliable, supporting faster improved root development.
Match Original Soil Level

Depth Consistency is what separates a thriving transplant from a struggling one. Set your root ball so its top aligns exactly with the surrounding soil surface — no higher, no lower.
- Check Stem Exposure: the stem base shouldn’t be buried or left bare
- Confirm Root Contact: fresh soil mix should meet roots evenly
- Use Level Verification: press a ruler against the stem to confirm depth
- Adjust your well-draining potting mix before finalizing position
- Apply Mulch Calibration: keep mulch below the stem, never touching it
Backfill, Firm, and Water

Once your herb sits at the right depth, backfill the container with your well-draining potting mix in small compaction layers, firming each layer gently with your fingers — not your fist. Think of it like tucking in roots, not packing a suitcase.
Avoid soil compaction by keeping target moisture consistent: barely damp, never soggy.
Add a drainage layer of perlite at the base if you haven’t already, then water slowly until it drains freely.
That first deep drink sets your watering schedule for transplants going forward.
Prevent Transplant Shock

The transplant is done, but the next week or two is where most herbs actually win or lose. Your plant is still adjusting, and a few simple habits can make all the difference between a thriving herb and a struggling one.
Here’s what to focus on right after transplanting.
Keep Soil Lightly Moist
Maintaining evenly moist soil is the single most critical task in herb transplanting during those first two weeks. Think of the target feel like a wrung-out sponge — damp but never dripping.
Use the Finger Moisture Test daily: insert your finger an inch deep, and water only when it feels barely cool. Morning Watering reduces evaporation and disease risk.
A Mulch Layer, Drip Irrigation system, or Moisture Meter Use each support a consistent watering schedule for transplants without guesswork.
Delay Fertilizer Briefly
Once moisture levels are stable, resist the urge to feed right away. Transplanted herbs require 14 days before fertilizing—or three to four weeks for sensitive varieties.
Fresh roots are vulnerable to osmotic balance shifts, and premature feeding risks burning tender tissue before microbial acclimation begins.
When resuming, start with half-strength starter solutions, gradually building toward a feeding schedule that promotes steady root development improvement.
Gradually Increase Sunlight
Light is medicine — but only in the right dose. Start with one to two hours of morning light duration, then add fifteen to thirty minutes every few days.
Leaf color monitoring tells you everything: bleaching or curling means slow down. Use shade cloth adjustment to cut intensity by twenty to forty percent if your full-sun location feels too harsh during hardening off seedlings.
Pinch Basil and Mint
Once your light exposure feels dialed in, it’s time to focus on pinching. About two weeks after transplanting herbs, gently pinch basil and mint tips just above a leaf pair. This post-transplant preparation habit encourages bushier growth, enhances essential oil concentration for stronger flavor, and naturally suppresses flowering inhibition.
Use clean fingers or sterilized scissors—prioritizing tool sanitation—to perform this task. For basil, initiate pinching when the plant displays four to six true leaves.
Check Pests and Rot
Scout your herbs weekly for early trouble signs — sticky honeydew on leaves is a classic mold indicator, and soft, mushy stems confirm rot needs immediate attention.
For organic pest control, apply insecticidal soap at the first sign of aphids or whiteflies.
Maintain moisture balance by letting the top inch of soil dry between waterings.
Good soil drainage improvement stops root rot prevention from becoming a daily emergency.
Top 3 Herb Growing Books
Once your herbs are thriving, the right book can take your growing from guesswork to genuine skill.
A few titles stand out for actually being useful — not just pretty to look at on a shelf. Here are three worth having on hand.
1. Rosemary Gladstar Medicinal Herbs Guide
Rosemary Gladstar’s Medicinal Herbs: A Beginner’s Guide is one of those books you’ll reach for again and again. It profiles 33 common herbs — including favorites like peppermint, chamomile, and lavender — covering how to grow, harvest, and use each one. You’ll find clear recipes for tinctures, salves, teas, and oils, all made with basic kitchen tools.
At just $11.49 for 224 pages, it’s an honest, practical investment for anyone serious about understanding the plants they’re cultivating.
| Best For | Anyone just getting into herbalism who wants a no-fuss, practical guide to growing and using medicinal plants at home. |
|---|---|
| Price | $11.49 |
| Page Count | 224 pages |
| Language | English |
| Herbs Covered | 33 herbs |
| Skill Level | Beginner-friendly |
| Preparation Guides | Tinctures, oils, salves, teas |
| Additional Features |
|
- Covers 33 herbs with real, usable recipes — tinctures, salves, teas, and more — all doable with basic kitchen gear
- Full-color photos and indexed entries make it easy to find what you need fast
- At $11.49, it’s a genuinely affordable starting point for building a home apothecary
- Only 33 herbs, so you’ll outgrow it if you want a deeper, more comprehensive reference
- Dosage and safety info is pretty light — not the book to rely on for serious or clinical use
- Some plants may be hard to source depending on where you live
2. Herbal Apothecary Medicinal Herb Handbook
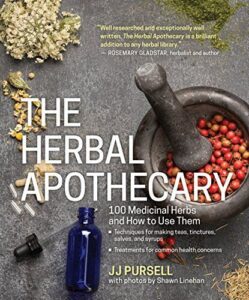
The Herbal Apothecary Handbook profiles 100 medicinal herbs—nearly three times the coverage of Gladstar’s guide. At $15.05 for 292 pages, it walks you through teas, tinctures, salves, and syrups with beginner-friendly ratios and full-color photos for each entry.
You’ll also find cultivation tips, harvesting notes, and safety cautions that matter when growing herbs for actual use. The book functions as a practical workshop in book form, emphasizing hands-on application over theory.
It is explicitly not a substitute for medical advice, positioning itself as a resource for informed herbal practice rather than clinical guidance.
| Best For | Beginners who want a hands-on, visual guide to making their own herbal remedies at home without attending expensive workshops. |
|---|---|
| Price | $15.05 |
| Page Count | 292 pages |
| Language | English |
| Herbs Covered | 100 herbs |
| Skill Level | Beginner-friendly |
| Preparation Guides | Teas, tinctures, compresses, salves |
| Additional Features |
|
- Covers 100 herbs with full-color photos, so you can actually identify what you’re working with
- Walks you through real preparations—teas, tinctures, salves—with beginner-friendly instructions
- Includes growing, harvesting, and storing tips, making it useful well beyond the kitchen
- The index can be frustrating—some conditions are buried under broader terms, so finding what you need takes extra digging
- Published in 2015, so some of the science or safety guidance may be a bit behind current standards
- At least one known error (the Red Root entry) slipped through, which is worth keeping in mind when following it closely
3. Best Little Culinary Herb Book
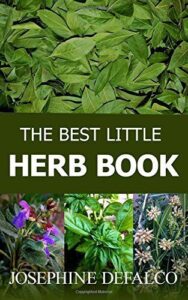
For cooks who want their herb garden to serve the kitchen first, The Best Little Culinary Herb Book hits a practical sweet spot. At $8.24 for 140 pages, it profiles 50 culinary herbs with color photos, flavor notes, and pairing suggestions that connect what you grow to what you cook.
You’ll find harvest timing cues, drying and freezing guidance, and simple recipes tested in a real home kitchen. The book is compact, beginner-friendly, and built around one clear goal: getting fresh herbs onto your plate.
| Best For | Home cooks and beginner gardeners who want to grow herbs they’ll actually use in the kitchen. |
|---|---|
| Price | $8.24 |
| Page Count | 140 pages |
| Language | English |
| Herbs Covered | Select culinary herbs |
| Skill Level | Beginner-friendly |
| Preparation Guides | Planting, harvesting, preserving |
| Additional Features |
|
- At $8.24, it’s an easy buy — great value for 140 pages of practical, kitchen-focused herb guidance.
- Recipes were tested in a real home kitchen by the author and a registered dietician, so they actually work.
- Covers seed saving and seedling sharing, which is a nice touch for anyone thinking long-term about their garden.
- Only covers a limited selection of herbs, so don’t expect a deep dive into more unusual varieties.
- At 140 pages, there’s not much room for troubleshooting — if something goes wrong, you may need to look elsewhere.
- Experienced gardeners will likely find it too basic; it’s really built for beginners.
Frequently Asked Questions (FAQs)
Is October too late to transplant?
It depends on your region. If the soil stays above 50°F and frost hasn’t hit, October can work — especially for hardy herbs like thyme, chives, or parsley.
For tender herbs like basil, wait until spring.
Can you plant herbs with roots from a grocery store?
Yes, you can.
Grocery store herbs like basil, mint, and oregano can root in water or soil. Once roots reach about an inch long, pot them up and treat them like any young transplant.
What herbs should never be planted together?
Some herbs look harmless together — until they quietly sabotage each other.
Keep mint away from basil, rosemary, and thyme.
Never pair fennel with dill or parsley.
And don’t mix lavender with cilantro.
Can I transplant herbs into self-watering containers?
Absolutely, self-watering containers work well for herbs.
To ensure success, use a well-draining mix with perlite and avoid compacting the soil, which prevents root rot near the reservoir.
How do I revive a wilting herb after transplanting?
Move the plant to a shaded spot right away and water gently at the base.
Keep soil moist but not soggy for the next week, and avoid fertilizing until new growth appears.
Which herbs grow well together in one pot?
Pair rosemary with thyme for a drought-tolerant duo.
Pair basil with oregano for sun-loving companions.
Pair parsley with chives for shade-tolerant flavor partners.
Each combo shares similar water, light, and soil needs.
Should I trim roots before placing in new soil?
Sometimes the kindest cut is no cut at all.
Trim only dead or mushy roots — never more than one-third of the root mass — then spread healthy roots evenly in fresh, moist soil.
Can growing kit herbs be transplanted in winter?
Transplant growing kit herbs in winter by keeping them indoors with bright light and good drainage. Hardy varieties handle it well.
Avoid basil and cilantro unless you have a warm, sheltered spot.
Conclusion
Think of your herbs the way you’d think of any living thing adjusting to a new environment—they don’t need things to be perfect, they need patience and the right conditions.
Now that you know how to transplant herbs from a growing kit, every step you take—timing the move, loosening the roots, easing them into sunlight—removes one more obstacle between seedling and harvest.
Give them steady soil, consistent moisture, and a little time. They’ll do the rest.
- https://seedsavers.org/how-to-harden-off-and-transplant-your-seedlings
- https://www.practicallyfunctional.com/how-to-transplant-seedlings-herb-garden
- https://sowrightseeds.com/blogs/planters-library/hardening-off-plants-toughen-up-your-babies-for-the-real-world
- https://extension.psu.edu/hardening-transplants
- https://www.bootstrapfarmer.com/blogs/how-to-grow-seedlings/how-big-should-seedlings-be-before-transplanting