This site is supported by our readers. We may earn a commission, at no cost to you, if you purchase through links.

Two seedlings, same tray, same day. One stands sturdy with fat green leaves. The other collapses overnight, stem pinched black at the soil line, gone before you even grab your coffee.
That’s the frustrating part about why seedlings die in seed trays — the damage often starts invisibly, days before symptoms show. Too much water, too little airflow, a light hung too high: small missteps stack up fast in that tiny root zone.
Good news: most causes trace back to a handful of fixable habits. Get watering, light, and spacing right, and your survival rate climbs dramatically.
Table Of Contents
- Key Takeaways
- Why Seedlings Die After Sprouting
- Fix Watering, Drainage, and Airflow
- Improve Light, Temperature, and Roots
- Top 5 Seedling Survival Helpers
- Frequently Asked Questions (FAQs)
- Why are my seedlings dying after sprouting?
- What happens if a seedling dies?
- Why do seedlings get damaged?
- Why is my seedling struggling?
- Can you revive dying seedlings?
- Is it normal for some seedlings to die?
- How to stop seedlings from dying?
- Can seedlings recover from shock?
- Should I use a fresh mix or reuse old soil?
- What tray material and drainage design works best?
- Conclusion
Key Takeaways
- Overwatering and poor drainage cause root rot and damping-off, so water from the tray base and let the soil surface dry slightly between waterings.
- Weak, leggy growth usually stems from insufficient light, so use grow lights positioned 2-4 inches above seedlings for 12-16 hours daily.
- Poor airflow and lingering humidity create fungal-friendly conditions, so remove humidity domes gradually and add fans for consistent air circulation.
- Overcrowded cells force roots to compete for nutrients and space, so thin seedlings to one per cell and use deeper cells for taproot species.
Why Seedlings Die After Sprouting
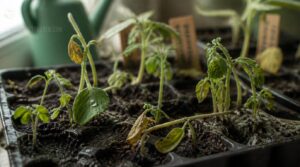
Sprouting is only the first hurdle your seedlings face. The days right after can bring their own set of problems, often without much warning. Here’s what usually goes wrong and why.
Timing plays a bigger role than most gardeners realize, so pairing your care routine with a zone-specific spring vegetable planting calendar can help your seedlings harden off right on schedule.
Overwatering and Root Rot
Too much water drowns roots before you even notice. Waterlogged soil blocks oxygen, causing anaerobic conditions where root rot pathogens thrive. Roots turn brown, mushy, and foul-smelling as tissue decays and spreads to healthy areas.
Fix it with soil moisture monitoring and proper drainage. Water only when the top inch feels dry. Check for a lack of drainage holes to prevent waterlogged conditions.
Damping-off Disease Symptoms
That rot doesn’t always stay hidden below the surface. Watch for stem lesions right at the soil line, soft or rotting stems, and mushy root tissue. Look for white mycelial growth or crown rot.
Fungi like Pythium and Rhizoctonia cause postemergence collapse—seedlings wilt fast.
Pull suspect seedlings immediately; discard before fungal growth spreads to healthy trays.
Weak Leggy Seedling Growth
Not every fungal problem shows up at the soil line. Sometimes seedlings just stretch upward, thin and pale, reaching for light that isn’t there.
Insufficient light causes stem elongation as plants chase brightness. Fix it with proper grow lights, a consistent 12-16 hour light schedule, and correct light height adjustments to deliver real PAR levels and prevent etiolation before stems weaken beyond recovery.
Heat and Humidity Stress
Heat and humidity work together, not separately. High humidity blocks sweat-style evaporation on leaves, trapping heat and raising canopy temperature. Combined with poor airflow, this creates fungal-friendly microclimates.
Keep temps between 18-25°C. Use heat mats for cold snaps, but pull humidity domes fast. Watch for wilting or leaf burn—early signs your seedlings can’t regulate stress properly.
Overcrowded Seed Tray Cells
Cramped cells force roots into direct competition for space, oxygen, and nutrients—stunting growth before it starts. Overcrowding triggers etiolation risks too: seedlings stretch toward light, becoming leggy and weak.
Nutrient depletion happens fast in tight quarters. Fix incorrect cell size by matching containers to crop needs, then use proper seedling thinning techniques—one plant per cell—to avoid overcrowding and prevent transplant shock later.
Fix Watering, Drainage, and Airflow
Most seedling deaths trace back to how you’re watering and how much air reaches the tray. Get these two things right, and root rot and damping-off stop being a threat. Here’s exactly how to fix your watering routine and airflow setup, step by step.
Water From The Tray Base
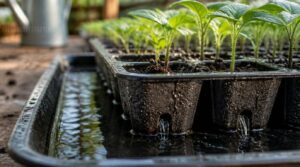
Skip the watering can. Set trays over a shallow reservoir instead. Capillary action pulls water up through drainage holes, so roots drink without soaked, fungus-prone surfaces.
Pair this bottom-watering method with mesh-bottomed trays, and you’ll sidestep the common causes of stunted herb seedling growth while roots air-prune into a stronger, fibrous network.
Bottom watering means every cell hydrates evenly, no dry pockets under crowded seedlings.
Stop once moisture wicks to the top. This bottom-up hydration keeps leaves dry and gives you real control over watering, cell by cell.
Keep Mix Lightly Moist
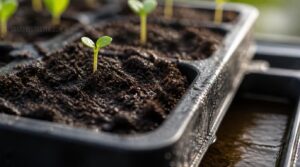
Moist, not wet — that’s the target. Roots need oxygen as much as water, so aim for 60-70% relative humidity in the mix, never standing water.
- Feels like a wrung-out sponge
- Wicking action stays steady, no pooling
- Capillary distribution reaches root zone evenly
- Perched water stays out of finer soils
- Rehydrates fully within 24 hours
Overwatering invites waterlogging fast. Bottom watering keeps this balance manageable.
Let Surfaces Dry Slightly
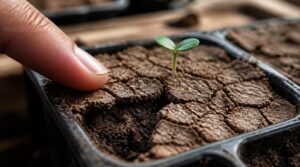
A damp surface is a fungal spore’s best friend. Once the top layer stays wet too long, damping-off risk climbs fast.
A damp surface is a fungal spore’s best friend, and lingering moisture invites damping-off fast
Let the top 1-2mm dry between waterings. This controls surface evaporation, breaks up pathogen-friendly moisture films, and keeps ambient humidity balanced—without shocking roots below, where the mix stays moist, not wet.
Check texture by touch. Barely damp means you’re managing moisture right, not risking waterlogging.
Remove Humidity Domes Early
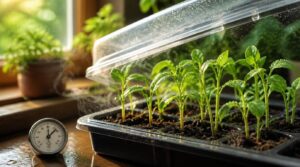
A dome left on too long turns your tray into a swamp. Vent gradually over 3–5 days once true leaves appear, using half-open vents for 4–6 hours daily.
Watch condensation—heavy buildup means wait 2 more days. Target 40–60% ambient humidity before full removal.
- Check leaf health first
- Crack vents partially
- Monitor with a hygrometer
- Remove fully once stable
Improve Airflow With Fans
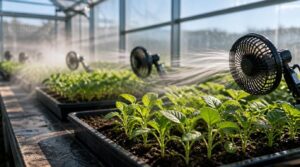
Still air is a death sentence for seedlings. Improper ventilation creates humid pockets where fungal hotspots take hold fast.
Set up cross ventilation: intake fans on the cool side, exhaust up top. Clip-on fans, tilted 10–20° across the tray, work great too.
Run fans during light hours. This improves air circulation, dries foliage, and keeps damping-off at bay.
Improve Light, Temperature, and Roots
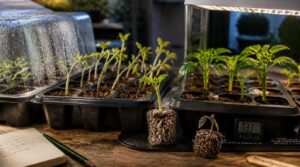
Watering fixes only go so far if your seedlings aren’t getting the right light, warmth, and room to grow roots. Weak light and poor temperature control cause just as many losses as soggy soil does. Here’s what to check next to keep your seedlings strong from root to leaf.
Provide 12–16 Hours Light
Skip the sun altogether — seedlings need 12–16 hours daily under grow lights on a timer. Photoperiod consistency prevents dark stress and stalled growth. Steady timing beats sunlight’s whims for even, etiolation-free growth.
Blue wavelengths build sturdy stems; red light aids elongation control later on. Check light intensity with a PAR meter, not guesswork.
Keep Lights Properly Positioned
Height matters as much as duration. Position grow lights 2–4 inches above seedlings, increasing to 6–8 inches as they double in size—preventing leaf burn while avoiding stretch.
Calibrate light intensity (150–200 μmol m⁻²s⁻¹) with a PAR meter, not eyeballing it. Use reflective surfaces around trays to bounce light evenly, cutting shadows and hotspots that stress developing roots.
Maintain 64–77°F Temperatures
Light gets seedlings growing, but the wrong temperature undoes that progress fast. Keep the root zone between 18–25°C (64–77°F) for steady, stress-free development.
- Place heat sources away from trays to avoid hot spots
- Use ambient room heat over direct heaters
- Monitor root zone temps with a probe thermometer
- Improve airflow to manage transpiration rate and stabilize drift
Use Deeper Cells When Needed
Cell depth matters as much as temperature control. Shallow cells force roots into a hard pan fast, stunting taproot development and root architecture strength.
| Shallow Cells | Deep Cells |
|---|---|
| Root circling | Straight growth |
| Fast drying | Moisture stratification |
| Transplant shock | Sturdy vigor |
Match tray type with crop—taproot species need depth. Deeper cells reduce transplant shock and support real seedling vigor.
Thin Seedlings Per Cell
Two seedlings sharing one cell means two root systems fighting for the same nutrients. Reducing light competition stops leggy seedlings before they start—preventing stem etiolation caused by insufficient light.
Best thinning timing: snip the weaker sprout at soil level once true leaves appear, protecting the survivor’s roots. This nutrient concentration boost, plus better airflow, gives one strong seedling room to thrive.
Top 5 Seedling Survival Helpers
Good technique only gets you so far without the right gear backing it up. The right mix, tray, fan, sensor, and fertilizer take the guesswork out of keeping seedlings alive. Here are five tools worth adding to your setup.
1. Espoma Organic Seed Starter Mix
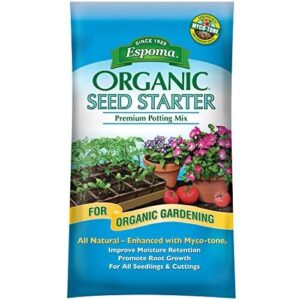
Espoma Organic Seed Starter Mix solves the medium problem before it starts. Its mix of sphagnum peat moss, perlite, yucca extract, and lime keeps moisture balanced while draining excess water—key for avoiding rot.
Built-in Myco-Tone mycorrhizae boost root partnership, helping seedlings establish faster and resist drought stress. The 16-quart bag covers most home setups, though large plantings may need extra bags. Certified organic, with no synthetic chemicals—safe for edibles from day one.
| Best For | Home gardeners starting seeds, seedlings, or rooting cuttings who want an organic, mycorrhizae-enhanced mix for small to mid-sized planting projects. |
|---|---|
| Indoor Use | Yes |
| Outdoor Use | Yes |
| Seedling Support | Direct |
| Package Size | 8 lb |
| Ease of Use | Simple mix |
| Gardening Purpose | Growing medium |
| Additional Features |
|
- Balanced organic blend (peat moss, perlite, yucca extract, lime) supports healthy moisture retention and drainage
- Includes endo- and ecto-mycorrhizae to boost root development and help seedlings establish faster
- Certified organic with no synthetic fertilizers or chemicals, making it safe for edible plants from the start
- One 16-quart bag may not be enough for large-scale or commercial growing needs
- Contains peat moss, which isn’t ideal for those seeking peat-free or lower-impact options
- Needs to be resealed properly after opening, or moisture exposure can shorten its shelf life
2. Root Naturally Peat Pellets 42mm
Fifty pellets per bag, each one solving the medium problem differently than loose mix does. Dry, they measure 42mm across; soaked, they swell to nearly 1.75 inches, expanding roughly 7x their original size within minutes.
Fine netting holds each pellet together, letting air and water move freely while roots push through. That netting breaks down over time, so transplant shock stays minimal. Made from sustainably harvested Canadian sphagnum peat, these pellets support strong root development and cut crop cycles by up to 25%.
| Best For | Home gardeners and small-scale growers starting seeds indoors who want strong, compact seedlings ready for a smooth transplant. |
|---|---|
| Indoor Use | Yes |
| Outdoor Use | Yes |
| Seedling Support | Direct |
| Package Size | 50 pellets |
| Ease of Use | Soak and plant |
| Gardening Purpose | Seed starting |
| Additional Features |
|
- Expands nearly 7x in minutes, giving roots plenty of room to grow
- Fine netting allows air and water to flow while keeping the pellet intact until it naturally breaks down
- Speeds up root development and can shorten crop cycles by up to 25%
- Requires soaking before use, adding an extra step to your prep routine
- Best suited for small-to-medium seedlings, not mature plants with larger root systems
- Made from peat, which may not appeal to gardeners looking for fully renewable growing media
3. Lasko Adjustable Pedestal Fan
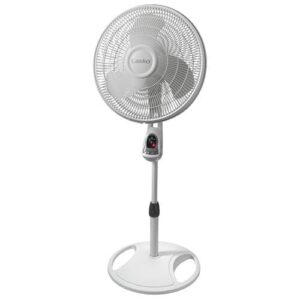
Stagnant air around seedlings invites trouble fast. The Lasko pedestal fan adjusts from 41 to 52 inches, so you can angle airflow across tray height without hunting for a stand.
Oscillation—60 or 90 degrees depending on model—sweeps air across every cell, breaking up the microclimates where damping-off thrives. Lower speeds keep the breeze gentle enough for delicate stems.
A fused safety plug and ETL listing mean it’s built for long daily runs on a grow bench without risk.
| Best For | This fan is best for anyone who wants strong, adjustable cooling for a bedroom, living room, home office, or dorm without breaking the bank. |
|---|---|
| Indoor Use | Yes |
| Outdoor Use | No |
| Seedling Support | Indirect |
| Package Size | 16 in blade |
| Ease of Use | Remote control |
| Gardening Purpose | Climate control |
| Additional Features |
|
- Height adjusts from 32 in to 47 in with a tilt-back head, so you can aim airflow exactly where you need it
- Remote control with 1-, 2-, and 4-hour auto-off timer makes it easy to adjust settings without getting up
- ETL listed with Lasko Blue Plug motor protection for reliable, safe operation
- Remote requires two AAA batteries, which aren’t included
- Plastic construction may feel less sturdy than metal-cased fans
- No air-purification features like ionizing or HEPA filtration
4. Indoor Outdoor Moisture Sensor
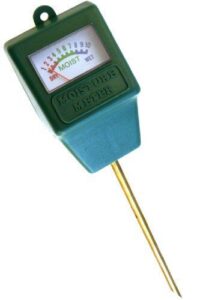
Guesswork kills more seedlings than pests ever do. An indoor outdoor moisture sensor takes moisture reading out of the "feels about right" category and gives you real numbers.
Capacitive probes resist corrosion and won’t shock roots like older resistive types. Insert to root depth, set your moisture thresholds, and get app alerts before soil turns swampy or bone-dry.
Battery life often stretches months. Pair it with tray-base watering, and root rot becomes a problem you catch before it starts.
| Best For | Hobby gardeners and indoor plant enthusiasts who want a simple, no-fuss way to check soil moisture before watering. |
|---|---|
| Indoor Use | Yes |
| Outdoor Use | Yes |
| Seedling Support | Indirect |
| Package Size | 0.31 lb |
| Ease of Use | No batteries needed |
| Gardening Purpose | Moisture monitoring |
| Additional Features |
|
- No batteries required, thanks to simple mechanical operation
- Color-coded scale makes moisture levels easy to read at a glance
- Works well for lawns, garden beds, and houseplants alike
- Needle gauge is less precise than electronic moisture probes
- Calibration can drift over time, so periodic checks are needed
- Not well suited for deep-rooted trees or very large planting areas
5. Espoma Organic Start Fertilizer
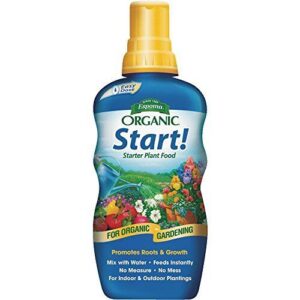
Once true leaves show up, seedlings need food fast — bare seed-starting mix runs out of nutrients within weeks. Espoma Organic Start delivers a 1-2-2 NPK ratio with kelp extract and humic acids, both of which boost nutrient uptake at the root zone.
Mix half-strength and apply every 1-4 weeks. It’s gentle enough for tender roots, yet strong enough to fuel transplant success without burning fragile seedling tissue.
| Best For | Gardeners and plant parents starting seedlings or transplants who want a gentle, organic, all-purpose feed for indoor and outdoor plants. |
|---|---|
| Indoor Use | Yes |
| Outdoor Use | Yes |
| Seedling Support | Direct |
| Package Size | 24 fl oz |
| Ease of Use | Dilute and pour |
| Gardening Purpose | Fertilization |
| Additional Features |
|
- Organic 1-2-2 NPK formula with kelp extract and humic acids boosts nutrient uptake without burning delicate roots
- Versatile enough to replace multiple fertilizers across houseplants, garden beds, and containers
- Easy-to-mix liquid concentrate that dilutes quickly for consistent feeding every 1-4 weeks
- Requires careful dilution to match label instructions for best results
- Not formulated to meet the nutrient needs of mature trees or shrubs
- Organic composition means a shorter shelf life compared to synthetic fertilizers
Frequently Asked Questions (FAQs)
Why are my seedlings dying after sprouting?
What looks like healthy growth one day, gone the next? Usually it’s damping-off, overwatering, or weak stems from poor light. Roots rot, stems collapse at the soil line, or seedlings simply can’t hold themselves up under stress.
What happens if a seedling dies?
A dead seedling won’t recover—pull it immediately. Left in the tray, it can spread fungal spores like Pythium to healthy neighbors. Discard soil-line collapsed stems fast, then sanitize that cell before reusing it.
Why do seedlings get damaged?
Small stresses stack like dominoes waiting to fall.
Waterlogged roots, cool damp air, and fungal pathogens attack stems at the soil line, while low light stretches tissue thin—each factor weakening seedlings until one final push tips them into collapse.
Why is my seedling struggling?
Check for soggy soil, weak light, or crowded cells. Struggling seedlings often show yellowing, thin stems, or collapse at the base — signs of root stress, damping-off, or poor airflow limiting growth.
Can you revive dying seedlings?
Wilting doesn’t always mean game over. Recovery is possible when caught early, especially if dehydration’s the cause—trim damaged roots, bottom-water gently, and shift trays to bright, indirect light while they stabilize.
Is it normal for some seedlings to die?
Yes, some losses are completely normal. Even with perfect care, a small percentage won’t make it — weak genetics, uneven germination, or minor stress. Losing a few seedlings isn’t failure; it’s part of the process every grower experiences.
How to stop seedlings from dying?
Get the basics right: water from the tray base, keep light close and consistent, maintain 64–77°F, and thin crowded cells. These five fixes address most causes of early seedling loss.
Can seedlings recover from shock?
The wilting that signals death often signals healing instead. Younger seedlings bounce back fastest — new leaves appear within days if roots reestablish.
Keep conditions stable, handling gently. No growth after 7–14 days means reassessing water, light, temperature.
Should I use a fresh mix or reuse old soil?
Fresh mix wins for seedlings—uniform texture, intact nutrients, low pathogen risk. Reusing old soil works only if pasteurized and cut 50:50 with compost and perlite to fix compaction and restore drainage before sowing.
What tray material and drainage design works best?
Non-porous plastic or stainless steel trays dry fast and sanitize easily. Look for inclined bottoms and drainage ports that channel water away from roots—this prevents pooling, root rot, and damping-off while keeping your seedlings evenly moist, not soggy.
Conclusion
A seed tray is a tightrope, and balance beats extremes every time. Most reasons why seedlings die in seed trays trace back to just three habits: overwatering, poor airflow, and crowded cells.
Fix those, and your seedlings stop teetering and start thriving. Water from the base, thin early, and keep air moving steadily.
Small corrections now mean sturdy stems later. Master these basics, and every tray becomes a confident, thriving harvest waiting to happen.
- https://seedsnsuch.com/blogs/gardeners-greenroom/prevent-damping-off
- https://hort.extension.wisc.edu/articles/damping
- https://extension.umn.edu/solve-problem/how-prevent-seedling-damping
- https://gardenbetty.com/leggy-seedlings-what-causes-them-and-how-to-correct-them
- https://www.almanac.com/pest/damping-seedling-killer-and-how-stop-it