This site is supported by our readers. We may earn a commission, at no cost to you, if you purchase through links.
A tray filled 15% too low won’t just look sparse — it can cut your germination rate before a single seed even sprouts. That’s the kind of detail beginners skip past, right up until half their tray comes up patchy while the rest fills in fine.
Depth isn’t a minor detail here; it controls moisture, air, and root contact all at once. Get it wrong, and you’re fighting compaction, dry pockets, or seeds that never find purchase.
Knowing how deep to fill seed starting trays — down to the millimeter, cell by cell — turns guesswork into a repeatable process you can trust season after season.
Table Of Contents
- Key Takeaways
- Fill Trays Nearly to The Top
- Choose The Right Starting Mix
- How to Fill Seed Trays
- Adjust Depth for Seed Size
- Prevent Common Filling Mistakes
- Frequently Asked Questions (FAQs)
- Can I bury leggy seedlings deeper?
- What are some common mistakes when starting seeds indoors?
- Is 2 inches too deep for seeds?
- How to fill seed starter trays?
- How often should I sterilize trays before reusing them?
- What temperature works best for germinating most seeds?
- How long should I harden off seedlings before transplanting?
- When are seedlings ready to transplant into the garden?
- How much light do seedlings need after sprouting?
- Conclusion
Key Takeaways
- Fill each cell nearly to the rim, leaving a 2–4mm watering lip, since underfilled cells can cut germination rates by up to 15%.
- Use a light, fluffy mix of peat or coir with a 1:1 perlite-to-vermiculite ratio to balance aeration and moisture, and always pre-moisten before filling.
- Fill loosely and tap gently to settle the mix instead of pressing down, since overpacking blocks oxygen and root growth just as much as underfilling does.
- Match planting depth to seed size—surface-sow tiny seeds, cover small seeds with about ¼ inch, and plant large seeds ½ to 1 inch deep—defaulting to shallower depth whenever you’re unsure.
Fill Trays Nearly to The Top
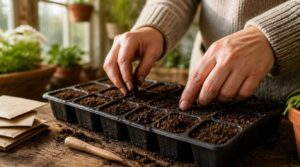
Getting the fill level right sets the stage for everything that follows, from germination to healthy root growth. It’s not just about dumping mix into cells and calling it done—a few small details make a real difference. Here’s what to keep in mind as you fill each tray.
Fill each cell to just below the rim with a light, even hand, and check out this guide to gardening with vegetable seeds for tips on matching mix depth to seed size.
Leave a Small Watering Lip
Stop about 2–4 millimeters short of the rim, that’s your watering lip. This small gap lets water pool briefly and wick downward through capillary action, spreading moisture evenly across every cell instead of sheeting off the sides.
A shallow lip prevents seed rot by avoiding waterlogged pockets, while durable, food-grade plastic resists warping through repeated fill-and-drain cycles season after season.
Aim for Even Cell Depth
Once you’ve set your watering lip, keep that fill line consistent across every cell in the tray. Uniform depth means uniform moisture distribution, equal root access, and synchronized germination—no dry pockets, no stragglers.
Check with a ruler or straight edge every few cells; it takes seconds and prevents the uneven seedling growth that plagues carelessly filled trays.
Avoid Overpacking The Mix
Press your fingers into the mix as you fill each cell—if it feels like a brick instead of a sponge, you’ve gone too far. Overpacking restricts root growth and traps air pockets that cause uneven moisture and poor seed emergence.
Dense mix also slows drainage, inviting waterlogging around shallow seeds. Fill loosely, let gravity and watering do the settling, and germination follows naturally.
Match Depth to Tray Size
Not every seed starting tray needs the same fill depth—a 72-cell tray with 2.25-inch cells behaves differently than a 32-cell tray built for melons. Match depth to tray footprint to keep seed-to-soil contact consistent across cells.
Shallow trays waste less mix and dry faster; deeper cells hold moisture longer but risk uneven germination if you don’t fill uniformly. Consistency, not guesswork, is what separates seedlings from stragglers.
Choose The Right Starting Mix
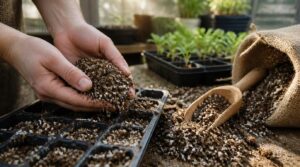
Depth only does half the job if what’s filling that tray works against your seedlings. The right starting mix gives roots room to breathe while holding just enough water to keep them going. Here’s what to look for before you scoop that first handful into a cell.
Light, Fluffy Texture
Think of your seed starting mix like a sponge full of tiny pockets—that’s what tender roots need to breathe. Particle size matters here: fine peat or coir plus perlite keeps mix density low, creating stable air pockets instead of a compacted mass.
Dense, heavy mixes suffocate roots and block soil aeration. A light, fluffy texture ensures consistent aeration across every cell in your seed starting trays, supporting even germination at whatever planting depth you choose.
Moisture Without Sogginess
How do you know your mix is right? It should feel like a wrung-out sponge—damp, not dripping. Water activity levels matter more than visible wetness; proper capillary action distributes moisture evenly, preventing soggy pockets that invite damping off.
If you’re spotting patchy germination or crusty surfaces despite regular watering, this guide to common seed starting problems and solutions can help you pinpoint what’s throwing off your mix.
Skip heavy watering. A light, even dampness helps germination without drowning roots, keeping your seed starting mix balanced from top to bottom.
Peat or Coconut Coir
Boiling down to the base ingredient, your seed starting mix hinges on peat or coconut coir. Peat holds moisture longer and buffers pH for acid-loving crops, but harvesting it raises real sustainability concerns.
Coir, a coconut byproduct, drains faster and offers better aeration, though it needs pre-soaking to flush excess salinity before seeds go in.
Perlite or Vermiculite Balance
Perlite and vermiculite work as a team, not rivals—one drains, the other holds. A 1:1 ratio balances aeration vs moisture for most seedstarting mix blends.
- Hot climates: lean toward vermiculite for moisture retention
- Dense trays: favor perlite for drainage efficiency
- Standard use: stick with equal parts
Vermiculite also offers nutrient buffering capacity, releasing potassium and calcium slowly while preventing root rot. While vermiculite holds water, perlite is made from volcanic glass material that helps improve soil aeration.
Avoid Heavy Garden Soil
Garden soil seems like a free, convenient fill—until it turns into a brick inside your cells. Clay soil risks include compaction and poor drainage, suffocating roots and inviting rot.
Instead, choose seedstarting mix or organic growing media built for porosity. Compost amendment benefits garden beds later, but for trays, stick with a fluffy, well-balanced growing medium that helps with real seedling care.
How to Fill Seed Trays
Once you’ve settled on the right mix, the next step is getting it into the tray correctly. Filling technique matters just as much as ingredients, since air pockets and uneven cells can throw off germination before seeds even sprout. Here’s the process, broken into five simple steps.
Pre-Moisten The Mix
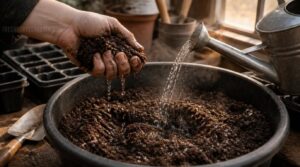
Dry mix straight from the bag won’t absorb water evenly, leaving dry pockets that stall germination in your seed starting trays.
- Squeeze test accuracy confirms proper hydration
- Even moisture prevents crusting and poor seed contact
- Wetting agents in organic seed starting mix aid absorption
- Balanced dampness avoids anaerobic conditions below the surface
Mix water in gradually, aiming for a wrung-out-sponge feel—damp, never soggy, before filling.
Fill Each Cell Loosely
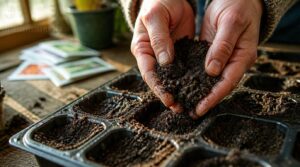
Once your mix is damp, scoop it into each cell without pressing down. Loose filling helps air pockets stay intact, which improves aeration benefits and prevents damping off in crowded seed starting trays.
Packed growing medium blocks moisture infiltration and invites surface crusting, so seeds struggle to break through. A light hand now means uniform sprouting and steadier seedling progress once germination begins.
Tap to Settle Mix
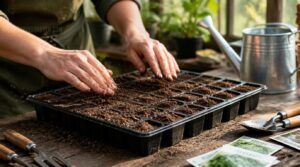
Now give the tray a few light taps against your work surface. This settles loose particles into small air gaps, creating a uniform top surface without compacting the whole cell.
Keep your tapping cadence gentle and consistent—short bursts work better than one hard knock. This works across peat, coir, and blended mixes, preventing hidden air pockets that disrupt germination and even moisture distribution.
Level The Surface Gently
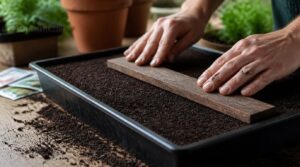
Once tapped, run a leveled hand or flat board across the surface with light, even pressure—no digging or dragging. You’re after a uniform ¼-inch reveal below the rim, checked from multiple angles.
If patches look dry, mist lightly before releveling. Consistent moisture keeps your growing medium settling evenly, which matters once you match depth to your seed packet instructions for reliable germination.
Water Before Planting Seeds
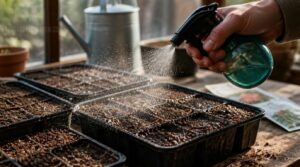
Now comes the step growers skip, then regret: watering before you sow. A gentle pass with a fine mist settles the mix and jumpstarts seed imbibition the moment seeds land.
- Mist evenly until surface looks damp, not puddled
- Let water absorb fully before planting
- Check for dry pockets—hydrophobic soil repels water
- Avoid soggy cells that invite seed rot
Adjust Depth for Seed Size
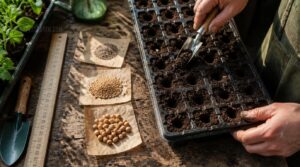
Not every seed wants the same treatment once it hits the mix. Depth depends entirely on size, and getting it wrong is one of the fastest ways to stall germination. Here’s how to match your covering technique to what you’re planting.
Tiny Seeds Need Surface Sowing
Some seeds germinate best when left uncovered — light triggers the process, so burying them means they’ll likely never sprout. Petunia, snapdragon, and lettuce fall into this light-dependent germination category.
Press seeds gently into a pre-moistened mix for solid surface contact, then mist lightly. Fine mist application prevents seed displacement, keeping seeds from washing away. Always check your seed packet instructions to confirm which varieties need this surface-sowing approach.
Small Seeds Need Shallow Cover
Basil, carrots, and most herb seeds need just a whisper of cover — roughly ¼ inch of fine-textured mix. Light pressing ensures seed contact without smothering, while a gentle misting keeps the surface from crusting over.
Check seed packet instructions for exact depth, since desiccation happens fast when coverage is too thin and moisture isn’t consistent during germination.
Large Seeds Go Deeper
Melons, cucumbers, and pumpkins carry hefty seed reserve energy, so they tolerate — and actually need — deeper planting. Aim for ½ to 1 inch in your growing medium, roughly two to three times the seed’s width.
That stored energy fuels faster emergence even through heavier soil, though compacted mixes still slow things down. Keep moisture retention consistent at depth for reliable germination.
Follow Packet Depth Instructions
That seed packet in your hand is the real expert here, not a general rule of thumb. When depth is listed as a range, use the midpoint for accuracy — millimeters matter more than you’d think.
- Verify depth before sowing
- Round irregular seeds up
- Note range midpoints
- Match packet to tray cell
- Check before every germination cycle
Avoid Burying Seeds Too Deep
Deep burial is the most common reason for slow or failed germination in seed starting trays. Bury too deep and you cut off oxygen availability, delaying seedling emergence and inviting damping off in overly moist soil.
When you’re unsure, err shallow — you’ll get better germination vigor and see seedlings break the surface days sooner than expected.
When unsure of planting depth, go shallow—seedlings emerge stronger and sooner
Prevent Common Filling Mistakes
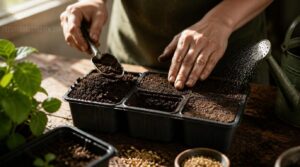
Even careful gardeners run into small filling errors that quietly undercut germination rates. Most of these mistakes trace back to how much mix goes in, how firmly it’s pressed, and how evenly moisture spreads through each cell. Here’s what to watch for before you plant a single seed.
Cells Filled Too Low
Skimping on mix costs you more than it saves. When cells sit half-empty, germination rate drops by up to 15%, seeds get displaced during watering, and roots stall before they even start.
- Uncovered seeds after watering
- Faster surface evaporation
- Uneven seedling vigor
- Delayed root development
- Inconsistent moisture across trays
Fill seed starting trays fully before transplanting seedlings into potting soil.
Mix Packed Too Firmly
Underfilling isn’t the only culprit—overpacking does just as much damage. Firm tamping compresses the growing medium, cutting oxygen diffusion rates and causing gas exchange issues that stall germination.
Roots then face penetration struggles, seedling emergence delays, and disrupted capillary action. Instead, fill loosely and tamp lightly, letting the mix settle naturally rather than forcing it down.
Uneven Cell Moisture
Firm packing isn’t the only enemy—inconsistent moisture across cells causes just as much trouble. Sorption hysteresis means identical humidity can leave some cells wetter than others, especially where compaction blocks capillary flow.
Watch for:
- Pooling near tray edges
- Dry pockets in center cells
- Compacted zones blocking water reservoirs
- Uneven pre-moistening before fill
Check moisture levels daily until germination stabilizes.
Poor Drainage Problems
Soil compaction in seed trays mirrors improper grading in a yard: water can’t escape, so it pools instead of draining through drainage holes. This traps moisture, inviting root rot, soil pathogens, and damping-off disease.
Check that drainage holes stay clear—clogged drainage ruins even well-textured mix. Good soil permeability keeps roots healthy, preventing the soggy conditions that doom seedlings before they sprout.
Refill After Settling
Once drainage is sorted, give seed starting trays a final check: the mix settles after watering, so top off any low cells to stay within a 1 to 2 millimeters refill height tolerance below the rim.
Confirm moisture sheen verification—damp, not soggy—then do a post settle relevel and gentle surface press. This keeps germination even and simplifies your seedling watering schedule.
Frequently Asked Questions (FAQs)
Can I bury leggy seedlings deeper?
Yes—leggy seedlings, especially tomatoes and peppers, benefit from stem burial during transplanting. Bury up to half the stem to encourage rooting, boost stability, and prevent transplant shock, but avoid burying cucurbits or thin-stalked seedlings, which risk rot.
What are some common mistakes when starting seeds indoors?
Common culprits include light exposure errors, temperature fluctuations, and improper watering habits leading to root rot or damping-off disease.
Poor air circulation and rough seedling handling during transplant also cause stress, weak stems, and uneven moisture levels in seed starting trays.
Is 2 inches too deep for seeds?
Picture a seedling running a marathon just to reach sunlight—two inches is that marathon. It’s too deep for most seeds, draining emergence energy, inviting damping off, and disrupting surface moisture seedlings depend on for even, timely germination.
How to fill seed starter trays?
Pre-moisten your mix, fill each cell loosely to avoid soil compaction, tap gently to settle, then level and bottom water. This helps healthy root development and prevents damping off in your germination trays.
How often should I sterilize trays before reusing them?
Sterilize trays after every use to prevent damping-off disease and cross-contamination. Wash with hot water at 180°F, then soak 10–15 minutes in a bleach solution (1:10 ratio). This kills lingering pathogens before your next germination cycle begins.
What temperature works best for germinating most seeds?
Most seeds thrive between 65°F and 75°F, though warm-season crops in your seed starting trays prefer 80–85°F.
A heat mat keeps soil warmer than surrounding air, speeding germination — especially helpful for cool season stragglers or tropical seedlings needing steady warmth.
How long should I harden off seedlings before transplanting?
Think of hardening off like easing into cold water rather than diving in — a shock invites trouble. Give seedlings 7 to 10 days of gradual outdoor exposure, monitoring weather closely, to prevent transplant shock and sunscald once they’re in the ground.
When are seedlings ready to transplant into the garden?
Your seedlings are ready once they show a true leaf count of 2 to 4, a healthy root system, soil above 50°F, and a stable weather window—no frost risk for a week after transplanting.
How much light do seedlings need after sprouting?
More light than you’d guess: aim for 14 to 16 hours daily, ideally via a south-facing window or grow lights positioned close to the canopy for even, consistent coverage.
Conclusion
A sparse tray and a thriving one often start with the same seeds, the same mix, the same light — the only difference is depth. Knowing how deep to fill seed starting trays turns that gap from mystery into method.
Fill nearly to the top, leave your watering lip, settle the mix, then let the seed’s size guide the cover. Small choices, measured in millimeters, decide whether your tray sprouts evenly or struggles. Master the depth, and germination takes care of the rest.