This site is supported by our readers. We may earn a commission, at no cost to you, if you purchase through links.

Building a simple cold frame garden solves this problem by trapping solar heat under a transparent lid, protecting plants from frost and stretching your harvest months beyond the normal season.
You don’t need carpentry skills or expensive materials to build one. With basic supplies and a few hours of work, you can create a mini greenhouse that shields seedlings in spring, grows lettuce through November, and gives you control over fresh produce year-round.
Table Of Contents
Key Takeaways
- A cold frame extends your growing season by up to three months and boosts annual harvest by 25–40% through simple solar heat trapping, letting you start seeds six weeks earlier in spring and harvest greens well into winter without electricity costs.
- You can build an effective cold frame using salvaged windows or doors and basic lumber for minimal cost, requiring no carpentry expertise—just a bottomless box with a transparent lid positioned to capture southern sunlight for six to eight hours daily.
- Temperature management is critical since cold frames can exceed 85°F on sunny days, requiring you to crack the lid open at 60°F and fully vent above 85°F while maintaining 50–70% humidity to prevent both heat damage and fungal disease.
- Regular maintenance including weekly debris removal, monthly glass cleaning to maximize light transmission, and seasonal hardware checks ensures your cold frame protects plants from frost while reducing pest intrusion by 50–70% compared to open gardens.
What is a Cold Frame Garden?
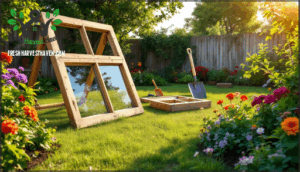
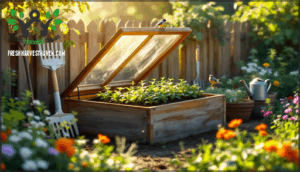
A cold frame is basically a bottomless box you set over your plants to trap warmth and protect them from frost. Think of it as a mini greenhouse that lets sunlight in through a transparent roof while keeping the cold air out.
You’ll find that cold frames come in different styles and materials, so let’s look at what options work best for your garden.
How Cold Frames Work
Think of a cold frame as a mini greenhouse that works by trapping heat and light to keep your plants cozy through the cold months. The transparent lid captures sunlight and creates a warm microclimate inside, while the insulation types—whether glass, plastic, or acrylic—retain that warmth close to your plants.
This thermal mass effect protects against frost and lets you extend the growing season notably. By combining smart sunlight capture with proper insulation, your cold frame construction becomes a powerful tool for winter gardening and frost protection without needing electricity or complicated equipment.
Benefits of Using Cold Frames
 View On Amazon
 - Frost Protection: Your transparent lid shields plants from freezing temperatures, wind, and snow while soil temperature stays warmer inside
- Season Extension: Start seeds six weeks earlier in spring and harvest well into late winter with crops like kale and spinach
- Crop Yield: You’ll boost your harvest by 25–40% annually thanks to longer growing periods and controlled conditions
- Pest Control: Physical barriers reduce pest intrusion by 50–70%, cutting down on damage and disease pressure
- Cost Efficiency: No electricity needed—just solar heat and basic materials, making this one of the cheapest ways to expand your gardening
Common Cold Frame Designs
There are several designs to choose from, each with its own advantages depending on your space and budget. A wooden cold frame offers traditional durability and good insulation for year-round use. Plastic sheeting frames are budget-friendly and easy to replace, perfect for seasonal adaptation. Glass or hard plastic designs provide excellent light transmission and ventilation systems for space optimization. The mobile cold frame with grips lets you reposition your setup as needed, ideal for DIY cold frame plans.
| Frame Materials | Best For | Cost |
|---|---|---|
| Wooden Cold Frame | Durability & insulation | Medium |
| Plastic Sheeting | Budget & replacement | Low |
| Glass/Acrylic | Light & longevity | High |
Choosing Materials for Your Cold Frame
The good news is you don’t need to spend a lot of money on fancy materials to build a cold frame.
You’ve got several practical options to choose from, and some of the best materials might already be sitting around your yard.
Let’s walk through what’ll work best for your situation.
Wood, Plastic, or Glass Options
Your frame materials make all the difference in how long your cold frame lasts and how well it protects your plants. Wood is the go-to choice for most gardeners—untreated cedar or hemlock frames last 5–10 years and provide excellent insulation, reducing temperature swings by 8–10°C. Plastic panels are lighter and cheaper but need replacing every 2–3 years. Glass transmits 95% of sunlight and lasts 25+ years, though it’s heavier and can break.
Consider these options:
- Wood frames with untreated rot-resistant wood increase durability by 30–40% compared to treated lumber
- Polycarbonate panels deliver R-values up to 1.8, outperforming glass at R-0.95 for better heat retention
- Polyethylene sheeting offers the lowest construction costs but requires frequent replacement due to UV breakdown
- Tempered glass reduces injury risks and extends your growing season by 5–8 weeks with proper sealing
For ideal results, refer to the cold frame guide to choose the best materials. Your choice depends on your budget, how long you want your cold frame gardening setup to last, and how much maintenance you’re willing to manage.
Upcycling Salvaged Windows or Doors
Salvaged windows and old doors are gardening gold—they’re free or cheap, they last forever, and they give your cold frame real character while keeping waste out of the landfill. Single-pane windows work fine, though double-pane offers better insulation. Look for sturdy frames without major cracks. Old solid doors can be propped at an angle for your lid.
Search your local salvage yards, Facebook Marketplace, or Craigslist for old window cold frame materials. Window recycling through upcycled cold frames means less money spent and more satisfaction knowing you’ve rescued materials destined for the dump.
Essential Tools and Supplies Needed
You’ll need a handful of basic tools and supplies to pull this build together, and most of them you probably already have sitting in your garage or shed. A power drill and screwdriver make assembly quick. Grab pressure-treated lumber for durability, wood screws to fasten everything, strong hinges for the lid, and Gorilla Wood Glue to reinforce joints. Weatherproofing sealer protects your frame from moisture. Don’t forget gardening gloves—splinters aren’t fun.
- A power drill and screwdriver (you’ve got this covered)
- Pressure-treated lumber and wood screws for a sturdy frame
- Heavy-duty hinges that won’t rust or fail mid-season
- Gorilla Wood Glue to reinforce joints and guarantee longevity
- Weatherproofing sealer to protect your investment from the elements
Step-by-Step Cold Frame Construction
Now it’s time to actually build your cold frame. You’ve picked your materials and gathered what you need, so let’s get to work.
The good news is that this doesn’t require expert carpentry skills—just basic tools and a little patience.
Here’s how to put it all together, from measuring and cutting your wood to installing hinges and making sure everything works right.
Measuring and Cutting Materials
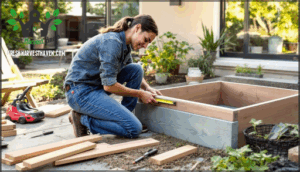
Getting the measurements right is half the battle—if your pieces don’t fit together, you’ll end up frustrated before you even get started. Measure your frame carefully based on your garden space and window size. Use a tape measure to mark where your corner posts will go, then cut your wooden box frame pieces to length with a saw. Don’t rush the cutting—precision cutting prevents gaps.
Gather your cutting tools, drill, and screwdriver before you begin. Double-check each measurement twice.
Assembling The Frame and Lid
Now comes the moment where all your careful cuts and measurements finally come together—this is where your cold frame actually starts to look like something real. Line up your wooden box pieces and secure them with wood screws at each corner. Drill pilot holes first to prevent splitting.
Position your salvaged window or clear door on top as your lid, then attach it firmly. Make sure everything sits level and tight—gaps let cold air sneak in and defeat the whole purpose of your DIY cold frame.
Installing Hinges and Supports
Your lid needs to move freely, and the right hinges make all the difference between a cold frame that works and one that frustrates you every time you open it.
Install heavy-duty hinges along the back edge of your frame—they’ll bear the weight and weather. Use corner brackets on the inside to reinforce where your frame pieces meet.
These door hardware components keep everything stable during wind and temperature swings. Secure everything with rust-resistant screws, and test your lid mechanism before planting anything.
Adding Ventilation Features
A cold frame can heat up faster than you’d expect on a sunny day, which means you’ll need a way to let that trapped warmth escape before your plants cook. Proper air circulation keeps temperatures steady and prevents moisture buildup that can rot your seedlings.
Here’s how to add ventilation to your cold frame:
- Install automatic vents – These roof openers respond to temperature changes, opening and closing without you being there to monitor them.
- Prop the lid open – On warm days, use a stick or prop to crack your frame lid just enough for air circulation without letting cold air dominate.
- Add side vents – Cut small holes near the base of your frame walls to let air move through, improving garden maintenance and preventing heat stress.
- Use ventilation systems – Consider hinged panels or louvers that give you control over temperature and humidity in your DIY cold frame during garden construction.
Placing and Using Your Cold Frame
Now that you’ve built your cold frame, it’s time to find the right spot in your garden and get started using it. Where you place your frame matters just as much as how you build it—the wrong location won’t give your plants what they need to thrive.
Let’s walk through how to set up your cold frame for success and then look at the best ways to use it throughout the year.
Best Locations for Maximum Sunlight
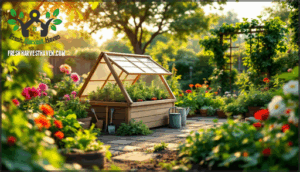
Place your cold frame where it gets the most southern exposure—ideally six to eight hours of direct winter sunlight. A south-facing orientation captures up to 85% of daily sun intensity during cold months, boosting soil and air temperatures by five to ten degrees compared to other spots. Angle your lid at fifteen to twenty degrees to optimize solar gain.
Position your cold frame to capture six to eight hours of direct southern sun for optimal winter warmth and plant growth
Avoid shade from trees, buildings, or slopes that can slash plant growth by thirty to forty-five percent. Position the frame near a south-facing wall for extra nighttime warmth from residual heat.
Setting Up for Drainage and Wind Protection
Good drainage and wind protection work together to keep your cold frame from becoming waterlogged or battered by gusts. Slope the ground slightly beneath your frame for proper soil drainage—even a gentle grade prevents water from pooling around plants. Position a wind barrier like a fence or hedge on the windward side to shield your garden protection setup.
Raise the frame’s soil level if your garden stays wet, and ensure ventilation gaps prevent moisture buildup. Frame placement matters: tuck it against a south-facing wall for warmth and wind shelter.
Starting Seeds and Protecting Plants
Once your cold frame is sited and protected, you can put it to work growing what you want—whether that’s getting a head start on spring seedlings or keeping greens alive through winter. Start seeds indoors, then move seedlings into the frame for plant hardening before transplanting outside. Direct sow cold-tolerant crops like lettuce and spinach for season extension and frost protection through crop rotation strategies.
- Sow seeds directly in frames for early or late harvests using cold frame gardening techniques
- Harden off indoor seedlings by gradually exposing them to outdoor conditions
- Practice crop rotation to maintain soil health and prevent disease buildup
Tips for Year-Round Use
Don’t wait for spring to put your cold frame to work—these simple tricks keep it productive from season to season. Your cold frame thrives year-round with smart seasonal planting and frost protection.
In spring and fall, grow cool-season crops like lettuce and spinach. Summer requires proper ventilation—prop the lid open on warm days to prevent overheating. Winter is your chance for a winter harvest of hardy greens. Monitor soil temperature regularly to time plantings right.
Here’s what works best:
| Season | Best Crops |
|---|---|
| Spring | Lettuce, spinach, peas |
| Summer | Tomatoes, peppers (with ventilation) |
| Fall | Kale, chard, carrots |
| Winter | Mâche, arugula, winter lettuce |
| Year-round | Microgreens, herbs |
This DIY cold frame extends the growing season dramatically, giving you fresh produce when others can’t garden outside.
Maintaining and Improving Your Cold Frame
Your cold frame’s going to need regular care to keep working well and protecting your plants. The good news is that maintenance is pretty straightforward—it mostly comes down to keeping an eye on conditions inside and doing seasonal cleanups.
Let’s look at the key ways to maintain your frame and make it even better over time.
Monitoring Temperature and Humidity
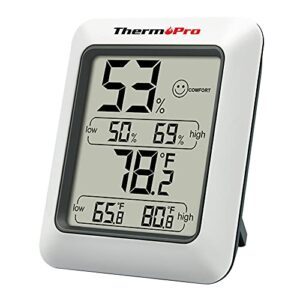
Keeping tabs on what’s happening inside your cold frame is the difference between thriving plants and struggling ones. On sunny days, interior temperatures can shoot past 85°F, risking heat damage, so crack the lid open when it hits 60°F and fully vent above 85°F. A simple thermometer works, but a thermohygrometer under tracks both temperature and humidity—ideal for catching the 50–70% humidity ideal range.
Position your sensor near soil level for accurate readings. Watch for excessive moisture that invites fungal disease, especially during winter when humidity often exceeds 70%. With proper ventilation and monitoring, you’ll maintain the climate control your plants need to flourish.
Cleaning and Seasonal Maintenance
Your cold frame won’t work at peak performance without regular cleaning and a bit of seasonal upkeep. Here’s your maintenance schedule to keep things running smoothly:
- Wipe down glass or plastic monthly to remove dirt and grime that blocks sunlight—critical for plant care during seasonal gardening transitions.
- Check hinges and hardware each season for rust or loosening, especially during winterization methods in fall.
- Remove debris and dead plant material weekly to prevent pest control issues and fungal problems in your garden protection system.
- Inspect seals and corners before winter and spring for gaps that compromise your cold frame maintenance routine.
These frame cleaning tips and seasonal checks take minutes but deliver months of reliable garden performance.
Upgrading With Thermometers or Portable Kits
Simple upgrades can transform your basic cold frame into a smart growing system that practically runs itself. Add thermal sensors for weather monitoring and soil heating control. Portable kits provide garden automation without rewiring your DIY cold frame.
These tools take the guesswork out of building a cold frame setup, extending the growing season through precise garden protection year-round.
Frequently Asked Questions (FAQs)
How do you prevent pests in cold frames?
Inspect your cold frame weekly for aphids, slugs, or mold since enclosed spaces trap moisture and attract pests.
Remove damaged leaves immediately, apply organic neem oil for insects, and maintain proper ventilation to prevent fungal growth.
What soil mix works best for cold frames?
Use a balanced soil mix with equal parts garden soil, compost, and coarse sand or perlite. This combination maintains proper moisture levels while providing essential organic matter for strong plant growth.
Adding aged manure boosts nutrient balance for vigorous development.
When should you close the lid at night?
Close the lid before sunset when temperatures drop below 40°F to trap daytime warmth and shield plants from overnight frost.
This simple temperature control method is essential for winter gardening success and effective garden protection methods throughout cold seasons.
Can cold frames protect from heavy snow?
Cold frames manage light snow well, but heavy snow can damage or collapse weak structures. Reinforce your DIY cold frame with sturdy braces and angled lids to shed weight.
Snow actually adds frame insulation, boosting frost protection methods for winter plant care underneath.
How do you manage excessive condensation buildup?
Prop open your lid on sunny days to release built-up moisture and boost airflow. Ventilation systems prevent condensation from forming into droplets that encourage mold.
Wiping down interior surfaces removes excess water, protecting plants from rot and improving Moisture Management through simple daily checks.
Conclusion
Picture frost creeping across your garden in October, stopping everything cold—except the greens thriving under your transparent lid, still growing while neighbors’ beds lie bare.
Building a simple cold frame garden gives you that control: an affordable shield against weather that extends harvests, protects seedlings, and keeps fresh food on your table when stores charge premium prices.
You’ve learned the steps. Now build it, use it, and enjoy months of extra growing time you didn’t have before.

