This site is supported by our readers. We may earn a commission, at no cost to you, if you purchase through links.
 You’ll preserve your herb harvest’s peak flavor by drying and storing fresh herbs properly.
Harvest them in the morning after dew evaporates but before the heat hits.
Air-dry leafy herbs like basil and oregano by bundling stems and hanging them upside down in a warm, dark spot with good airflow.
For faster results, use your oven on its lowest setting or a dehydrator.
Once they crumble easily between your fingers, strip leaves from stems and store them in airtight containers away from light and heat.
Label everything with dates—dried herbs stay potent for about a year when stored correctly.
The secret lies in timing your harvest and controlling moisture removal.
Table Of Contents
- Key Takeaways
- Harvesting Fresh Herbs
- Drying Fresh Herbs
- Preparing Herbs for Storage
- Storing Dried Herbs
- Using Dried Herbs
- Frequently Asked Questions (FAQs)
- How to dry herbs for storage?
- What is the best way to dry fresh herbs?
- How do you store fresh herbs?
- How do you preserve dried herbs?
- Do herbs dry well?
- How do you dry herbs without special equipment?
- What is the best way to dry and store fresh herbs?
- Which herbs should not be dried?
- Is it better to dry or freeze fresh herbs?
- How do you prevent herbs from losing color?
- Conclusion
Key Takeaways
- Harvest at the right time – Cut herbs in the morning after the dew evaporates but before the day’s heat hits to capture peak essential oils and maximum flavor.
- Choose your drying method wisely – Air-dry sturdy herbs like rosemary by hanging bundles upside down, or use a dehydrator at 95-115°F for faster, more controlled results that preserve up to 90% of essential oils.
- Store in airtight containers – Use glass jars labeled with dates and keep them in cool, dark places away from heat and light to maintain potency for up to a year.
- Follow the 3:1 substitution rule – Use one teaspoon of dried herbs for every tablespoon of fresh herbs in recipes, and add them earlier in cooking to allow for proper rehydration.
Harvesting Fresh Herbs
The key to preserving herbs’ peak flavor starts with proper harvesting techniques that capture their essential oils at their strongest.
You’ll want to cut your herbs early in the morning after the dew evaporates but before the day’s heat reduces their potency.
This technique is crucial for maintaining the herbs’ flavor, as it ensures that their essential oils are preserved at their strongest.
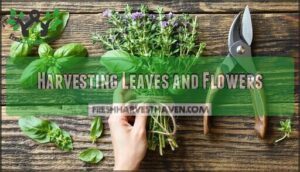
Harvesting Leaves and Flowers
Your herb garden’s morning glory holds the key to maximum flavor. Harvest leaves and flowers after dew evaporates but before noon’s heat sets in. This optimal timing guarantees peak essential oils and prevents wilting.
Use clean garden shears for precise cuts, taking no more than one-third of each plant to encourage regrowth. To maximize growth, remember to follow the one-third harvesting rule.
Harvesting techniques for superior leaf quality:
- Choose vibrant, disease-free leaves before flowering impact reduces potency
- Cut stems just above leaf nodes to promote branching
- Handle delicate herbs gently to avoid bruising
- Select younger flower selection buds over fully opened blooms
- Rinse briefly only if soil clings to leaves
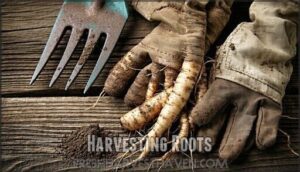
Harvesting Roots
While leaves and flowers grab attention, roots hide underground treasures worth harvesting. Root identification starts with knowing which plants store nutrients below ground. Optimal timing occurs during late fall or early spring when plants enter dormancy.
Soil preparation makes digging easier – water the area lightly beforehand. Use digging techniques with a garden fork, working in circles around the plant. This approach minimizes damage while accessing the root system.
| Season | Root Quality | Plant Energy | Harvest Benefit |
|---|---|---|---|
| Spring | Concentrated | Stored below | Maximum potency |
| Summer | Diluted | Active growth | Lower quality |
| Fall | Peak levels | Preparing dormancy | Excellent harvest |
| Winter | Stable | Dormant state | Good collection |
Post-harvest handling involves thorough cleaning and proper preparation. Leave some roots intact for regrowth – you’ll thank yourself next season when fresh herbs return stronger than before.
Handling Fresh Plant Material
After bringing roots indoors, proper handling keeps your fresh herbs in perfect condition.
Gentle touch prevents bruising those delicate leaves you’ve worked hard to harvest.
Transport herbs in breathable materials like paper towels to avoid moisture buildup.
Here’s your handling checklist:
- Inspect immediately – Look for vibrant leaves and discard imperfections
- Keep cool – Move herbs to a dim area to prevent wilting
- Process quickly – Rinse or not, then prepare for drying herbs right away
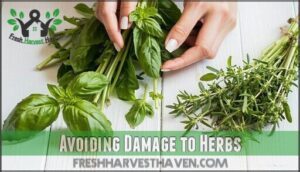
Avoiding Damage to Herbs
Every herb deserves careful handling to prevent bruising and mold growth. Use gentle movements when washing and sorting—rough treatment damages delicate leaves and reduces essential oils.
Quick, soft shakes remove insects without harm. Avoid sunlight exposure during processing, which degrades flavor compounds.
Handle stems minimally to prevent crushing. Proper pest prevention starts with gentle cleaning techniques.
These herb drying tips protect your harvest’s integrity, ensuring successful herb flavor preservation throughout the drying process.
Drying Fresh Herbs
Once you’ve harvested your fresh herbs, proper drying becomes essential for preserving their flavor and extending their shelf life.
Whether you choose air drying, oven methods, or modern dehydrators, the right technique will transform your garden bounty into a pantry staple that lasts for months.
Air Drying Methods
When drying herbs naturally, hanging bundles work best for sturdy varieties like rosemary and thyme.
Tie small bunches with string, ensuring good airflow between stems. Paper bag methods protect delicate leaves from dust while maintaining circulation.
Drying racks offer excellent results for flat-leaf herbs.
Climate impact matters—dry environments speed the process, while humidity slows it. Choose your herb types wisely for ideal air drying success.
Microwave Drying Techniques
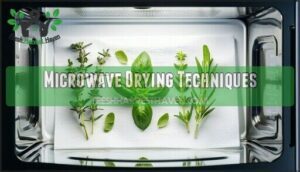
Why settle for slow drying when microwave drying herbs quickly preserves maximum flavor? Remove thick stems and place 4-6 herb stems between paper towel layers.
Set microwave power levels to high, drying herbs in microwave using 30-second drying time intervals to prevent scorching. You can find a suitable herb drying product online.
- Speed demon: Complete herb moisture content removal in 1-3 minutes
- Flavor fortress: Retains over 70% of essential oils compared to air drying
- Color champion: Maintains vibrant green appearance through controlled microwave wattage
Monitor closely during each interval for scorching prevention—overheated herbs taste bitter.
Oven Drying Procedures
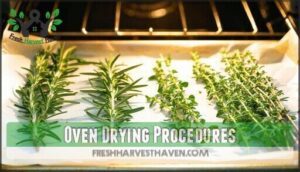
Your oven transforms into a reliable herb-drying station with proper temperature control. Set your oven to its lowest setting, ideally between 170-200°F, for maximum flavor retention. Baking sheets lined with parchment paper create the perfect foundation for herb placement. Precise results require consistent heat maintenance.
Oven drying requires these steps:
- Remove herb leaves from stems completely
- Spread herbs in single layers on baking sheets
- Prop oven door open slightly for moisture escape
- Monitor drying time carefully, typically 2-4 hours
Check herbs every 30 minutes during drying fresh herbs. They’re ready when leaves crumble easily between your fingers. This herb drying technique preserves more flavor than air drying while working faster.
Dehydrator Drying Methods
Food dehydrators offer three key advantages for drying herbs: precise temperature settings, consistent airflow, and reliable results.
Set your dehydrator to 95-115°F, with higher temperatures for humid climates. Arrange herbs in single layers on trays, ensuring good air circulation.
Dehydrating typically takes 2-4 hours, depending on herb thickness. For those looking to buy, a specialized machine is available.
This method preserves up to 90% of essential oils, making it superior to air drying for flavor retention.
Preparing Herbs for Storage
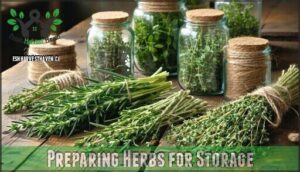
Once your herbs are properly dried, you’ll need to prepare them for long-term storage to maintain their flavor and potency.
This essential step involves removing stems, cleaning any dirt or debris, and discarding damaged portions that could affect the quality of your preserved herbs.
Removing Leaves From Stems
Once your fresh herbs are perfectly dried, it’s time for leaf separation.
This herb preparation step requires gentle stemming techniques to preserve quality. Efficient removal protects delicate leaves while maximizing your harvest.
Here’s how to handle different herb types:
- Pull method: Grip stems firmly and slide fingers downward to strip leaves
- Scissor technique: Cut woody stems like rosemary with kitchen shears for easier removal
- Minimize damage: Work slowly with fragile herbs like basil to prevent crushing
- Quality check: Discard any bruised or discolored leaves during the herb drying process
Cleaning and Drying Roots
Root washing begins with removing all soil under cool running water.
Scrub gently with a soft brush, then slice thick roots into smaller pieces for faster drying.
Root slicing exposes more surface area, reducing drying time substantially.
Arrange sliced roots in single layers on screens or trays, ensuring good airflow.
Turn pieces daily to prevent mold formation during the herb drying process.
Garbling Leaves and Flowers
After your herbs finish drying, garbling separates quality leaves and flowers from stems and debris.
This critical step removes up to 15% of unwanted material, boosting potency and shelf life.
- Flower separation: Gently crumble blooms from woody stems by hand
- Leaf inspection: Check each piece for discoloration or disease spots
- Pest removal: Discard any material showing insect damage or eggs
- Debris elimination: Screen out twigs, seeds, and foreign matter completely
Removing Damaged Parts
Once you’ve finished garbling, scan each herb bundle for trouble spots. Identifying Damage means checking for brown edges, black spots, or slimy patches that spell trouble for your herb drying efforts.
Bruise Removal keeps fresh herbs from spoiling the whole batch during storage. Discarding Debris like dead leaves prevents mold growth during the herb drying process.
Disease Prevention starts here – one bad leaf can ruin perfectly good herbs. Pest Control also matters since tiny bugs love hiding in damaged areas.
To maximize flavor retention, consider the importance of preserving essential oils during this process. Use clean scissors to trim problem spots, saving healthy portions for successful herb storage later.
Storing Dried Herbs
Once you’ve properly prepared your dried herbs, it’s time to store them correctly to maintain their flavor and potency for months to come.
The right storage containers and conditions will keep your herbs fresh and aromatic, ready to enhance your cooking whenever you need them, which is crucial for their overall potency.
Choosing Airtight Containers
When selecting the right storage solution, airtight containers make all the difference for preserving your herbs’ potency. Container Materials like glass jars outperform plastic by blocking light and preventing flavor contamination.
Size Matters—choose containers that fit your herbs snugly to minimize air exposure. Some gardeners also use containers for overwintering sensitive herbs.
Consider these essential features:
- Sealing Mechanisms with tight-fitting lids prevent moisture infiltration
- Dark-colored mason jars protect against Light Exposure damage
- Proper Humidity Control through quality herb storage containers
Herb drying glass jars remain the gold standard for serious herb enthusiasts.
Labeling and Dating Containers
Why struggle with mystery herbs months later? Proper labeling transforms your herb storage containers into an organized system.
Use permanent markers on mason jars or stick waterproof labels directly onto airtight containers. Include the herb name and drying date using a consistent date format like "Basil – 07/30/25."
This simple practice delivers clear labeling benefits: you’ll track shelf life accurately and maintain information accuracy. Quality label durability prevents smudging, ensuring your herb labeling system stays reliable over time.
Maintaining Cool and Dark Conditions
Think of your pantry as a protective vault for storing herbs. Choose cool spots below 70°F, away from sunlight exposure that destroys essential oils.
Temperature control and darkness benefits work together to extend shelf life.
Proper container placement shields fresh herbs from humidity impact, preserving their potency for months of flavorful cooking.
Preserving Flavor and Potency
Your herbs’ flavor intensity depends on smart storage choices.
Use amber glass jars for superior aroma preservation and light exposure protection.
Moisture control through airtight sealing prevents oil retention loss.
Store in cool, dark locations to maintain herb potency throughout the storage duration.
Avoid crushing until use for maximum flavor preservation and flavor retention.
Using Dried Herbs
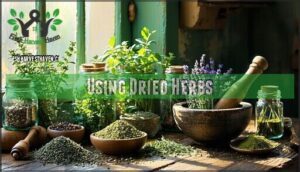
You’ve successfully transformed your fresh herbs into dried treasures, and now it’s time to put them to work in your kitchen.
Understanding how to properly use, substitute, and even reconstitute these concentrated flavor gems will help you create delicious meals year-round.
While getting the most from your herb preservation efforts, utilizing these dried treasures will enhance your culinary experience.
Cooking With Dried Herbs
Mastering cooking with dried herbs transforms your culinary applications with concentrated flavor intensity. Use half the amount compared to fresh herbs for ideal herb seasoning.
- Add sturdy herbs like rosemary early in cooking methods for deep flavor development
- Sprinkle delicate herbs like basil during final minutes to preserve taste
- Create dynamic herb combinations by mixing complementary dried varieties together
- Apply rehydration tips by soaking in warm broth before adding to dishes
Smart dried herb usage maximizes shelf life and enhances every meal.
Freezing Herbs for Preservation
Frozen herbs deliver fresh flavors when drying isn’t ideal.
Whole Leaf Freezing preserves delicate herbs like basil—just lay them flat on trays. Oil Infusion Freezing creates ready-to-use portions by mixing chopped herbs with olive oil. Frozen Herb Cubes work perfectly in soups and stews.
Blanching considerations include briefly scalding sturdy herbs to maintain vibrant color. Most frozen herbs maintain excellent flavor preservation for six months, making herb freezing process simple yet effective.
For best results, remember airtight containers are essential for preventing freezer burn.
Reconstituting Dried Herbs
Flavor revival starts with proper rehydration techniques. Soak your dried herbs in warm water for 10-15 minutes to restore texture and awaken dormant flavors.
Hydration methods for culinary applications:
- Equal parts water-to-herbs for soups and marinades
- Grind fine herbs into pasta dough after reconstitution
- Add to oil before creating salad dressings
- Test potency levels and adjust seasonings accordingly
This reconstitution process transforms brittle leaves back into workable ingredients, extending their shelf life while maximizing taste impact in your dishes.
Substituting Fresh Herbs With Dried Herbs
When substituting fresh herbs with dried ones, remember that dried herbs pack roughly three times the flavor punch. Use one teaspoon of dried herbs for every tablespoon of fresh—this standard ratio prevents overpowering your dishes.
However, dried herb ratios vary by type. Woody herbs like thyme and oregano follow the 3:1 rule perfectly, while delicate herbs like basil need gentler substitution since flavor intensity changes dramatically during drying.
For best herb substitutions, add dried herbs earlier in cooking to allow proper rehydration techniques. Shelf life impact means your dried herbs stay potent longer than fresh, making conversions reliable for months.
Herb Fresh (1 tbsp) Dried Equivalent Notes
Frequently Asked Questions (FAQs)
How to dry herbs for storage?
Properly preparing and preserving your precious produce starts with harvesting herbs in the morning after dew evaporates.
Bundle small bunches, hang upside down in dark, ventilated areas for one to three weeks until they crumble easily.
What is the best way to dry fresh herbs?
Harvest herbs in the morning after dew evaporates.
Bundle small amounts and hang upside down in a dark, well-ventilated area.
Alternatively, use a dehydrator at 95°F or oven at lowest setting until leaves crumble easily.
How do you store fresh herbs?
Store fresh herbs by placing them in airtight containers like mason jars.
Label with the herb name and date.
Keep containers in cool, dark places away from heat and light to preserve flavor and potency.
How do you preserve dried herbs?
Like a time capsule for flavor, you’ll preserve dried herbs by storing them in airtight containers away from light and heat.
Use mason jars, label with dates, and keep in cool, dark places for maximum potency.
Do herbs dry well?
Yes, herbs dry exceptionally well when you harvest them at peak freshness and use proper techniques.
You’ll get best results with sturdy varieties like rosemary and thyme, though delicate herbs also dry successfully with care.
How do you dry herbs without special equipment?
Mother Nature’s kitchen doesn’t require fancy gadgets.
Hang herb bundles upside down in a cool, dark spot, spread leaves on screens, or use your oven’s lowest setting with the door cracked open.
What is the best way to dry and store fresh herbs?
Harvest herbs in early morning after dew evaporates but before heat peaks.
Air-dry by hanging small bundles upside-down in dark, ventilated spaces for one to three weeks.
Store in airtight glass jars, labeled with dates, in cool, dark locations, ensuring complete preservation of the herbs.
Which herbs should not be dried?
Tender herbs like lettuce work as shields against flavor loss.
High-moisture herbs such as basil, tarragon, lemon balm, cilantro, parsley, and mint lose their delicate flavors when heated and dried.
Use them fresh instead. For best results, harvest herbs before flowers open.
Is it better to dry or freeze fresh herbs?
For most herbs, drying beats freezing hands down. You’ll preserve stronger flavors and keep them shelf-stable for months. Freeze only delicate herbs like basil that lose their punch when dried.
How do you prevent herbs from losing color?
Think color’s just cosmetic?
You’re harvesting herbs at their peak—right after morning dew evaporates—then quickly moving them to cool, dark spaces.
Avoid direct sunlight and high heat during drying to preserve vibrant colors.
Conclusion
Fresh herbs wither quickly, while dried herbs preserve months of garden-fresh flavor.
Mastering drying and storing fresh herbs transforms seasonal abundance into year-round culinary treasures. You’ve learned the essential techniques—from perfect harvest timing to proper storage methods.
Your dried herbs will retain maximum potency when you follow these straightforward steps. Remember to label containers with dates and store them in cool, dark places.
With practice, you’ll develop an intuitive sense for when herbs are perfectly dried and ready for storage, which is crucial for maintaining their culinary treasures and ensuring they remain a year-round delight.
- https://www.burpeehomegardens.com/blog/2017/08/07/harvesting-herbs-101.html
- https://www.simplyrecipes.com/how-to-dry-herbs-4-easy-ways-6751498
- https://nchfp.uga.edu/how/dry/herbs.html
- https://extension.oregonstate.edu/food/preservation/drying-herbs-sp-50-921
- https://extension.psu.edu/lets-preserve-drying-herbs

