This site is supported by our readers. We may earn a commission, at no cost to you, if you purchase through links.

Most gardeners make the same mistake: they spend all summer fighting weeds, then set down their tools the moment temperatures drop. That’s exactly when the next wave begins.
Henbit, chickweed, and deadnettle don’t wait for spring—they germinate in soil as cool as 35°F, quietly establishing root systems while your garden sits unattended through autumn.
Meanwhile, dandelion taproots push past a meter deep, stockpiling carbohydrates for a vigorous spring comeback.
Fall isn’t the off-season for weeds. It’s their recruitment phase.
Getting ahead of them now—before the ground freezes—changes the entire character of what you’ll face come April.
Table Of Contents
- Key Takeaways
- Common Fall Garden Weeds to Know
- Why Fall is The Best Time for Weed Control
- Manual Weed Removal Methods That Work
- Top 5 Tools for Fall Garden Weed Control
- Herbicide Application for Fall Weed Control
- Mulching and Cover Crops to Suppress Weeds
- Fall Garden Cleanup and Ongoing Weed Monitoring
- Frequently Asked Questions (FAQs)
- What is the best weed control in the fall?
- Is October too late to spray for weeds?
- Does it do any good to kill weeds in the fall?
- When to apply fall weed control?
- How to control fall weeds?
- Do I need Weed control in the fall?
- Can you kill weeds in the fall?
- What weed control products can I use in the fall?
- Can you use Weed Killer in the vegetable garden in the fall?
- When is the best time to control weeds?
- Conclusion
Key Takeaways
- Fall is actually prime time for weed control because cool temperatures make herbicides more effective, keeping them active in leaf tissue longer and improving uptake into root systems.
- Winter annual weeds like henbit, chickweed, and deadnettle germinate in soil as cool as 35°F, meaning they’re quietly establishing root systems in your garden long before you notice them in spring.
- Perennial weeds such as dandelion spend autumn stockpiling carbohydrates in taproots that can exceed a meter deep, so targeting them now — before the ground freezes — disrupts their spring comeback at the source.
- Combining preemergent herbicide application (ideally by early September), hand removal, and 2–4 inches of organic mulch addresses three different points in a weed’s life cycle, giving you the most durable control heading into winter.
Common Fall Garden Weeds to Know

Not all fall weeds play by the same rules, and knowing what you’re dealing with changes everything about how you fight back. Some germinate in cool soil and quietly overwinter, while others have been building deep root systems since spring.
Here are the main types you’ll likely find taking hold in your garden this season.
From fast-growing annuals to hardy perennials, choosing the right summer garden plants can make all the difference in how well each variety thrives in your space.
Winter Annual Broadleaf Weeds (Henbit, Chickweed, Deadnettle)
Three winter annual broadleaf weeds — henbit, chickweed, and deadnettle — are the sneaky early arrivals of fall lawn weed control strategies.
Their seed viability extends years in cool, moist soil, and moisture fluctuation triggers germination once soil temperatures drop to that 35–55°F threshold.
You’ll recognize henbit by its distinctive leaf scalloping identification and square stems.
Edge habitat management along fence lines and sidewalks is where these weeds get their foothold first.
Perennial Broadleaf Weeds (Dandelion, Creeping Charlie, Wild Violet)
Unlike winter annuals, perennial broadleaf weeds — dandelion, creeping charlie, and wild violet — are already here, rebuilding their root carbohydrate storage before the ground freezes. Dandelion taproots can exceed a meter deep. Creeping charlie exploits shade tolerance differences to spread where grass struggles. Wild violet carries rhizome fragmentation risk during digging.
Fall lawn weed control strategies work best when herbicide application timing in fall aligns with active soil moisture influence.
Grass-Like and Problem Weeds (Wild Onion, Plantain, Thistles)
Perennial troublemakers like wild onion, plantain, and thistles demand a different playbook entirely.
- Wild Onion Scent Detection — crush a leaf; that sharp smell confirms bulb extraction is your only real fix.
- Plantain Leaf Mulching — remove the rosette and use those broad leaves as compost.
- Thistle Bolting Control — cut the root crown before the stalk rises.
Fall weed management techniques, including preemergent herbicide in September, stop all three.
Why Fall is The Best Time for Weed Control

Most gardeners think spring is prime time for weed control, but fall actually gives you the upper hand. Weeds are working hard underground right now, and that’s exactly what makes them vulnerable.
Here’s why timing your attack this season pays off before the first freeze arrives.
How Cooler Temperatures Boost Herbicide Effectiveness
Fall is actually the season where herbicide application timing works in your favor. Cooler temperatures slow weed metabolism, so herbicides stay active in leaf tissues longer — improving leaf surface retention and systemic translocation to the roots.
Adjuvant performance also peaks when humidity rises and temperatures drop below 20°C.
Combined with higher soil moisture uptake, fall postemergent herbicide application reaches where it matters most.
Fall Germination Windows for Winter Annuals
Most winter annual weeds don’t wait for your permission — they respond to precise seed dormancy cues like shortening day length and dropping soil temperatures.
When soil hits 50–60°F, henbit, chickweed, and deadnettle break dormancy fast.
Moisture timing matters equally; a week of consistent autumn rain triggers mass germination.
Regional window variations mean you normally have a 4–8 week preemergent herbicide application window before frost closes it.
Preventing Weed Seed Banks Before Spring
Every weed you let go to seed this fall is a promise of future headaches — the soil seed bank grows quietly beneath the surface, waiting for spring.
Every weed that seeds this fall quietly builds next spring’s battle beneath the soil
Target it now with three actions:
- Apply preemergent herbicide application guidelines before October germination windows close.
- Use light exclusion strategies — 2–4 inches of organic mulch block germination triggers.
- Practice Soil Moisture Management to avoid disrupting seed dormancy, which exposes buried seeds.
Manual Weed Removal Methods That Work
Not every weed problem needs a spray bottle — sometimes your hands and the right technique are enough. Manual removal works best when you match the method to the weed and the timing to the season.
Here’s what actually gets the job done.
Hand-Pulling Techniques for Tap-Rooted Weeds

Tap-rooted weeds like dandelion aren’t just stubborn — they’re engineered to survive a poor pull.
Moist Soil Pulling is your first advantage: wait after rain, then apply Root Crown Grip just above the soil line.
The Twist-and-Lift Method breaks soil cohesion without snapping the taproot.
Finish with Post-Pull Mulch to suppress exposed seeds. For best results, consider the pre‑emergent herbicide application to prevent new weed seeds from germinating.
| Technique | When to Apply | Key Benefit |
|---|---|---|
| Moist Soil Pulling | After rain or irrigation | Cleaner root removal |
| Twist-and-Lift Method | Firm-rooted perennials | Reduces taproot breakage |
| Post-Pull Mulch | Immediately after removal | Suppresses newly exposed seeds |
Hoeing and Raking Young Seedlings Effectively

Young weeds are easiest to cut when they’re 2–4 inches tall — hit them any later and you’re chasing a problem.
Soil Moisture Management matters here: hoe on dry mornings to get a clean cut.
Apply the Blade Angle Technique by keeping your hoe nearly parallel to the ground.
Use a Light Pass Strategy during Cool Overcast Timing to protect nearby seedlings with minimal disturbance.
When and How to Use a Digging Fork or Spade

When hand removal alone won’t cut it, reach for a digging fork or spade.
For digging out deep-rooted perennials like dandelion or thistle, Soil Moisture Timing is everything — work after rain when soil is friable.
Use the Root Exposure Technique: insert tines near the base, apply Ergonomic Leverage with a controlled body-weight pry.
For Rocky Soil Adaptation, alternate tools.
Always practice Tool Maintenance after each session.
Top 5 Tools for Fall Garden Weed Control
Having the right tools in your hands makes every weed-pulling session faster, cleaner, and a lot less frustrating. Whether you’re dealing with deep-rooted dandelions or a spreading mat of creeping Charlie, there’s a specific tool built for the job.
Here are five worth keeping in your fall garden arsenal.
1. Creeping Thyme Ground Cover Seeds
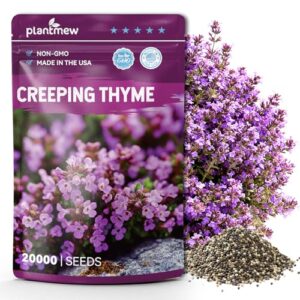
Creeping thyme isn’t just pretty — it’s a biological weed barrier that works while you sleep.
PLANTMEW’s 10 g bag holds over 20,000 non-GMO Thymus serpyllum seeds, enough to colonize paths, patios, and garden gaps with a dense, fragrant mat.
Once established in USDA zones 4–9, it shades the soil surface, cutting off light that weed seeds need to germinate.
It’s drought-tolerant, pollinator-friendly, and basically takes care of itself — a long-term investment in less weeding.
| Best For | Gardeners who want a low-maintenance, drought-tolerant ground cover that suppresses weeds and attracts pollinators across USDA zones 4–9. |
|---|---|
| Primary Use | Ground cover planting |
| Operation Type | Manual seeding |
| Chemical Free | Yes |
| Weed Control | Preventive mat cover |
| Weight | 0.35 oz (seeds) |
| Warranty/Guarantee | Not specified |
| Additional Features |
|
- 20,000 seeds in one small bag — plenty to fill in paths, patios, and garden gaps without buying in bulk
- Hardy perennial that’s drought-tolerant once established, so you’re not babying it all season
- Releases a pleasant fragrance underfoot and brings in bees and butterflies without any extra effort
- Some buyers reported the plants didn’t smell or grow like true thyme, suggesting possible species mislabeling
- One bag likely won’t cut it for larger areas — you may need to grab multiple packets
- Germination can be slow and unpredictable depending on soil prep and climate, so don’t expect instant results
2. AUSAIL Propane Weed Torch
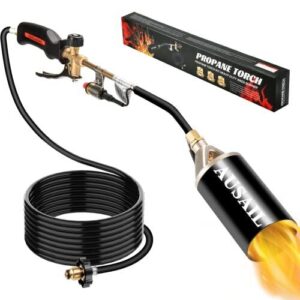
Where creeping thyme manages soil-level suppression, sometimes you need something with more firepower — literally.
The AUSAIL Propane Weed Torch connects to a standard 20 lb propane cylinder and delivers up to 3,600°F through a refractory steel burner head, enough to rupture weed cell walls on contact.
You don’t need to incinerate them; a quick pass does the job.
The 10 ft hose gives you real range across driveways and garden edges without dragging your tank every few feet.
| Best For | Homeowners and gardeners who want a fast, chemical-free way to kill weeds on driveways, patios, and garden edges without getting down on their knees. |
|---|---|
| Primary Use | Weed burning |
| Operation Type | Propane-powered |
| Chemical Free | Yes |
| Weed Control | Heat destruction |
| Weight | 0.6 lb |
| Warranty/Guarantee | 3-year warranty |
| Additional Features |
|
- Hits up to 3,600°F, so a quick pass kills weeds without soaking the ground in chemicals
- The 10 ft hose gives you solid reach — no lugging the propane tank every few steps
- Pulls double duty beyond weeds: melts ice, lights campfires, softens asphalt, and more
- No propane tank included, and a 20 lb cylinder adds bulk if you’re moving around a lot
- Thick or well-watered weeds may need a second pass, and some regrowth is possible
- It’s loud, produces a bright flame, and runs hot enough to crack gravel — not ideal for tight residential spots
3. Comimark Garden Bandit Hand Loop Weeder
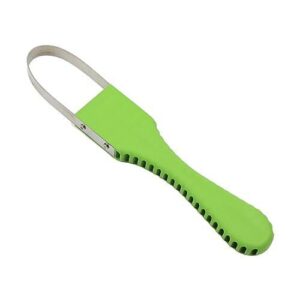
Not every weed calls for a flame. For the ones tucked between seedlings or crowding the base of perennials, precision beats power every time.
That’s where the Comimark Garden Bandit Hand Loop Weeder earns its place. Its stainless steel loop blade slides just under the soil surface, hooking beneath shallow roots and lifting them clean — henbit, chickweed, young dandelion.
At roughly 12 inches long and 5.3 oz, it’s light enough for one-handed work without tiring your wrist across a full bed.
| Best For | Gardeners who work in tight spaces and want precise, root-level weed removal without disturbing nearby plants. |
|---|---|
| Primary Use | Hand weeding |
| Operation Type | Manual tool |
| Chemical Free | Yes |
| Weed Control | Loop extraction |
| Weight | 5.3 oz |
| Warranty/Guarantee | Not specified |
| Additional Features |
|
- The U-shaped steel loop slides cleanly under shallow roots, pulling weeds out whole instead of just snapping the tops off
- At 5.3 oz and pocket-sized, it’s easy to carry around the yard and tuck into a garden bag
- No batteries, no moving parts — just a simple tool that works whenever you pick it up
- The blade can feel underwhelming on tough or deep-rooted weeds straight out of the box — you may need to sharpen it
- Bending or kneeling to use it gets uncomfortable fast if you’re working a large area
- Shipping comes from overseas, so don’t expect it on your doorstep in two days
4. WORKPRO Dandelion Weeder with Wooden Handle
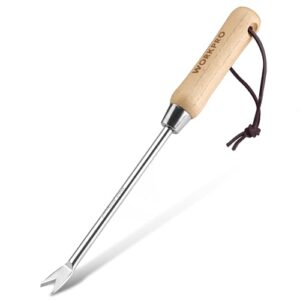
Sometimes the loop weeder lifts a dandelion cleanly — and sometimes it doesn’t because that taproot goes deeper than it looks. That’s where the WORKPRO Dandelion Weeder earns its keep.
Its four-claw stainless steel head cradles the root and pulls it whole, reducing the chance of regrowth from a broken crown.
At 12.8 inches and just 7 oz, it gives you real leverage without bulk.
Use it after rain, when soil yields, and the root follows the tool.
| Best For | Anyone who wants a no-chemical, hands-on way to pull weeds from lawns, garden beds, or small plots without wrecking their wrists. |
|---|---|
| Primary Use | Root removal |
| Operation Type | Manual tool |
| Chemical Free | Yes |
| Weed Control | Fork extraction |
| Weight | 7 oz |
| Warranty/Guarantee | Not specified |
| Additional Features |
|
- Polished stainless steel resists rust, so it holds up season after season
- Lightweight and compact — easy to toss in a bag or hang in the shed
- At $9.99, it’s a pretty painless buy for the convenience it delivers
- The fork is sharp, so you’ll want to watch out around irrigation lines or delicate root systems
- Struggles with deep or woody roots — it’s built for shallow weeds, not the stubborn stuff
- Small size means a big weed patch will have you working repetition after repetition
5. Harrison Greys Wooden Hand Broom
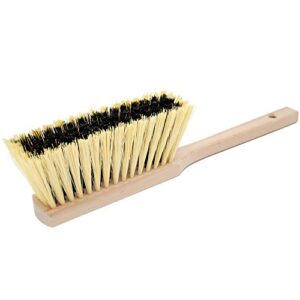
After the WORKPRO extracts that root, loose soil and debris stay behind — and that’s where the Harrison Greys Wooden Hand Broom steps in. Its 14.2-inch beechwood frame fits naturally in one hand, and medium-soft synthetic bristles sweep fine particles from garden beds without disturbing surrounding plants or freshly cleared soil.
Use it to clear debris from pathways, patio edges, or planting zones after weeding.
Keeping surfaces clean removes seed-hiding material and reduces the chance of undetected germination.
| Best For | Gardeners and homeowners who want a lightweight, everyday brush for sweeping up fine debris from patios, garden beds, car interiors, and delicate surfaces. |
|---|---|
| Primary Use | Garden cleanup |
| Operation Type | Manual tool |
| Chemical Free | Yes |
| Weed Control | Surface sweeping |
| Weight | Not specified |
| Warranty/Guarantee | No-questions-asked guarantee |
| Additional Features |
|
- The beechwood handle feels solid and comfortable to hold, giving you good control without hand fatigue.
- Medium-soft bristles are gentle enough for delicate surfaces like wood, stone, and window ledges without scratching.
- Compact size makes it easy to toss in a shed, car trunk, or garden basket — ready whenever you need it.
- Not built for heavy-duty messes — thick grime or stubborn stains will be too much for the softer bristles.
- The wooden handle needs to be dried off after wet use, or it risks warping or deteriorating over time.
- At just over 14 inches, it’s short — not ideal for reaching tight corners or elevated surfaces without some awkward bending.
Herbicide Application for Fall Weed Control

Regarding fall weed control, herbicides can do the heavy lifting that hand tools simply can’t. Knowing which type to use — and when to use it — makes the difference between a clean garden bed in spring and a weed problem that just keeps coming back.
Here’s what you need to know about the main herbicide options for fall.
Pre-Emergent Herbicides Applied in Early September
Timing is everything with pre-emergent herbicides — apply too late and the weeds have already won. In early September, when soil temperature windows drop to 50–65°F, that’s your signal to act.
Products containing isoxaben or pendimethalin work by blocking germination before chickweed and henbit establish.
Calibrate your spreader carefully, respect environmental buffer zones near water, and always follow label rates.
Post-Emergent Systemic Herbicides for Perennial Roots
When perennial weeds like dandelion and creeping Charlie refuse to quit, a postemergent systemic herbicide is your most reliable option. Translocation mechanics carry active ingredients — glyphosate, dicamba, or 2,4-D — from treated foliage down through the phloem directly to root crowns.
Root uptake timing matters: apply during warm, sunny fall days when plants are actively transpiring. Selective formulations protect nearby grasses while targeting broadleaf perennials.
Guarantee full application coverage for effective perennial weed control.
Liquid Vs. Granular Herbicide Options
Choosing between liquid and granular herbicides comes down to your site conditions and target weeds.
Liquids win on Coverage Uniformity across slopes and irregular beds, with Activation Timing that’s nearly immediate — critical for herbicide application timing in fall when the window narrows fast. Weather Constraints, like wind, make Equipment Precision essential for liquids.
Granules offer longer Residual Duration, but need moisture to activate.
Safety Tips and Label Compliance for Fall Applications
Before you mix a single drop, read the full label — it’s your legal contract and safety guide in one. Check your PPE inspection log, confirm proper storage protocols, and never apply before rain or high winds.
Weather monitoring isn’t optional; drift ruins neighboring plants fast.
Keep a spill response kit nearby, and rotate chemistries to support herbicide resistance management within your integrated pest management approach.
Mulching and Cover Crops to Suppress Weeds

Once the herbicides have done their work, your next job is keeping new weeds from moving in.
Mulch and cover crops are two of the most reliable tools for that — each working differently depending on what your beds need. Here’s how to use them well this fall.
Choosing The Right Organic Mulch Thickness and Type
Not all mulch is created equal — and the wrong depth can do more harm than good. Follow these mulch thickness guidelines for effective fall weed control strategies:
- Vegetable beds: 2–3 inches of straw for moisture balance and weed suppression
- Trees and shrubs: 3–4 inches of bark or wood chips to insulate roots
- Border beds: Shredded leaves at 2–4 inches improve decomposition rates and soil health
- Pathways: 2 inches of coarse chips — walkable and functional
- Bare soil patches: Organic mulch blocks light, directly supporting mulching to reduce weed growth
Material comparison matters too. Coarse wood chips last longer; shredded leaves break down faster. Factor in seasonal adjustments — top up mulch as it decomposes heading into winter.
Always follow placement practices: keep mulch a few inches from stems to prevent rot.
Sheet Mulching With Cardboard for New Beds
Sheet mulching turns bare soil into a no-weed zone without breaking your back.
Start with Cardboard Preparation: use plain brown cardboard, remove tape and staples, soak it thoroughly, and overlap sheets by 6–8 inches.
Layer Sequencing matters — Nitrogen Enrichment, like compost, goes directly on top, followed by Carbon Mulch Selection, such as wood chips.
This sheetmulch system blocks light completely, and the Decomposition Timeline means your soil improves all season, making covering bare soil to prevent weeds a Fall weed control strategy that pays dividends by spring.
Planting Cover Crops After Harvest to Block Weeds
Once the cardboard breaks down, bare soil is your next vulnerability — and that’s where fall cover crops take over.
Plant within two weeks of harvest for maximum Cover Crop Timing benefits:
- Cereal rye and oats form a weed‑blocking layer fast, suppressing up to 70% of weed biomass
- Legume Nitrogen Fixation through crimson clover or hairy vetch improves soil while cover cropping to shade out weeds
- Termination Techniques, like roller‑crimping, preserve Biomass Mulch Benefits without tilling
- Regional Species Selection matters — choose winter annuals suited to your climate for mulching to prevent winter weeds through spring
Ground Cover Perennials as a Long-Term Solution
Cover crops handle the short game — ground cover perennials play the long one. Varieties like Pachysandra terminalis and Thymus serpyllum rely on Root Zone Competition and Seasonal Growth Patterns to crowd out cool-season broadleaf perennials year after year.
Their Establishment Techniques favor cool, moist planting windows, and once rooted, Soil Stabilization Benefits kick in — reducing bare soil gaps where weed seeds find footing.
Fall Garden Cleanup and Ongoing Weed Monitoring

the end of the growing season doesn’t mean your weed work is done. What you do in these final weeks determines how much of a fight you’re facing come spring.
Here’s what to focus on before the ground freezes.
Post-Season Bed Cleanup to Remove Weed Debris
Once weeds start dying back, that’s your window — don’t let it close. A thorough post-season cleanup removes the debris and dormant seeds that fuel next year’s problem.
Follow this Debris Bagging Protocol for effective Fall weed control strategies:
- Cool Morning Collection — Work when soil is slightly damp for easier lifting
- Root Fragment Removal — Pull entire crowns; leave nothing that can resprout
- Final Pass Scheduling — Complete cleanup within two weeks of first hard frost
- Compost Temperature Control — Hot compost only; aim for 145–160°F to kill seeds
- Bag perennial rhizomes separately — Trash them; never compost creeping Charlie or thistle roots
Overseeding Thin Lawn Areas to Crowd Out Weeds
Bare soil is a weed’s open invitation. When you overseed thin lawns with a certified cool-season blend — Kentucky bluegrass or tall fescue work well in northern regions — dense turf forms within six to eight weeks, cutting weed germination by up to 70 percent.
| Step | Key Detail |
|---|---|
| Soil pH | Target 6.0–7.0 before seeding |
| Seed-soil contact | Loosen top ¼ inch; rake lightly |
Match your irrigation schedule to the seedbed: short, frequent cycles for the first two to three weeks, then taper off. Endophyte varieties add pest resistance. A tight stand starves the seedbank — winter annual weeds can’t compete when there’s no bare ground left to colonize.
Recording Weed Species for Targeted Spring Treatment
What you record in fall becomes your roadmap come spring. Use a Standardized Spreadsheet with Species Coding and Growth Form Tags to document every weed you find — dandelion, henbit, creeping Charlie.
Add a Digital Photo Log with dates and locations. Assign a Seed Bank Rating to prioritize high-risk species. This data drives precise weed identification and treatment and sharpens your preemergent herbicide timing.
Scheduling Follow-Up Treatments Before First Frost
Don’t leave follow-up treatments to guesswork — build a Frost Timing Calendar tied to your region’s average freeze dates and set Treatment Interval Planning windows 2–3 weeks apart. Watch Weather Window Monitoring data closely; spray only when temperatures stay above 10°C with light wind.
Log Application Rate Adjustments and herbicide application timing in fall into your Record Keeping System to sharpen every future season.
Frequently Asked Questions (FAQs)
What is the best weed control in the fall?
What if the single best move you make all year happens in fall?
Combining herbicide application timing in fall with hand removal clears both roots and seed banks before winter locks the ground.
Is October too late to spray for weeds?
October isn’t too late — but timing matters. If soil stays above 50°F and weeds are still actively growing, systemic herbicides can still reach the roots and deliver effective control.
Does it do any good to kill weeds in the fall?
Yes — absolutely. As the old saying goes, "a stitch in time saves nine."
Killing weeds in fall cuts off their seed bank before winter, giving your garden a cleaner, stronger start come spring.
When to apply fall weed control?
Target your calendar window from early September to mid-October.
Soil temp threshold stays above 50°F, moisture timing precedes application, frost avoidance guides your end date, and rain delay means waiting 48 hours post-rain.
How to control fall weeds?
Persistent plants demand proactive, purposeful action.
Combine hand removal, preemergent herbicide, and mulching to reduce weed growth — each method targets a different vulnerability in the weed’s life cycle before winter locks the season in place.
Do I need Weed control in the fall?
Skipping fall weed control costs you more time, money, and chemical use come spring.
Winter annual broadleaf weeds germinate now, so acting in the fall season protects your soil health and garden aesthetic appeal.
Can you kill weeds in the fall?
Absolutely — fall is actually one of the most effective windows for weed control.
Cooler temperatures slow growth but extend herbicide activity, making seasonal timing of herbicide use a key advantage for lasting results.
What weed control products can I use in the fall?
Fall gives you three solid product categories: granular pre-emergents, selective broadleaf sprays, and organic herbicide mixes.
Match the product to the weed type and apply within the seasonal timing window for best results.
Can you use Weed Killer in the vegetable garden in the fall?
Yes, you can use weed killer in the fall vegetable garden — but crop selectivity and residue persistence matter. Always check label compliance before applying anything near edible plants.
When is the best time to control weeds?
The best time to control weeds is before they set seed. Target early spring, post-rain windows, and pre-frost scheduling — when soil is permeable and plants are still actively growing.
Conclusion
Don’t let weeds pull the wool over your eyes—mastering fall garden weed control is the real magic trick.
As temperatures drop, your rivals in green are secretly plotting their spring comeback. Stay one step ahead with strategic planning, precise timing, and the right tools for the job.
By investing in fall weed control, specifically focusing on effective fall garden weed control, you’ll save yourself a world of trouble come April.