This site is supported by our readers. We may earn a commission, at no cost to you, if you purchase through links.
Your first frost date circles closer on the calendar, and suddenly that August garden plan feels like a ticking clock. The difference between a storage bin full of crisp carrots in January and a soggy mess by October often comes down to decisions you make right now—before you even pull the first beet.
Most gardeners focus on getting seeds in the ground, but the real magic of fall crop harvesting and storage methods starts with understanding how cold-hardy varieties respond to shortening days and dropping temperatures.
A spinach plant harvested at dawn after a light frost tastes sweeter than one picked at noon in September, and knowing why changes everything about how you’ll approach the coming weeks. The techniques you use from field to fork determine whether your harvest feeds you through winter or disappoints by Thanksgiving.
Table Of Contents
Key Takeaways
- Harvest fall crops at dawn after a light frost when sugar content peaks and enzymes are most active, which can boost sweetness by up to 40% compared to midday picking.
- Work backward from your first frost date, adding 10–14 days as a buffer, and account for a 10–20% increase in days to maturity since fall crops mature slower than seed packets suggest.
- Store different crops in their specific temperature and humidity zones—root vegetables at 32–40°F with 90–95% humidity, winter squash at 50–55°F with 60–70% humidity—to extend storage life from months to seasons.
- Handle your harvest gently from field to storage using proper tools and loose single-layer stacking, since good handling practices can cut bruising rates by 40% and reduce spoilage by preventing damage that invites mold and rot.
Planning Your Fall Crop Harvest
Planning a successful fall harvest starts long before you step into the garden with your basket. You’ll need to make smart decisions about what to plant, when to plant it, and how to time everything around your local climate.
Let’s walk through the key steps that’ll set you up for a bountiful fall harvest.
Selecting Cold-Hardy Fall Vegetables
Choosing fall crops starts with matching cold-hardy vegetables to your climate zone. In USDA Zones 6–7 and below, collards and kale thrive in temperatures near 0°F, while broccoli and cabbage gain sweetness after light frosts.
Your variety selection should reflect frost resistance and local planting timing—late summer sowing works well for cool-weather vegetables when you’ve prepared soil properly for fall crop harvesting. For a second salad season, consider direct seeding in August.
Understanding Days to Maturity
After you’ve picked the right cold-hardy varieties, maturity definition becomes your best planning tool. Days to maturity tells you the average time from seeding or transplanting to harvest, but fall vegetables need maturity adjustments—add 10–20% to published timelines when planting 11–13 weeks before frost.
Here’s what affects your crop maturity:
- Vegetable variation: Spinach matures in 35–45 days, while carrots need 60–80 days
- GDD calculation: Sweet corn requires 850–900 growing degree days
- Predictive tools: Combining calendar days with physical plant traits improves accuracy by 15%
Temperature and planting date alter these numbers substantially, so don’t treat seed packets as gospel. Planning a fall garden requires understanding the average first frost date for your region.
Timing Planting to Local Frost Dates
Once you’ve calculated days to maturity, frost date averages become your anchor point. The first frost in your hardiness zone sets your final planting deadline—work backward from that date, adding a 10–14 day buffer for microclimate considerations.
Historical climate data reveals surprising variation: Zone 5b frost arrives mid-October, while high-elevation spots freeze by early September, demanding careful planting schedule adjustments to protect crops from frost damage.
Succession Planting for Extended Harvest
Rather than sowing everything at once, succession planting strategies let you stagger planting every 10–14 days for continuous harvest and yield optimization. This approach extends the harvest season by up to 40 days and boosts cumulative yield by 25–40% per square meter.
Stagger plantings every 10–14 days to extend your harvest by 40 days and boost yields up to 40 percent per square meter
You’ll also enjoy better crop diversity, improved labor distribution, and 34% lower peak workload demands—keeping your fall crops flowing steadily through November.
Identifying Peak Ripeness in Fall Crops
Knowing when your fall crops are ready to pick can feel like guessing, but vegetables actually send clear signals when they’ve reached their prime. You’ll need to watch for changes in color, texture, and size, while also understanding how cooler temperatures and shorter days affect when things ripen.
Let’s look at the specific signs that tell you it’s harvest time, so you can catch each crop at its absolute best.
Visual and Physical Ripeness Indicators
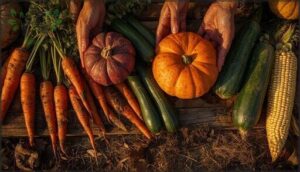
Recognizing peak ripeness starts with reading your crops’ signals. Over 90% of fall vegetables show clear color changes at maturity—carrots deepen to rich orange as beta-carotene peaks, while pumpkins shift to uniform coloration.
Texture analysis matters too: firm root vegetables resist deformation when ready, and sweet corn kernels release milky liquid.
Size uniformity, sugar content, and moisture levels all confirm you’re harvesting fall vegetables at their absolute best.
Vegetable-Specific Harvest Signs
Each fall vegetable whispers a unique harvest secret. Root crop signs include carrot shoulders peeking at ½–¾ inches and beet roots hitting 2–3 inches in diameter—any larger turns them pithy.
Brassica indicators reveal broccoli’s tight blue-green buds and cauliflower’s compact 6–10 inch heads.
Fruiting cues show tomatoes shifting to the breaker stage, while allium maturity appears when 75% of onion tops fall over.
Legume timing demands plump, bright green pods before fiber develops.
Impact of Daylength and Temperature on Maturity
When autumn days shorten, your crops respond in surprising ways—photoperiod sensitivity and temperature effects can shift maturity timing by 30 to 60 days, reshaping your harvest scheduling completely. Understanding days to maturity means accounting for both factors:
- Short-day crops mature faster under reduced daylength
- High temperatures delay potato tubers and reduce pea yields
- Combined responses alter crop-specific harvest signs
- Northern growers face rapid daylength changes requiring careful timing planting to local frost dates
Essential Fall Harvesting Techniques
The way you handle your fall crops during harvest can make or break your storage success. Using the right tools and techniques protects your vegetables from bruising and damage, which means they’ll last longer and taste better.
Let’s walk through the essential harvesting methods that’ll help you bring in your fall bounty at its absolute best.
Choosing The Right Harvesting Tools
Sharp, well-maintained tools make all the difference when you’re bringing in your fall bounty. Pruning shears with excellent blade sharpness and tool ergonomics protect delicate stems, while soil knives handle root vegetables with precision. For larger operations, powered harvesters boost efficiency considerably.
Choose crop-specific tools with safety features like rounded blade tips—these essential harvesting tools reduce damage, speed up collection by 30-50%, and keep your harvest looking its best.
Best Practices for Gentle Handling
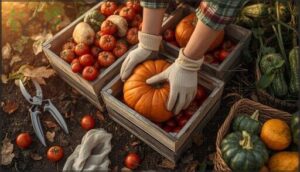
Think of your produce as if it were a dozen eggs—how you touch it matters just as much as your tool selection. Proper harvesting techniques and worker training can cut bruising rates by 40%, so here’s how to keep your crops in top shape:
- Handle each piece gently, never throwing or dropping during harvest
- Choose cushioned, non-abrasive containers to minimize bruising by 24%
- Stack crops loosely in single layers when possible
- Sort out damaged produce immediately to prevent spoilage spread
- Keep harvested vegetables shaded and cool right from the field
These best practices for gentle handling protect your hard work from field to storage.
Harvesting Root Vegetables, Greens, and Squash
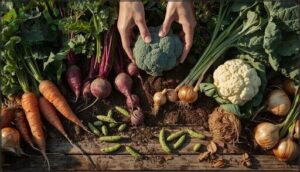
Each crop requires its own approach to guarantee quality from ground to table. Root harvest requires digging deep—spading forks or shovels work best—while greens picking involves cutting outer leaves 3–6 inches tall for regrowth. Squash maturity shows when rinds harden and stems brown; leave 2 inches of stem attached to reduce spoilage by 15%.
Harvest damage—bruising, cutting—can slash yields 13–50%, so whether you’re manual vs. mechanical, treat each vegetable carefully during harvesting root vegetables, harvesting leafy greens, and harvesting squash and pumpkins. These harvesting fall vegetables techniques set the stage for proper postharvest handling and storage success.
| Crop Type | Manual Method | Mechanical Option |
|---|---|---|
| Root Vegetables | Spading fork, gentle lift | Digger harvesters (70% adoption) |
| Leafy Greens | Scissors, cut-and-come-again | Trimmer for large plots |
| Winter Squash | Hand-cut with stem | Field conveyors reduce handling |
Timing Harvests for Maximum Flavor
Picking at the sweet spot depends on ripening cues and crop markers working together. When enzyme activity peaks—peroxidase hitting 442 U/g in corn, for instance—your vegetables reach peak sweetness and flavor. Cool nights below 10°C boost sugar levels, while moisture content around 21% preserves aromatic notes.
Visual and physical ripeness indicators like tight broccoli buds or carrot shoulders signal it’s time to harvest, timing and flavor right.
Post-Harvest Handling and Preparation
Once your fall crops are out of the ground, the work isn’t quite done yet. How you handle them in those first hours can make the difference between produce that lasts for months and vegetables that spoil within weeks.
Let’s walk through the essential steps to clean, prep, and protect your harvest so it stays fresh and flavorful all season long.
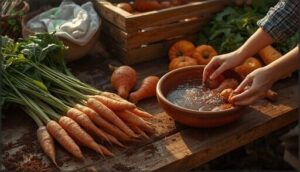
Cleaning and Sorting Crops Safely
Cleaning and sorting crops safely starts the moment your vegetables leave the garden. Wash water quality makes all the difference—using a chlorinated solution at 50–200 ppm can slash surface pathogens by up to 99%.
Don’t forget equipment sanitation standards and worker hygiene, either.
Culling damaged produce early reduces spoilage by roughly 62%, protecting your entire harvest from contamination.
Trimming, Curing, and Prepping Vegetables
After cleaning and sorting, proper trimming sets your vegetables up for long-term storage success. Snip outer leaves from leafy greens and cabbage to cut rot by 38%, and trim beet tops to under an inch to drop soft rot risk by 40%.
Curing methods matter too—winter squash cured at 80–85°F for 10–14 days reduces mold by 60%, while properly dried onions last 67% longer than uncured bulbs.
Preventing Spoilage and Fungal Issues
Moisture monitoring and storage sanitation are your best weapons against mold growth. Check humidity levels weekly—anything above 70% invites trouble, so ventilation becomes critical.
Crop rotation before harvest cuts fungal buildup by disrupting pathogen cycles, while biocontrol agents like Trichoderma protect stored produce naturally.
Proper airflow control prevents those moisture pockets where spoilage loves to start, keeping your harvest safe longer.
Effective Storage and Preservation Methods
Getting your fall harvest from garden to storage is only half the battle—keeping it fresh for months is where the real work begins. The right storage method can mean the difference between crisp carrots in January and a compost pile by December.
Let’s walk through the conditions each crop needs, the storage setups that actually work, and the preservation techniques that’ll help you enjoy your harvest well into spring.
Ideal Storage Conditions by Crop Type
Your vegetables deserve different homes after harvest—think of storage as matchmaking between crops and conditions. Temperature control and humidity management work together to keep produce fresh longer, but what works for carrots won’t suit winter squash. Here’s what ideal storage conditions look like for your main fall crops:
- Storing root vegetables: Keep carrots, beets, and turnips at 32–40°F with 90–95% humidity in plastic bags or damp sand; they’ll last 3–7 months when airflow needs are met.
- Storing onions and garlic: Cure them first, then store at 32–40°F with 65–70% humidity in mesh bags for proper ventilation and shelf-life impact of 4–8 months.
- Storing winter squash and pumpkins: These prefer warmer spots at 50–55°F with lower 60–70% humidity; keep them away from ethylene-producing fruits and they’ll hold 3–6 months.
- Storing cabbage and greens: Hardy cabbages tolerate near-freezing temps (32°F) with high humidity, while delicate greens need 34–38°F storage and must stay dry to prevent rot.
- Understanding ethylene sensitivity: Carrots turn bitter near apples, so separate ethylene producers from sensitive crops in your storage area.
Using Root Cellars and Modern Solutions
Whether you’re building a traditional root cellar or exploring modern monitoring solutions, both harvest storage methods offer distinct advantages. Root cellars provide passive cooling and cost savings—they operate without electricity, reducing utility bills while storing root vegetables for months.
Meanwhile, IoT sensors deliver real-time humidity tracking and alerts for cold storage. Combining cellar construction with smart technology strengthens winter storage reliability and food security across your entire operation.
Canning, Freezing, Drying, and Fermenting Produce
Beyond root cellars, food preservation through canning, freezing, drying, and fermenting vegetables extends your harvest and cuts household waste. Pressure canning remains the best practice for low-acid vegetables, while freezing reduces food waste by 47% compared to fresh produce. Drying offers lightweight, long-lasting storage, and fermentation trends show an 8.2% annual market growth through 2035.
- Canning safety: Use pressure canners for vegetables to prevent health risks
- Freezing waste: Frozen spinach waste is nearly 14 times lower than fresh
- Drying quality: Combined methods preserve taste, texture, and nutrients longer
- Fermentation trends: Global market projected to reach $666 billion by 2035
Monitoring and Maintaining Stored Harvest
After you’ve worked hard to store your fall harvest, your next job is keeping watch. Check stored crops every 7 to 14 days, watching for spoilage detection signs like mold growth or unusual odors.
Temperature control and humidity levels matter most—keep moisture levels below 14% and maintain proper air circulation.
Strong pest prevention strategies and regular inspection frequency protect storage conditions, ensuring your vegetables last through winter.
Frequently Asked Questions (FAQs)
How does frost improve vegetable sweetness and flavor?
When temperatures dip below freezing, your carrots and kale trigger a survival response: they convert stored starches into simple sugars, boosting sweetness by up to 40% while reducing bitterness and adding complex, nutty flavors.
What are signs of overripe fall vegetables?
Look for wrinkling skin, soft spots, or browning edges—these texture degradation signs signal overripeness.
Mold growth, offensive odor alterations, and nutritional decline follow, causing market losses and accelerating spoilage through ethylene exposure.
Can you replant after early fall harvest?
You can replant after early fall harvest if soil temperatures stay between 45–50°F.
Choose cool-season crops like lettuce, spinach, or brassicas—they’ll germinate quickly and extend your harvest by several weeks.
How do you prevent pests in stored crops?
Protecting stored crops starts with grain sanitation—clean bins thoroughly to eliminate residue.
Moisture control below 13%, hermetic storage, and IPM strategies combining monitoring with chemical alternatives drastically reduce pest infestation and spoilage prevention efforts.
Whats the shelf life of fermented vegetables?
Fermented vegetables last about one month when homemade and refrigerated, while commercial versions keep three to six months. Proper brine submersion and cold storage (38–55°F) maintain microbial stability and food safety longer, though nutritional quality gradually declines over time.
Conclusion
Your timing determines flavor, your technique determines longevity, and your storage conditions determine whether your harvest thrives or fades. Fall crop harvesting and storage methods aren’t separate steps—they’re a continuous conversation between you and your vegetables.
Harvest at dawn when sugars peak, handle with care as vegetables journey to storage, monitor conditions as weeks pass into months. This attention transforms abundance into security, turning September’s bounty into January’s comfort.
- https://www.agrolatam.com/crops/usda-crop-progress-nov-2025-corn-soy-wheat-harvest/
- https://www.wylr.net/2024/10/25/autumns-abundanceautumn-months-critical-to-crop-production-across-the-u-s/
- https://opisystems.com/grain-storage-practices-across-the-globe/
- https://www.businessage.com/post/4-storage-solutions-transforming-the-future-of-agriculture
- https://agriculture.institute/food-fundamentals-fv/causes-prevention-post-harvest-losses/

