This site is supported by our readers. We may earn a commission, at no cost to you, if you purchase through links.
You’ll combine four heaping cups of diced Roma tomatoes with fresh jalapeños, cilantro, lime juice, and a pinch of salt in a food processor.
The beauty of homemade salsa lies in controlling the texture and heat level to match your taste perfectly, plus you’ll avoid all those preservatives found in store-bought versions.
Table Of Contents
Key Takeaways
- Choose Roma tomatoes for best results since they’re meaty with fewer seeds that won’t water down your salsa, avoiding watery varieties like cherry tomatoes. Start with mild peppers and add heat gradually – you can always spice up your salsa but you can’t cool it down once it’s too hot. Use short pulse bursts in your food processor with dry ingredients first, then add tomatoes last to control texture and prevent turning your chunky salsa into soup. * Fresh homemade salsa stays good for 3-4 days refrigerated, or you can preserve it for 18 months through proper water bath canning techniques.
Choosing The Best Garden Salsa Ingredients
The secret to outstanding garden salsa lies in choosing the right ingredients that work together to create fresh, vibrant flavor.
You’ll want to focus on selecting ripe tomatoes, the perfect pepper heat level, and aromatic herbs that bring out the best in your homemade creation.
Tomato Varieties for Fresh Salsa
The tomato you pick can make or break your salsa—it’s literally the star of the show. Roma tomatoes are your best bet for homemade salsa recipe success. Their meaty flesh and fewer seeds create that perfect chunky texture.
Beefsteak tomatoes work great too, especially if you want extra tomato flavor. Skip watery varieties like cherry tomatoes—they’ll make your garden fresh salsa soggy.
Pepper Options and Heat Levels
Want to turn up the heat or keep things mild—choosing the right pepper can make or break your salsa game. Here’s your heat roadmap:
- Mild Territory: Green bell pepper delivers crunch without spice, perfect for sensitive spice tolerance
- Medium Heat: Jalapeno pepper hits 2,500-8,000 on the Scoville Scale—your classic spicy salsa starter
- Fire Zone: Cayenne pepper cranks up serious heat for adventurous palates
Start mild, then add heat gradually. You can always spice up, but you can’t cool down!
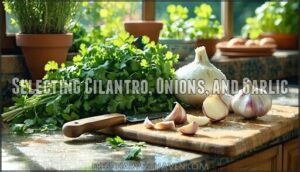
Selecting Cilantro, Onions, and Garlic
Think of cilantro, onions, and garlic as your salsa’s flavor foundation – get these three right, and you’re already halfway to salsa excellence. Fresh cilantro brings bright, citrusy notes that make your homemade garden salsa pop. White onion adds sharp bite, while garlic delivers aromatic depth.
| Ingredient | Best Choice | Flavor Profile |
|---|---|---|
| Cilantro | Fresh bunches with bright green leaves | Citrusy, herbaceous kick |
| Onion Varieties | White or yellow onion | Sharp, clean bite |
| Garlic | Fresh cloves, firm and plump | Pungent, aromatic base |
Choose cilantro with no yellowing – wilted herbs kill your salsa’s freshness. For garlic health benefits and optimum flavor, use fresh cloves rather than pre-minced. These salsa ingredients and preparation choices create the perfect herb selection balance.
Using Fresh Vs. Store-Bought Produce
Garden fresh produce transforms your homemade garden salsa in ways that’ll make your taste buds sing. Fresh tomatoes and fresh cilantro deliver vibrant flavors and enhanced nutrient retention compared to store-bought alternatives.
More people want fresh produce these days, even with worries about pesticides in non-organic options.
Your flavor profiles become more intense and authentic when using garden-fresh ingredients over processed varieties. Fresh salsa offers a vibrant, bright flavor due to its raw ingredients.
Essential Tools and Prep Tips
Getting your salsa right starts with having the proper tools and knowing a few key prep tricks.
The right equipment can make the difference between chunky excellence and mushy disappointment, while smart prep work keeps your fingers safe from those fiery peppers.
Must-Have Equipment for Salsa Making
You don’t need a professional kitchen to make restaurant-quality salsa, but having the right tools makes all the difference between a chunky mess and silky excellence. Here’s your essential toolkit:
- Food Processor or Blender – Your texture control center for consistent chopping
- Canning Jars and Jar Lifter – Essential for home canning and water bath canning safety
- Canning Funnel – Prevents messy spills when following canning instructions
Food Processor Vs. Manual Chopping
The age-old kitchen debate: reach for your trusty knife or fire up the food processor? Both chopping techniques work beautifully for garden-fresh salsa.
Your food processor delivers consistent texture control and saves time—perfect for large batches. Processor speed settings help achieve your ideal salsa texture.
Manual dicing gives you precise blade safety and lets you control every chop. Hand-chopping creates rustic charm that makes homemade food feel truly personal.
Safe Handling of Hot Peppers
Hot peppers might look innocent, but they pack a punch that can turn your kitchen session into a painful mistake if you’re not careful. Here’s your pepper safety playbook for homemade salsa:
- Glove up immediately – Disposable nitrile gloves prevent jalapeno oils from burning your skin
- Keep hands away from face – Never touch eyes, nose, or mouth while handling peppers
- Wash everything twice – Clean knives, cutting boards, and gloves with dish soap after use
- Ventilate your workspace – Open windows to prevent eye irritation from pepper vapors
Trust me, burn prevention beats dealing with painful aftereffects.
Step-by-Step Easy Salsa Recipe
Now that you’ve got your tools ready and ingredients prepped, it’s time to bring everything together in this simple salsa recipe.
You’ll transform fresh garden produce into a vibrant, flavorful salsa in just minutes using these straightforward steps.
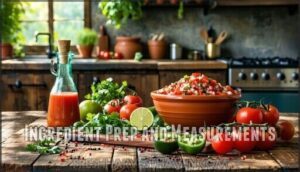
Ingredient Prep and Measurements
Getting your measurements spot-on makes the difference between salsa that sings and one that falls flat.
Start with 4 heaping cups of Roma tomatoes—their meaty texture won’t water down your homemade garden salsa. Add 2 tablespoons bottled lime juice for tang and safety. For spice levels, begin with one jalapeño, then taste-test before adding more. Fresh cilantro needs just 5 sprigs chopped fine.
These ingredient ratios create the perfect foundation for your fresh salsa recipe.
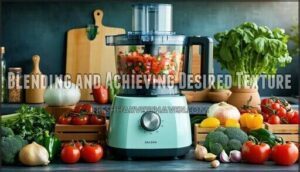
Blending and Achieving Desired Texture
Once your ingredients are prepped and ready, it’s time to work some food processor magic—but here’s where many home cooks stumble into chunky disaster or watery soup territory. Master these three pulse technique essentials for perfect texture control:
- Start with dry ingredients first – Add onions and peppers before tomatoes to prevent watery mess
- Use short pulse bursts – Three 1-second pulses, then check consistency before continuing
- Add tomatoes last – This prevents your fresh salsa recipe from turning into gazpacho
Your food processor or blender speed determines everything. Quick consistency checks between pulses guarantee your garden fresh salsa maintains that perfect chunky-yet-cohesive texture that makes salsa making an art form.
Adjusting Seasonings for Taste
Think of tasting your salsa like tuning a guitar – each flavor needs to hit just the right note before the whole thing comes together in perfect harmony.
Think of tasting your salsa like tuning a guitar—each flavor needs to hit the perfect note before everything harmonizes beautifully
Start with salt content, adding pinches until flavors pop. Taste for spice levels – more jalapeño for heat lovers. Add lime juice for acid adjustment and brightness. Balance garlic intensity against other ingredients.
Remember, customizing salsa flavor means trusting your taste preferences over rigid salsa recipe rules.
Quick Refrigeration and Serving Advice
Fresh salsa waits for no one—but a quick chill in the fridge transforms your chunky masterpiece from good to absolutely irresistible. Cover your homemade garden salsa tightly and refrigerate for at least 30 minutes before serving.
This chilling technique lets fresh flavors meld beautifully while following proper food safety guidelines. Serve within 3-4 days for peak taste.
Canning and Storing Garden Salsa
Want to enjoy your garden salsa year-round? Proper canning techniques let you preserve that fresh summer flavor for months in your pantry.
With the right sterilization process and storage methods, you’ll have homemade salsa ready whenever cravings hit.
Safe Home Canning Procedures
Following proper canning safety guidelines prevents botulism and other serious foodborne illnesses. The USDA has established specific procedures that home canners must follow to preserve food safely.
Key canning safety essentials:
- Use only tested recipes from USDA or extension services
- Add bottled lemon juice to maintain proper acidity levels
- Process salsa in a boiling water bath for recommended times
- Check equipment annually for accurate pressure readings
Always follow established canning instructions exactly—no shortcuts with food preservation. Understanding food safety guidelines is vital for successful home canning.
Proper Jar Sterilization and Sealing
Clean jars are like a blank canvas for your salsa masterpiece—one speck of bacteria can ruin the whole batch. Start your jar sterilization by washing them in hot, soapy water, then keep them hot in your dishwasher or a 200°F oven.
For lid preparation, simmer new lids in hot water—never boil them. This canning safety step ensures proper vacuum sealing during water bath canning.
Refrigeration Vs. Long-Term Pantry Storage
Your beautiful salsa deserves the right home – but should it live in your fridge for quick enjoyment or join the pantry squad for months of storage bliss?
Fresh garden fresh salsa keeps 3-4 days refrigerated, perfect for immediate snacking. Water bath canning transforms it into pantry gold, lasting 18 months through proper preservation techniques and food safety protocols.
Shelf Life and Storage Tips
You know that sinking feeling when you pop open your homemade salsa and it tastes flat or smells off?
Smart storage keeps your garden harvest fresh and prevents all that hard work from going to waste.
Here’s your storage roadmap:
- Refrigerated fresh salsa: Stays crisp for 3-4 days in airtight containers
- Water bath canning: Sealed jars maintain shelf stability for 18 months in cool pantries
- Freezer storage: Preserves flavor up to 6 months, though texture softens slightly
- Canning methods: Always use tested recipes with proper acid levels for safe preservation
- Refrigeration tips: Keep opened jars chilled and use clean utensils to prevent contamination
Serving Ideas, Nutrition, and Customization
Your fresh garden salsa opens up a world of serving possibilities beyond the classic chips and dip.
This nutritious blend packs essential vitamins while offering endless customization options to match your taste preferences and dietary needs.
Creative Ways to Serve Fresh Salsa
Sure, you can dunk chips in salsa all day long, but why stop there when this vibrant mixture can transform everything from breakfast scrambles to grilled chicken into something extraordinary?
Spoon it over eggs for a zingy morning boost, create show-stopping taco bars for parties, or use it as a marinade for grilled meats that’ll have your neighbors peeking over the fence.
Nutritional Benefits and Dietary Info
Homemade salsa packs a nutritional punch that’ll make your taste buds and body happy. This garden-fresh condiment delivers impressive health benefits while keeping calories surprisingly low.
- Low Caloric Intake: Each 2-tablespoon serving contains just 5-20 calories with minimal fat and zero cholesterol
- Vitamin Content: Provides 5-7% daily value of vitamin A and around 5% vitamin C for immune assistance
- Mineral Benefits: Delivers up to 715mg potassium per 100g serving, assisting heart health and blood pressure regulation
- Antioxidant Effects: Contains lycopene and quercetin that fight inflammation and may reduce cancer risk
The Total Carbohydrate content stays between 1-4 grams per serving, while Dietary Fiber aids digestion. Protein remains minimal at 0-0.7 grams, making this perfect for various dietary needs.
Flavor Variations and Add-Ins
Once you’ve mastered the basic recipe, it’s time to turn your salsa into a canvas for creativity. Transform your salsa recipes with these flavor variations that’ll make your taste buds dance.
| Spicy Additions | Smoky Flavors |
|---|---|
| Extra jalapeno pepper for heat | Chipotle peppers in adobo |
| Serrano or habanero peppers | Smoked paprika sprinkle |
| Red pepper flakes | Fire-roasted tomatoes |
| Cayenne powder pinch | Grilled corn kernels |
Mix in fresh herbs like oregano or basil. Add citrus zest from oranges or limes beyond the standard lime juice. For an umami boost, try a splash of soy sauce or fish sauce. Roasted garlic creates a deeper flavor than raw garlic cloves.
Trending Market Preferences (Vegan, Organic)
Here’s where things get interesting for salsa makers. The organic food market hit $231.52 billion last year and it’s growing fast at nearly 14% annually, while more people are going vegan or just eating less meat and want clean, gluten-free options.
- Vegan trends drive demand for clean-label, plant-based salsas targeting mainstream audiences beyond traditional vegan consumers
- Organic options satisfy consumer preferences for sustainable packaging and pesticide-free ingredients in specialty food segments
- Market growth reflects increased willingness to pay premium prices for healthier, environmentally-conscious vegan recipes and gluten-free recipes
Frequently Asked Questions (FAQs)
How long does fresh salsa last unrefrigerated?
Ever wonder how quickly that vibrant Fresh Garden Salsa turns from delicious to dangerous?
That fresh salsa you whipped up? It’s only good for 2-4 hours sitting out on the counter.
Warm temperatures kick bacterial growth into overdrive, so getting it back in the fridge quickly isn’t just smart—it’s essential for safe snacking.
Can I freeze homemade garden salsa safely?
Absolutely, freezing homemade garden salsa is perfectly safe for food preservation. However, expect texture changes after thawing—the frozen mixture becomes softer and more liquid.
For best results, use proper freezer storage containers and follow safe thawing practices when you’re ready to enjoy your preserved salsa.
What causes watery salsa and prevention tips?
Unlike perfect store-bought versions, watery texture plagues making homemade salsa when tomatoes release excess moisture.
Drain chopped tomatoes, salt them beforehand, or use Roma varieties for better salsa consistency and flavor balance prevention methods.
Is salsa safe during pregnancy concerns?
Good news for expecting moms – homemade garden salsa is perfectly safe during pregnancy when you use clean, fresh ingredients.
Just follow standard food safety practices and you won’t have any issues.
Key pregnancy considerations for homemade salsa:
- Food processing safety – Wash all fresh produce thoroughly to eliminate potential salsa allergens and bacteria
- Glutenfree benefits – Garden fresh salsa naturally promotes healthy eating with essential Nutrition Facts like vitamin C
- Heartburn management – Start with mild heat levels since pregnancy can increase sensitivity to spicy foods
- Fresh preparation – Choose homemade over restaurant versions to control ingredients and reduce contamination risks
How do I reduce salsa acidity naturally?
While traditional acidic tomatoes can overwhelm delicate palates, adding Natural Sweeteners like honey or maple syrup helps achieve better pH Balance.
Incorporate Alkaline Ingredients such as sweet bell peppers alongside your lime juice and jalapeno for ideal Flavor Enhancement through Acidity Reduction.
Conclusion
Successfully crafting this garden fresh salsa recipe easily transforms ordinary ingredients into remarkable flavor. You’ve mastered the art of balancing heat, acidity, and freshness while avoiding preservatives found in store-bought versions.
Your homemade creation not just tastes better but gives you complete control over texture and spice levels.
Whether you’re serving friends at a gathering or meal-prepping for the week, this simple technique delivers restaurant-quality results every single time.
- https://pinchofwellness.com/homemade-fresh-garden-salsa/
- https://www.loveandlemons.com/homemade-salsa-recipe/
- https://www.nutritionvalue.org/Salsa,_red,_homemade_74402200_nutritional_value.html
- https://montanahomesteader.com/how-to-make-and-preserve-garden-fresh-salsa/
- https://www.foodsafetynews.com/2010/07/salsa-and-guacamole-common-causes-of-food-poisoning-study-finds/


