This site is supported by our readers. We may earn a commission, at no cost to you, if you purchase through links.
 The average home gardener loses about 30% of their harvest to poor timing—picking too early robs you of flavor, while waiting too long invites pests and spoilage. Mastering gardening harvesting seasonal crops transforms this gamble into a predictable rhythm, where you know exactly when each vegetable hits its peak.
Your garden speaks in subtle signals: carrot shoulders peeking through soil, broccoli heads tight as fists, tomatoes shifting from firm to slightly yielding. Learning to read these signs means you’ll catch crops at their nutritional and flavor peak, then preserve that goodness through methods that can extend your harvest for months.
This guide walks you through timing indicators for cool and warm-season vegetables, proper cutting techniques that encourage regrowth, and storage strategies that keep your bounty fresh long after frost arrives.
Table Of Contents
- Key Takeaways
- When to Harvest Your Seasonal Crops
- How to Harvest Different Crop Types
- Top 10 Garden Products for Harvesting
- 1. 365 Halved Brussels Sprouts 12oz
- 2. Early Girl Tomato Plant 4-Pack
- 3. Organic Sweet Potato Orange Blend
- 4. Organic Butternut Squash Single Squash
- 5. Jevrench Garden Netting Plant Cover
- 6. Miracle-Gro Organic Mulch for Landscaping
- 7. VEVOR Walk-in Tunnel Greenhouse 20x10x7
- 8. Indoor Hydroponics Growing System Garden
- 9. Blackout Curtains Linen Textured Room Darkening
- 10. Burpee Organic Potting Soil Mix
- Storage and Preservation After Harvest
- Climate and Season Planning Strategies
- Frequently Asked Questions (FAQs)
- What is the season of harvesting crops?
- What does seasonal harvesting mean?
- What is harvesting crops called?
- What vegetables are continuous harvest?
- What diseases commonly affect harvest-ready crops?
- How does rainfall timing impact harvest quality?
- Which pests target crops during harvest season?
- What are signs of overripe vegetables?
- How do you prevent harvest contamination?
- How do weather patterns affect harvest quality?
- Conclusion
Key Takeaways
- Harvesting at the right moment—when visual cues like color, firmness, and size align with crop-specific maturity windows—captures peak flavor and nutrition while preventing the 30% yield loss most gardeners experience from poor timing.
- Clean, sharp cutting tools and proper harvest techniques (like cutting above growth nodes and sanitizing between crops) reduce disease spread by 40%, encourage regrowth for multiple harvests, and extend your crop’s shelf life significantly.
- Storage success depends on matching each crop to its ideal conditions—cool-season vegetables need 32-36°F with high humidity, while curing root crops like sweet potatoes and onions at 70-90°F for days or weeks transforms them into pantry staples that last months instead of weeks.
- Strategic planning through hardiness zone awareness, succession planting every 7-14 days, and soil temperature monitoring (planting when soil hits 60-75°F) creates continuous harvests throughout the season while protecting crops from frost damage and heat stress.
When to Harvest Your Seasonal Crops
Knowing when to harvest isn’t guesswork—it’s about reading the signals your crops send you. Each type of vegetable has its own telltale signs that scream "I’m ready," and catching them at the right moment means better flavor, longer storage, and less waste.
Let’s walk through the timing cues for cool-season vegetables, warm-season crops, root vegetables, and leafy greens so you can pick at peak ripeness.
Cool-Season Vegetables Timing
When your garden calendar shows late winter, cool-season vegetables enter their best planting window—but knowing when to harvest is where most gardeners struggle. You’ll want to harvest spinach and lettuce when leaves reach 6–8 inches tall, usually 45–60 days after sowing, before temperatures climb above 75°F and trigger bolting. These crops maintain peak ripeness between 40°F and 70°F, so maturity duration depends heavily on temperature sensitivity and seasonal adaptation. One should consider carrot harvest timings approximately 60-80 days after planting.
Here’s your vegetable harvesting guide for cool-season vegetables:
- Broccoli reaches harvest quality at 6–7 inches across, usually 2–4 months after planting
- Cabbage forms firm heads 60–90 days from transplanting
- Radishes mature fastest at 25–40 days when roots show above soil
- Cauliflower needs 55–80 days and benefits from leaf blanching
- Arugula delivers harvesting vegetables in just 4–6 weeks
Warm-Season Crop Indicators
Timing warm-season crops requires watching visual maturity cues and understanding soil temperature requirements. These crops need soil temperatures above 60°F, with 70°F being best, and they thrive between 65°F and 86°F air temperatures, accumulating 1,200 to 2,000 growing degree days from planting to harvest. Some of these, like tomatoes, are considered tender vegetables and can be injured by frost.
You’ll spot ripe tomatoes by their deep, even color and slightly soft feel, while beans are ready when pods become plump and snap easily. Zucchini hits peak quality at about 4 inches long, before seeds toughen the flesh.
Plant structure changes also signal harvest timing—yellowing lower leaves on tomato plants and drying bean stems indicate maturity.
Root Vegetable Harvest Signs
Check your carrots when orange shoulders poke through the soil—that’s your visual maturity cue they’ve reached at least 1 inch in diameter. Beets show readiness around 2 inches across, while parsnips and turnips reveal their upper roots as harvest indicators. Don’t wait too long, though—over-mature carrots turn woody and bitter, showing how texture and flavor changes signal perfect timing.
Here’s what to watch for:
- Shoulder emergence: Carrots, beets, and turnips display their tops at soil level when ready
- Calendar harvest benchmarks: Carrots mature in 70–90 days, beets in 55–70 days
- Environmental disease indicators: Heavy rain increases splitting risk, requiring immediate harvest
- Specialized practices: Use garden forks 6 inches away in compacted soil to prevent root damage
Leafy Greens Peak Timing
While root vegetables announce readiness when their shoulders emerge, leafy greens require more attention to temperature effects and photoperiod impact. Peak quality arrives when harvest maturity indicators align with regional variations—spinach thrives at 35–40 days post-planting when temperatures stay between 35–64°F, lettuce reaches peak flavor in 45–55 days before heat triggers bolting, and kale delivers maximum antioxidants at 45 days. Proper harvesting techniques preserve storage life and nutritional value.
Watch for these harvest timing signs:
- Temperature thresholds: Harvest spinach and lettuce before daily highs exceed 75°F to prevent bitterness.
- Leaf size indicators: Pick lettuce when outer leaves reach 6–8 inches, leaving inner growth intact.
- Photoperiod awareness: Extended daylight above 14 hours accelerates bolting, reducing leafy green quality by 30%.
How to Harvest Different Crop Types
Knowing when to harvest is only half the battle—how you harvest makes all the difference between crops that stay fresh for weeks and ones that spoil in days. Each type of plant needs its own approach, from the angle of your cut to the time of day you pick.
Let’s walk through the techniques that’ll help you bring in your garden’s bounty without bruising, damaging, or shortening its shelf life.
Proper Cutting Techniques for Vegetables

Sharp tools aren’t just convenient—they’re essential for keeping your vegetables healthy and productive. Clean, sharp knives or scissors reduce microbial contamination by up to 40% compared to dull blades, which means less spoilage and healthier plants. Your blade maintenance routine matters too, since regular sharpening every 10–15 kg of produce improves efficiency and cuts postharvest damage by 20%.
For leafy greens like kale or Swiss chard, cut 2–3 cm above the crown to realize their regrowth potential—you’ll get up to three additional harvests from the same plant. Tool sanitation between crops prevents cross-contamination, so wipe down your harvesting knives with a 200 ppm chlorine solution.
Regarding cutting height, precision pays off: broccoli needs 10–15 cm of stem left to encourage side shoots, while herbs should be snipped above a leaf node for faster regrowth. These vegetable harvesting techniques minimize bruising and keep your garden producing longer.
Fruit Picking Methods

Harvesting fruit demands a delicate touch, and manual methods still dominate over 55% of global fruit production because they minimize bruising in delicate varieties. You’ll reach peak quality by recognizing maturity cues—firmness, color saturation, and sugar content—since premature picking leads to poor ripening while delayed harvests increase spoilage risk.
Robotic harvesters are advancing rapidly, achieving 50–84% field efficiency in orchard systems, though AI integration and sensor-driven maturity detection technologies continue improving accuracy to reduce damage by up to 30%.
- Apples: Twist gently upward—ripe fruit releases without force
- Stone fruits: Check for slight softness near the stem, ensuring firmness thresholds meet sweetness standards
- Berries: Look for uniform color and harvest during cool morning hours to preserve quality
- Citrus: Heavy weight signals peak juice content and best storage life
Herb Harvesting Best Practices

Mid-morning yields peak quality when you harvest herbs after dew evaporates but before midday heat—that’s when essential oils concentrate most intensely. Cutting techniques matter: snip basil before flowering to lock in 0.8–1.5% oil content, or wait until mint shows buds for over 2% potency. Sharp, sanitized scissors prevent disease while encouraging regrowth when you cut above leaf nodes.
Harvest herbs mid-morning after dew dries but before midday heat strikes—that’s when essential oils hit peak concentration
Drying methods vary by species—air-dry rosemary in cool spaces under 60% humidity, preserving 90% of fragrance, while tender basil needs faster processing to maintain storage life up to twelve months in airtight containers.
Tools for Clean Harvesting

Clean tools work like insurance for your harvest—they protect your investment. You’ll want bypass pruners with stainless steel blades that resist corrosion and cut branches up to an inch thick, reducing crop damage by 20–30%. Ergonomic design features like soft-grip grips cut hand fatigue by 25% during long picking sessions.
Sanitize your harvest shears and knives with 50–150 ppm chlorine solutions between crops to prevent pathogen spread, which can reduce losses by 35%. Collection baskets with smooth interiors won’t bruise tender produce, while specialized diggers extract root vegetables intact.
Blade maintenance matters—sharp edges require 40% less cutting force, promoting faster healing and regrowth.
Top 10 Garden Products for Harvesting
Having the right tools makes all the difference when it’s time to bring your harvest in from the garden. Whether you’re growing leafy greens, root crops, or fruiting plants, the products you choose can protect your harvest, extend your growing season, and set you up for success.
Here are ten garden essentials that’ll help you harvest smarter and grow better.
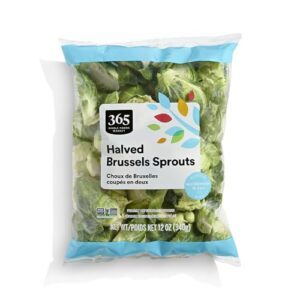
1. 365 Halved Brussels Sprouts 12oz
 View On Amazon
Rushed schedules don’t have to mean compromising on healthy vegetables, especially when you grab a bag of these halved Brussels sprouts. This 12-ounce product packaging delivers four servings of pre-washed, cool-season vegetables that save valuable time while preserving nutritional value—each serving offers 45 calories, 8g carbohydrates, and 3g dietary fiber.
You’ll appreciate these features when planning your harvesting seasonal crops strategy:
- Storage life extends 3-5 weeks under proper refrigeration at 32°F with 95% humidity
- Harvesting process involves manual cutting and hydrocooling to maintain freshness
- Dietary use fits vegan, keto, paleo, and gluten-free meal plans seamlessly
The harvest timing for Brussels sprouts peaks between September and March, when commercial growers employ careful storage and preservation after harvest techniques. These halved sprouts roast beautifully in 20-25 minutes, caramelizing naturally to bring out their sweet, nutty flavor.
2. Early Girl Tomato Plant 4-Pack
If you’re hunting for a tomato variety that won’t let you down, Early Girl tomato plants deserve a spot in your garden bed. These indeterminate champs reach maturity in 50-60 days, producing 4-8 ounce fruits continuously until frost arrives—up to 300 tomatoes per plant under ideal conditions.
You’ll want to space them 36 inches apart in full sunlight, maintaining soil pH between 6.0 and 6.8 with moderate watering practices to prevent blossom end rot. Their built-in disease resistance to verticillium and fusarium wilt means less fussing with fungicides, while their drought tolerance makes harvesting seasonal crops more forgiving.
Harvest timing peaks during summer months, when you’ll pick ripe fruits twice weekly for the freshest flavor and best storage and preservation after harvest.
3. Organic Sweet Potato Orange Blend
From early spring planting to late autumn harvest, tomatoes and root crops both reward careful timing. Organic sweet potatoes are your next big win in the seasonal crops lineup, offering nutritional value that goes beyond simple carbs.
A medium 130-gram potato delivers 110 calories, 4 grams of fiber, and serious beta-carotene levels—your body converts this into vitamin A for sharp vision and strong immunity. You’re also getting 9% of your daily potassium and 13% of your iron, all with zero fat or cholesterol.
Harvesting timing matters: wait 90–120 days after planting when leaves yellow and skins harden. Then comes the magic—curing techniques transform these tubers into storage champions. Cure them at 85°F with high humidity for 5–7 days, and they’ll sweeten up while extending storage life to six months in your root cellar.
That’s how organic yields translate to lasting pantry power, especially as market growth for organic sweet potatoes climbs 8% annually through consumer demand for nutrient-dense harvests.
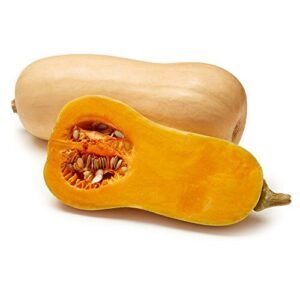
4. Organic Butternut Squash Single Squash
 View On Amazon
Sweet potatoes aren’t the only root-zone rockstar worth your attention this harvest season. Butternut squash brings equally impressive nutrition to the table—about 48 calories per 100 grams, plus 400% of your vitamin A needs and solid potassium for heart health.
Harvest maturity arrives when the rind hardens and tan color deepens, usually before the first frost when stems dry out. You’ll want to cut stems 1–2 inches above the fruit to meet quality standards and prevent decay.
Curing techniques at room temperature for 2–8 weeks boost storage life to three months, transforming fresh harvest into reliable pantry stock. That extended storage duration explains why market value for butternut squash keeps climbing—nutritional benefits that last.
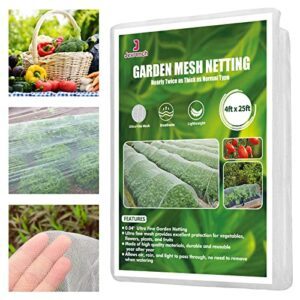
5. Jevrench Garden Netting Plant Cover
 View On Amazon
Protecting mature seasonal crops from pest damage calls for reliable garden products that work across multiple harvests. Jevrench Garden Netting delivers exactly that defense, using ultra-fine 0.8mm × 1mm polyethylene mesh that blocks 98–99% of common garden invaders—aphids, beetles, moths, birds, and squirrels—while maintaining 85–90% light transmission for healthy photosynthesis.
This netting material’s durability lasts 3–5 seasons under standard outdoor conditions, and its 30–40 g/m² weight won’t crush your growing plants. The pest control efficiency reduces insect-borne damage by roughly 75%, cutting pesticide use by up to 80% in some crop types.
You’ll appreciate the environmental benefits: it’s non-toxic, recyclable, and reusable, replacing 10–15 single-use covers each season. Practical applications span vegetable rows, fruit trees, and nursery beds, and at $15–$35 per roll, it’s far more affordable than greenhouse construction.
Rain and irrigation penetrate easily, maintaining consistent soil moisture for your harvesting techniques throughout the season.
6. Miracle-Gro Organic Mulch for Landscaping
 View On Amazon
Once you’ve defended your crops with quality netting, soil preparation becomes your next priority. Miracle-Gro Organic Mulch transforms that post-harvest bed into a thriving foundation for next season’s bounty, addressing weed suppression and moisture retention in one practical application.
This OMRI-certified mulch uses sustainable wood sourced within 150 miles of major retailers, eliminating dyes and contaminants while supporting organic certification standards. Spread a 3-inch layer around your garden beds, and you’ll block roughly 90% of weeds while cutting water needs considerably—organic matter decomposes gradually, feeding soil microbes and earthworms that boost soil health by 35% over time.
The visual appeal matters too; natural wood tones complement any landscape without artificial colors. At 6 square feet of coverage per 1.5-cubic-foot bag, it’s an affordable investment in garden products that work while you plan your next planting cycle.
7. VEVOR Walk-in Tunnel Greenhouse 20x10x7
If you’re serious about extending your growing season, this tunnel greenhouse delivers real year-round protection. The 20×10×7-foot structure offers 140 square feet of covered space, letting you practice succession planting and push warm-season crops eight weeks beyond typical outdoor limits—users report greenhouse crop yields exceeding field harvests by 25% or more.
Twelve mesh roll-up windows boost ventilation efficiency, dropping humidity from 90% to 65% in about fifteen minutes, while the galvanized steel frame withstands winds up to 20 mph with decent structure wind resistance.
Assembly challenges exist—expect two to four hours with four people—but anchoring eight inches deep cuts storm displacement by 60%. The PE cover’s two-year-plus lifespan and 84% UV transmittance keep seasonal crops thriving while you control temperature, moisture, and storage life right from harvest through curing.
8. Indoor Hydroponics Growing System Garden
Hydroponics Market Growth transforms how you approach indoor gardening, letting you harvest fresh vegetables year-round without soil. These systems use 90% less water than traditional methods while delivering nutrients directly to roots, accelerating growth by 30-50% and supporting urban adoption in tight spaces.
You’ll benefit from sustainable benefits like eliminating pesticides and maximizing vertical space—some setups yield 240 to 390 times more per square foot than field gardens. However, system energy consumption and nutrient management demand attention:
- LED grow lights refine photosynthesis while cutting energy use by 40% compared to older bulbs
- Automated timers and sensors monitor pH levels, preventing nutrient imbalances that stall growth
- Quiet recirculating pumps deliver water efficiently, though malfunctions risk total crop loss within days
- Modular 10-pod units enable 50-100 annual harvests of herbs and greens with minimal garden produce storage techniques needed
Expect algae control and regular system checks, but the payoff—continuous harvesting and reduced environmental impact—makes hydroponics a solid choice for committed vegetable gardening enthusiasts.
9. Blackout Curtains Linen Textured Room Darkening
Light management matters when you’re storing garlic, seeds, or cured root vegetables indoors. These linen-textured blackout curtains excel at creating UV-free zones that preserve your harvest’s peak flavor and extend storage life by blocking up to 99% of incoming light.
You’ll notice thermal efficiency too—the multi-layered construction reduces cooling costs by 10-15% in hot months, stabilizing temperatures that keep potatoes and squash fresh longer. Linen durability shines through repeated washings, handling garden dust without losing light-blocking power over years of use.
Market trends show strong demand for dual-purpose textiles, and acoustic properties add a bonus: heavier weaves dampen noise by 12-15 decibels, creating quieter spaces for seed sorting after harvest. The breathable fabric prevents moisture buildup that spoils crops, making these curtains a practical choice for serious gardeners applying proper harvesting techniques and seasonal crop planning year-round.
10. Burpee Organic Potting Soil Mix
 View On Amazon
Sustainable soil composition starts from the ground up, and Burpee’s organic potting mix delivers exactly what your harvest season demands. This OMRI-listed blend combines coconut coir, compost, and perlite with an N-P-K ratio of 0.12–0.12–0.12, feeding plants for three months while you focus on proper harvesting techniques and harvest timing.
You’ll see organic soil benefits in action—tests show 40% greater herb foliage compared to generic mixes, plus moisture retention rated 5/5 by independent reviews. The sustainable coconut coir replaces peat moss, cutting waste while supporting healthy roots in containers.
Potting mix applications span vegetables, herbs, and flowers, though you’ll want to pre-moisten the dry blend before planting. Consumer soil reviews consistently praise growth performance, especially when amended with bone meal for tomatoes. At $14.80 per 9-quart bag, it’s recognized as a top-value choice for gardeners applying storage techniques that preserve peak flavor long after harvest.
Storage and Preservation After Harvest

Once you’ve brought in your harvest, the real work begins—keeping it fresh and flavorful for weeks or even months. The right storage method depends on what you’ve grown, from quick refrigeration to slower curing processes.
Let’s look at four proven techniques that’ll help you enjoy your garden’s bounty well beyond harvest day.
Refrigeration Requirements by Crop Type
Your fridge isn’t just keeping food cold—it’s running a precise life-support system for your harvest. Different crops demand specific temperature thresholds and humidity levels, and getting these refrigeration requirements wrong can cut your storage durations in half. Temperate crops like cabbage thrive near freezing at 32–34°F with 90–95% humidity, while tropical varieties such as tomatoes need warmer temps around 55–60°F to avoid chilling damage. The cold chain matters from garden to table, and mixed storage can backfire—storing apples with leafy greens causes flavor cross-contamination in up to 40% of cases due to ethylene sensitivity.
- Leafy greens need 32–36°F with 95–100% humidity, lasting 10–14 days when properly stored
- Root vegetables like carrots perform best at 32–36°F with 90–95% humidity for 3–6 months
- Tropical crops including peppers require 45–50°F to prevent pitting and early spoilage
- Berries demand strict 31–32°F storage, with temperature fluctuations reducing shelf life by 25%
- Bulb crops need lower 60–70% humidity to prevent mold during fruit and vegetable storage
Curing Techniques for Long-Term Storage
Curing isn’t just drying—it’s coaxing your harvest into a state of suspended animation where flavors concentrate and natural barriers toughen against decay. Root vegetables like sweet potatoes and onions undergo controlled moisture loss that reduces microbial decay by 30–50% while extending marketable storage from weeks to months. The process triggers biochemical changes: sweet potatoes develop suberin layers at 27–32°C, while onion necks seal and outer skins become papery during their 10–14 day curing window.
| Crop | Curing Conditions | Post-Harvest Benefits |
|---|---|---|
| Sweet Potatoes | 27–32°C, 75–95% RH, 3–10 days | 50% reduced weight loss, 120-day storage life |
| Onions | 27–32°C, 80% RH, 10–14 days | 70% less fungal spoilage, 8-month peak flavor retention |
| Garlic | 24–30°C, 60–70% RH, 2–4 weeks | Tight wrappers prevent mold, extended harvest timing value |
| Winter Squash | 27–29°C, 70% RH, 10 days | 90% firmness retention after 3 months |
| Cassava | Controlled ventilation, 45 days | 8.3% vs 16% weight loss, US$35M economic impacts |
Equipment controls matter—forced-air systems cut mold by 40% through precise humidity management, while solar-powered units reduce costs by 25–30%, supporting sustainable practices across long-term storage operations.
Blanching and Freezing Methods
Freezing locks in the garden’s bounty, but only if you blanch first—otherwise, enzymes keep working even at subzero temperatures, stealing away flavor and color. Blanching halts enzyme activity by briefly exposing vegetables to boiling water, then shocking them in ice water. This process protects nutrient retention during months of frozen storage, though you’ll lose 15–31% of vitamin C even with proper technique.
Follow these freezing protocols for seasonal crops:
- Water Blanch Correctly – Use one gallon of boiling water per pound of vegetables, timing precisely from when water returns to a boil.
- Match Blanching Times – Green beans need 3 minutes, corn on the cob requires 7–11 minutes depending on ear size, while leafy greens take just 2–3 minutes.
- Cool Immediately – Submerge in ice water for the same duration as blanching to stop cooking and prevent nutrient degradation.
- Pack for Storage Life – Remove air pockets to prevent freezer burn, leaving 0.5–1.5 inch headspace before sealing.
Most crops maintain quality for 8–12 months when stored at −18°C, making this preservation method ideal for extending your crop harvesting season well into winter.
Root Cellar Storage Solutions
While freezing works wonders for most crops, some vegetables reach their true potential in different conditions. Root cellars tap into underground temperature stability, offering long-term storage without electricity. You’ll maintain produce quality for months when you build DIY root cellars with proper temperature control between 32-40°F and humidity levels around 85-95%.
Your vegetable storage setup needs two key features: ventilation systems with intake vents near the floor and exhaust vents at the ceiling, plus multi-zone storage to separate ethylene producers like apples from sensitive crops like potatoes. This separation extends shelf life by up to 25% compared to mixed storing harvested produce.
Here’s what thrives in root cellar storage:
Best Crops include carrots and beets lasting 4-8 months in damp sand, potatoes storing 4-6 months in darkness, and onions keeping 8-10 months with good airflow. Apples last 3-5 months when stored separately at 32°F with 90% humidity, while winter squash prefers warmer zones around 55-59°F for 2-4 months.
Check your stored harvest weekly, removing spoiled items immediately to protect the rest.
Climate and Season Planning Strategies

Your harvest success doesn’t just depend on what you grow—it hinges on when you plant and how well you prepare for what Mother Nature throws your way. Smart gardeners know that understanding your local climate, protecting crops from temperature swings, timing plantings strategically, and keeping tabs on soil conditions can mean the difference between a bumper crop and a disappointing yield.
Here’s what you need to focus on to work with the seasons instead of against them.
Understanding Your Hardiness Zone
By understanding your hardiness zone, you’ll plant smarter, not harder. The USDA hardiness zones divide the country into 13 climate classifications based on average winter lows, helping you pick plants that survive your winters.
The 2023 zone map updates used data from 13,400 weather stations, revealing that 67% of U.S. locations shifted warmer.
Microclimate variations within your growing zone matter too—elevation, urban heat, and soil affect survival. Match your crop selection to your zone’s climate implications for thriving harvests.
Frost Protection Methods
Your hardiness zone shows you what survives winter, but frost protection methods determine what thrives through unexpected cold snaps. Wind machines reduce crop loss by 60–80% by circulating warmer air downward, while row covers trap heat and raise temperatures by 10–27°F depending on material. Overhead irrigation methods release latent heat as water freezes, protecting tissue at 32°F. Orchard heaters boost canopy temperatures by 2–5°F, and forecast systems with frost date alerts let you deploy protections before temperatures drop.
Monitor your local frost dates and layer these methods for reliable winter defense.
Succession Planting for Continuous Harvest
Once you’ve mastered frost protection, succession planting becomes your ticket to a continuous harvest that keeps your table stocked all season. This method staggers crop sowings at regular intervals, preventing feast-or-famine cycles while maximizing your garden’s productivity. Plant fast-maturing greens like lettuce every 7–10 days, and you’ll enjoy fresh salads for months rather than weeks.
Here’s your succession planting roadmap for climate resilience and steady yields:
- Implement staggered planting intervals of 7–14 days for leafy greens and 14–28 days for root crops to maintain consistent harvest timing.
- Practice strategic crop rotation between cool and warm-season vegetables to reduce weed reduction and pest buildup.
- Use planning charts to track sowing dates, maturity windows, and harvest schedules across multiple plantings.
- Layer different maturity varieties like early, mid, and late-season beans to extend your seasonal crops window by 4–6 weeks.
- Monitor temperature and frost dates to calculate how many succession cycles fit your growing season.
This approach transforms bare patches into productive space, improving soil health while delivering that staggered harvest you’re after.
Soil Temperature Monitoring
Beyond ensuring your seasonal crops go in at the right moment, soil temperature monitoring gives you the precision edge that makes or breaks yield impact. A simple soil thermometer inserted two to four inches deep reads your root zone’s readiness, guiding planting dates and irrigation efficiency with real accuracy. Sensor technologies now pair temperature tracking with moisture data, letting you adjust water schedules when root growth actually kicks in, usually around 75°F for most vegetables.
Here’s how soil temperature monitoring shapes your crop harvesting success:
| Temperature Range | Crop Response | Action to Take |
|---|---|---|
| Below 50°F (10°C) | Root elongation slows sharply; germination stalls | Delay planting warm-season crops; focus on cool-season varieties |
| 60–84°F (16–29°C) | Peak nutrient uptake and root growth | Plant, irrigate, and fertilize for maximum productivity |
| Above 86°F (30°C) | Heat stress begins; water demand spikes | Increase irrigation frequency; apply mulch to cool soil |
| 65–75°F (18–24°C) | Ideal for most vegetable germination | Sow seeds for reliable emergence and uniform stands |
Tracking soil temperatures at multiple depths reveals when your garden transitions from dormant to active, directly affecting storage life by influencing crop maturity timing and overall plant vigor.
Frequently Asked Questions (FAQs)
What is the season of harvesting crops?
Crops don’t stick to one harvest season—timing depends on what you’re growing, where you live, and your local climate. Cool-season crops like lettuce and spinach thrive in spring’s cooler temperatures, while warm-season vegetables such as tomatoes and peppers peak during summer’s heat.
Root vegetables bridge multiple seasons, and succession planting extends your growing season well into fall.
What does seasonal harvesting mean?
Seasonal harvesting means collecting your crops when they reach peak ripeness, aligning harvest timing with natural growth cycles and local climate conditions. This ideal harvest timing maximizes crop quality, flavor, and nutrition while minimizing waste and unnecessary resource use throughout your harvesting schedule.
What is harvesting crops called?
The agricultural world calls this process reaping, crop gathering, or simply harvesting—traditional terms for collecting mature produce from your garden or field, rooted in centuries of farming practice.
What vegetables are continuous harvest?
Leafy greens like lettuce, spinach, and kale are classic continuous harvest vegetables, allowing you to pick outer leaves while the plant keeps producing.
Fruiting vegetables such as cucumbers, zucchini, and pole beans yield steadily throughout the season, while perennial options like asparagus and rhubarb return year after year—true staggered harvest champions.
What diseases commonly affect harvest-ready crops?
Just when your vegetables ripen ideally, fungal infections like powdery mildew and fusarium wilt can strike, while bacterial impacts from wilt and viral transmission threaten your yield—requiring immediate disease control to protect harvest-ready crops and maintain plant health.
How does rainfall timing impact harvest quality?
Rainfall timing impacts harvest quality in ways that go beyond simple growth. Heavy rain during ripening dilutes sugars in fruits like grapes and tomatoes, reducing sweetness and causing flavor dilution. Excessive moisture triggers fruit cracking—tomatoes can split when rapid water uptake exceeds skin elasticity, while cherries experience over 80% cracking under heavy downpours.
Waterlogged soils lead to nutrient leaching, washing away nitrogen and other essentials before plants absorb them. Wet conditions also promote disease spread, creating ideal environments for fungal infections and root rot that compromise your entire harvest.
On the flip side, drought stress concentrates sugars but limits nutrient uptake, reducing both size and yield. That’s why monitoring weather patterns and timing your harvest before predicted rainfall protects quality, prevents splitting, and reduces harvest contamination risks. Strategic watering—consistent moisture without extremes—gives you the best harvest quality while minimizing overripe vegetables and yield reduction.
Which pests target crops during harvest season?
Thousands of pests descend on ripening crops like an invading army. You’ll battle aphids swarming vegetables, reducing yields by 30-40%, while cucumber beetles attack squash, corn earworms bore into ears, and spider mites thrive in hot weather.
Harvest pest control requires vigilance—bacterial infection risks and fungal disease impact intensify crop loss when pests create entry wounds. Vertebrate pest damage from deer and birds adds pressure, with insect infestation rates peaking during harvest season.
Effective pest control strategies prevent harvest contamination and protect your hard-earned yield.
What are signs of overripe vegetables?
When produce passes peak quality, you’ll notice soft or mushy spots that give under gentle pressure. Vibrant colors fade to dull or yellowed tones, and dark blemishes appear.
Off-putting fermented odors signal flavor degradation and poor shelf life ahead.
How do you prevent harvest contamination?
Clean containers and careful handling control contamination.
Wash your hands before picking, use sanitized tools with proper tool sanitation, harvest when crops are dry, and refrigerate produce immediately to maintain harvester hygiene and water quality standards.
How do weather patterns affect harvest quality?
Weather patterns directly shape your harvest quality through temperature fluctuations, precipitation effects, and sunlight influence. Drought stress reduces nutrient concentrations by up to 30%, while excessive rainfall can dilute flavor and increase rot risk by 36%, affecting your harvest season outcomes.
Conclusion
Sure, you could ignore everything in this guide and just yank vegetables whenever the mood strikes—if you enjoy mealy tomatoes and bitter greens.
Gardening harvesting seasonal crops rewards those who actually pay attention: read the signals, harvest with intention, and store properly. Your carrots won’t text you when they’re ready, but their shoulders will push through the soil like tiny orange flags.
Master these timing cues and preservation methods, and you’ll eat well past the season’s end—while your neighbors scramble to salvage their forgotten zucchinis.