This site is supported by our readers. We may earn a commission, at no cost to you, if you purchase through links.

Last season, raised bed tomato growers in northern climates reported 22% larger fruit sets than their in-ground counterparts—and it wasn’t luck. The secret lies in understanding how elevated soil temperatures, improved drainage, and strategic placement work together to create an environment where tomato plants thrive.
But most gardeners never tap into this potential because they treat raised beds like regular garden plots. The difference between mediocre yields and baskets overflowing with ripe tomatoes comes down to six critical decisions you’ll make before your first seedling touches soil. Get the location wrong and you’ll sacrifice 40% of your harvest. Skimp on depth and your roots hit a ceiling just as fruit production peaks.
Master the fundamentals of growing tomatoes in raised beds, though, and you’ll transform a simple wooden frame into a high-performance growing system that outproduces traditional gardens year after year.
Table Of Contents
- Key Takeaways
- Choosing The Best Raised Bed Location
- Building and Sizing Your Raised Bed
- Preparing Soil for Raised Bed Tomatoes
- Selecting Tomato Varieties for Raised Beds
- Spacing and Planting Tomato Seedlings
- Watering and Irrigation Best Practices
- Supporting and Training Tomato Plants
- Companion Planting and Pest Management
- Top 10 Products for Raised Bed Tomato Success
- 1. Drip Irrigation Watering System Kit
- 2. Metal Garden Plant Support Tower
- 3. Galvanized Garden Plant Support Stakes
- 4. Sturdy Garden Tomato Plant Stands
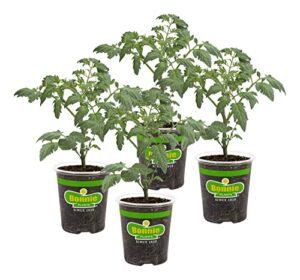
- 5. Sweet Cherry Tomato Live Plants
- 6. Disease Resistant Tomato Plants
- 7. Natural Wood Raised Garden Bed
- 8. Natural Wooden Garden Planter Box
- 9. Elevated Wooden Garden Planter Box
- 10. Epsom Salt Plant Fertilizer Supplement
- Frequently Asked Questions (FAQs)
- How deep should a raised bed be for tomatoes?
- Why put baking soda around tomato plants?
- Why put an egg in the hole when planting tomatoes?
- What fertilizer schedule works best for tomatoes?
- How do you harvest tomatoes at peak ripeness?
- Can you grow tomatoes year-round in beds?
- What companion plants boost tomato growth naturally?
- How do you preserve tomato seeds properly?
- When should I harvest tomatoes for best flavor?
- How do I prevent blossom end rot naturally?
- Conclusion
Key Takeaways
- Raised beds give you a 22% yield advantage over ground planting by warming soil faster and improving drainage, but only if you position them for 6-8 hours of direct sun and keep them at least 10 feet from mature trees to avoid root competition.
- Your bed needs 18-24 inches of depth for indeterminate varieties to develop strong root systems, paired with a 50/50 mix of quality topsoil and compost at a pH between 6.0 and 6.8 for optimal nutrient uptake.
- Proper vertical support and consistent moisture management are non-negotiable—indeterminate tomatoes need tall stakes or towers installed at planting time, plus 1-2 inches of water weekly delivered through drip irrigation to prevent both disease and fruit cracking.
- Strategic companion planting with basil and marigolds cuts pest populations by 14-70% while boosting yields by up to 20%, turning your raised bed into a self-defending system that reduces your need for chemical interventions.
Choosing The Best Raised Bed Location
Your raised bed’s location can make or break your tomato harvest before you even plant a single seed. Getting this decision right means choosing a spot that balances sunlight exposure with practical access to water and proper drainage.
Let’s walk through the three essential factors that’ll set your tomatoes up for a productive season.
Selecting a Sunny Spot
For maximum productivity, position your raised garden bed where tomato plants receive 6-8 hours of direct full sun daily. Southern exposures work best in northern latitudes, delivering 22% larger fruit sets. Insufficient sunlight cuts yields by 40% and delays ripening. Monitor shade patterns throughout the season—even morning shadows from nearby structures reduce your harvest.
Position your raised bed where tomatoes get 6-8 hours of direct sun daily—insufficient light slashes yields by 40% and delays ripening
Proper bed orientation and climate considerations determine whether you’ll harvest abundantly or struggle with disappointing returns when growing tomatoes in raised beds. To improve growth, consider the soil health benefits when planning your raised bed garden.
Ensuring Good Drainage
Sunlight alone won’t guarantee success—your raised bed location must promote fast water drainage to prevent root rot. Select sites on naturally sloped ground or position beds 3-8 inches high to improve soil porosity and prevent waterlogging. Avoid compact clay areas where the water table rises easily. Check pre-built frames for unobstructed drainage holes.
Proper soil preparation and soil aeration transform raised bed gardening techniques into productive harvests. Ensuring healthy soil life is vital for a thriving garden.
Avoiding Competition From Trees and Shrubs
Position your raised bed at least 10-15 feet from mature trees to avoid root barrier problems and soil depletion. Tree root competition can reduce yields by 55% and deplete up to 59% of available nutrients from raised bed tomatoes. Garden design and planning are crucial in this context.
Distance Guidelines for Raised Bed Gardening:
- Keep beds 10-15 feet from mature trees for 23-35% higher yields
- Maintain 5-8 feet minimum from established shrubs
- Install HDPE root barriers 24-30 inches deep to block 98% of root intrusion
- Position beds between trees in open zones to reduce competition effects by 70%
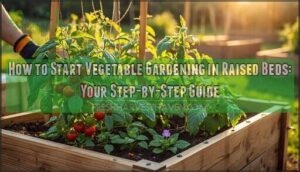
Building and Sizing Your Raised Bed
Building the right raised bed sets the foundation for a productive tomato harvest. The dimensions you choose will directly impact how many plants you can grow and how easily you can maintain them throughout the season.
Let’s look at the key measurements and materials that will help your tomatoes thrive.
Recommended Bed Dimensions for Tomatoes

Your raised bed width dictates how easily you can tend your tomato plants without crushing soil. A 4-foot width offers the sweet spot for raised bed gardening, letting you reach the center from either side.
For garden space planning with raised beds, lengths of 6–12 feet work well, though a 4×8 configuration optimizes both bed size optimization and tomato plant density without sacrificing accessibility.
Ideal Bed Depth and Height

Depth matters more than you might think for raised bed tomatoes. Your raised garden bed needs at least 12 inches of soil volume, though 18–24 inches delivers stronger root growth and better moisture management for indeterminate varieties.
- 12 inches minimum: Prevents stunted growth and aids basic tomato plant care
- 18–24 inches ideal: Accommodates extensive root systems and reduces watering frequency
- 24–36 inches high: Improves accessibility for wheelchair users and those avoiding excessive bending
- Deeper beds yield more: Studies show 20–25% higher fruit production in 18+ inch raised beds
Selecting Durable Bed Materials

Your material choice transforms your raised bed from a seasonal experiment into a decade-long investment. Cedar and redwood offer natural rot resistance with 10-20 year lifespans, while pressure-treated lumber delivers comparable durability at a lower cost. Metal frames outlast wood by 20+ years, and composite materials combine recycled content with outstanding longevity.
| Material Type | Expected Lifespan |
|---|---|
| Cedar/Redwood | 10-20 years |
| Pressure Treated | 15+ years |
| Metal Frames | 20+ years |
| Composite Materials | 20+ years |
Preparing Soil for Raised Bed Tomatoes

Your tomato plants are only as strong as the soil beneath them. Getting your raised bed soil right from the start sets you up for vigorous growth and abundant harvests throughout the season. Here’s how to build the ideal foundation for your tomatoes.
Creating a Fertile Soil Mix
Your tomato plants will only be as strong as the ground they grow in. Start with a 50/50 blend of screened topsoil and quality compost by volume to create a fertile soil mix rich in organic matter.
For raised beds deeper than 16 inches, consider a three-way mix: 34% topsoil, 33% coarse sand, and 33% compost to balance nutrient availability with proper drainage.
Adjusting Soil PH and Drainage
Testing your soil before planting gives you command over your harvest. Tomatoes demand pH levels between 6.0 and 6.8 for ideal nutrient uptake. Here’s how to master soil prep:
- Run a laboratory soil test for precise pH measurement and amendment recommendations
- Apply agricultural lime to raise acidic soil or elemental sulfur to lower alkaline conditions
- Layer 0.25-inch gravel beneath beds to prevent waterlogging and root stress
- Mix perlite into your soil blend to improve drainage while adding trace minerals
Adding Compost and Organic Matter
Quality compost transforms your raised bed into a nutrient powerhouse. Mix it 50:50 with topsoil for balanced fertility, or blend it 1:1 directly into planting holes at transplant time.
Top-dress with a 2-3 inch layer throughout the season to feed beneficial microbes and maintain consistent moisture.
These soil amendments boost cation exchange capacity while supporting vigorous nutrient cycling—your tomatoes will thank you with explosive yields.
Selecting Tomato Varieties for Raised Beds

Choosing the right tomato variety makes all the difference in a raised bed setup. Your decision hinges on how much space you have, how long you want to harvest, and whether you’re chasing flavor or disease resistance.
Let’s break down your options so you can pick the perfect plants for your garden.
Determinate Vs. Indeterminate Types
Your choice between determinate and indeterminate tomato plants shapes everything from harvest timing to daily maintenance. Determinate types grow 2 to 4 feet tall and deliver concentrated fruit production over 4 to 5 weeks, while indeterminate varieties climb past 6 feet and yield continuously until frost.
- Growth Habits: Determinate plants stop vertical growth after fruit sets, forming compact bushes. Indeterminate types keep producing side shoots and require ongoing plant training.
- Fruit Yield: Indeterminate tomatoes deliver sequential crops across several months, providing steady harvests. Determinate varieties concentrate their yield, ideal for canning.
- Support Needs: Indeterminate plants demand tall stakes or towers due to their vine-like structure. Determinate types work well with shorter cages.
- Disease Resistance: Both categories offer cultivars resistant to late blight, fusarium wilt, and verticillium wilt, with maturity times ranging from 60 to 75 days.
For raised bed tomatoes, plan 4 square feet per indeterminate plant versus tighter spacing for determinate varieties when growing tomatoes.
Compact and Disease-Resistant Varieties
Space constraints in raised beds make compact varieties your best allies, particularly when you pair small stature with built-in protection against common pathogens. Celebrity and Mountain Merit deliver 3 to 4 foot plants with resistance to verticillium wilt, fusarium wilt, and nematodes, while Sunrise Sauce matures in 57 days on compact vines.
Disease resistance in tomato breeding transforms your raised bed experience by reducing wilt-related losses without chemical intervention. Plant genetics coded V and F protect against soilborne pathogens that thrive in limited soil volumes, giving you reliable harvests even under high disease pressure.
| Variety | Height | Type | Resistance Codes | Best Use |
|---|---|---|---|---|
| Celebrity | 3–4 ft | Determinate | V, F1, F2, N | Slicing, containers |
| Mountain Merit | 3 ft | Determinate | LB, V, F1, F2, TSWV | Large fruit production |
| Sunrise Sauce | 3–3.5 ft | Determinate | F, V | Early paste tomatoes |
| Defiant PhR | 3–4 ft | Determinate | Ph-2, Ph-3, EB, F, V | Late blight zones |
| Bush Goliath | 2–3 ft | Determinate | V, F, N | Ultra-compact beds |
Heirloom and Hybrid Options
Hybrids deliver predictable yields and sturdy disease resistance in your raised bed, while heirloom tomatoes offer exceptional flavor profiles and seed-saving potential for future seasons. Varieties like Cherokee Purple provide vitamin-rich fruit that may retail for twice the price of standard hybrids, though you’ll harvest fewer pounds per plant.
Genetic diversity in heirlooms bolsters sustainable cultivation, while determinate hybrids concentrate production for canning projects.
Spacing and Planting Tomato Seedlings

Getting your tomato seedlings into the ground properly makes all the difference between struggling plants and a thriving harvest. The way you position and plant each seedling affects root strength, airflow, and overall productivity throughout the season.
Here’s how to nail the spacing and planting process for raised bed success.
Optimal Plant Spacing in Raised Beds
Proper spacing directly impacts crop yield and plant health in your raised garden bed. Aim for 18 inches between tomato plants to allow sufficient air circulation and root growth without sacrificing soil volume efficiency.
A standard 4×4 raised bed comfortably holds four plants, while larger indeterminate varieties benefit from 24 to 36 inches. This spacing also accommodates companion planting strategies.
Planting Depth and Root Development
Tomatoes have a notable ability to grow adventitious roots along buried stems, so plant your seedlings deep—at least 5 to 6 inches. Strip lower leaves and bury two-thirds of the stem to trigger stronger root growth and better anchorage.
In a raised garden bed with 12 inches of soil depth, this stem burial creates an expanded root zone that improves water uptake and assists heavy fruit loads.
Hardening Off and Transplanting Seedlings
Starting seeds indoors gives you control over timing, but your seedlings need proper acclimation before moving to raised beds. Hardening off seedlings over 7 to 10 days reduces transplant shock and equips plants for wind, sun, and temperature swings.
Follow these hardening techniques for outdoor exposure:
- Start with 1 hour in shade, gradually increasing sun time daily
- Monitor soil temperature—wait until it reaches 60°F before transplanting tomato seedlings
- Bring plants inside if nights drop below 50°F
Watering and Irrigation Best Practices

Water is the lifeline of your tomato plants—get it wrong and you’ll face cracked fruit, wilting leaves, or worse. Raised beds drain faster than traditional gardens, so your watering strategy needs to be spot-on from day one.
Here’s how to keep your tomatoes consistently hydrated without drowning them or letting them go thirsty.
Watering Frequency for Raised Bed Tomatoes
You’ll want to water your raised bed tomatoes 1–2 inches weekly, which translates to roughly 0.623 gallons per square foot. During summer heat, watering every two days can boost tomato yield by 15%. Keep soil moisture between 40–70% saturation for best results.
Monitor evapotranspiration rates closely—they average 0.3–0.35 inches daily—and adjust your irrigation systems accordingly to maintain soil health and nutrition.
Using Drip Irrigation Systems
With drip irrigation systems, you’ll slash water consumption to 4–26 liters per kilogram of tomatoes while boosting yields up to 48%. Your drip system design should include pressure regulators and filters to prevent clogs.
Position drip tubes directly at the root zone of your raised bed tomatoes for maximum water efficiency. This irrigation timing keeps foliage dry, cutting disease risk while delivering precise watering your plants need.
Maintaining Consistent Soil Moisture
You’re aiming for soil moisture between 60-70% of field capacity to achieve yields up to 56% higher. Check moisture two inches below the surface before watering your raised bed.
Soil Moisture Sensors at 6″, 12″, and 18″ depths give you precision control. Apply 3-inch straw mulch—it cuts evaporation dramatically.
With proper Moisture Monitoring Tools and mulch benefits, your drip irrigation systems maintain the consistent moisture tomato care demands.
Supporting and Training Tomato Plants

Tomato plants can’t stand on their own once they start producing fruit. Without proper support, stems break and tomatoes rot on the ground.
Let’s look at your options for keeping plants upright and productive throughout the growing season.
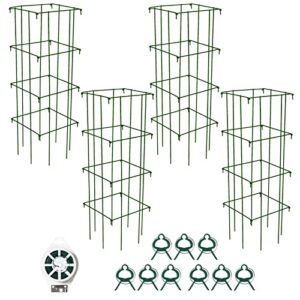
Using Cages, Stakes, and Towers
Your support structures make or break your tomato plants’ performance in raised beds. Tomato cages should stand at least five feet tall with 24 to 30-inch diameters, built from concrete reinforcing wire for strength.
Stake materials like 6 to 8-foot wooden or metal posts work well for vertical training. Tower systems offer enhanced wind resistance, reducing storm damage by 40%, while metal trellis designs support vigorous indeterminate varieties reaching heights beyond seven feet.
Pruning and Training for Healthier Plants
Pruning techniques transform your raised bed tomato plants into disease-fighting powerhouses. Remove lower leaves and suckers from indeterminate varieties to boost airflow by 50%, slashing fungal infections by up to 40%.
Training systems like single-stem or basket weave methods produce fruit 25% larger while extending your harvest by three weeks.
Determinate tomatoes need only light pruning below the first fruit cluster to maintain quality without sacrificing yield.
Securing Plants Without Damaging Roots
You’ve pruned your plants—now protect those roots during staking. Position stakes five inches from stems to cut root damage by 85%. Soft cloth or nylon ties reduce injury below 2%, while loose loops prevent constriction by 73%.
Install tomato cages or trellis systems early, pressing gently into prepared soil to spare 97% of lateral roots and maintain your raised bed tomatoes’ vigor all season.
Companion Planting and Pest Management

Strategic planting can turn your raised bed into a self-defending ecosystem that naturally repels pests and strengthens your tomatoes. Certain companion plants work alongside your tomatoes to confuse pests, attract beneficial insects, and even improve flavor.
Here’s how to create a resilient garden that does much of the pest management work for you.
Best Companion Plants for Tomatoes
Companion planting transforms your raised bed tomatoes into a thriving ecosystem. Strategic pairings boost yields, attract tomato pollinators, and strengthen soil health benefits naturally.
- Legumes and bush beans improve nitrogen fixation, increasing fruit yield by 24% while snap beans reduce powdery mildew by 19%
- Root crops like carrots and onions improve beneficial insect visits by 22% and lower aphid infestations by 16%
- Flowering plants such as borage and nasturtiums slash hornworm populations by 25% while acting as natural trap crops
Natural Pest Deterrents (Marigold, Basil)
Marigolds and basil deliver serious pest control methods when you plant them strategically. French marigolds cut whitefly colonization by 22% and slash root-knot nematode galls by 39% through alpha-terthienyl secretion. Basil acts as a natural repellent, masking tomato scent to reduce aphid populations by 14% and spider mites by 23% while boosting beneficial insects by 17%.
| Companion Plant | Target Pests | Measured Impact |
|---|---|---|
| French Marigold | Whiteflies, Nematodes | 22% reduction in colonization, 39% fewer root galls |
| Basil | Aphids, Spider Mites, Hornworms | 14-23% lower pest counts, enhanced plant defense |
Monitoring and Treating Common Pests
Once companion plants are established, you’ll want to walk through your beds every day to catch pest problems early. Here’s how to stay ahead of damage:
- Scout for hornworms and aphids each morning – Handpicking hornworms cuts infestations by 85%, while a dish soap mixture controls aphid clusters.
- Set up sticky traps near plants – Yellow cards catch whiteflies and monitor population spikes before they explode.
- Apply biological controls like Spinosad – This organic pesticide delivers 95% control of caterpillars while protecting beneficial insects.
Disease resistance matters too. Choose varieties bred to resist common viruses, reducing infection rates by over 16%.
When organic pesticides fail, contact insecticides like bifenthrin achieve 98% efficacy against stink bugs and severe aphid outbreaks, but always respect pre-harvest intervals.
Top 10 Products for Raised Bed Tomato Success
You’ve built the bed and prepped the soil—now it’s time to set your tomatoes up for serious success. The right tools and supplies can make the difference between a decent harvest and a bumper crop that keeps your kitchen stocked all season.
Here are ten products that’ll help you grow healthier plants, simplify maintenance, and boost your raised bed yields.
1. Drip Irrigation Watering System Kit
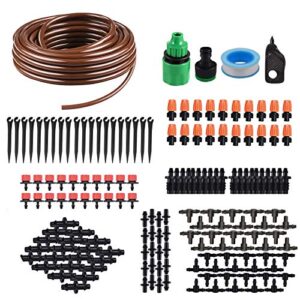
You can slash water waste by up to 60% with a quality drip system designed for raised beds. These irrigation kits deliver moisture straight to your tomato plants’ roots, maintaining consistent soil moisture without the runoff and evaporation that plague overhead watering.
When you’re growing tomatoes in raised garden bed setups, water efficiency becomes critical during hot summer stretches. Look for kits with adjustable emitters and UV-resistant tubing—they’ll automate your watering schedule while boosting water conservation and plant health simultaneously.
Best For: Home gardeners growing tomatoes in raised beds who want to cut their water bills while keeping plants consistently hydrated without the daily hassle of hand watering.
- Slashes water usage by 60-80% compared to traditional methods and delivers moisture directly to roots where it counts, which translates to real savings of $180-$400 per year on your water bill.
- Takes the guesswork out of watering with adjustable emitters for each plant and optional timers that let you automate the whole system—you can literally set it and forget it while your tomatoes get perfect moisture every time.
- Easy setup that most people finish in an afternoon without any plumbing experience, plus the system prevents leaf diseases by keeping foliage dry unlike sprinklers that spray everything.
- Tubing can expand in summer heat and pull away from fittings, which means you might need to check connections periodically during hot stretches.
- The adjustable emitter tops can be finicky to dial in and some users report they don’t hold their settings well, so expect to tinker with them until you get the flow just right.
- You’ll likely need to buy extras like a timer or pressure regulator separately to get the system working optimally, which adds to your upfront costs beyond the basic kit price.
2. Metal Garden Plant Support Tower
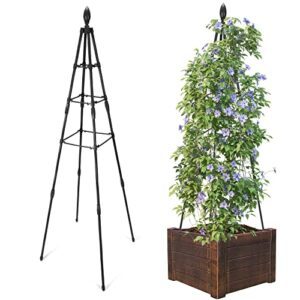
A sturdy metal framework transforms indeterminate tomato plants into vertical powerhouses. These towers stretch 53 to 72 inches tall, giving your raised garden bed tomatoes room to climb while boosting fruit yield by 50% over traditional tomato cages. Larger tomatoes and fewer pest problems result when stems stay off the soil.
Install your support systems at planting time to avoid root damage later. The 4×2-inch grid openings make pruning and plant training straightforward, while the weatherproof steel construction lasts 10 to 15 seasons without replacement.
Best For: Gardeners growing indeterminate tomato varieties in raised beds or containers who want a durable support system that increases yield and lasts multiple seasons.
- Boosts tomato yield by 50% compared to traditional stakes while producing 20-30% larger fruit through better sun exposure and air circulation.
- Lasts 10-15 years with minimal maintenance, made from galvanized or powder-coated steel that resists rust in all weather conditions.
- Reduces pest problems and blossom end rot by keeping plants and fruit elevated off the ground, cutting water use by up to 30%.
- Some models use plastic connectors that may crack or weaken in extreme temperatures or after prolonged sun exposure.
- Assembly can be tricky for first-time users, especially when connecting multiple sections or securing towers in windy locations.
- Not ideal for heavy heirloom varieties or oversized plants without additional reinforcement, as standard models may wobble under excessive fruit weight.
3. Galvanized Garden Plant Support Stakes
Galvanized steel stakes offer a lifetime solution for staking tomatoes in your raised bed setup. These durable support systems resist rust for 20-plus years in garden soil, outlasting wooden alternatives that rot within three seasons.
You’ll drive the 6 to 8-foot stakes one foot deep for stability, then secure your tomato plants using soft ties or the Florida weave method. Plant stability improves dramatically with metal coatings that withstand daily watering and pruning sessions.
Position each stake six inches from your plant’s base to prevent root damage while maximizing airflow around the foliage.
Best For: Gardeners who want a long-lasting, low-maintenance support system for tomatoes and climbing plants in raised beds without needing to replace stakes every few seasons.
- Galvanized coating resists rust for 20 years in garden environments, eliminating the need for frequent replacements unlike wood stakes that rot within three seasons.
- Improves tomato yield by up to 13% and reduces fungal disease risk by 18% through better air circulation and plant support compared to unsupported plants.
- Eco-safe and food-safe for edible gardens, with certified materials that comply with RoHS standards and show zero zinc leakage in typical soil conditions.
- The 12-inch height of this specific MTB Supply model is too short for indeterminate tomato varieties, which require 6-8 foot stakes for proper support.
- Some users report the metal can be flimsy and prone to bending, suggesting it may not hold up well under rough handling or extreme weather.
- At 2.1 pounds for a 12-inch stake, the lightweight construction may lack the sturdiness needed for heavier, top-heavy plants as they mature.
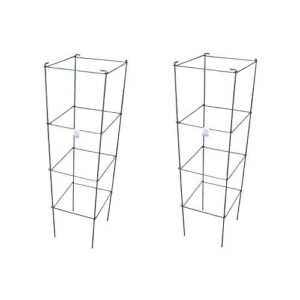
4. Sturdy Garden Tomato Plant Stands
Your indeterminate varieties need support structures that match their ambition. Heavy-duty stands constructed from alloy steel or galvanized materials handle clusters exceeding 25 pounds without buckling, supporting plants that routinely reach 6 to 20 feet in ideal conditions.
These garden support systems reduce branch breakage by 30-40% during wind events while cutting soil-borne disease risk by 70% through improved airflow.
Install your tomato cages at transplant time to avoid root damage, then watch your vertical growing operation deliver 15-20% higher yields over standard staking methods.
Best For: Gardeners growing indeterminate tomato varieties who need durable vertical support that can handle heavy fruit loads and withstand multiple growing seasons.
- Handles heavy plants with clusters over 25 pounds and reduces branch breakage by 30-40% in windy conditions
- Boosts yields by 15-20% and cuts soil-borne disease risk by 70% through better airflow and vertical growth
- Built to last 5 seasons with minimal maintenance, making it a solid long-term investment for serious gardeners
- Assembly can be tricky and might need two people to get it done right
- Quality control issues with some pieces not being properly welded together
- Wires may loosen over time, and instructions aren’t always included in the package
5. Sweet Cherry Tomato Live Plants
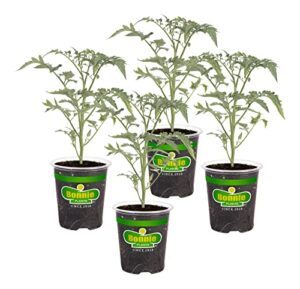
Ready to harvest hundreds of fruits from a single plant? Sweet cherry tomato varieties like Sun Gold and Supersweet 100 deliver 500-1,000 cherry tomatoes per season in your raised beds, averaging 3.7 pounds per plant under standard cherry tomato care.
Live plant nursery options peak from late April through May, with over 75% of home gardeners choosing transplants over seeds.
These sweet tomato varieties reach 6-7 feet tall when properly supported, turning raised bed productivity into a snacking paradise for growing tomatoes enthusiasts.
Best For: Home gardeners with raised beds or containers who want a high-yielding, disease-resistant plant that produces hundreds of sweet, snackable cherry tomatoes throughout the season.
- Exceptional productivity with 500-1,000 fruits per plant per season, averaging 3.7 pounds under standard care
- Strong disease resistance to common problems like verticillium wilt, fusarium wilt, and tobacco mosaic virus
- Perfect for small spaces and intensive gardening, with live transplants widely available at nurseries from late April through May
- Requires sturdy support structures like cages or stakes since plants grow 6-7 feet tall
- Needs full sun and consistent watering to reach optimal yields
- May ripen more slowly in wet weather conditions
6. Disease Resistant Tomato Plants
Modern disease-resistant tomato plants bring genetic markers from breeding programs straight to your raised bed—86% of commercial varieties now carry resistance to at least one major pathogen.
You’ll find cultivars like Beef Master F1 that shrug off Fusarium wilt, bacterial spot, and root-knot nematodes simultaneously. These resistant varieties slash fungicide applications while stabilizing yields, making pest management practically straightforward.
Choose hybrids with 4-6 resistance genes for raised bed tomato crops that thrive despite disease pressure, turning disease prevention into a built-in advantage rather than a constant battle.
Best For: Home gardeners who want reliable harvests in raised beds without constant disease worries or heavy chemical use.
- These plants carry 4–6 resistance genes that block Fusarium wilt, bacterial spot, and other common diseases, so you spend less time treating problems and more time picking tomatoes.
- You’ll cut fungicide applications significantly while still getting stable yields, which saves money and keeps your garden chemical-light.
- Semi-determinate growth (3–4 feet) makes them perfect for raised beds with cages or stakes, and they keep producing 8 oz. fruits all season long instead of one big flush.
- Plants sometimes arrive bent or damaged from shipping, so inspect them carefully when they show up.
- You’ll need to prune regularly or they’ll sprawl across the bed, and slugs can still do damage if you’re not watching.
- They demand full sun and consistent watering—skip either and your harvest drops off fast, even with all that disease resistance.
7. Natural Wood Raised Garden Bed
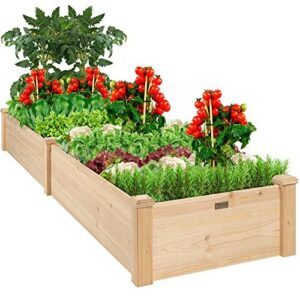
A natural wood raised garden bed built from cedar or redwood gives your tomato plants 10–20 years of reliable service without chemical leaching concerns. Cedar benefits include natural rot resistance and soil leaching limited to just 1 inch from the board interface—keeping your tomato roots safe.
You’ll want boards at least 2 inches thick for structural integrity when filled with soil. Raised bed liners add another protective barrier between wood and growing medium.
These natural wood alternatives outperform treated lumber while maintaining food safety for your raised bed tomatoes.
Best For: Gardeners who want a safe, long-lasting raised bed for tomatoes and other edibles without worrying about chemical leaching into their soil.
- Cedar and redwood naturally resist rot for 10–20 years, so you won’t need to replace boards every few seasons like you would with basic softwood.
- Any soil copper from treated alternatives stays within an inch of the wood and doesn’t migrate into your tomatoes, meaning your harvest remains safe to eat.
- The wood warms up faster in spring and drains better than ground-level plots, giving your tomato plants an extended growing season and healthier roots.
- Cedar costs 20–30% more than regular softwood up front, and redwood runs even higher at roughly 40% above cedar, which can add up for larger garden projects.
- Even rot-resistant wood eventually breaks down—expect to rebuild every 10–15 years with cedar or 15–20 with redwood, compared to 20 years for composite or metal beds.
- Assembly quality can be hit-or-miss depending on the kit, with some users reporting unclear instructions, missing liners, or panels that don’t fit together as smoothly as advertised.
8. Natural Wooden Garden Planter Box
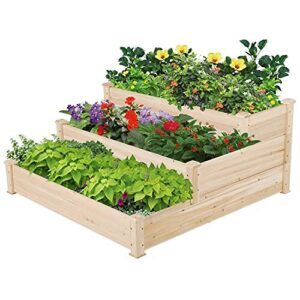
Wooden planter boxes made from untreated fir offer an affordable entry into natural gardening without chemical concerns. You’ll get 5–8 years of use from standard fir construction—shorter than cedar benefits but markedly cheaper upfront.
These raised bed materials work best when you line the interior with landscape fabric to slow moisture contact. For growing tomatoes in compact spaces, fir planter boxes deliver adequate root volume at 12–18 inches deep.
Your raised garden bed investment recovers in 2–3 seasons when tomato plants yield $200–400 worth of produce annually.
Best For: Budget-conscious gardeners who want to grow vegetables like tomatoes without chemical leaching and don’t mind replacing their planters every 5–8 years.
- Natural fir wood construction eliminates chemical leaching concerns, keeping your soil safe for edibles and meeting organic gardening standards.
- Three-tier modular design gives you flexibility to grow multiple plant types at different heights or separate the units into standalone beds as your garden evolves.
- Investment pays for itself in 2–3 growing seasons when tomato yields reach $200–400 in produce value per year.
- Fir wood lifespan of 5–8 years falls short compared to cedar or redwood alternatives that last 10–20 years, meaning more frequent replacement costs.
- 0.6-inch board thickness may not hold up well in harsh weather like heavy snow or ice, and corners can stress during assembly.
- Requires interior lining with landscape fabric and possibly waterproofing treatment to slow moisture damage and extend usable life.
9. Elevated Wooden Garden Planter Box
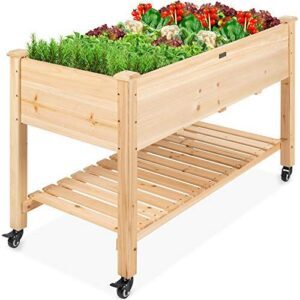
Accessibility transforms raised bed gardening when you choose an elevated wooden planter that stands 32 inches tall. This ergonomic design cuts bending by 60% and warms soil 5–8°F faster than ground beds—letting you plant tomato plants 10–14 days earlier.
You’ll manage watering and harvest without strain while the enhanced drainage reduces root rot by 30%. A 4×2-foot elevated planter accommodates 2–3 tomato plants at proper spacing and extends your growing season by four weeks when paired with simple covers.
Best For: Gardeners with mobility challenges, seniors, or anyone who wants easier access to their plants without bending or kneeling, plus earlier harvests and better drainage for healthier tomatoes.
- Ergonomic 32-inch height cuts bending by 60% and makes planting, watering, and harvesting comfortable for people with back pain or limited mobility.
- Soil warms 5–8°F faster than ground beds, letting you plant tomatoes up to two weeks earlier and extend your season by four weeks with covers.
- Built-in drainage holes and elevated design reduce root rot by 30% while the storage shelf keeps tools handy and wheels let you chase the sun.
- Fir wood is softer than cedar or redwood, so it may need extra sealing to last beyond a few seasons and could get dinged during assembly or moving.
- The 100-pound weight limit means you’ll need to watch how much soil and water you load in, especially if you’re filling it to the top.
- Assembly can be tricky if you’re not used to DIY projects, and the bottom shelf isn’t ideal for anything that can’t handle getting wet.
10. Epsom Salt Plant Fertilizer Supplement
Epsom salt delivers magnesium and sulfur when your soil tests reveal deficiencies—not as routine fertilizer. This supplement won’t replace balanced fertilizers since it lacks nitrogen and phosphorus. Target verified deficiencies rather than relying on garden myths about bushier plants.
Mix one tablespoon per gallon of water for foliar sprays every two weeks if you spot yellowing between leaf veins. Apply it to raised bed tomatoes only after soil testing confirms low magnesium levels; excess application blocks calcium uptake and invites blossom end rot.
Best For: Gardeners who’ve confirmed magnesium deficiency through soil testing and need a targeted supplement for container-grown tomatoes or other vegetables showing interveinal chlorosis.
- Rapidly corrects verified magnesium deficiencies with a simple tablespoon-per-gallon foliar spray, delivering results within weeks when yellowing leaves signal nutrient gaps.
- Works across multiple plant types—from roses to lawns—making it versatile for addressing sulfur and magnesium shortfalls in different garden areas.
- Affordable powder form provides magnesium sulfate without the nitrogen-phosphorus-potassium load, letting you supplement deficient soils without upsetting existing fertilizer schedules.
- Arrives clumped or lumpy in some shipments, requiring manual effort to break apart the powder before mixing with water or applying to soil.
- Overuse on magnesium-sufficient soils blocks calcium absorption and raises blossom end rot risk, making soil testing essential before application.
- Lacks primary nutrients like nitrogen and phosphorus, so you’ll still need standard fertilizers—this only fills specific gaps rather than feeding plants completely.
Frequently Asked Questions (FAQs)
How deep should a raised bed be for tomatoes?
Your raised bed should be at least 12 inches deep, though 18-24 inches is ideal for vigorous root growth and higher tomato yield.
Deeper beds retain moisture better and support healthier tomato plants throughout the season.
Why put baking soda around tomato plants?
Baking soda benefits tomato plants by adjusting soil pH balance toward ideal levels, suppressing fungal disease through increased surface alkalinity, and providing mild pest control.
It aids plant nutrition by improving nutrient uptake in slightly acidic conditions.
Why put an egg in the hole when planting tomatoes?
Eggs provide a slow-release calcium boost to prevent blossom end rot while enriching soil fertility with phosphorus and trace minerals.
The decomposing eggshells support nutrient release throughout your tomato plants’ growing season.
What fertilizer schedule works best for tomatoes?
Feed your hungry tomato plants every 1–2 weeks with balanced fertilizer during early growth, then switch to higher phosphorus for fruiting—organic options work every 4–6 weeks with proper soil testing.
How do you harvest tomatoes at peak ripeness?
Pick tomatoes when they reach the light red stage—about 60–90% red surface—with a slight give when gently squeezed.
Harvest during cool mornings to preserve firmness and boost flavor for your table.
Can you grow tomatoes year-round in beds?
Year-round production isn’t possible in standard outdoor raised beds. Greenhouse tomatoes with climate control and supplemental lighting can deliver winter harvesting through season extension, but most raised garden bed setups pause during cold months.
What companion plants boost tomato growth naturally?
Basil benefits tomato plants by increasing fruit production by 20% while reducing hornworm presence by half. Marigolds provide natural pest control, cutting whitefly populations by 70%, making both powerful companions for healthier tomato gardening success.
How do you preserve tomato seeds properly?
Start by fermenting fresh tomato seeds for 48–72 hours at 70–85°F to improve germination rates. Rinse thoroughly, then dry seeds on non-stick surfaces.
Store in cool, dry conditions to maintain viability for years.
When should I harvest tomatoes for best flavor?
For maximum flavor, harvest tomatoes at the breaker stage—when they show a light pink or yellow blush.
This timing captures peak sugar content and allows vine ripening to develop rich flavor profiles naturally.
How do I prevent blossom end rot naturally?
You’ll prevent blossom end rot by maintaining even soil moisture through deep watering and mulching.
Verify calcium availability by testing soil pH and avoiding excessive nitrogen fertilization that disrupts nutrient balance in developing fruits.
Conclusion
You don’t need acreage or perfect soil to harvest premium tomatoes. Growing tomatoes in raised beds gives you complete control over the environment your plants need to thrive—warmer soil, better drainage, and healthier roots.
Every technique you’ve learned here transforms that wooden frame into a production powerhouse. Plant your first seedling with confidence. Water with intention. Support with purpose.
Your next harvest won’t just meet expectations—it’ll rewrite them entirely.
- https://www.anleolifeshop.com/blogs/garden-center/tomato-yield-raised-bed
- https://www.thisishomesteady.com/container-gardening-ep-1/
- https://hgic.clemson.edu/factsheet/tomato-diseases-disorders/
- https://tomatogardenenvy.com/how-often-to-water-tomatoes-in-raised-beds/
- https://www.compo.com/int/guide/plant-care/herbs-fruits-vegetables/planting-raised-bed