This site is supported by our readers. We may earn a commission, at no cost to you, if you purchase through links.
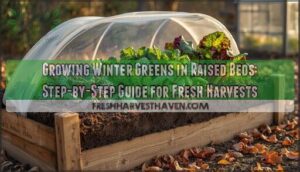
Plant hardy varieties like kale, spinach, and Swiss chard by late summer for best results. Row covers and cold frames become your best friends for frost protection.
The secret isn’t just what you plant, but how you layer your materials and time your plantings to work with winter’s rhythm rather than against it.
Table Of Contents
- Key Takeaways
- Building and Preparing Raised Beds
- Preparing Soil for Winter Greens
- Selecting and Planting Winter Greens
- Protecting and Maintaining Winter Crops
- Harvesting and Using Winter Greens
- Frequently Asked Questions (FAQs)
- What month do you plant winter greens?
- What vegetables should not be grown in a raised bed?
- What is the best winter cover crop for raised beds?
- What are the best greens to grow in raised beds?
- Will plants survive winter in raised beds?
- What to put on raised garden beds for winter?
- How do you plant greens in a raised bed?
- What are the easiest winter vegetables to grow?
- How do I prepare my raised beds for winter?
- Should you leave a raised garden bed bare over winter?
- Conclusion
Key Takeaways
- You’ll need to start your raised bed setup in early fall, layering branches, green waste, and compost-rich soil to create proper drainage and winter insulation.
- Plant your winter greens like kale, spinach, and Swiss chard by late summer (August-September) to ensure they’re established before the first frost hits.
- Use row covers and cold frames as your main defense against harsh weather—they can boost temperatures by 8-20°F and extend your harvest window by weeks.
- Harvest during warm afternoons when plants aren’t frozen, picking outer leaves while letting the center keep growing for continuous winter harvests.
Building and Preparing Raised Beds
You’ll want to build your raised beds with sturdy materials—wood, metal, or prefab—and time the setup in early fall for best results.
For winter greens, layer the base with pruned branches, green waste, and rich compost to help hold warmth and moisture through cold months.
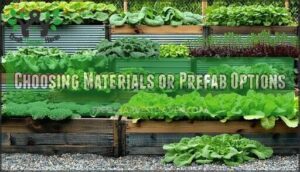
Choosing Materials or Prefab Options
When setting up your raised bed garden, choosing the right path makes all the difference. Consider these:
- Check material durability—metal lasts, wood weathers.
- Debate DIY vs. prefab—prefab is quick, DIY means custom.
- Factor in aesthetic choices.
- Compare size considerations for portable raised beds. Consider the best materials available for longevity.
Do your cost analysis—DIY saves cash but takes time.
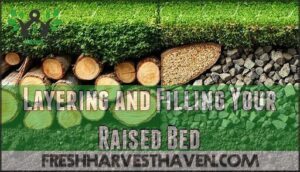
Layering and Filling Your Raised Bed
Once you’ve picked your raised bed, focus on layering materials for strong drainage considerations and long-term decomposition. Start with branches or shrub trimmings, then add green waste, packing each layer lightly to avoid soil compaction.
Top off with garden soil blended with rich compost and soil amendments for nutrient density—your greens will thank you later when it’s time to fill a raised bed.
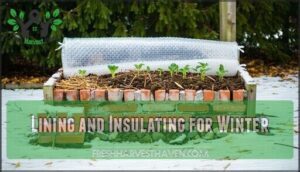
Lining and Insulating for Winter
Once you’ve added the soil layers, it’s time to talk insulation for winter vegetables. Bubble Wrap works wonders for heat retention when lining your raised bed walls, while bed liners help with moisture control and block soil contamination.
Try winter mulch like straw for an extra layer. Using brick or stone can provide better temperature regulation. That’s how you insulate soil and keep plants protected from cold snaps.
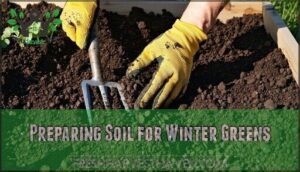
Preparing Soil for Winter Greens
You’ll want to start by clearing away spent crops and weeds, then run a quick soil test to check nutrient levels before planting hardy greens like kale or spinach.
Taking these steps in late summer ensures your raised beds are well-prepared for consistent winter harvests.
Removing Weeds and Old Plants
Before winter sets in, walk through and with a sharp eye, use the right tool selection for weed identification. Pull weeds and remove annuals completely, then trim back perennials and clear green waste.
For proper plant disposal, compost or bag fall leaves, but avoid disturbing the soil too much. Keeping roots out now is key to preventing regrowth during fall garden cleanup.
Conducting a Soil Test
You’ve pulled the weeds; now it’s time to get your soil test kit out. Soil testing sheds light on soil pH and key soil nutrients, spotting any nutrient deficiency before it stunts your greens.
Use proven testing methods, gathering samples from different bed spots. Interpreting results helps you nail down corrective amendments and dial in overall soil fertility. These reports estimate available nutrient levels in the soil.
Amending and Mulching The Soil
Once you’ve run a soil test and checked the pH, it’s time to amend the soil. Reach for aged compost or slow-release fertilizers to boost soil fertility and balance pH. You can find quality compost products online.
Apply winter mulch after planting—straw or shredded leaves work well. Mulch application cuts down weeds and helps maintain moisture, making your soil ready for hearty greens.
Selecting and Planting Winter Greens
When selecting winter greens for your raised bed, choose hardy varieties like kale, spinach, or Swiss chard, and aim to plant them by late summer for the best winter harvests.
To achieve the best results, match each green to your local climate and plan planting times carefully, since certain types, such as arugula or tatsoi, thrive even as temperatures fall.
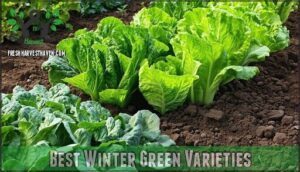
Best Winter Green Varieties
Once your raised beds are ready, pick winter vegetables known to thrive in cool months. Go with kale varieties—like Siberian—built for real cold. Try spinach options such as ‘Winter Giant’ for extra hardiness.
Swiss chard shows resilience, while lamb’s lettuce and sturdy lettuce types keep salads interesting. Asian greens round out your winter lineup and grow fast.
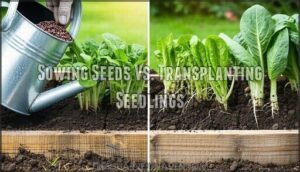
Sowing Seeds Vs. Transplanting Seedlings
Both methods work for your winter garden, but seed starting indoors gives you better root development and avoids transplanting shock. Direct sowing timing works great for hardy winter vegetables like spinach and kale.
Indoor seed starting costs more upfront but extends your growing season. For raised bed gardens, transplanting seedlings lets you control spacing better.
Consider cost comparison when planning your winter crops strategy.
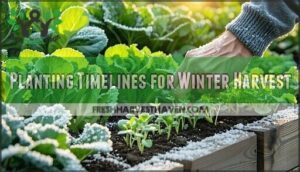
Planting Timelines for Winter Harvest
Timing your winter garden correctly makes all the difference between harvesting fresh greens in January or watching your raised bed sit empty. Ideal sowing for most winter vegetables starts in late summer, with frost dates determining your planting window. Regional variations mean northern gardeners start earlier than southern counterparts.
- Start planting winter vegetables 6-8 weeks before your area’s first frost date
- Succession planting every 2 weeks ensures continuous harvests through winter months
- Hardy varieties like kale and spinach can be sown later than tender crops
- Check regional frost dates through local extension services for precise timing
- Extending harvest periods requires strategic planning and protective coverings
Protecting and Maintaining Winter Crops
Once your winter greens are established, they’ll need consistent protection from harsh weather and regular maintenance to thrive through the cold months.
You’ll monitor temperature drops, adjust watering schedules for slower growth rates, and watch for common winter pests that target stressed plants.
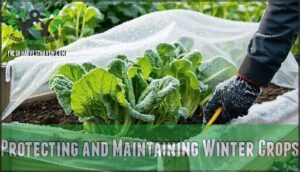
Using Row Covers and Cold Frames
When cold weather arrives, row covers and cold frames become your winter vegetables’ best friends. These frost protection tools can extend your harvest window by weeks.
| Cover Type | Temperature Boost | Best For |
|---|---|---|
| Lightweight Row Cover | +2°F | Light frost protection |
| Heavy-Duty Row Cover | +8-10°F | Severe cold snaps |
| DIY Cold Frame | +10-15°F | Continuous winter growing |
| Commercial Cold Frame | +15-20°F | Year-round production |
| Double Protection | +20°F+ | Extreme cold climates |
Row covers made from spun-bonded materials allow air and water through while boosting soil temperature. Cold frame styles range from simple wooden boxes with old windows to fancy hinged models. Both offer pest protection and create microclimates perfect for hardy greens. They can extend the season by several weeks. Remember proper ventilation needs—prop open cold frames on sunny days above 45°F to prevent overheating your precious winter crops.
Watering and Fertilizing in Cold Weather
Winter vegetable gardening requires different watering strategies compared to summer crops. Raised bed plants need consistent moisture, but cold-weather conditions mean less frequent watering. This is because dormancy slows nutrient uptake. Water midday when temperatures peak to prevent ice buildup around roots.
Winter soil retains moisture longer, so always check before watering. Apply liquid fertilizer monthly during mild spells. Cold weather fertilizer can significantly boost growth. Mulch is essential to protect against freeze-thaw cycles that can damage plant crowns.
Monitoring for Pests and Diseases
Beyond watering schedules, your winter vegetable gardening success hinges on early detection of threats lurking in raised bed corners. Regular scouting prevents small problems from becoming garden disasters that derail your winter garden care efforts.
- Check weekly for slug trails – Look for silvery paths on soil and chewed leaf edges, especially after rain
- Examine leaf undersides – Aphids cluster there while powdery mildew shows white patches on kale surfaces
- Practice crop rotation – Move plant families every 3-4 years to break disease cycles naturally
- Apply organic controls early – Diatomaceous earth and copper barriers work best before pest populations explode
Harvesting and Using Winter Greens
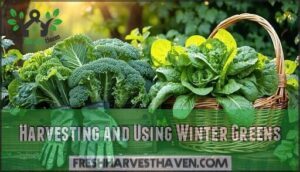
You’ll harvest your winter greens from November through March, picking outer leaves while letting the center continue growing for extended harvests.
Store freshly cut greens in the refrigerator for up to a week, and use them in soups, salads, and stir-fries to enhance their nutritional benefits during the coldest months.
Tips for Harvesting in Cold Conditions
Harvest your raised bed winter vegetables during warm afternoons when plants aren’t frozen to avoid mushy, damaged leaves. Frozen greens become "gooey when they thaw out" and compromise quality.
Select sharp garden scissors for clean cuts that promote regrowth. Understanding leafy greens basics is essential for a successful harvest.
Ideal timing means collecting cold-resistant winter vegetables before temperatures plummet below their tolerance levels. Post-harvest care involves gentle handling to prevent bruising delicate leaves.
Storing and Incorporating Greens Into Meals
Fresh harvest winter greens need proper storage techniques to enhance their nutritional benefits. Store spinach and lamb’s lettuce in containers lined with damp paper towels. Freezing greens requires blanching first—spinach for ninety seconds, others for two minutes.
Asian salads featuring rocket work well with quick sautéing. Cooking methods include steaming, stir-frying, and adding to soups.
Recipe ideas range from wilted spinach salads to hearty winter grain bowls with mixed greens.
Frequently Asked Questions (FAQs)
What month do you plant winter greens?
Like catching the perfect wave, timing’s everything with winter greens. You’ll want to plant most varieties in late summer—think August through early September—for that sweet November-to-February harvest window.
What vegetables should not be grown in a raised bed?
Large root vegetables like carrots and potatoes struggle in shallow raised beds. Deep-rooted crops need more soil depth than most raised beds provide effectively.
What is the best winter cover crop for raised beds?
Crimson clover works best for winter cover crops in raised beds. You’ll get nitrogen fixation, weed suppression, and spring flowers that attract beneficial insects before incorporation.
What are the best greens to grow in raised beds?
Kale, spinach, and Swiss chard excel in raised beds, tolerating temperatures down to 20°F. You’ll also have success with arugula, bok choy, and winter lettuce varieties for reliable harvests.
Will plants survive winter in raised beds?
Most winter greens survive freezing temperatures surprisingly well – kale and spinach tolerate down to 20°F in raised beds.
You’ll get better cold protection since raised beds drain well and warm faster than ground-level gardens.
What to put on raised garden beds for winter?
You’ll want to add a thick layer of mulch, like straw or shredded leaves, to insulate your beds. Cover crops or row covers also protect plants from harsh winter conditions.
How do you plant greens in a raised bed?
You’ll prepare soil by adding compost, then space seeds according to packet instructions. Plant lettuce every two weeks for continuous harvests. Water gently and mulch around plants.
What are the easiest winter vegetables to grow?
Like sturdy soldiers standing guard against winter’s chill, kale and spinach lead the pack for beginner-friendly cold-season crops. You’ll also find success with Swiss chard, arugula, and lettuce varieties designed for winter growing.
How do I prepare my raised beds for winter?
Start by clearing debris and adding a four-inch compost layer. Line walls with bubble wrap for insulation.
Test soil pH and nutrients. Apply balanced fertilizer, then mulch heavily to protect roots from freezing temperatures.
Should you leave a raised garden bed bare over winter?
Don’t leave your raised bed bare over winter. Cover soil with mulch, plant cover crops, or grow cold-hardy greens to prevent erosion and maintain fertility.
Conclusion
Successfully growing winter greens in raised beds transforms cold months into productive harvest seasons. You’ve learned that proper bed preparation, soil amendments, and strategic planting timing create the foundation for thriving crops.
Cold protection methods like row covers extend your growing season substantially. The key lies in working with winter’s natural rhythm rather than fighting it.
With consistent watering, pest monitoring, and proper harvesting techniques, you’ll enjoy fresh spinach, kale, and Swiss chard throughout winter. Your raised beds become year-round food production systems.

