This site is supported by our readers. We may earn a commission, at no cost to you, if you purchase through links.
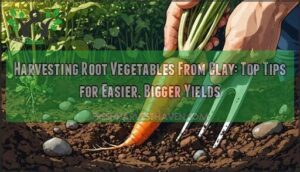
Mix in compost or manure each season—think of it as giving your soil a daily smoothie—to help those veggies grow straight and strong. Handle roots gently to stop them snapping.
Craving more secrets for beating the clay? Stick around for tried-and-true tips that really work.
Table Of Contents
- Key Takeaways
- Clay Soil Characteristics and Challenges
- Best Root Vegetables for Clay Soil
- Preparing Clay Soil for Root Crops
- Planting Techniques for Success
- Timing Your Root Vegetable Harvest
- Effective Harvesting Methods in Clay
- Post-Harvest Care and Storage Tips
- Frequently Asked Questions (FAQs)
- How to break up clay soil for vegetable garden?
- How to know when root vegetables are ready to pick?
- How deep should clay soil be loosened before harvest?
- What tools work best for clay soil harvesting?
- When is clay soil too wet to harvest?
- How to prevent root vegetables from breaking apart?
- Can you harvest clay-grown vegetables in winter?
- How can I prevent root vegetables from tasting bitter?
- What pests are common when growing roots in clay?
- Are there companion plants that benefit root crops in clay?
- Conclusion
Key Takeaways
- Always loosen your clay soil before harvest with a garden fork or broadfork so you don’t snap root vegetables as you pull them.
- Mix in compost or manure each season to help roots grow straight and make both planting and harvesting easier.
- Pick dry weather for harvesting—wet clay grabs onto roots, making them harder to lift without damage.
- Store harvested roots in a cool, dark spot with good airflow and the right humidity to keep them fresh for months.
Clay Soil Characteristics and Challenges
You’ll notice clay soil feels heavy and sticky, especially after rain, which makes it tough on root vegetables. It’s important to break up those dense clumps and mix in organic matter to help roots grow straight and strong.
Understanding Clay Soil Structure
Ever dig in clay and feel like you’ve hit concrete? That’s because clay particle size is tiny, making soil pore space scarce. Water retention runs high, but roots struggle with compaction issues.
For better vegetable harvesting, loosen soil before planting. Focus on root penetration and crop management—these agricultural practices make all the difference for easy harvesting techniques.
Impact on Root Vegetable Growth
Clay soil density acts like a tough gatekeeper, making it hard for roots to grow straight or deep. You’ll spot root size variation—some skinny, some stubby.
Poor nutrient availability and waterlogged roots can slow growth, mess with harvest timing, and cut down crop yield.
For better agriculture results, improve texture before planting for smoother harvesting and smarter crop management.
Common Harvesting Obstacles
After learning how clay limits root size, let’s tackle the real trouble at harvest: stuck veggies and broken roots. Clay’s heaviness causes root breakage, tough pulling, and even pest interference. Here’s a quick guide:
- Watch out for soil compaction
- Use sturdy harvesting tools
- Harvest during dry weather
- Expect some root breakage
- Beware of efficient harvester… moles!
Best Root Vegetables for Clay Soil
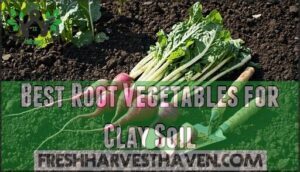
You can grow tough root vegetables like daikon radish, beets, turnips, and salad onions in clay soil if you work the ground first.
Start by loosening the soil and mixing in compost so roots will have an easier path as they grow.
Daikon Radish and Strong Taproots
When thick clay tests your patience, try planting daikon radish for its famous Daikon Soil Breaking ability. The strong taproot pushes deep, easing Harvesting Challenges and pulling up nutrients that help nearby plants, making it great for Companion Planting.
To get the best out of your clay soil, work in plenty of compost, make sure it gets enough water, and stick to good gardening habits for an easier harvest.
Beets, Turnips, and Salad Onions
When you’re done marveling at the power of taproots, shift gears to beet varieties, turnips, and salad onions. Work compost into your rows for better harvesting and richer turnip flavor.
Space each crop so roots aren’t elbowing neighbors. Water deeply, mulch often, and try companion planting for pest control.
Follow this harvesting guide for longer onion storage and bigger yields.
Crops to Avoid in Heavy Clay
Not every root crop is a good fit for heavy clay. Poor choices like carrots, parsnips, and potatoes often end up root bound, stunted, or waterlogged. These crops struggle to grow straight, get harvested whole, or produce much of a yield.
For better results in clay, avoid crops known for limited yield and environmental impact on tough agricultural ground. Amending the soil with compost can improve soil structure and fertility.
Preparing Clay Soil for Root Crops
Getting clay soil ready for root crops means you’ll need to mix in compost or manure, then build up beds or mounds to help water drain.
Add cover crops before planting to break up the soil and give your roots room to grow straight.
Amending With Compost and Manure
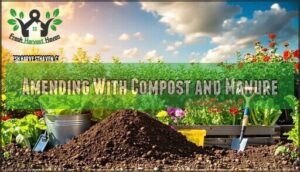
So, you’ve picked out root veggies perfect for clay. Now, let’s turn mud into a crop-friendly bed.
Work in a generous mix of well-rotted manure and rich compost, digging it deep into the soil. About a bucket per square yard is a good target.
This not only packs in nutrients but also helps loosen up heavy clay, making it easier for your root veggies to thrive—plus, it’s a small step that really highlights why sustainable practices matter.
Building Raised or Mounded Beds
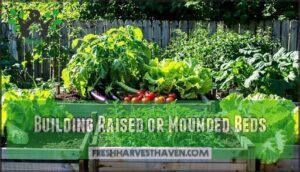
When you build raised or mounded beds, you give root veggies a running start. Use sturdy materials for your beds and pile soil at least eight inches high. Good drainage improvement means roots grow deep instead of sideways.
Raised beds heat up faster in spring, keep pests at bay, and make planting and picking your veggies a breeze.
It’s a simple way to take some hassle out of gardening.
Benefits of Cover Crops
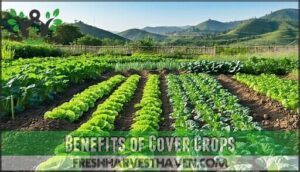
After shaping beds, get even better soil improvement by planting cover crops like daikon or cowpeas. These plants break up hard clay, boost nutrient cycling, and keep your soil from washing away—think natural erosion control.
Plus, they block weeds and help water retention. Using cover crops makes harvesting root vegetables easier and promotes more sustainable agriculture practices for future crop management.
Planting Techniques for Success
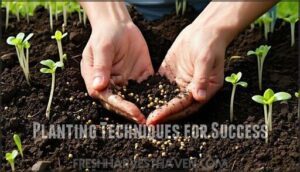
Start by loosening the clay and mixing in plenty of compost to help your seeds take root and grow strong.
Spread the seeds out with enough space and cover them with a thin layer of soil, making sure to keep them damp but not soggy.
Seed Spacing and Depth in Clay
Two key moves help root vegetables thrive in clay: watch your Clay Seed Depth and use Ideal Spacing. Shallow planting avoids waterlogging, but don’t go too shallow or seeds dry out. For best results:
- Space seeds wider than on sandy soil.
- Plant just deep enough to cover.
- Avoid crowding—rootbound Prevention keeps seedlings strong.
Mulching and Moisture Management
After getting your spacing right, it’s time to talk mulch. Mix up Mulch Types like straw, leaves, or grass clippings to lock in moisture and prevent erosion.
Check your soil’s moisture with a simple finger test or use a moisture meter if you like gadgets.
Water smart and use good drainage—these habits are key for steady moisture, which means bigger, better harvests.
Encouraging Healthy Root Development
After mulching to lock in moisture, focus on healthy roots for bigger harvests. Think of your root veggies like deep-sea divers—they need oxygen, room, and food to go deep.
Boost their journey below the soil by:
- Loosening soil for root aeration
- Adding compost to help soil microbes
- Watering smart for steady nutrient uptake
- Spacing seeds for early growth
Timing Your Root Vegetable Harvest
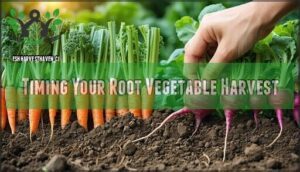
Choose a cool, dry morning to check your garden, and look for root vegetables with strong tops and firm shoulders peeking from the soil.
Gently loosen the clay and test a few for size to see if the roots are ready to pull.
Recognizing Signs of Maturity
As your root crops develop, keep an eye out for visual cues, texture changes, and the all-important “size matters” rule. Test by gently pulling one and checking for firmness—not stringy or squishy. Each veggie has its days to maturity, so use this table for quick reference. Taste testing? It’s the oldest harvesting tip in the book.
| Crop | Size Matters (inches) | Texture Changes |
|---|---|---|
| Carrot | 1.5 | Firm, not woody |
| Beet | 2.0 | Smooth, not wrinkly |
| Daikon | 8-12 | Crisp, not rubbery |
| Turnip | 2.5 | Dense, not spongy |
Best Weather and Soil Conditions
Spotting mature roots is just half the job; next, pay attention to the best weather and soil conditions. Aim for harvesting after a dry stretch, when soil is crumbly, not sticky. Look out for:
- Soil Temperature above 50°F
- Moderate Sun Exposure
- Moisture Levels that aren’t soggy
- Seasonal Timing—avoid frosty mornings
- Microclimate Effects around your garden
Daily Garden Monitoring
With each sunrise and a cup of coffee in hand, walk your garden rows, keeping your eyes peeled for Pest Detection and signs of Disease Prevention. Check the soil’s moisture for proper Watering Needs. Give Growth Assessment and Ripeness Checks their time.
Sticking with your daily gardening habits really makes a difference when it’s time to harvest—those small, steady routines can lead to a bigger, healthier crop.
Effective Harvesting Methods in Clay
You’ll want to use a garden fork or broadfork to gently loosen the soil around your root vegetables, which helps you pull them out without snapping them in half.
Always improve your clay soil with compost or mulch first, so your harvest goes smoothly and you end up with bigger, cleaner roots.
Using Broadforks and Garden Forks
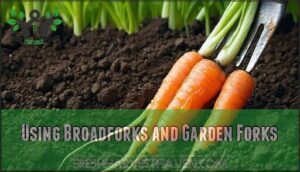
Grab your garden fork or broadfork early. Drive it gently beside your row, rocking it back to loosen the earth—think of it as giving the soil a good stretch.
This boosts soil aeration and compaction relief, making pulling easier while reducing root damage.
Maintain your tools; sharp tines mean efficient harvesting and better crop yield, key agricultural practices for gardeners.
Push-Pull Technique for Uprooting
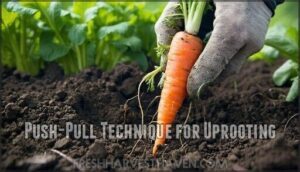
When it’s time for harvesting, use the push-pull technique for gentle extraction. Wiggle the plant from side to side, using soil leverage to loosen it. Don’t yank; instead, rock and lift steadily. If the crop resists, try tool alternatives like a fork.
Using this approach makes your harvest smoother, helps you get more out of your crops, and can cut down on bruising or damage when you store them.
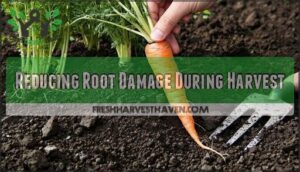
Reducing Root Damage During Harvest
Once you’ve loosened soil, gentle extraction matters. Check soil moisture—too wet or dry, and roots snap. Choose the right tool; broadforks work well for efficient harvesting.
Minimize bruising with careful handling techniques. Lift crops steadily, don’t yank. Adding organic matter, like compost, can improve soil structure for easier harvesting.
Sorting out damaged ones now means better storage later. These little steps boost your crop yield and make harvesting and storage easier.
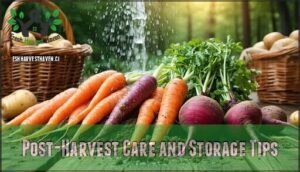
Post-Harvest Care and Storage Tips
After pulling your root vegetables from heavy clay, you’ll need to clean, cure, and store them carefully to prevent spoilage.
Follow these steps to keep your harvest fresh and get the most from your hard work.
Cleaning and Curing Root Vegetables
After you pull root crops from tough soil, gentle washing is your first step—mud sticks tight after harvesting. Pat them dry and set them where air flows well for the curing duration, usually a week or two. Stay mindful of avoiding bruising.
Here are a few simple tips to keep your root crops in great shape:
- Gentle Washing
- Avoiding Bruising
- Curing Duration
- Best Conditions
Proper Storage for Longevity
Root vegetables last longer when stored in cool, dark spots with temperature ranges between 32–40°F. Sand or sawdust helps maintain Humidity Control and ensures Ideal Conditions.
Check for rot each week. Proper storage supports food security, crop yield, and ongoing food production. Aim for a Storage Duration of two to six months, depending on the crops harvested.
Troubleshooting Common Storage Issues
Your cellar’s secrets start with rot prevention—never store bruised crops. Keep humidity levels between 85-95% and prevent temperature fluctuations for longer shelf life. Routinely check for pests.
Store each harvest so air circulates around roots, boosting food security. These tactics protect crop yield, making sustainable farming a reality—because one rotten onion can spoil the whole bunch.
Frequently Asked Questions (FAQs)
How to break up clay soil for vegetable garden?
Start by mixing in compost or aged manure every season and spread mulch to keep the soil crumbly.
Try planting daikon or cowpeas—they dig in deep, making the clay loosen up like an old shoelace.
How to know when root vegetables are ready to pick?
You’re left guessing until tops poke up or skin color deepens. Use your hands to gently brush back soil.
Vegetables should look full-sized and firm. Wiggle one free—if it slides out easily, it’s harvest time.
How deep should clay soil be loosened before harvest?
Loosen clay soil down 8 to 12 inches before harvest. Give it a good going-over with a sturdy garden fork. Break up clods, let air in, and your veggies will come out with less wrestling.
What tools work best for clay soil harvesting?
Think of clay soil as a stubborn loaf of bread—slice it right with a sturdy garden fork or broadfork.
Wiggle these tools in deep, gently pry, and pull roots free, easing their journey home.
When is clay soil too wet to harvest?
If your boot sinks or soil sticks stubbornly to your shovel, it’s too wet to harvest. Wait for the surface to lose its shine and crumble in your hand, or you’ll risk tearing roots and compacting clay.
How to prevent root vegetables from breaking apart?
They say, “A stitch in time saves nine,” so work the soil before pulling veggies.
Use a garden fork to gently loosen dirt, water lightly for easy digging, and always add compost—it’s your best insurance against breakage.
Can you harvest clay-grown vegetables in winter?
You can dig up vegetables from clay in winter, but the ground might feel like rock. Wait for a mild day so the soil’s not frozen solid, and use a fork to gently ease roots out.
How can I prevent root vegetables from tasting bitter?
Like biting into a lemon, bitter roots leave a sour memory.
To avoid this, water consistently, enrich your soil with compost, harvest before veggies get oversized, and keep them from drying out in the sun.
What pests are common when growing roots in clay?
You’ll often find root maggots, wireworms, and cutworms hanging around clay soil, as it stays moist and cool.
Keep an eye out for tunneling and nibbled roots—crop rotation can keep most pests guessing.
Are there companion plants that benefit root crops in clay?
Plant beans or cowpeas beside your root crops—they’ll loosen up tough clay with their deep roots and add nutrients to the soil.
Mixing in marigolds helps control pests so your turnips and carrots grow stress-free.
Conclusion
Tackling clay soil is like dealing with a stubborn friend—patience pays off. Break up the earth, use plenty of compost, and space seeds just right. With steady care, you make harvesting root vegetables from clay a simple routine.
Check roots often, loosen soil before digging, and handle crops gently. Store vegetables in cool, dry spots to keep them fresh longer. Stick to these steps, and your clay soil will start producing bigger, tastier yields.
- https://nextdoorhomestead.com/blog/how-plant-garden-clay-soil/
- https://extension.oregonstate.edu/news/clay-soil-challenges-solutions-oregon-gardeners
- https://alluvialsoillab.com/blogs/soil-facts-3/improving-clay-soil-tips-and-tricks-for-better-drainage-and-plant-growth
- https://growingformarket.com/articles/strategies-farming-clay
- https://www.groworganic.com/blogs/articles/strategies-for-growing-in-clay-soil

