This site is supported by our readers. We may earn a commission, at no cost to you, if you purchase through links.
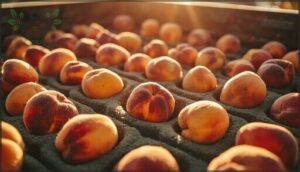
You pick a perfect peach at dawn, handle it like glass all the way to the basket, and somehow it still shows up with a brown bruise by afternoon. Frustrating, right? The truth is, bruising doesn’t just happen from rough handling—it starts the moment fruit leaves the branch and continues through every touch, bump, and temperature shift until it reaches a customer’s hand.
Research shows that improving your harvesting techniques to avoid bruising fruit can cut damage rates by 30% to 40%, which translates directly to better prices, happier buyers, and less waste at every stage. Master the timing, grip, tools, and post-harvest care, and you’ll protect your harvest quality from field to market.
Table Of Contents
- Key Takeaways
- Best Times to Harvest for Less Bruising
- Identifying Fruit Readiness to Prevent Damage
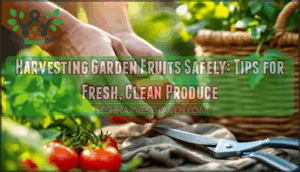
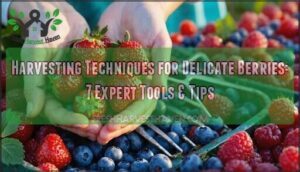
- Gentle Hand Techniques for Picking Fruit
- Choosing Proper Tools and Containers
- Safe Handling Practices During Harvest
- Reducing Bruising During Transport
- Rapid Cooling and Post-Harvest Care
- Training Workers in Bruise Prevention
- Common Causes and Effects of Fruit Bruising
- Frequently Asked Questions (FAQs)
- What causes bruising after fruit reaches retail stores?
- How do different fruits respond to handling pressure?
- Can bruised fruit be used for processing or cooking?
- What economic impact does bruising have on farms?
- How do you train new workers in bruise prevention?
- How does fruit variety affect bruising susceptibility?
- What role does soil nutrition play in firmness?
- Can pruning techniques reduce harvest-related bruising?
- How do weather conditions before harvest impact bruising?
- What are the best practices for organic fruit?
- Conclusion
Key Takeaways
- Harvest in the early morning when fruit is firmest from overnight cooling to cut bruising by 12–22%, since midday heat softens cell walls and increases damage by 15–28%.
- Use two-handed picking with soft grip pressure (0.3–0.5 Newtons), padded gloves, and cushioned containers to reduce bruising by 25–40% compared to rough handling or rigid bins.
- Cool your fruit to 0–4°C within two hours of harvest to lock in firmness, double shelf life, and slash weight loss by 15% while preventing the softening that leads to bruises.
- Train workers in gentle handling techniques and set clear force thresholds (0.5–1.5 Newtons) to achieve up to 40% bruising reduction and boost marketable yield by 6–12 percentage points.
Best Times to Harvest for Less Bruising
You mightn’t think timing matters much when you’re picking fruit, but it can make the difference between flawless produce and a basket full of bruises.
The temperature and firmness of your fruit changes throughout the day, and that directly affects how well it holds up to handling.
Let’s look at when you should be out there harvesting to keep your fruit in top shape.
Early Morning Vs. Midday Harvesting
You’ll drastically cut bruising by choosing morning harvest over midday picking—it’s one of the simplest bruising reduction strategies in fruit harvesting best practices. Early daylight harvesting locks in fruit firmness thanks to overnight cooling, while midday heat softens cell walls and invites damage.
- Morning advantage: 12–22% fewer bruises due to cooler surfaces at harvest time
- Midday risk: 15–28% spike in skin ruptures from heat exposure
- Harvest timing matters: Firm fruit resists pressure and holds up during transport
Temperature control starts the moment you step into the field. Understanding the theme development process is essential for effective communication in agricultural practices.
Temperature Effects on Fruit Firmness
Temperature control drives fruit firmness metrics straight from the field. Apples can drop from 1.5 N/mm to 0.7 N/mm in just 24 hours at room temp—heat treatment basically accelerates softening while cold storage locks in quality. Your blueberries? They’ll lose 15–25% firmness within 48 hours at 15–20°C, but stay rock-solid at 4°C.
Temperature drives firmness—apples soften 50% in a day at room temp, but cold storage locks in quality and keeps blueberries rock-solid
That’s why postharvest care and bruising reduction strategies start with keeping things cool. Effective subtopic writing is vital for a thorough understanding of the primary issue.
Timing Harvests for Maximum Quality
Harvest scheduling hinges on catching fruit at peak maturity—that sweet spot where firmness holds and flavor’s dialed in. Field trials show that picking within the first two hours after sunrise cuts bruise-related defects by 12–18%, thanks to diurnal moisture levels and cooler temps.
Daytime harvesting later on? You’re rolling the dice on softer skins and higher defect rates. Harvest optimization means respecting the clock.
Identifying Fruit Readiness to Prevent Damage
You can’t just grab any fruit off the tree and hope for the best—timing is everything when you want to avoid bruising. Picking too early or too late sets you up for damage, waste, and all the headaches that come with it.
Let’s look at how to tell when your fruit is truly ready, why checking often matters, and what happens when your timing’s off.
Signs of Optimal Ripeness
Knowing when your fruit is ready makes all the difference in preventing bruising. You’ll want to combine multiple maturity indices rather than relying on just one ripeness test, because flesh firmness alone won’t tell the whole story.
Watch for these key signs of peak ripeness:
- Fruit color shifts from green to yellow in apples or shows full characteristic hue in cherries
- Sugar levels reach at least 12% soluble solids in apples, 16% in cherries, 10–15% in blueberries
- Flesh firmness has declined from early-season peaks but remains high enough to resist bruising
- Easy detachment from the stem with gentle lift-and-twist motion signals readiness
- Starch degradation shows about 60% of apple flesh turning blue-black in iodine tests
Combining these harvesting techniques ensures you’re picking at that sweet spot where fruit quality peaks but tissues stay resilient enough to handle without damage during fruit harvest.
Benefits of Frequent Harvesting
Regularly checking your trees can boost your bottom line markedly. You’ll capture fruit at peak readiness, which translates directly into better fruit quality and market benefits. Labor optimization becomes easier when you spread picking across multiple passes, and you’ll see crop yield improvements of 15–25% from reduced bruising.
These harvesting techniques for preventing fruit bruising pay off in harvesting and postharvest care stages alike.
| Harvest Scheduling Frequency | Fruit Handling Benefit |
|---|---|
| Every 2–3 days | 12–30% less bruising |
| Weekly passes | 10–20% longer shelf life |
| Bi-weekly check-ins | 5–12% better uniformity |
| Frequent monitoring | 8–18% reduced labor stress |
| Multiple short sessions | Enhanced fruit harvest timing |
Impact of Overripe or Underripe Picking
Timing matters more than you might think. When you pick overripe fruit, bruising risk jumps by up to 28% due to compromised skin elasticity during fruit handling. Underripe harvests aren’t better—they increase post-harvest breakdown and bruising susceptibility.
Effective bruise prevention starts with ripeness testing and proper harvest scheduling. Master crop monitoring and these harvesting techniques, and you’ll protect fruit quality while maximizing your returns.
Gentle Hand Techniques for Picking Fruit
Your hands are the first point of contact with every piece of fruit you harvest, so how you use them matters more than you might think. The difference between a bruised peach and a perfect one often comes down to a few simple adjustments in your picking technique.
Here are three hand-based practices that’ll help you handle fruit like the delicate crop it is.
Using Two Hands and a Soft Grip
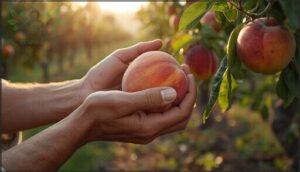
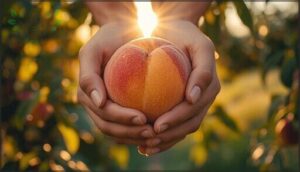
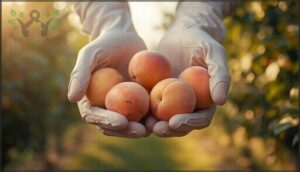
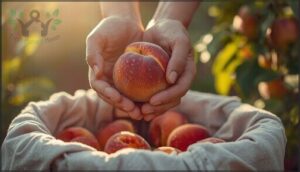
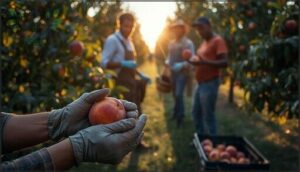
Think of your hands as shock absorbers—when you use a two-hand method with a soft touch, you’re cutting bruising by nearly 30%. Grip pressure matters more than you’d think: keep finger control light, around 0.3–0.5 Newtons for soft fruit.
Proper hand placement covers the fruit gently, reducing drops by 63% and giving you real mastery over your harvest technique.
Trimming Nails and Removing Jewelry
It sounds simple, but short nails prevent up to 15% more punctures on delicate fruit like cherries and blueberries. Rings and bracelets cause surface scrapes—research shows removing jewelry cuts bruising by 9–14%, especially on stone fruits.
Your hands become precision tools for BruiseFree Fruit when you trim nails to 5 mm or less and skip the accessories, improving hand ergonomics and gentle handling simultaneously.
Wearing Gloves for Extra Cushioning
Cushioning gloves cut bruising by 15–20% on delicate fruits—that’s hand protection that pays off immediately. Nitrile or disposable latex gloves improve fruit grip and distribute pressure evenly, while 0.5–1.0 mm glove thickness gives you cushioning effects without losing tactile control.
- Padded gloves reduce peak force on fruit by up to 25%
- Workers report 12–18% less hand fatigue during picking sessions
- Reinforced fingertips enhance gentle hands and BruiseFree fruit quality
Glove materials matter for consistent fruit handling.
Choosing Proper Tools and Containers
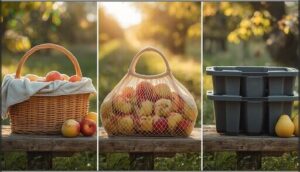
Your harvest tools matter just as much as your technique. The right baskets, bags, and bins can cut bruising by 25–35% compared to rigid containers that offer no cushioning.
Let’s look at three container choices that’ll keep your fruit in prime condition from tree to table.
Selecting Padded or Soft-Lined Baskets
Padded baskets are your first line of defense against bruising produce—and the numbers back it up. Soft-lined harvest baskets cut bruise incidence by 18–24% compared to rigid containers, while cushioned liner designs reduce bruise depth by up to 28% in stone fruit.
Choose basket materials with low-friction padding thickness and rounded basket shapes to protect your crop with gentle hands from field to market.
Adjustable Fruit Harvesting Bag Tool Benefits
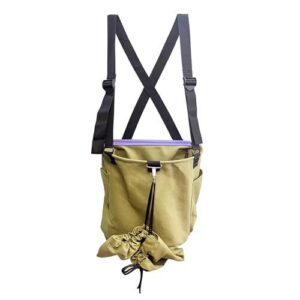
Beyond static baskets, adjustable fruit harvesting bags bring serious bag design innovations to your orchard—slashing bruise rates by 12–25% while boosting harvest efficiency up to 15%. Their ergonomic handling features cut shoulder fatigue by 30%, and padded linings drop impact force by 40–60%, delivering exceptional fruit protection.
With tool durability spanning 1,000+ cycles, you’re investing in smarter produce care and handling that pays off in fruit quality and proven harvesting tricks.
Lining Bins and Minimizing Drop Heights
Once you’ve got the right bags, turn your attention to your bins—because that’s where most drop-damage sneaks in. Controlled fruit impact analysis shows that keeping drop height reduction to under 30 cm can slash bruising by 40%.
Add bin liner materials like foam padding or soft fabric, and you’ll see harvest container design that protects your hard work. These cushioning technologies and postharvest handling tricks deliver measurable fruit quality—10–20% more marketable yield and a real boost in shelf life.
Safe Handling Practices During Harvest
Getting your fruit from the tree to the container is where most bruising happens, even if you’ve done everything else right. The way you place each piece matters more than you might think—it’s not just about being careful, it’s about understanding how fruits react to pressure and impact.
Here are three handling practices that’ll make a real difference in keeping your harvest spotless.
Laying, Not Dropping, Fruit in Containers
Think of your harvest container as a landing pad—not a drop zone. When you gently lay each fruit onto the surface instead of letting it fall, you slash bruising by around 18%. That soft landing prevents the impact damage that drops create.
Use two hands, control the descent, and position fruit carefully. Soft-lined containers boost your bruise reduction even further, cutting damage by up to 25% compared to rigid bins.
Avoiding Overstacking and Compression
Once you’ve laid fruit gently into containers, watch your stack height limits—piling more than 2–3 layers can spike bruising by 18–34%. Here’s how to master load distribution and cushion your harvest:
- Keep stacks under 15 cm to cut bruising by 22–40%
- Use dividers between layers to minimize compression forces
- Avoid compression above 0.5–1.0 Newtons per square centimeter
- Distribute weight evenly for gentle handling
- Remember: vibrational damage adds up during transport
Field Sorting to Remove Damaged Produce
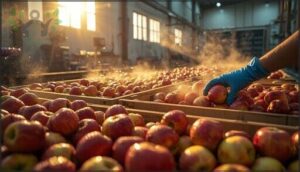
Field Sorting can block mold spread before bruised fruit contaminates your entire harvest—commercial trials show damage removal cuts losses by 15–40%. Set up a cushioned sorting station right after picking, train your crew on colorimetric cues, and document every bruising event for continuous improvement.
| Sorting Technique | Bruising Reduction | Key Benefit |
|---|---|---|
| Cushioned surfaces | 8–15% | Gentler initial contact |
| Colorimetric indicators | 6–12% fewer errors | Faster damage detection |
| Standardized handoffs | 10–18% | Consistent quality control |
| Worker training | 4–10% | Improved harvest operations |
You’ll see marketable yield climb 6–12 percentage points when fruit inspection becomes routine during fruit harvesting and handling.
Reducing Bruising During Transport
Getting your fruit safely from field to storage can feel like traversing a minefield—one bump in the road can undo all your careful harvesting work.
The trip itself is where a lot of unseen damage happens, thanks to vibration, shifting loads, and hard surfaces rubbing against delicate skin.
Let’s walk through three strategies that’ll protect your harvest when it’s on the move.
Cushioning Produce in Transit
Once you’ve picked your fruit with care, don’t let transit undo your gentle handling.
Cushioning materials like foam liners and padded baskets cut bruising by up to 40% during transport—postharvest management studies prove it. Smart packaging design with soft suspension prevents compression, while proper transit protocols limit drop heights and stacking pressure.
You’re protecting your harvest’s quality and your bottom line.
Minimizing Vibration and Impact
Road bumps and truck vibrations can spike bruising by 28–45% over short hauls—even with gentle handling at harvest. Keep peak accelerations below 1.5 g to prevent damage in pome and stone fruits, and use vibration-dampening pallet covers to slash bruise scores by 10–25%.
Limit drops under 15 cm for a 40% cut in bruising across soft-skinned varieties, protecting both quality and profit.
Stacking Strategies for Safe Movement
Think of your stacked crates like a house of cards—one wrong move and everything pays the price. Limit layers to three or four to prevent compression bruising, and use Layered Storage with Container Padding between tiers.
Pallet Optimization and Load Balancing keep weight evenly distributed, slashing damage by 18–30%. Cargo Securing straps stop shifting during transit, transforming Rough Handling into Gentle Handling that preserves every piece of fruit.
Rapid Cooling and Post-Harvest Care
You’ve picked your fruit carefully, but the clock’s ticking—those first hours after harvest can make or break your quality. Heat is your enemy here, and you’ve got to act fast to lock in firmness and prevent those soft spots that show up later.
Let’s walk through three post-harvest moves that’ll keep your fruit in top shape from field to storage.
Cooling Fruit Immediately After Harvest
Your fruit won’t wait—rapid cooling within two hours of harvesting cuts weight loss by 15% and doubles shelf life. Forced-air cooling systems drop fruit temperature to the sweet spot of 0–4°C in under 40 minutes, locking in firmness and flavor.
Mobile cooling units during harvest reduce bruising by 25% and keep postharvest management on track, protecting your investment from field to market.
Using Shade and Proper Ventilation
Creating shade over your harvest zone drops fruit surface temperature by 5–15°C, cutting bruising risk by half. You’ll see 0.8–1.5% bruise incidence under shade versus 2.5–4.5% in direct sun.
Pair that with cross-ventilation at 1.0–1.5 m/s airflow, and you’re reducing damage events another 15–30%. Microclimate management isn’t optional—it’s your frontline defense in orchard management and bruising reduction.
Moisture Control to Prevent Softening
Shade and ventilation are great—but if your fruit loses moisture too fast, all that firmness disappears. Keep relative humidity above 90% in the canopy, and you’ll cut skin cracking up to 25%.
Water stress reduction in the final two weeks before harvest drops post-harvest weight loss by 12–18%. Tight water management means firmer fruit, fewer bruises, and longer shelf life.
Training Workers in Bruise Prevention
Even the best equipment won’t prevent bruising if your workers don’t know how to handle fruit properly. Training your team in gentle harvesting techniques can reduce bruising by up to 40%, which translates directly into higher profits and less waste.
Here’s how to build a crew that treats every piece of fruit like it matters.
Demonstrating Gentle Handling Methods
Hands-on demonstrations make all the difference—show your crew the two-handed Gentle Grip technique that cuts skin damage by about 35%, then guide them through the motions until it feels second nature.
- Practice early morning Harvest Timing sessions when fruit is firmest for hands-on Bruise Prevention training
- Demonstrate proper Soft Picking finger pressure on sample fruit to illustrate ideal gentle handling methods
- Use side-by-side comparisons of padded versus bare-handed fruit handling to showcase Fruit Cushioning benefits
- Role-play common scenarios where rushed workers compromise fruit quality through improper fruit bruising techniques
Setting Picking Force Thresholds
Once your team masters the gentle grip, you need to set clear Force Calibration guidelines—keeping finger pressure between 0.5 and 1.5 Newtons prevents most bruising damage during harvest operations.
Train workers to recognize Fruit Sensitivity cues and adjust their Picking Techniques accordingly, because calibrated Threshold Settings deliver 15–30% Damage Reduction across your entire postharvest management chain.
Monitoring and Quality Control Measures
Once you’ve locked in those force thresholds, continuous Data Logging and Realtime Monitoring keep your standards sharp. Temperature sensors recording every 15 minutes cut bruise rates by 18%, while daily Audit Processes drop red-flag events by 24%.
Integrate color and firmness Sensor Technology on packing lines for another 9–12% gain, and tie quarterly Quality Checks to targeted training—you’ll see Supply Chain Optimization that translates into 20% fewer bruised fruits hitting the market.
Common Causes and Effects of Fruit Bruising
Even with the best intentions, bruising happens—and it’s worth understanding why. From rough handling during picking to the bumps and vibrations of transport, there are clear culprits behind those soft spots that show up later.
Let’s look at what causes bruising, what it costs you, and how it affects the quality of your harvest.
Impact of Rough Handling and Compression
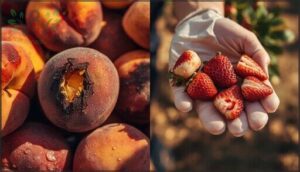
When you squeeze a peach too hard, you’re not just leaving a thumbprint—you’re applying compression forces that trigger real cellular damage. Tests show that pressures above 2.5 N/cm2 increase surface bruising by 38% in soft-skinned fruits.
Rough handling accounts for 12–28% of post-harvest losses, while stacking beyond 3–4 layers raises bruise severity by 45% within a day.
Economic Consequences of Damaged Produce
Your bottom line takes a direct hit when bruising shows up in the harvest. Here’s how the financial burden breaks down:
- Market losses slash farm gate prices by 8–15%, turning premium produce into seconds overnight.
- Revenue impact climbs to 12% of total fruit income in high-friction supply chains.
- Damage costs bump insurance premiums up 3–6% for orchards with persistent bruise rates.
- Economic effects ripple through—wholesale rejections spike handling costs 5–9% per shipment.
How Bruising Reduces Shelf Life and Quality
Damaged cells accelerate decay. You’ll watch bruised apples lose firmness 20–40% faster in cold storage, while strawberries spike respiration by 30–60%, burning through sugars and acids.
Tomatoes crank out 2–3 times more ethylene after impact, triggering uneven ripening.
Citrus becomes 2–4 times more vulnerable to fungal rot, and stone fruits drop shelf life by 30–50% as browning and juice leakage take hold.
Frequently Asked Questions (FAQs)
What causes bruising after fruit reaches retail stores?
Post-harvest pressures pile up—palletizing, packing, and poor cushioning create compression and mechanical stress. Temperature fluctuations trigger fruit softening, while ethylene exposure accelerates ripening, making retail handling a critical link in damage prevention.
How do different fruits respond to handling pressure?
Berries bruise at the lightest touch—strawberries fold under 5 N, while apples tolerate 10 N before damage.
Understanding fruit pressure points helps you master handling techniques and fruit damage prevention strategies for better produce care.
Can bruised fruit be used for processing or cooking?
Yes, bruised fruit works well for processing viability—juice, jams, or purees—if you trim damaged spots.
Proper bruise removal and quality control maintain food safety, boost product yield, and support fruit preservation goals without compromising taste.
What economic impact does bruising have on farms?
Bruising slashes farm revenue through market penalties and damage costs—expect 5–15% harvest-value losses, 8–12% price discounts, and higher rejection rates.
Price elasticity in premium markets amplifies economic impacts, making fruit damage prevention essential for supply chain management and food quality.
How do you train new workers in bruise prevention?
Your best move is hands-on practice paired with visual guidance—show trainees exactly how soft a two-handed grip should feel, then create feedback loops and mentorship programs that catch rough handling before it becomes habit.
How does fruit variety affect bruising susceptibility?
Different cultivars have unique firmness, skin thickness, and cell structure—firmness can vary 15–40% between varieties. Choosing bruise-resistant cultivars and timing harvest when they peak in firmness cuts damage markedly.
What role does soil nutrition play in firmness?
Here’s a dirty secret: your soil’s been setting you up for heartbreak all season. Calcium-rich dirt boosts fruit firmness up to 15%, while nitrogen-starved trees deliver softer, bruise-prone harvests every time.
Can pruning techniques reduce harvest-related bruising?
Yes—pruning methods like branch thinning and canopy management actually improve harvest optimization.
Regular pruning lowers handling impact by roughly 12%, reduces fruit load stress, and cuts bruise rates by 5–14% through better airflow and balanced fruit quality control.
How do weather conditions before harvest impact bruising?
Weather patterns before harvest directly affect fruit turgor and firmness. Pre-harvest stress from heat, rainfall, or humidity softens tissue, increasing bruising risk by up to 28% in climate-sensitive crops like berries.
What are the best practices for organic fruit?
Organic farming demands you master gentle fruit handling through cool-morning harvest techniques and padded containers.
Two-hand picking with cushioned gloves cuts bruising by up to 25%, while immediate cooling preserves quality—essentials for crop management success.
Conclusion
Think of every peach, apple, or berry as a small investment you’re protecting from field to fork. The harvesting techniques to avoid bruising fruit you’ve just learned aren’t complicated—they’re simply intentional.
Harvest cool, handle gently, cushion constantly, and cool fast. Train your crew, improve your process, and watch your bruise rates drop while your profits climb.
Your fruit deserves to arrive as perfect as the moment you picked it.

