This site is supported by our readers. We may earn a commission, at no cost to you, if you purchase through links.
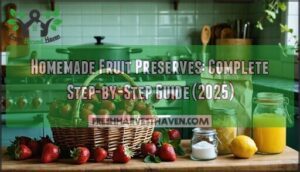 You’ll master homemade fruit preserves with just three ingredients: peak-ripe seasonal fruit, granulated sugar in equal weight, and fresh lemon juice.
You’ll need sterilized mason jars with brand new lids—old ones just won’t create that airtight seal you’re after.
A heavy-bottomed pot is your best friend here, preventing those heartbreaking burnt spots while you stick to that crucial 1:1 fruit-to-sugar ratio.
The water bath method keeps everything food-safe, and that quarter-inch of headspace at the top? It’s what stops your beautiful preserves from bubbling over and making a mess.
Peak strawberry season in early summer and fall apple harvests offer the best flavor profiles. Your kitchen becomes a preservation powerhouse when you nail the timing and temperature control that separates runny disasters from jewel-toned triumphs.
Table Of Contents
- Key Takeaways
- Essential Tools and Ingredients for Fruit Preserves
- Step-by-Step Guide to Making Fruit Preserves
- Mastering The Canning and Sealing Process
- Troubleshooting Common Preserve Problems
- Creative Ways to Use Homemade Fruit Preserves
- Nutrition Facts and Storage Tips
- Frequently Asked Questions (FAQs)
- Conclusion
Key Takeaways
- You’ll create perfect preserves with just three simple ingredients: peak-ripe seasonal fruit, equal-weight granulated sugar, and fresh lemon juice for proper preservation and flavor balance.
- Use sterilized mason jars with new lids and heavy-bottomed pots to prevent scorching—the 1:1 fruit-to-sugar ratio ensures safe preservation while water bath canning at precise temperatures guarantees proper sealing.
- Master the timing by macerating fruit overnight with sugar to draw out natural juices, then cook for 15-25 minutes until you achieve the perfect gel consistency without needing commercial pectin.
- Store your sealed preserves in cool, dark places for up to one year, and once opened, they’ll stay fresh in the refrigerator for about a month while maintaining peak flavor quality.
Essential Tools and Ingredients for Fruit Preserves
You’ll need the right tools and fresh ingredients to create perfect preserves every time.
Start with a heavy-bottomed pot, sterilized canning jars with new lids, and peak-ripeness seasonal fruit for the best flavor and safety results.
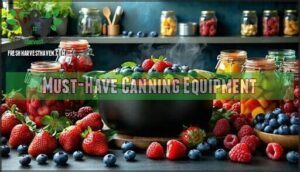
Must-Have Canning Equipment
If you want to make jam that’s actually safe to eat and store, you’ll need the right gear:
- Wide, heavy-bottomed pot – prevents scorching during cooking
- Deep stockpot or pressure canners – facilitates proper water bath canning
- Jar lifters – safely handle hot canning jars
- Canning funnel – prevents messy spills when filling
- Acid testers – verify proper pH for preservation safety
These tools transform your kitchen into a preserve-making powerhouse.
Choosing The Best Jars and Lids
Your canning setup is complete—time to focus on jars and lids. Half-pint or pint jars work best, and here’s the crucial part: always buy fresh lids for each batch.
Those lids are your safety net. The rubber seal only works once, so reusing them risks spoiled food and failed seals. Stick with Mason jars—they handle the heat and pressure like champs.
Avoid jars from store-bought products. They look similar but won’t create the tight seal you need, potentially wasting your entire batch.
Selecting Fresh, Seasonal Fruits
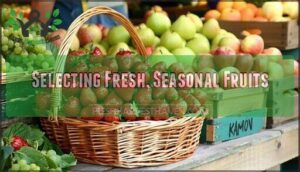
Once you’ve got your jars ready, it’s all about finding the best fruit. Summer farmer’s markets are perfect for peak strawberries – look for ones that smell sweet and give slightly when pressed.
Come fall, you’ll want to grab crisp apples and juicy pears at their harvest peak.
Local sourcing gives you the ripest seasonal varieties. Feel your fruit – it should yield slightly to pressure without being mushy. This ripeness sweet spot creates preserves with remarkable flavor depth.
Key Ingredients for Flavor and Preservation
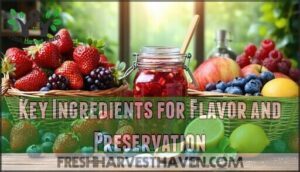
Time for the ingredient list. You’ll want granulated sugar—roughly the same weight as your fruit to get that proper balance.
Toss in some lemon juice too. It keeps the acid levels right for pectin activation and locks in those nutrients.
The acid prevents browning and adds brightness. Some fruits need extra pectin for setting. These simple ingredients work together, transforming fresh produce into shelf-stable preserves.
Step-by-Step Guide to Making Fruit Preserves
You’ll transform fresh seasonal fruit into perfect preserves using precise 1:1 fruit-to-sugar ratios and proper sterilization techniques.
This straightforward process takes you from prep work through cooking to achieve that ideal gel consistency every time.
Preparing and Prepping Your Fruit
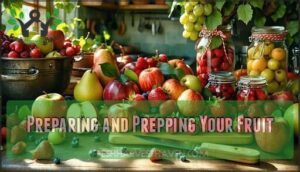
With your equipment ready, it’s time to focus on fruit selection and prep work. Choose fresh fruit at peak ripeness—you want it slightly soft but not mushy.
Wash everything thoroughly, then get to work on peel removal for apples and pears. Core preparation means removing seeds and tough centers.
For berries, gentle seed sorting removes any stems or damaged pieces. Cut larger fruits into uniform pieces for even cooking during fruit preserve making.
Macerating Fruit for Maximum Flavor
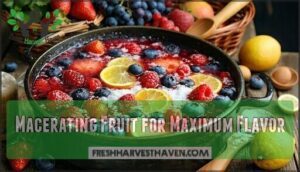
Once you’ve prepped your fruit, toss it with sugar and lemon slices in your large pot. This maceration time lets fruit enzymes break down cell walls while sugar balance draws out natural juices.
Let everything sit overnight—this flavor enhancement step transforms ordinary fruit into something magical. The fruit texture softens perfectly, creating the foundation for exceptional homemade fruit preserves.
Cooking and Achieving The Perfect Consistency
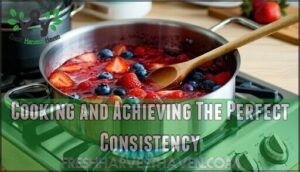
After your fruit has macerated overnight, it’s time to transform that sugary mixture into perfect homemade fruit preserves. Bring the mixture to a rolling boil over medium-high heat, then reduce to a gentle simmer.
This cooking time usually ranges from 15-25 minutes for ideal gel formation without pectin jam methods. Watch for sugar balance as the fruit texture breaks down naturally, creating rich flavor enhancement through concentrated fruit preserve recipe magic.
Enhancing With Spices and Flavorings
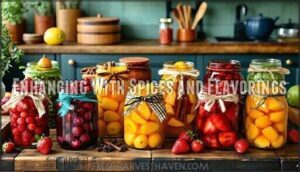
Spice blending transforms ordinary homemade fruit preserves into gourmet creations. You’ll discover exciting flavor profiles by adding aromatics during the final cooking stages. Here’s your spice toolkit:
- Warm spices: Add 1/2 teaspoon cinnamon or cardamom per batch
- Citrus zest: Grate fresh lemon or orange peel for brightness
- Vanilla extracts: Stir in 1 teaspoon pure vanilla after cooking
- Herbal infusions: Try fresh thyme or rosemary sprigs
- Bold combinations: Mix star anise with pear or ginger with apple
Time your additions carefully—delicate herbs go in last, while hardy spices can simmer longer.
Mastering The Canning and Sealing Process
You’ll transform your beautiful fruit mixture into shelf-stable preserves that can last up to one year when you master proper water bath canning techniques.
This critical step requires precise timing and temperature control to verify your jars seal correctly and stay safe for long-term storage.
Water Bath Canning Basics
Water bath canning is your foundation for safe food preservation—get this right and everything else falls into place.
Start by sterilizing your jars in boiling water for 10 minutes—proper jar sterilization prevents contamination. Fill your deep stockpot with enough water to cover jars by 2 inches.
The water bath method works perfectly for high-acid preserves, maintaining proper acid balance naturally.
Always test jar seals by pressing the center—they shouldn’t pop back.
Using Pectin and Setting The Gel
Getting gel formation right is where the real magic happens—turning runny fruit into spreads that actually stay put on your toast.
Some fruits come loaded with natural pectin. Apples and citrus are your friends here, while strawberries and other soft fruits usually need backup.
When making homemade preserves, powdered pectin works great but demands precision with sugar ratios and acid balance. Want to test if it’s set? Drop a small amount on a cold plate from the freezer—properly gelled jam will wrinkle when you push it with your finger.
Safely Filling and Sealing Jars
When your gel reaches the right consistency, it’s time to get those hot preserves into your sterilized jars. Make sure to leave a quarter-inch headspace at the top—this little buffer zone keeps everything from bubbling over during the water bath process.
Wipe jar rims clean with a damp cloth to guarantee proper sealing. Place new lids on top and screw bands finger-tight. Don’t overtighten or you’ll prevent proper venting during processing.
Labeling and Dating Your Preserves
With your jars sealed tight, labeling becomes crucial for safe storage. Write down what’s inside, when you made it, and assign each batch a number using waterproof markers or labels that stick well and won’t fade.
Include shelf life information—most homemade fruit preserves last one year when stored properly. Smart labeling turns your pantry into an organized system and makes homemade gift ideas look professional.
Troubleshooting Common Preserve Problems
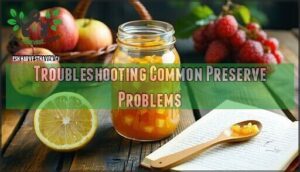
Even experienced preserve makers run into issues like runny jams or floating fruit pieces.
You can fix most problems by adjusting your cooking time or adding a bit more lemon juice for better gel formation.
Fixing Runny or Overly Thick Preserves
Nobody wants preserves that are too runny or thick as pudding. Here’s how to fix preserve texture issues with your homemade fruit preserves:
- Runny preserves: Re-cook with 1 tablespoon lemon juice per cup – the extra acidity helps gel formation
- Overly thick consistency: Add 2-3 tablespoons warm water or fruit syrup while stirring gently
- Sugar balance problems: Test consistency checks on a cold plate before jarring your no pectin jam
- Fruit preservation mistakes: Cook longer for firmer set, less time for softer lowsugar preserve recipes
Preventing Floating Fruit and Cloudiness
After you fix consistency problems, floating fruit and cloudy preserves can mess up how your homemade preserves look. Getting your jars ready the right way stops fruit from floating by getting rid of air pockets before you seal them.
To keep preserves clear, don’t stir too much during water bath canning. Just let the fruit settle on its own while the syrup clears up.
Your no pectin jam works best when you handle it gently through the whole preserving process.
Ensuring Safe Storage and Shelf Life
Proper storage methods and food safety practices determine your preserves’ shelf life. Water bath canning creates shelf-stable jars lasting up to one year in cool, dark places. Here’s your storage game plan:
- Store sealed jars in pantries below 70°F away from direct sunlight
- Check jar seals monthly – lids shouldn’t flex when pressed
- Refrigerate opened preserves and use within three months
- Label containers with dates for easy food preservation tracking
- Discard any jars showing mold, off-odors, or bulging lids
Container selection matters for long-term preservation techniques success.
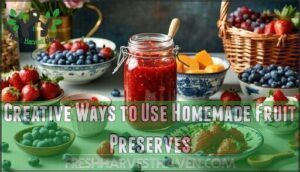
Creative Ways to Use Homemade Fruit Preserves
You’ve mastered the art of preserve-making, and now it’s time to put those beautiful jars to work beyond your morning toast.
Your homemade preserves can transform everything from savory glazes that’ll make your dinner guests ask for the recipe to thoughtful gift baskets that show you really care.
Breakfast and Dessert Pairings
Your homemade fruit preserves shine brightest at breakfast and dessert time. Swirl jam recipes into yogurt parfaits for morning energy, or spoon fruit preserve recipe creations over oatmeal toppings.
Transform pastries with cake fillings made from your homemade jam, brush pastry glazes onto croissants, or create show-stopping ice cream sundaes with warm preserves drizzled on top.
Savory Dishes and Glazes
Your fruit preserve recipe transforms into elegant meat glazes when you brush it over pork tenderloin or duck breast.
Mix preserves with balsamic vinegar for charcuterie boards, or stir into marinades for grilled chicken.
They’re perfect cocktail ingredients too—muddle with bourbon or gin.
Try spreading on savory baking like focaccia with goat cheese pairings.
Homemade Gift Ideas and Presentation
Nothing beats watching someone’s face light up when they unwrap your homemade jelly. Transform your fruit preserve making into memorable homemade gifts with customized labels featuring hand-drawn designs or family photos.
Create presentation ideas using mason jars tied with seasonal ribbons for holiday gifting. Add wooden spoons or recipe cards for unique pairings.
Your homemade food gifts become treasured keepsakes when you put heart into the details.
Building Gift Baskets With Preserves
Create stunning gift baskets by pairing your homemade fruit preserves with complementary items. Combine strawberry jam with artisanal crackers and aged cheddar for elegant basket themes.
Add seasonal touches like cinnamon-spiced apple butter alongside tea blends for holiday packaging.
Mix three different fruit combinations—berry medleys, citrus marmalades, and stone fruit preserves—to showcase your homemade gifts beautifully.
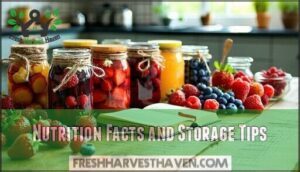
Nutrition Facts and Storage Tips
You’ll want to know exactly what’s in your homemade preserves and how to store them properly for greatest freshness and safety.
Each tablespoon contains about 40 calories and 10g of sugar, plus you’ll get natural antioxidants and vitamin A from the fresh fruit you’ve carefully selected at peak ripeness.
Calorie and Sugar Content Per Serving
Understanding the nutritional information helps you make informed choices about your homemade preserves. Each tablespoon packs approximately 56-60 calories, with sugar sources accounting for nearly all the carbohydrate content. Fruit preserves are also known to be high in vitamins, contributing to their health benefits.
- Calorie Breakdown: A standard 20-gram serving contains 56-60 calories from carbohydrates
- Sugar Sources: Each serving delivers 13-14 grams of combined natural and added sugars
- Serving Sizes: Recipe modifications can reduce sugar content by 50% using alternative sweeteners
Your health impact depends on portion control and frequency of consumption.
Vitamins and Health Benefits
Your homemade fruit preserves pack more nutrition than you’d expect. Each serving delivers vitamin C for immune boost and B vitamins for energy metabolism. The antioxidants fight inflammation while natural sugars provide quick energy. Fiber content aids digestive health, and minerals like potassium promote heart function.
Though processing reduces some vitamins, your preserves retain significant antioxidant boost from the original fruit. By incorporating them into your diet, you can enjoy the benefits of preserved fruit options that offer a convenient and nutritious way to maintain a balanced diet.
How to Store Preserves for Freshness
After your water bath canning adventure, proper storage keeps your preserves tasting garden-fresh for months. Store sealed jars in cool dark places like pantries or basements—heat and light are freshness killers.
Check jar sterilization worked by verifying lids stay sealed tight. Use clean storage containers if transferring portions. These freshness tips protect your preserve shelf life naturally.
Shelf Life and Refrigeration Guidelines
Your unopened homemade fruit preserves stay fresh for up to 12 months in cool, dark storage conditions between 50-70°F.
Once opened, refrigeration is your best friend – these gems last about a month in the fridge for peak quality. Food safety guidelines suggest opened jars are safe for up to 6 months refrigerated, though flavor fades earlier.
Watch for bulging lids, mold, or off-odors as spoilage signs.
Frequently Asked Questions (FAQs)
Can you freeze homemade fruit preserves?
Think of your freezer as nature’s pause button—you’re absolutely right to freeze preserves! They’ll keep beautifully up to one year frozen, maintaining their bright flavors.
Leave half-inch headspace for expansion when storing.
What fruits should never be mixed together?
Avoid pairing acidic fruits like oranges, pineapples, and strawberries with sweet fruits like bananas and grapes. The pH clash can disturb your digestion and cause fermentation that’ll leave you feeling uncomfortable.
How do you know when preserves expire?
Check for visual changes like mold, darkening, or separation. Smell for off odors—fresh preserves smell fruity. Taste a small amount if it looks and smells normal but seems questionable.
Can diabetics safely eat homemade fruit preserves?
Like finding a needle in a haystack, managing blood sugar while enjoying preserves requires careful choices.
People with diabetes can enjoy jam in moderation, especially when it’s homemade and free from refined sugar. Monitor portion sizes and count the carbs in your meal planning.
Whats the difference between jam and preserves?
Preserves contain whole fruit pieces or large chunks, while jam features crushed fruit that’s smoother and more spreadable.
You’ll notice preserves have more texture and visible fruit bits compared to jam’s uniform consistency.
Conclusion
Creating outstanding homemade fruit preserves transforms seasonal abundance into year-round sweetness. You’ve mastered the delicate balance of fruit, sugar, and acid that creates perfect texture and flavor.
Your sterilized jars now hold liquid gold—ruby strawberry, amber peach, and deep purple plum preserves that’ll brighten winter mornings. Store them properly and they’ll maintain peak quality for months.
Most importantly, you’ve discovered that homemade fruit preserves aren’t just food preservation—they’re edible memories captured in glass.
Homemade fruit preserves transform seasonal abundance into edible memories captured in glass
- https://www.canr.msu.edu/news/how_long_does_home_preserved_food_last
- https://extension.psu.edu/food-for-profit-commercial-production-of-jams-jellies-and-fruit-butters/
- https://foodinjars.com/blog/canning-101-sugars-role-in-home-preserved-food/
- https://www.verifiedmarketreports.com/product/fruit-preserves-market-size-and-forecast/
- https://www.cognitivemarketresearch.com/jams-jellies-preserves-market-report

