This site is supported by our readers. We may earn a commission, at no cost to you, if you purchase through links.

Use sharp, clean scissors or garden shears to make cuts about an inch above the base of each leaf stem. This method keeps your kale plant producing fresh leaves for months instead of ending your harvest after one picking.
Start harvesting when leaves reach 6-8 inches long and feel firm to the touch. The magic happens when you master the timing and technique that turns a single kale plant into your personal salad factory.
Table Of Contents
Key Takeaways
- Harvest outer leaves first – You’ll cut the mature outer leaves while leaving the center crown untouched, which keeps your plant producing fresh leaves for months instead of ending your harvest after one picking.
- Use proper cutting technique – You’ll make clean cuts with sharp, sanitized scissors or shears about one inch above the base of each leaf stem at a 45-degree angle to prevent disease and encourage healthy regrowth.
- Time your harvest correctly – You’ll pick leaves when they’re 6-8 inches long and feel firm to the touch, harvesting every 1-2 weeks during cool morning hours for the best flavor and quality.
- Handle with care after cutting – You’ll cool your kale immediately in cold water, store it unwashed in breathable bags at 32-40°F, and avoid washing until you’re ready to use it to maintain maximum freshness and nutrition.
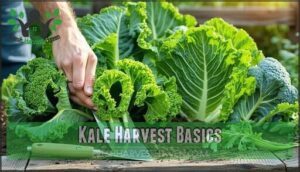
Kale Harvest Basics
Understanding kale’s growth stages and harvest timing helps you pick leaves at peak flavor and nutrition.
You’ll need clean sharp tools and know when your plants reach the 55-75 day harvest window for best results.
Kale Growth Stages
Understanding kale growing stages helps you time your harvesting kale perfectly for maximum yield.
Your kale journey starts with seed germination in 5-10 days, followed by seedling development with true leaves forming within two weeks.
From tiny seeds to thriving plants in just two weeks – kale’s rapid transformation rewards patient gardeners.
Ideal conditions during leaf maturation produce the best kale harvest quality.
- Seed Germination: Seeds sprout within 5-10 days at 45-85°F soil temperatures
- Seedling Development: True kale leaves appear 7-14 days after sprouting begins
- Leaf Maturation: Plants reach harvestable size at 55-75 days after planting
- Preferred Conditions: Cool temperatures (55-75°F) create tender, flavorful kale leaves
- Bolting Prevention: Monitor for early flowering signs when to harvest kale properly
Harvest Timing Factors
Several key factors determine ideal harvest timing for kale.
Plant variety affects maturity speed and seasonal impact influences flavor development.
Environmental conditions like temperature and moisture control when to harvest kale.
You’ll achieve best results by monitoring leaf size and checking for pest damage.
Proper harvest timing maximizes regrowth potential while ensuring peak nutrient density for your kale harvest.
Tools Needed for Harvest
You’ll need sharp, clean cutting implements like kitchen shears or pruning scissors for harvesting kale leaves.
Storage containers protect your kale plant harvest during transport methods. Safety gear isn’t essential but gloves help.
Cleaning supplies sanitize tools between cuts. Ergonomic tool designs can reduce hand strain.
These kale harvesting tips guarantee successful cutting kale while maintaining plant health.
How to Harvest Kale
Now you’re ready to harvest kale from your thriving plants.
Proper kale harvesting tips guarantee continuous production throughout the growing season.
You can pick kale leaves when they reach 8-10 inches in length and show deep green color.
Here’s how to pick kale effectively:
- Select outer leaves first while leaving the center growing point intact
- Use clean sharp scissors or garden shears for clean cuts
- Harvest in cool morning hours for best quality and flavor
- Pick regularly every 1-2 weeks to stimulate regrowth and prevent bolting
- Remove no more than one-third of the plant at each harvesting session
Different kale varieties may have slightly different harvesting frequencies.
Regular harvesting kale leaves promotes regrowth stimulation and helps with natural pest control.
The best time to harvest kale is when leaves are mature but still tender.
This kale plant harvest method guarantees your plants keep producing fresh leaves for months, ensuring a continuous production throughout the season.
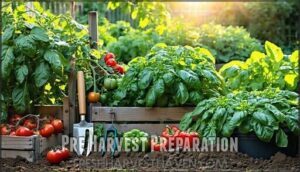
Pre Harvest Preparation
Before you harvest kale, you need to prepare properly to get the best results.
Perfect preparation leads to perfect kale every single time.
Check that leaves are mature and deep green, clean your cutting tools, and remove any damaged or yellowing leaves first, to ensure you have the best results from your harvest.
Checking for Readiness
Before you harvest your kale, you need to check if it’s actually ready to pick.
Look for mature kale leaves that measure 6-10 inches long with deep green color. These leaf size and color indicators show perfect timing for the best taste.
You can even taste test a small piece – mature leaves should be tender, not bitter or tough.
Understanding the soil quality factors is vital for a successful harvest.
Cleaning and Sanitizing Tools
Clean tools prevent disease and contamination during harvest.
Use rubbing alcohol or diluted bleach solution for tool sterilization.
Wipe blades thoroughly to remove plant residue and dirt.
Sharpen cutting tools beforehand for clean cuts that heal quickly.
For effective sterilization, consider isopropyl alcohol options.
Store disinfected tools in a dry place between uses to protect your mature kale plants.
This disinfection method protects your plants when cutting and picking during harvest time.
Removing Damaged Leaves
Before the best time harvest kale arrives, you’ll want to scout your garden kale for problem areas.
Yellowing or damaged leaves drain energy from healthy growth and invite disease. Remove these troublemakers by grasping near the base and snapping downward.
This simple step supports disease prevention while encouraging regrowth. Your mature kale will thank you with stronger stems and better plant health when you start cutting kale properly, which is a key step for better plant health.
Harvesting Kale Techniques
Once you know your kale is ready to harvest, proper technique makes all the difference in yield and plant health.
You’ll want to focus on selecting the right leaves, cutting stems correctly, and handling your harvest with care to maximize both quality and future growth.
Leaf Selection Methods
Your leaf selection strategy determines harvest success. Target mature leaves measuring 8-10 inches with deep green color. Skip damaged or yellowing foliage to maintain plant health.
- Choose outer leaves first – preserving inner growth for continuous production
- Select leaves at ideal leaf age – 55-75 days from planting for best texture
- Avoid pest damage impact – bypass leaves with holes or discoloration
- Maintain harvesting frequency effects – pick every 7-10 days for maximum yield
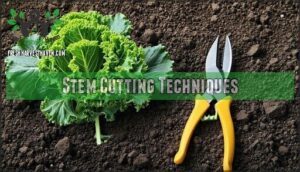
Stem Cutting Techniques
When cutting kale, angle matters for healthy regrowth.
Make clean cuts at a 45-degree angle about one inch above the soil line.
Tool sharpness prevents stem damage and disease prevention starts with sanitized blades.
For optimal leaf flavor, harvest when leaves reach 6-12 inches.
Sharp scissors or pruning shears work best for cutting height precision.
This technique guarantees your organic kale continues producing fresh leaves for all your kale recipes throughout the harvest season.
Handling and Storage
Proper handling transforms fresh kale from garden to table while preserving its organic goodness.
Quick cooling methods and smart bagging options protect nutrient retention during storage.
- Immediate cooling: Rinse fresh kale in cold water within 30 minutes of picking kale to maintain crispness and extend storage duration
- Smart bagging: Store unwashed leaves in breathable bags to preserve kale nutrition for up to two weeks
- Washing practices: Clean kale just before using in kale recipes to prevent premature deterioration
Using a crisper container helps maintain freshness.
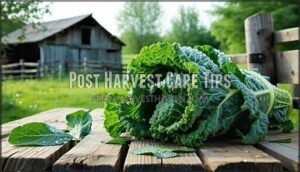
Post Harvest Care Tips
Your freshly harvested kale needs immediate cooling to preserve its crisp texture and nutritional value.
Proper post-harvest handling determines how long your kale stays fresh and maintains its quality in storage.
Cooling and Storage Methods
Quick cooling is your fresh kale’s best friend after picking kale.
Store at ideal temperature near 32°F with humidity control around 95-98%.
Use perforated storage containers or breathable bags to prevent moisture loss.
See various kale cooling products that can help.
Skip washing effects until ready to eat since wet leaves spoil faster.
Proper crop preservation extends shelf life from days to weeks while maintaining kale nutrition during harvest season, which is crucial for fresh kale.
Maintaining Nutrient Quality
Protecting kale’s nutritional powerhouse requires smart handling after harvest.
You’ll maximize the health benefits when you eat kale by following these preservation steps:
- Cool immediately – Temperature drops lock in vitamins and minerals
- Avoid washing until ready to use to prevent nutrient loss
- Shield from sun exposure – UV rays destroy delicate compounds
- Choose breathable bag types for proper air circulation
- Store unwashed to maintain peak vegetable nutrition levels
These cooling methods guarantee your nutrient-rich vegetables retain maximum value during storage duration.
Extending Shelf Life
Store your freshly harvested kale at storage temperatures between 32-40°F with humidity control at 95% for maximum shelf life.
Choose proper packaging options like perforated bags to prevent moisture buildup.
Avoid washing effects by keeping leaves dry until use, as washing accelerates decay.
To further improve storage, consider using paper bags storage for breathable conditions.
Consider ripening inhibitors through controlled atmosphere storage.
These food preservation techniques help maintain kale benefits while extending your nutrient-rich vegetables’ freshness up to two weeks after harvest.
Frequently Asked Questions (FAQs)
Do you pick kale from the top or bottom?
Like a green treasure chest, kale offers riches from the bottom up.
You’ll harvest outer leaves first, working from the plant’s base upward.
This method keeps the central growing tip intact, ensuring continuous production throughout the growing season.
Can you harvest kale in winter conditions?
You can harvest kale through winter since it’s frost-tolerant and actually sweetens after cold exposure. However, you’ll need to protect plants from harsh freezing temperatures and heavy snow accumulation.
How often should you harvest from plants?
Ironically, the secret to abundant kale harvests isn’t waiting longer—it’s picking more often.
You’ll get the best results harvesting every one to two weeks throughout the growing season.
Regular picking encourages fresh growth.
What causes bitter taste in kale leaves?
Excessive heat and stress cause kale leaves to turn bitter.
You’ll taste this unpleasant flavor when plants experience hot weather, drought, or overcrowding.
Harvest during cool mornings and water consistently to prevent bitterness.
Does harvesting method affect regrowth speed?
Sharp shears make all the difference.
When you cut cleanly near the base, your kale bounces back faster than rough tears or dull cuts.
Proper harvesting technique directly speeds regrowth by minimizing plant stress and damage, which is why using sharp shears is crucial.
Can you eat kale flowers and stems?
Yes, you can eat kale flowers and young tender stems.
The flowers taste sweet and mild while young stems are crunchy.
Older thick stems become tough and bitter so avoid those completely, especially the tough ones.
Conclusion
Professional kale harvesting contrasts sharply with amateur picking that kills plants.
You’ve learned how to harvest kale properly through strategic leaf selection and precise cutting techniques.
Your kale plants will continue producing for months when you cut outer leaves first and leave the center crown intact.
Sharp clean tools prevent disease while proper timing guarantees peak nutrition.
These methods transform single plants into continuous producers that supply fresh greens throughout the growing season, making them continuous producers.

