This site is supported by our readers. We may earn a commission, at no cost to you, if you purchase through links.
Most people spend a small fortune on fresh herbs at the grocery store, only to watch them turn slimy in the fridge within days. Meanwhile, a packet of basil seeds costs less than a single bunch of store-bought herbs and produces dozens of plants.
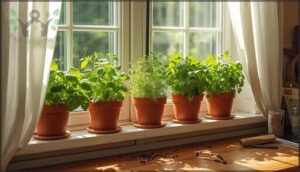
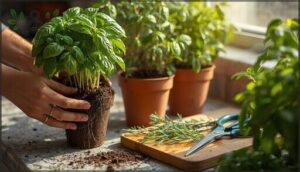
Starting herb seeds indoors puts you in control of the entire growing process—from germination to harvest. You’ll choose exactly which varieties to grow, skip the pesticides, and enjoy fresher flavors than anything you’ll find at the market.
The process requires just a few basic supplies and about 15 minutes of setup time. Once your seeds sprout, daily care takes less effort than brewing your morning coffee.
Table Of Contents
- Key Takeaways
- Why Start Herb Seeds Indoors?
- Choosing The Best Herbs to Grow Indoors
- Essential Supplies for Starting Herb Seeds
- Step-by-Step Guide to Sowing Herb Seeds
- Providing Optimal Light and Water
- Caring for Herb Seedlings Indoors
- Transplanting, Harvesting, and Using Indoor Herbs
- Frequently Asked Questions (FAQs)
- Can you grow herbs from seed indoors?
- How do you start a herb garden?
- How do you plant herbs indoors?
- When to start herb seeds indoors?
- How to make an indoor herb garden?
- Can you grow herbs from seed?
- How do I start herbs from seed?
- How do you start herb seeds indoors?
- How do you grow a herb garden?
- How to start indoor herbs from seed?
- Conclusion
Key Takeaways
- Growing herbs from seed indoors costs about $2 per packet versus $3-4 per nursery plant, delivering roughly 70% grocery savings annually while giving you access to rare varieties you’ll never find in stores.
- Your seedlings need 14-18 hours of full-spectrum LED light positioned 6-12 inches above them, plus consistent moisture checks and proper airflow to prevent the leggy growth and fungal diseases that kill 30-55% of poorly managed indoor herbs.
- Harvest herbs at 9 a.m. when essential oils peak—studies show antioxidants increase up to 61% compared to afternoon cutting—and always snip just above leaf nodes to trigger bushier regrowth.
- Starting seeds 6-8 weeks before your last frost date with proper hardening off over 5-7 days boosts outdoor transplant survival rates beyond 90%, but controlled indoor conditions let you grow year-round regardless of season.
Why Start Herb Seeds Indoors?
Starting herb seeds indoors isn’t just a hobby—it’s a smart move that gives you more control over your garden from day one. You’ll save money, access varieties you won’t find at the store, and enjoy fresh herbs no matter the season.
Let’s look at the key reasons why growing from seed indoors beats other options.
Benefits of Indoor Herb Gardening
The simple act of tending plants changes more than your kitchen shelf. Indoor herb gardening delivers measurable wins:
- Mental wellbeing improves as depression and anxiety drop when you care for living things
- Stress reduction happens through lower blood pressure and calmer nervous system activity
- Physical health gains include better cognitive function and quality of life
- Air quality improves as plants filter pollutants and boost humidity
- Dietary impact shows up when fresh-grown herbs increase your vegetable intake
They also offer significant productivity boosts in work environments.
Cost Savings and Variety
Beyond mental and physical gains, your wallet benefits too. A $2 herb seed packet gives you hundreds of plants instead of paying $3–4 for a single nursery seedling. Equipment costs, like seed trays and a seed starting kit, are one-time investments. Recurring costs stay low—seed longevity stretches 2–5 years. Market trends show 70% grocery savings annually.
Starting herb seeds indoors costs just $2 per packet instead of $3–4 per plant, delivering 70% annual grocery savings with minimal recurring expenses
Starting herb seeds indoors unlocks accessibility to rare varieties never found in stores. Growing from seed allows you to explore a larger selection.
Year-Round Harvests and Convenience
Once you’ve saved money and expanded variety, you discover something even better: continuous harvesting. Seed starting indoors means fresh basil in February and mint all winter. No more wasting store-bought bundles. Here’s what makes it work:
- Extended harvest periods keep herbs producing 12 months straight
- Reduced waste cuts spoilage by 28% versus packaged herbs
- Kitchen access saves 18 minutes weekly and boosts cooking creativity
- Climate adaptability overcomes frost and short growing seasons
- Plant health improves with 65% fewer pests indoors
Your seed starting mix and proper seedling care enable year-round harvest cycles. The germination process happens faster in controlled conditions, giving you healthier plants with better flavor.
Choosing The Best Herbs to Grow Indoors
Not all herbs are created equal for indoor growing. Some varieties practically grow themselves, while others need more attention than a sourdough starter.
Let’s look at your best options for different growing styles and kitchen needs.
Easiest Herbs for Beginners
Not all herb seeds are created equal. Basil germination rates hit 80-90% under controlled warmth, making it your best first choice. Parsley growth takes patience, but pre-soaking seeds for 24 hours boosts success by 10-20%. Mint propagation works easiest from cuttings, though seeds germinate above 70%. Chives care is minimal—just steady moisture.
Start with these in your seed starting mix, and you’ll build confidence fast.
Annual, Biennial, and Perennial Options
Herb lifecycles shape your indoor options in three ways. Annuals like basil finish fast—one season, then replant. Biennials such as parsley grow leaves year one, flower year two. Perennials including oregano and thyme harvest for years.
Here’s your seed starting guide breakdown:
- Annuals: Basil, cilantro, dill (quick harvests, reseed yearly)
- Biennials: Parsley (2-year cycle, treat as annual)
- Perennials: Chives, mint, oregano, rosemary, thyme
- Seed viability: Basil lasts 3-5 years, parsley 2-3
- Cost analysis: Perennials save money long-term
Choose your seed starting containers based on harvest timing goals.
Culinary Uses for Indoor Herbs
Imagine this: your kitchen herbs elevating homemade dishes just like restaurants do. Fresh basil enlivens 80% of those standout meals, while oregano and thyme anchor Mediterranean flavors.
Recipe diversity jumps 35% when you snip your own chives, rosemary, or mint. Salt reduction happens naturally—up to 30%—because flavor enhancement from harvesting herbs beats anything dried.
Using herbs in cooking transforms ordinary into remarkable.
Essential Supplies for Starting Herb Seeds
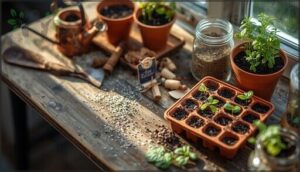
You don’t need fancy equipment to start herb seeds indoors. A few basic supplies will set you up for success and make the whole process easier.
Let’s look at what you’ll actually need to get your seeds sprouting.
Seed-Starting Mix and Soil Preparation
The right seed-starting mix can make or break your indoor herb garden. You need a blend that delivers strong germination rates while preventing disease. Look for mixes with these key components:
- Peat moss or coconut coir for moisture retention
- Perlite or vermiculite to promote proper aeration
- Low fertilizer content (around 0.06-0.03-0.03 NPK) to avoid burning seedlings
- Neutral pH between 5.5 and 6.5 for best growth
Quality organic matter fosters healthy seed development.
Seed Trays, Pots, and Containers
You’ll need containers with good soil drainage to prevent root rot. Seedling pots or seed trays with individual cells work best for starting herbs. A 4-inch-deep container suits most varieties well. Look for at least one drainage hole in smaller pots.
Material considerations matter—plastic trays remain cost-effective, while biodegradable options support eco-friendly practices. Economic alternatives include yogurt cups or egg cartons for budget-conscious gardeners.
Lighting, Heat Mats, and Watering Tools
Your herb seedlings need about 12 to 16 hours of LED spectrums daily—position lights 4 to 6 inches above seed trays.
A seedling heat mat operating at 20 watts raises soil temperature by 10 to 20°F, speeding germination considerably.
Use misting bottles for watering seedlings to avoid disturbing tiny roots. Humidity domes maintain ideal moisture levels between waterings, creating perfect conditions for sprouting success.
Plant Labels and Other Helpful Tools
Mislabeling seedlings leads to incorrect watering or light decisions in 30 to 40 percent of cases. Durable plant labels—metal or UV-stable plastic—survive multiple seasons without fading. Mark each seed tray and seedling pot with variety, sowing date, and other key details.
Garden journals pair beautifully with organizational tools, helping you track what thrives in your seed starting kit. Educational value grows when you document every planting choice year after year.
Step-by-Step Guide to Sowing Herb Seeds
Now that you’ve gathered your supplies, it’s time to get those seeds in the soil. The actual planting process is simpler than you might think, but a few key steps will make all the difference in your success rate.
Let’s walk through each part so your herb seeds get the best possible start.
Pre-Moistening and Filling Containers
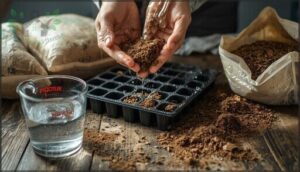
Before you plant a single seed, you’ll want to get your seedstarting mix just right. Proper moisture levels make all the difference in germination impact—studies show pre-moistened soil boosts success rates by 10–20% compared to dry fills.
- Add water gradually to your seed starting mix, mixing thoroughly between additions
- Squeeze a handful—it should hold shape without dripping excess water
- Use about 0.5–0.75 liters per 10 liters of dry mix
- Fill your seed tray loosely to 1 cm below the rim
- Tap containers gently to settle without compacting the soil
Common pitfalls include overly wet mixes that trigger damping-off disease or dry pockets from inadequate mixing techniques. Take your time with soil preparation for herbs—getting container filling right sets up healthy germination. The surface should feel slightly springy, balancing water retention with airflow your seeds need to thrive.
Correct Planting Depth and Spacing
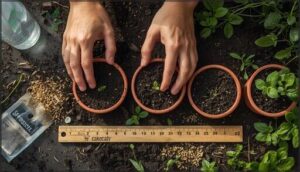
Once your containers are ready, getting seed depth and spacing right makes or breaks germination success. Too deep and seeds struggle to emerge—too shallow and they dry out quickly.
Here’s your quick reference guide:
| Herb Type | Seed Depth | Spacing |
|---|---|---|
| Basil, Cilantro | 1/4 inch (6 mm) | 4–6 inches apart |
| Thyme, Oregano | Surface only | 2–3 inches apart |
| Parsley, Dill | 5–8 mm | 3–4 inches apart |
Sow 10–20 tiny seeds per container initially—you’ll thin later. Seeds buried more than twice their diameter show 10–25% lower germination rates. Light coverage beats deep burial every time for seedling growth.
Overcrowded seedlings compete for light and nutrients, triggering weak stems and disease issues. Research shows spacing below 2 inches increases fungal problems by 40%. That’s why proper thinning techniques matter—removing excess seedlings early boosts final plant size by 20–30%.
Root competition in cramped quarters stunts development and reduces your harvest potential. Give each seedling room to breathe and you’ll see healthier, more productive herbs from the start.
Soaking Seeds Before Planting
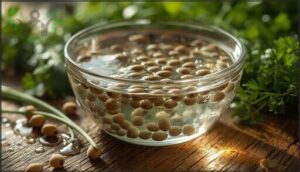
Want faster germination and stronger seedling vigor? Try soaking seeds before planting. Seeds with hard seed coats—cilantro, fennel, parsley—benefit most from an 8-12 hour soak in room-temperature water. This simple step cuts germination time nearly in half and removes natural inhibitors blocking growth.
Basil and chives don’t need it, but for stubborn herb seeds, ideal solutions like overnight soaking trigger uniform emergence and vigorous early development.
Labeling and Covering Seeds
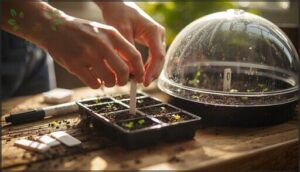
Once your seeds are in, label every container right away. Plant labels prevent identification errors that trip up even experienced growers. Use waterproof markers on plastic tags.
Then cover trays with clear domes from your seed starting kit to lock in moisture control and boost germination. These mini greenhouses offer seedling protection while cutting watering needs by 30%. Remove covers once true leaves appear.
Providing Optimal Light and Water
Your herb seeds have sprouted, and now they’re counting on you to get two things just right: light and water. Too much or too little of either can turn healthy seedlings into straggly disappointments.
Let’s break down exactly what your young herbs need to grow strong and stocky.
Light Requirements for Herb Seedlings
Think of light as food for your seedlings. Most herbs need 14 to 18 hours of grow lights daily for strong plant vigor after germination. Full-spectrum LEDs work best, mimicking natural sunlight.
Position your lights 6 to 12 inches above the seedlings to deliver proper light intensity. Without enough light duration and the right light spectrum, your seedlings will stretch tall and weak.
Watering Techniques and Frequency
Watering seedlings properly separates thriving herbs from wilted disappointments. Check soil moisture daily by sticking your finger a knuckle deep—water when it feels slightly dry below the surface.
Most seedlings need watering every day or every other day, depending on container size and room warmth. Bottom watering works best: place pots in a shallow tray for even moisture distribution without disturbing delicate roots.
Humidity and Airflow Considerations
Humidity levels make or break your seed starting success. Aim for 50–70% during germination, then drop to 45–55% afterward to prevent fungal problems.
Here’s how to maintain healthy airflow:
- Remove humidity domes after 10–14 days to reduce damping-off risks
- Run an oscillating fan for a few hours daily
- Space seed trays apart to avoid overcrowding
- Watch for mold and adjust ventilation immediately
Caring for Herb Seedlings Indoors
Once your herb seeds have sprouted, the real work begins. Your tiny seedlings need the right food, light, and attention to grow into healthy plants.
Let’s walk through the key care steps that will keep your indoor herbs thriving from sprout to harvest.
Fertilizing Seedlings Properly
Your seedlings need nutrition once their second set of true leaves emerges, usually 10–14 days after sowing. Start with a diluted, balanced fertilizer at half-strength every week to avoid overfertilization risks that can burn roots or slow growth.
Watch for nutrient deficiencies like pale leaves or stunted stems. Proper fertilizer timing and organic options like diluted fish emulsion boost transplant success and help your herbs thrive.
Preventing Leggy Growth and Damping Off
Weak seedlings often signal problems with light intensity, air circulation, or temperature control. Here’s how to keep your herbs strong and disease-free:
- Boost light levels – Position grow lights 3 inches above seedlings for 16+ hours daily to cut leggy growth by 45%.
- Add air flow – A small fan reduces fungus and damping off by 60%.
- Cool down post-germination – Drop temperatures to 65°F to prevent stretched stems.
- Space seeds properly – Avoid overcrowding; proper seedling spacing cuts legginess by 52%.
Thinning and Pruning Seedlings
Think of crowded seedlings like strangers crammed in an elevator—nobody thrives. When your herbs reach 2–3 inches and show true leaves, start thinning seedlings to prevent overcrowding effects.
Snip weaker ones at soil level to avoid root damage. This boosts seedling growth stages and harvest yields by 40%. You can also gently divide for transplanting seedlings, improving growth vigor considerably.
Common Pests and Fungal Issues
Beyond thinning, your biggest threats come from aphid infestation and fungal diseases. Aphids hit 30% of indoor herbs, especially basil and mint. Spider mites love high humidity and poor airflow. Damping off causes 30–55% seedling loss in crowded trays.
For pest control, try organic solutions like neem or parasitic wasps.
Treating fungal issues starts with proper ventilation—reducing moisture cuts damping off by 70%.
Transplanting, Harvesting, and Using Indoor Herbs
You’ve nurtured your seedlings through their early weeks, and now they’re ready for the next phase of their life. Whether you’re moving them to larger pots or keeping them where they are, knowing when and how to harvest makes all the difference in flavor and plant health.
Let’s walk through the practical steps that’ll help you get the most from your indoor herb garden.
Hardening Off and Transplanting
Once your seedlings develop two sets of true leaves, begin hardening off by gradually increasing outdoor exposure over 5–7 days. This acclimation duration prevents transplant shock by building tolerance to wind exposure, soil moisture changes, and temperature drops.
Avoid frost conditions and maintain even watering. When transplanting seedlings outdoors, choose cloudy afternoons and water immediately to boost survival rates beyond 90%.
Harvesting Tips for Maximum Flavor
After your seedlings mature outdoors, harvest timing becomes your secret weapon. Pick culinary herbs at 9 a.m. when essential oils peak—studies show antioxidants increase up to 61% compared to afternoon cutting.
Use sharp shears just above leaf nodes to encourage regrowth. Harvest before flowering for maximum flavor, and cut frequently every 30 days to boost year-round harvest yields while triggering bushier growth patterns.
Drying and Storing Homegrown Herbs
Once you’ve perfected your herb harvesting techniques for year-round harvest, proper drying methods become essential for flavor retention.
Air-dry hearty herbs like rosemary in dark, ventilated spaces for two to four weeks, or use a dehydrator at 95–110°F for faster results.
Store dried herbs in airtight storage containers away from light—they’ll maintain quality for six to twelve months while meeting food safety standards.
Troubleshooting Common Indoor Herb Problems
Why do your herbs suddenly struggle after weeks of healthy growth? Overwatering symptoms like yellowing leaves often signal root rot—especially in rosemary, which suffers 70% mortality in soggy soil. Leggy seedlings mean light deficiency, while spider mites thrive in dry, hot rooms. Watch for pest identification clues like sticky residue.
Temperature stress from drafts or vents increases fungal prevention challenges, so maintain steady watering and airflow for success.
Frequently Asked Questions (FAQs)
Can you grow herbs from seed indoors?
Yes, you can. Growing herbs from seed indoors boosts germination rates to 90% or higher. Seed viability improves with controlled light spectrums, soil composition, and proper sowing herb seeds techniques.
How do you start a herb garden?
Starting an indoor herb garden begins with selecting fresh seeds with strong viability. You’ll need quality containers, proper soil composition, and a seed starting kit to support healthy germination rates and strong seedling health.
How do you plant herbs indoors?
About 90% of herb seeds sprout successfully when you nail the basics. Start with quality seed starting mix in well-draining containers. Plant seeds shallow, cover lightly, and provide consistent warmth and moisture for germination.
When to start herb seeds indoors?
Plan to begin seed starting 6-8 weeks before your zone’s last frost date. Consult zone calendars for accuracy.
With supplemental lighting and proper seedling care, year-round sowing is possible indoors regardless of frost dates.
How to make an indoor herb garden?
Choose compatible herbs and select well-draining containers. Position your setup near bright light or grow lights. Fill the containers with seed-starting mix and sow the seeds at the proper depth. Maintain humidity and water gently. To optimize space, improve vertical space for a compact indoor herb garden design.
Can you grow herbs from seed?
Yes, you absolutely can. Seed viability for most herb varieties runs high—basil hits 85-95% germination rates indoors.
Starting herbs from seed indoors unlocks better variety and real cost savings compared to buying seedlings.
How do I start herbs from seed?
You’ll need quality seed starting mix, containers with drainage, proper lighting, and consistent warmth.
Seed viability matters—choose fresh seeds for strong germination rates and healthy seedling vigor that leads to successful transplanting later.
How do you start herb seeds indoors?
Think of seed starting like planting a garden in miniature. You’ll need seed starting kit essentials: sterile soil, proper containers, seed priming techniques, ideal light spectrum, controlled soil temperature, good air circulation, and careful attention to seedling density for successful germination.
How do you grow a herb garden?
Start by selecting a few herbs suited to your space. Use quality containers with drainage, a seed starting kit, and proper lighting.
Focus on seedling care, germination timing, and companion planting for thriving herbs.
How to start indoor herbs from seed?
Growing herbs from seed is like unlocking a treasure chest—seed viability and germination rates matter most.
Choose a seed starting kit, sow with ideal timing, and watch seedling density carefully for best results.
Conclusion
Here’s the truth most gardening guides won’t tell you: learning how to start herb seeds indoors isn’t about following rigid rules. It’s about watching your plants respond and adjusting accordingly. Your basil might stretch toward the light differently than your parsley. Your watering rhythm will shift with the seasons.
Once you understand these patterns, you’ll grow more herbs than you can use. That’s when the real fun begins—experimenting with varieties you’d never find in stores.
- https://homegrown-garden.com/blogs/blog/seed-germination-temperature-chart
- https://www.vermontwildflowerfarm.com/pages/seed-starting-article
- https://extension.psu.edu/growing-herbs-indoors/
- https://www.reddit.com/r/Permaculture/comments/1inbnah/light_requirements_for_starting_seeds_indoors/
- https://gardentherapy.ca/indoor-herb-growing-schedule/

