This site is supported by our readers. We may earn a commission, at no cost to you, if you purchase through links.

Most first-time gardeners don’t fail because they picked the wrong plants. They fail because they started too soon, worked soil that wasn’t ready, or skipped the prep work that makes everything else easier.
Spring looks like go-time the moment temperatures climb, but the ground often tells a different story.
Get the timing and the groundwork right, and even a modest backyard plot can produce more than you’d expect.
These spring gardening tips for beginners cut through the guesswork—so your first season builds real confidence, not just compost.
Table Of Contents
- Key Takeaways
- Preparing Your Garden for Spring
- When to Start Spring Gardening
- Test and Amend Your Soil
- Plant Your First Spring Crops
- Watering and Mulching Basics
- Protect Plants From Frost
- Prevent Pests and Disease
- Top 5 Spring Gardening Essentials
- Frequently Asked Questions (FAQs)
- What is the easiest plant to grow in spring?
- When should I start preparing my garden for spring?
- What is the gardening 3 year rule?
- What is the rule of 3 in gardening?
- What is the most common mistake of first time gardeners?
- When should I start planting my spring garden?
- How should I prep my garden for spring?
- What is Spring Garden Planning?
- How do you plan a Spring Garden?
- Should you plant a garden in spring?
- Conclusion
Key Takeaways
- Timing beats enthusiasm — wait until soil temps hit 40–50°F for cool-season crops and 65°F for warm-season ones, because planting into cold, wet ground stalls growth before it starts.
- Prep your soil before you plant anything: clear debris, pull weeds, test pH (aim for 6.0–7.0), and work in 2–3 inches of compost to give roots the foundation they need.
- Frost doesn’t follow a calendar, so keep row covers ready, harden off seedlings over 7–14 days, and hold off on heavy pruning until daytime temps stay consistently above freezing.
- Crowded plants, wet foliage, and dirty tools are your biggest disease risks — space for airflow, water at the roots, rotate crops every two years, and sanitize blades between beds.
Preparing Your Garden for Spring

Spring cleanup is one of those tasks that sets the tone for everything that follows. Before you plant a single seed, your garden needs a fresh start.
From pulling out dead growth to waking up tired soil, renewing your garden beds in spring gives you the clean foundation every new season deserves.
Here’s what to tackle first.
Clear Dead Plants and Winter Debris
Before anything else gets planted, your spring garden cleanup sets the tone for the whole season. Clear winter debris first — it’s where disease spores and overwintering pests hide.
- Rake carefully to remove dead stems and leaf litter
- Prune dead growth before spring to reduce mold risk
- Sort debris: compost safe material, bag the rest
- Create mulch from leaves to use later
Good garden sanitation and pest habitat reduction start here. Begin cleanup after daytime temperatures exceed 50°F(https://livinglargeinasmallhouse.com/spring-garden-cleanup/) for a week.
Check Beds, Borders, and Supports for Damage
Once the debris is cleared, take a walk through your beds with fresh eyes. Check raised bed frames for loose boards, cracked corners, or signs of rot — Bed Frame Leveling and Fastener Tightening matter more than most beginners realize.
Look for Border Edge Wear, inspect any Support Beams, and do a quick Slat Damage Check. Catching small breaks now saves bigger headaches at planting time.
Remove Weeds Before They Establish
Weeds don’t wait, so neither should you.
Once your structures are checked, pull any weeds you spot now — hand pulling works best when soil is moist.
Dig out perennial roots completely.
For early season garden cleanup, preemergent timing matters: apply before seeds germinate.
Groundcover planting and barrier fabric use also help with weed control before weed establishment takes hold.
Refresh Beds With Compost and Organic Matter
Once the weeds are out, it’s time to feed your soil. Spread 2–3 inches of organic compost across your beds and work it into the top 6–8 inches.
Good soil amendment benefits earthworm habitat, improves soil aeration, and boosts moisture retention. A healthy carbon nitrogen balance also helps with pathogen suppression — giving your plants the strongest start possible.
Keep Some Garden Debris for Beneficial Insects
Before you sweep every corner clean, hold back a little.
Hollow stems serve as bee nesting sites for over 30 percent of native bee species, and leaf litter habitat shelters hundreds of overwintering predators.
Hollow stems shelter over 30 percent of native bees, while leaf litter hides hundreds of overwintering predators
A small brush pile refuge in a shaded corner attracts lacewings and parasitic wasps.
Dead plant food also feeds soil life.
Using garden debris for habitat is one of the smartest things you can do.
When to Start Spring Gardening

Timing is everything in spring gardening, and starting too early is just as frustrating as starting too late. The good news is that few simple signals will tell you exactly when your garden is ready.
what to watch for before you plant your first seed.
Watch Your Average Last-frost Date
Your last frost date is the anchor for every spring planting decision. Check NOAA frost maps for your region’s historical frost tracking data, then adjust for microclimate factors like elevation or sheltered slopes.
- Set up weather alert setup notifications for late cold snaps
- Use temperature thresholds for planting as your go-signal
- Keep row covers ready for frost protection and late-season safeguards
Wait Until Soil is Workable, Not Wet
Even after frost clears, patience matters. Use the Squeeze Test Timing method — grab a handful from 6–8 inches deep and press firmly.
Good Soil Crumb Consistency means it holds shape, then crumbles. If it smears or drips, Avoid Planting In Wet Soil and apply Dry Weather Waiting of 3–7 days.
This simple Moisture Check Method protects soil structure and prevents compaction damage.
Use Soil Temperature to Guide Planting
Air temperature can fool you. Soil temperature is what actually matters for germination.
Use a soil thermometer and check at 4–6 inches — that’s your real planting signal.
Cool-season crops need at least 40–50°F at that depth; warm-season vegetables want 65°F or above.
Track readings over several days, not just one, to confirm your crop temperature windows before sowing.
Start With Cool-season Crops First
Cool-season crops are your garden’s head start. Spinach, lettuce, kale, and radishes are frost-resistant varieties that tolerate dips to around 28°F and thrive in 60–65°F daytime temperatures.
Direct sow cold-hardy crops first as soon as soil reaches 40–50°F — rapid germination techniques like light mulching over rows help seeds emerge faster. Early vegetable planting means early harvest benefits, sometimes within 30–40 days.
Hardening Off Seedlings Before Transplanting
Hardening off seedlings gradually is the bridge between your indoor nursery and the garden. Start with 1–2 hours of outdoor time daily, using shade cloth to soften intense light.
Temperature acclimation, moisture management, and wind tolerance training all build together over 7–14 days.
If leaves droop or brown at the edges, bring them back inside.
Sturdy stems and calm leaves mean they’re ready.
Test and Amend Your Soil

Good soil is the foundation everything else depends on. Before you plant a single seed, it’s worth taking a few minutes to understand what’s actually going on beneath the surface.
Here’s what to check and fix first.
Test Soil PH Before Planting
Before you plant a single seed, test your soil pH. Most vegetables thrive between 6.0 and 7.0 — outside that window, nutrients lock up and plants struggle.
A basic soil testing kit gives you a solid starting point, though home kit accuracy varies, so follow sampling depth guidelines of 4–6 inches.
Seasonal pH fluctuations mean spring readings can shift, so build a simple pH monitoring schedule into your routine.
Check Nutrient Levels With a Soil Test
pH tells you one piece of the story. A full soil test fills in the rest — nitrogen, phosphorus, potassium, and the secondary nutrients your crops quietly depend on.
Here’s what a good test covers:
- Macro-nutrient ratios (N-P-K) for current crop needs
- Calcium, magnesium, and sulfur as secondary nutrients
- Micronutrient importance — iron, zinc, and boron in extended tests
- Soil Test Timing — ideally before planting, then every 1–3 years
- Nutrient Deficiency Indicators — yellowing, stunted growth, poor fruit set
Smart nutrient management starts with knowing what’s already there.
Adjust PH With Lime or Sulfur
Once your soil test reveals a pH problem, fixing it’s straightforward. To raise low pH, lime application timing matters — fall or early spring works best. Choose dolomitic lime if magnesium is also low.
To drop pH, calculate your sulfur rate based on soil texture and how far off you are.
Always wear safety gear during pH adjustment, and recheck pH after a few months.
Mix in 2–3 Inches of Compost
After balancing your pH, compost is your next move. Spread 2–3 inches evenly across your beds — that uniform compost layer enhances soil structure improvement, encourages microbial population growth, and delivers slow nutrient release right when seedlings need it.
Working it into the top 6 inches also aids root penetration.
Think of it as the foundation your spring garden preparation depends on.
Loosen Compacted Soil Before Sowing
Even after adding compost, compacted soil can choke your roots before they ever take hold. Loosen it first — your plants will thank you.
- Use core aeration to remove plugs 2–3 inches deep
- Try broadfork loosening to reach 8–12 inches without disrupting structure
- A hand cultivator works well for small beds
- Use a soil probe measurement to check compaction depth
- Focus on timing soil loosening a few days before sowing
Plant Your First Spring Crops
Getting your first crops in the ground feels like the real start of the season. The good news is you don’t need to figure it all out at once — a few smart choices early on will set you up for a strong harvest.
Here’s what to focus on first.
Choose Easy Beginner Vegetables

Start with crops that don’t demand flawless results. Radishes grow fast to harvest in just 25 days, and lettuce seedlings are ready in 30 to 60 days.
Bush bean planting pays off in 50 to 60 days. For bigger yields, zucchini delivers fast. Cherry tomato compact varieties fit any small space.
Weaving in peas, spinach, and carrots rounds out a confident, productive first bed.
Direct-sow Cold-hardy Crops Outdoors

As soon as the ground is workable, cold-hardy crops are ready to go. No waiting, no fuss — just pre-sowing soil prep and the right timing.
- Spinach — germination temperature: 40–50°F, seed depth: ¼ inch
- Arugula — early harvest window of just 25 days
- Radishes — soil moisture consistency is key for quick 25‑day picks
- Beets — sow at ¼–½ inch deep once soil hits 40°F
- Carrots — direct sow cold‑hardy crops first when top 2 inches thaw
Start Warm-season Seeds Indoors

Warm-season crops like tomatoes and peppers need a head start indoors — about 6–8 weeks before your last frost. Use a heat mat to keep soil at 70–75°F for steady germination.
Position grow lights 2–4 inches above seed trays, running full-spectrum LEDs 14–16 hours daily. Maintain 60–70% humidity, then reduce it once true leaves appear.
Always practice seedling labeling — mix-ups are costly.
Space Plants for Airflow and Growth

Crowded plants are a disease waiting to happen. Give each one room to breathe — proper canopy spacing keeps garden airflow moving and reduces mold pressure.
- Follow plant spacing guidelines from your seed packet exactly.
- Use vertical training with trellises to open aisles for air velocity.
- Arrange taller plants behind shorter ones for balanced light and airflow monitoring.
- Space plants properly for airflow and disease prevention from day one.
Add Companion Plants for Healthier Beds

Think of companion planting as building a team — every plant pulling its own weight.
Marigolds push aphids and whiteflies away from tomatoes, while nitrogen-fixing legumes like bush beans quietly enrich the soil beside them.
Pollinator-friendly herbs such as thyme draw beneficial insects early in the season.
Choose companion plants wisely using these companion planting strategies, and your beds will work smarter from day one.
Watering and Mulching Basics

Getting water right is one of the biggest things beginners get wrong — and it’s easier to fix than you’d think. A few simple habits, paired with mulch, can save your plants from both drought and overwatering.
Here’s what actually works.
Water Deeply When The Top Inch Dries
Before you water again, poke your finger an inch into the soil — if it’s still damp, hold off. When it’s dry, water deeply enough to reach 6–8 inches down.
soil penetration depth target encourages roots to follow moisture downward, reducing root zone saturation at the surface.
Use a moisture probe to confirm your watering schedule is actually reaching the root zone.
Follow The One-inch-per-week Rule
Once you’re watering deeply, the next step is knowing how much. Aim for about 1 inch per week — combining rainfall and irrigation.
Rainfall integration matters here: check your rain gauge before reaching for the hose.
Soil texture effects change how fast that moisture moves down. Sandy soil drains faster, so it may need a little more.
Deep watering benefits your plants by pulling roots downward, boosting water use efficiency naturally.
Water Early in The Morning
Timing matters as much as amount. Watering early in the morning gives your plants a real hydration boost before heat builds up.
Moisture absorbs into the soil before it evaporates, which enhances better soil moisture management throughout the day. It also keeps leaves dry, cutting down fungal risk.
Avoid overwatering young plants — wet foliage overnight invites disease fast.
Use Mulch to Hold Moisture
Mulch is your soil’s best insulator. A 2–3 inch layer cuts surface evaporation by up to 40 percent — that’s real moisture staying where roots need it.
- Bark mulch benefits: forms a dense mat, slowing evaporation quickly
- Straw mulch warmth: loosens spring soil while locking summer moisture in
- Wood chip retention: breaks down slowly, steadying soil moisture all season
- Compost mulch nutrition: feeds soil microbes as it decomposes
- Plastic mulch efficiency: aggressively prevents moisture loss for warm-season crops
Keep mulch several inches from stems to avoid rot.
Try Drip Irrigation or Soaker Hoses
Drip irrigation and soaker hoses take the guesswork out of keeping your garden hydrated. Drip systems use emitter placement strategies to deliver water directly to roots, cutting waste by up to 50–80%.
Soaker hoses are simpler — just lay them along rows.
Both reward you with consistent moisture and healthy plants.
Don’t skip filtration maintenance or seasonal system storage to keep things running smoothly.
Protect Plants From Frost

A late frost can sneak up on you even when spring feels like it’s fully arrived. The good news is that a few simple steps can keep your plants safe when temperatures dip overnight.
Here’s what you can do to protect them.
Cover Tender Plants on Cold Nights
A single cold night can undo weeks of careful work. That’s why frost protection isn’t optional — it’s your safety net.
Before temperatures dip toward freezing, act on these three steps:
- Place fabric over tender seedlings at dusk
- Use a hoop house setup to maintain an air gap between plant and cover
- Time cover removal after sunrise to prevent overheating
Layered insulation — like doubling lightweight fabric — extends protection when temperatures threaten to stay below 28°F for several hours. Cold frames offer similar security for low-growing crops. Monitor your forecast so your plants aren’t caught off guard.
Use Row Covers or Frost Blankets
Not all frost protection is created equal — and your cover material choice makes a real difference. Lightweight row covers let in 70–90% of light while nudging nighttime temps up by 1–3°C, ideal for early spring gardening.
Heavier frost blankets push that buffer to 4–8°C. Either way, hoop support systems keep fabric off foliage, ventilation strategies prevent humidity buildup, and microclimate benefits kick in fast.
Watch temperature thresholds for planting closely.
Plant in Raised Beds for Warmer Soil
Raised beds give you a real edge in early spring. Their exposed sides absorb sunlight and warm soil 4–12°F faster than in-ground plots — that’s preseason warmth working in your favor.
This bed edge insulation helps enhanced root development and temperature-driven yield from the start.
Mix in compost during soil preparation and soil amendment to increase soil heat retention for stronger, earlier growth.
Handle Frost-heaved Plants Carefully
When a plant gets pushed up by freezing soil, act fast. Gently loosen the soil around the exposed root crown, then press it back so the crown sits at or slightly above ground level.
Firm the soil to close air pockets, then water lightly.
Apply 3–4 inches of mulch for soil warmth management and drainage enhancement.
Check heaved spots after every thaw.
Delay Heavy Pruning Until Freezing Passes
Hold off on heavy pruning until daytime temperatures stay consistently above freezing for at least a week. This promotes Bud Dormancy Extension and Apical Dominance Retention, keeping vulnerable buds protected.
- Prune dead growth before spring growth surges
- Time garden tasks by temperature thresholds, not calendar dates
- Use row covers for late frosts during dividing perennials in early spring
- Delayed pruning benefits wound healing — Winter Wound Healing improves when cuts happen in milder conditions
- Pruning labor efficiency peaks once frost risk passes
Prevent Pests and Disease

Pests and diseases don’t wait for you to be ready — they show up early and move fast. The good news is that a few simple habits can keep most problems from gaining a foothold.
Here’s what to do to protect your garden this spring.
Inspect Plants Weekly for Early Damage
Walk your garden once a week — that’s your first line of defense. Check leaf undersides for eggs or clusters during each garden inspection.
Use a pest magnifier to catch tiny nymphs early. Watch for moisture stress signs like wilting or yellowing as early disease indicators.
Symptom documentation each week turns scattered observations into patterns, making early pest detection and disease prevention far more reliable.
Encourage Ladybugs and Other Beneficial Insects
Spotting pests early is half the battle — keeping beneficial insects around is the other half. Ladybugs, lacewings, and ground beetles are your natural allies.
Here’s how to bring them in and keep them:
- Grow nectar-rich flowers like yarrow, daisies, and fennel to attract pollinators and adult beneficials
- Build shelter piles from logs or brush for overwintering pollinators
- Set up shallow water stations with pebbles for safe landing
- Practice smart aphid management by keeping small pest populations as a natural food source
- Use targeted pesticides only as a last resort — protecting beneficial insects during garden preparation keeps your ecosystem balanced
Avoid Overhead Watering on Leaves
Wet leaves are an open invitation for fungal disease. When moisture lingers on foliage — especially during cool spring mornings — powdery mildew and leaf spots move fast.
Drip irrigation benefits your beds by delivering water directly to roots, keeping foliage dry. Pair that with a mulch barrier strategy to retain moisture and support canopy airflow management, and you’ll cut disease pressure substantially.
Rotate Crops to Break Pest Cycles
Pests are creatures of habit — they return to the same beds expecting the same meal. That’s where crop rotation planning breaks the cycle.
Swap plant families each season using Family Rotation Intervals of at least two years. Host-Free Years starve soil-dwelling pests naturally. Add Cover Crop Benefits through legumes between seasons, and Diverse Planting Sequences keep Integrated Pest Management IPM working without heavy pest control inputs.
Keep Tools Clean to Limit Spread
Dirty tools carry disease from bed to bed faster than you’d think. Build a simple sanitization routine: scrub blades with soap and water, then wipe with 70% isopropyl alcohol.
Sharp tools matter too — blade sharpening means cleaner cuts and fewer entry points for pathogens.
Try color-coded management to keep tools separate between beds, and always practice thorough drying practices before storage to prevent rust and mold.
Top 5 Spring Gardening Essentials
The right tools can make a real difference, especially when you’re just getting started. A well-chosen essentials will save you time, guesswork, and frustration through the whole season.
Here are five spring gardening must-haves worth adding to your setup.
1. Complete Gardening Success Guide Book
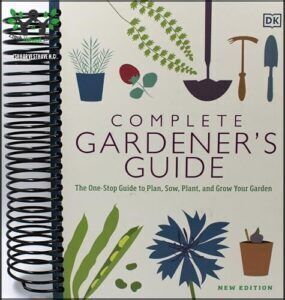
Think of this book as your gardening mentor in print form. The Complete Gardening Success Guide covers everything from soil prep to pest control, with step-by-step photos and diagrams that make each task easy to follow.
It includes "Plant Chooser" galleries to help you match plants to your climate and soil type. At $34.55, it’s a practical investment whether you’re building your first raised bed or troubleshooting a failing crop.
Beginners especially benefit from its clear checklists and seasonal guidance.
| Best For | Beginner gardeners who want a visual, all-in-one guide to designing, planting, and maintaining a garden from the ground up. |
|---|---|
| Price | $34.55 |
| Beginner Friendly | Yes |
| Indoor Use | Yes |
| Outdoor Use | Yes |
| Gift Ready | Yes |
| Warranty/Support | Publisher support |
| Additional Features |
|
- Covers a huge range of topics — from container growing to full DIY landscaping projects like raised beds and patios.
- The "Plant Chooser" galleries make it easy to pick the right plants for your climate and soil without second-guessing yourself.
- Step-by-step photos and diagrams mean you can actually follow along, even with zero experience.
- Region-specific advice can be hit or miss if you’re gardening outside North America.
- It’s print-only — no app, no digital companion, no interactive tools.
- Experienced gardeners may find it too introductory for their needs.
2. YAMRON Digital Soil Moisture pH Temperature Meter
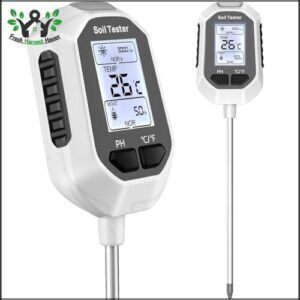
soil guesswork is one of the fastest ways to waste a season. The YAMRON 4-in-1 meter takes the mystery out of it by measuring moisture, pH, temperature, and light in about 10 seconds.
Just push the 8-inch stainless steel probe roughly 4 inches into moist soil and read the backlit LCD. The rotating head makes checking raised beds simple without awkward bending.
At $27.98, it’s an honest tool that tells you exactly what your plants need before problems start.
| Best For | Home gardeners and hobbyists who want a simple, no-fuss way to stop guessing and start growing smarter. |
|---|---|
| Price | $27.98 |
| Beginner Friendly | Yes |
| Indoor Use | Yes |
| Outdoor Use | Yes |
| Gift Ready | No |
| Warranty/Support | Manufacturer support |
| Additional Features |
|
- Reads moisture, pH, temperature, and light all in one tool — no switching between devices
- Rotating LCD head makes it easy to check raised beds or tall pots without awkward angles
- Quick 10-second readings keep your workflow moving
- PH accuracy can drift up to ±0.5 units, especially in very dry or very wet soil
- LCD font runs small, so temperature and moisture values can be a strain to read
- No power button — you’re relying on auto-shutoff, which can feel a little clunky
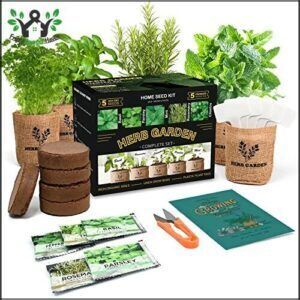
3. Organo Republic Medicinal Herb Seed Pack

Thirty-five medicinal and tea herb varieties in one box — that’s what the Organo Republic Seed Pack delivers for $29.74. You get over 16,300 non-GMO, heirloom seeds, from chamomile and echinacea to lavender and peppermint, each sealed in a resealable packet with a QR code linking to growing instructions.
It’s beginner-friendly and works indoors or out. Just note that germination rates vary across varieties, so start a few extra seeds per packet to give yourself a solid margin.
| Best For | Beginner gardeners, herbal tea lovers, and anyone who wants to grow their own medicinal herbs at home without a lot of prior experience. |
|---|---|
| Price | $29.74 |
| Beginner Friendly | Yes |
| Indoor Use | Yes |
| Outdoor Use | Yes |
| Gift Ready | Yes |
| Warranty/Support | Family-owned USA brand |
| Additional Features |
|
- 35 herb varieties and 16,300 seeds for $29.74 — solid value for the price
- Non-GMO, heirloom seeds with QR-linked growing guides make it easy to get started
- Resealable packets keep seeds fresh, and unopened stock stays viable up to 3 years
- Real-world germination rates fall well short of the claimed 90%, with some users seeing 30–50% failure
- Seed counts can be misleading — some packets labeled "~1000 seeds" reportedly contain only a handful
- Quality control is inconsistent; wrong seeds have shown up in labeled packets, and the included tools feel flimsy
4. Mint Indoor Herb Garden Kit
Fresh herbs on your windowsill — that’s what the Meekear Mint Indoor Herb Garden Kit makes possible, even mid-February. It comes with five planter bags, five compressed soil discs, plant markers, mini pruning shears, and a planting guide.
Each disc expands up to 10 times its size once hydrated — ready to plant in minutes.
Keep temperatures between 18–24°C and expect your first harvest around 4–6 weeks.
One note: the small bags may need upsizing once seedlings hit 2–3 inches.
| Best For | Beginners and home cooks who want fresh herbs on a windowsill without a lot of fuss — or anyone looking for a cute, practical gift. |
|---|---|
| Price | Not listed |
| Beginner Friendly | Yes |
| Indoor Use | Yes |
| Outdoor Use | Yes |
| Gift Ready | Yes |
| Warranty/Support | Brand support |
| Additional Features |
|
- Everything you need is in the box — soil, markers, shears, and a guide, so you’re not scrambling for supplies
- The compressed soil discs are a clever touch; just add water and you’re basically ready to plant
- Compact enough to sit on a shelf or balcony without taking over the space
- The bags aren’t waterproof, so you’ll need a tray underneath to catch drainage
- Seeds can be hit or miss — some users have had trouble with germination or got the wrong herb variety
- Once seedlings hit 2–3 inches, the bags get too small and you’ll need to transplant them
5. Foxlang Galvanized Raised Garden Bed
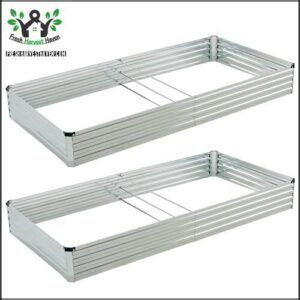
The Foxlang Galvanized Raised Garden Bed gives your spring setup a serious upgrade. Each 4 × 3 × 1 ft bed (sold in a 2‑pack) offers 12 inches of root depth — plenty for tomatoes, carrots, and peppers.
The open-bottom design drains naturally, so roots don’t drown. Assembly is straightforward, no special tools needed.
Just note the thin panels can dent under heavy pressure, and some users report early surface rust. A solid foundation for any beginner ready to grow confidently.
| Best For | Beginner gardeners who want an easy-to-assemble, affordable raised bed setup for growing vegetables, herbs, or flowers without a lot of heavy lifting. |
|---|---|
| Price | Not listed |
| Beginner Friendly | Yes |
| Indoor Use | No |
| Outdoor Use | Yes |
| Gift Ready | No |
| Warranty/Support | 3-year warranty |
| Additional Features |
|
- Comes as a 2-pack with 12 inches of depth — plenty of room for deep-rooted veggies like carrots and tomatoes.
- Open-bottom design drains naturally, which helps prevent root rot and keeps weeds from sneaking in underneath.
- Lightweight and modular, so you can move the beds around your yard if your layout changes.
- Thin sheet metal dents and bends more easily than thicker steel options, especially under heavy soil.
- Some users have reported early rusting, which suggests the galvanization may not hold up great in wet climates.
- The open bottom can let soil shift or spill out over time, so expect a little maintenance to keep things tidy.
Frequently Asked Questions (FAQs)
What is the easiest plant to grow in spring?
Want a win right out of the gate? Grow radishes.
They germinate in 3–7 days and are harvest-ready in about 25 days — hard to beat that kind of speed for a first-time gardener.
When should I start preparing my garden for spring?
Start preparing your garden four to six weeks before your average last frost date.
That window gives you time for cleanup, soil work, and planning before the real growing season kicks in.
What is the gardening 3 year rule?
Think of it like planting patience.
The gardening three-year rule means perennials sleep in year one, creep in year two, and leap in year three — roots first, then growth, then full bloom.
What is the rule of 3 in gardening?
The rule of three means grouping plants in sets of three — one tall, one medium, one low — to create natural depth and balance.
It keeps your beds visually interesting without feeling cluttered.
What is the most common mistake of first time gardeners?
The most common mistake? Planting too much, too close together.
Overcrowded beds choke airflow, invite disease, and stunt growth. Give each plant room to breathe — spacing matters more than most beginners expect.
When should I start planting my spring garden?
Your timing depends on your last frost date and soil temperature. For cool-season crops, once soil hits 40–50°F (4–10°C), you’re ready. Warm-season vegetables need consistently warmer nights above 50°F.
How should I prep my garden for spring?
Start by clearing out dead plant material, then loosen compacted soil and work in 2–3 inches of compost. Test your pH, pull early weeds, and you’re ready to plant.
What is Spring Garden Planning?
Spring garden planning means deciding what to grow, where to put it, and when to plant it. You’re fundamentally mapping out your season before a single seed hits the soil.
How do you plan a Spring Garden?
Well begun is half done." Plan your spring garden by mapping your space, noting sunlight, checking frost dates, testing soil, and choosing crops suited to your climate and skill level.
Should you plant a garden in spring?
Yes — spring is one of the best times to garden.
Longer days, warming soil, and spring rains create ideal conditions for both cool-season and warm-season crops to take root and thrive.
Conclusion
Think of your garden as a conversation—the soil speaks first, and your job is to listen.
Every spring gardening tip for beginners comes back to one truth: preparation decides the harvest before a single seed drops. You’ve learned when to start, how to read your soil, and what your plants actually need to thrive.
That foundation doesn’t just grow vegetables—it grows confidence.
This season, let the work you put in do the talking.
- https://www.youtube.com/watch?v=A_9l1ku58rs&list=PLOCd6lFGB16zxYhzGxrZYxgMzpmDhtNqr&index=7
- https://www.pinterest.com/provenwinners/perennials-for-spring/
- https://apps.apple.com/us/app/iscape-landscape-design/id439688430
- https://play.google.com/store/apps/details?id=com.iscapeit.android
- https://www.gardeningknowhow.com/garden-how-to/propagation/seeds/soaking-seeds.htm