This site is supported by our readers. We may earn a commission, at no cost to you, if you purchase through links.
Winter’s frozen grip loosens around mid-March, and your garden soil transforms from rock-hard clay into workable earth. That narrow window between thaw and planting season determines whether your tomatoes will burst with fruit or struggle through summer.
Preparing garden soil for spring isn’t about randomly tossing compost onto beds—it’s a strategic sequence of tasks timed to soil temperature, moisture levels, and your region’s last frost date. Start too early and you’ll compact wet soil into brick-like clumps. Wait too long and you’ll miss the ideal planting window for cool-season crops.
The difference between garden success and disappointment often comes down to those critical 2-to-4 weeks of prep work before you plant a single seed.
Table Of Contents
- Key Takeaways
- When to Start Prepping Garden Soil
- Clear Debris and Prepare Garden Beds
- Test and Assess Your Garden Soil
- Improve Soil Structure and Fertility
- Amend and Maintain Soil for Planting
- Frequently Asked Questions (FAQs)
- When to start prepping your garden for spring?
- When should I start prepping my garden for spring?
- How do you prepare a garden bed for spring?
- What is best to put on soil before planting?
- How to amend garden soil in the spring?
- How deep should I dig my garden beds?
- Can I prepare soil with clay?
- When is the best soil preparation time?
- What tools do I need for soil?
- How often should I test garden soil?
- Conclusion
Key Takeaways
- Start soil prep 2 to 4 weeks before your last frost date, working only when soil crumbles easily and reaches 50°F to avoid compaction damage that ruins drainage and root growth.
- Test your soil’s pH levels, texture, and nutrient levels before adding amendments—guessing leads to disasters like overliming alkaline soil and killing your tomatoes within weeks.
- Layer 2 to 4 inches of finished compost into the top 8 to 12 inches of soil, then adjust pH with lime or sulfur and match fertilizer ratios to what you’re planting (high nitrogen for leafy greens, high phosphorus for fruiting crops).
- Clear debris and pull weeds before they seed, but leave old crop roots underground to decay—they create air pockets, feed beneficial microbes, and act as natural fertilizer for spring plants.
When to Start Prepping Garden Soil
Timing is everything when you’re getting your garden soil ready for spring planting. Start too early and you’ll damage your soil structure, but wait too long and you’ll miss your planting window.
Once your soil is workable, check out these spring garden fertilizer recommendations to give your plants the nutrients they need right from the start.
Here’s what you need to know about the best time to begin soil preparation and how to read the signs that your garden is ready for work.
Ideal Timing for Spring Soil Preparation
For spring planting success, start soil preparation 2 to 4 weeks before your average last frost date. This seasonal planning window gives you time to spread compost, work amendments into the topsoil, and let everything settle before seeding.
Cool season crops benefit from earlier prep, while warm season plants need beds ready closer to that frost date. Timing drives soil health and strong harvests.
It’s also important to assess your soil’s readiness based on proper moisture and workability to avoid compaction and promote healthy plant growth.
Monitoring Weather and Soil Conditions
Once you’ve set your timing window, keep an eye on real conditions before you dig in. Weather forecasts and soil checks help you avoid working waterlogged beds, which smears soil structure and ruins drainage patterns.
Track these markers for excellent soil preparation:
- Soil moisture between 41 and 80 percent signals workable texture
- Frost dates based on your zip code and yard history
- Soil temperature holding steady at target ranges for days
- Drainage patterns showing water soaks in within 2 to 4 hours
- pH level readings across different bed locations
Monitoring weather and soil health protects soil fertility and structure before planting. Using a can help guarantee your soil isn’t too wet or dry before you start working.
A soil pH meter or moisture gauge gives you concrete numbers to guide your prep work.
Early Tasks for Optimal Results
Before soil is ready for serious work, knock out a few quick wins that set your garden up for success. Winter cleanup starts with debris removal—rake out dead leaves and fallen branches to let beds warm faster and cut hiding spots for slugs.
Pull cool-season weeds before they seed, spread a layer of organic compost for soil aeration, and trim winter-damaged stems during spring pruning to direct energy into healthy growth.
For best results with your herbs during colder months, explore these winter herb gardening tips to keep them thriving indoors.
Clear Debris and Prepare Garden Beds
Before you dig into testing or amending your soil, you need to get your garden beds ready for action.
Clearing out debris and prepping the surface creates a clean slate where amendments can work their magic and plants can actually thrive.
Here’s what you need to tackle first.
Remove Rocks, Branches, and Plant Debris
Clearing your garden of rocks, branches, and plant debris is the foundation of excellent soil preparation. Removing surface stones larger than an inch gives roots space to spread, and taking out fallen branches opens beds to direct sunlight so soil warms faster.
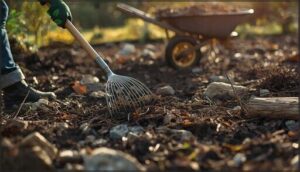
Use a garden rake for small rocks and twigs, then haul away larger debris with a wheelbarrow for efficient garden cleanup.
Eliminate Weeds and Weed Seeds
After you’ve cleared the obvious debris, tackling weeds and seeds keeps your garden soil free from competition. Pull mature weeds before they drop seeds, then try a stale seedbed approach: prepare the top two inches early, let the first flush sprout, and scrape those seedlings with a shallow hoe.
For stubborn patches, soil solarization or a spring pre emergent creates a weed barrier that protects soil health all season.
Leave Beneficial Plant Roots in Soil
When cutting back old crops, leave the roots underground to decay—they’re a gift to your soil health. Root decay creates air pockets for soil aeration, feeds beneficial microbes that drive nutrient cycling, and acts like built-in organic compost.
Leave old crop roots in the soil—they’re built-in compost that feeds microbes and creates air pockets
As these roots break down, they boost carbon sequestration and trigger nutrient release, giving your spring plants a natural fertilizer already in place.
Create a Smooth, Raked Surface
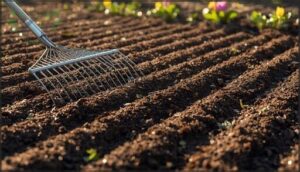
After clearing debris, rake the surface smooth to help tiny seeds connect with soil. Use overlapping strokes in two directions to break clods and level bumps, creating a fine texture ideal for spring gardening.
Work while soil’s still moist—waiting lets clumps harden. This soil smoothing and bed shaping ensures even germination, better drainage, and easier planting across your garden bed.
Test and Assess Your Garden Soil
You can’t fix what you don’t know, and that’s where soil testing comes in. Before you add compost or amendments, you need to understand what’s actually happening beneath the surface.
Here are three essential assessments that’ll give you a clear picture of your garden soil’s condition.
Determine Soil Texture (Clay, Sand, Loam)
You can’t build a thriving garden on mystery dirt, so start with a simple mason jar test: fill it one-third with sifted soil, add water and a drop of dish soap, shake well, then watch as sand sinks in one minute, silt settles over a few hours, and clay takes up to three days.
Measure each layer to find your soil composition—sandy soils drain fast, clay holds water tight, and loam balances both beautifully.
Test Soil PH and Nutrient Levels
Once you know your texture, grab a home pH test kit or mail a sample to your local Extension lab—those color capsules and test strips give you quick readings on soil pH and nutrients like nitrogen, phosphorus, and potassium, so you’re not guessing at fertilizer application.
Lab testing methods deliver precise NPK levels and catch hidden deficiencies, turning soil preparation into a science you control.
Identify Drainage and Compaction Issues
Poor drainage and soil compaction kill roots before you even plant, so test them now. Dig a 12-inch hole, fill it with water, and watch how quickly it drains—moderate soil should drop about 1 to 2 inches per hour, giving roots moisture and air.
Check for these red flags that signal trouble:
- Puddles sitting 24 hours after rain mean waterlogging problems
- Hard crust on top that blocks water infiltration shows compaction
- Screwdriver barely pushes in a few inches
- Roots circling near the surface instead of diving deep
Dense soil chokes root growth and floods root zones, wrecking soil health and fertility before spring planting even begins.
Improve Soil Structure and Fertility
Once you’ve tested your soil and know what you’re working with, it’s time to get your hands dirty and make real improvements. Your garden’s success depends on loose soil that roots can move through easily and plants can thrive in.
Here’s how to build the foundation your spring crops need.
Loosen Soil to Proper Depth
After your garden soil is tested and assessed, you’ll want to loosen it to the right depth so roots can spread easily. Most vegetables thrive when soil aeration reaches 8 to 12 inches deep, breaking through any compaction and opening pathways for air, water, and nutrients.
Use a garden fork or tiller for depth control, working the soil when it’s slightly moist to protect soil texture and boost soil health and fertility for vigorous spring growth.
Add Organic Matter (Compost, Aged Manure)
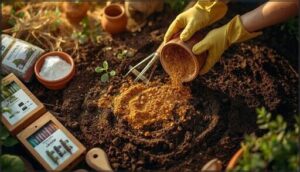
Once your soil is loose and aerated, layer in a 2 to 4 inch blanket of finished compost to enhance soil enrichment and boost microbial activity. Compost benefits include better water retention, slow‑release natural fertilizers, and healthier soil structure for organic gardening.
If you’re using aged manure as an organic amendment, apply it at least 90 to 120 days before harvest to guarantee manure safety and follow soil preparation techniques that protect your crops.
Incorporate Worm Castings and Organic Fertilizers
After blending compost into your soil preparation, you can boost microbial activity and nutrient balance even more by adding worm castings at 10 to 20 percent by volume.
Worm casting benefits include gentle nutrient release and improved water retention. Pair them with organic fertilizers matched to your crops—higher nitrogen for leafy greens, higher phosphorus for flowers, higher potassium for fruit—to support soil microbes and create excellent compost blending results.
Amend and Maintain Soil for Planting
You’ve done the heavy lifting—now it’s time to fine-tune your soil so it’s ready for planting. This stage is all about balancing pH, getting your nutrients right, and adding protective layers that set your garden up for success.
Let’s walk through the final steps to make sure your soil is in top shape before you plant.
Adjust Soil PH With Amendments
When your soil testing reveals a pH outside the ideal 6.0 to 7.0 range, you’re not stuck with it.
Ground agricultural lime raises acidic soil and improves calcium levels, while elemental sulfur lowers alkaline pH by converting to acid. Mix these amendments into the top six to eight inches alongside compost, and they’ll gradually shift pH where nitrogen, phosphorus, and potassium become readily available.
Blend in Nutrients (NPK Balance)
Once you’ve adjusted pH levels, it’s time to match nutrients to what your plants actually crave. Nitrogen fuels leafy greens, phosphorus jumpstarts root growth and blooms, and potassium builds strong stems and disease resistance.
Choose balanced fertilizer blends like 10-10-10 for mixed beds, or lean toward higher nitrogen sources such as blood meal for lettuce, and higher phosphorus ratios like 5-10-10 for fruiting crops.
Apply Mulch and Consider Cover Crops
After nutrients are in place, lock in your work with a protective layer. Mulch benefits go beyond looks—a 2 to 3 inch blanket cuts watering needs in half, blocks weed seeds from sprouting, and moderates soil temperature swings. If you planted cover crops last fall, mow them now and either till in the organic matter or leave it as natural mulch. Both strategies boost soil erosion control, suppress weeds, and feed beneficial microbes for sustainable gardening success.
Here’s why this combination works so well:
- Moisture retention – Mulch slows evaporation and keeps roots evenly hydrated through warm spells.
- Weed suppression – A consistent layer blocks sunlight, preventing weed germination before it starts.
- Nutrient boost – Decomposing cover crops and organic mulches release slow, steady fertility into your soil.
Final Soil Checks Before Spring Planting
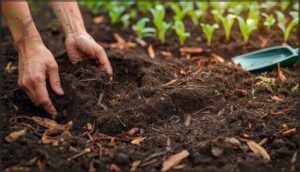
Before you plant, run quick checks to lock in excellent results. Squeeze a handful—if it holds shape but crumbles easily, Soil Moisture is perfect for spring planting.
Drainage Tests confirm water moves through in under 24 hours. Compaction Checks with a garden fork, PH Confirmation near 6.0–7.0, and Seedbed Preparation with pea-sized crumbs guarantee your soil pH, soil texture, compost, and fertilizer work together seamlessly.
Frequently Asked Questions (FAQs)
When to start prepping your garden for spring?
You can start spring garden preparation 2 to 4 weeks before your area’s last frost date.
Check soil temperature and weather patterns first—soil should reach 50°F and crumble easily for ideal garden readiness.
When should I start prepping my garden for spring?
You can begin spring garden preparation once soil temperatures hit the 40s Fahrenheit and beds are workable but not waterlogged, usually a few weeks before your last frost date.
How do you prepare a garden bed for spring?
Like a blank canvas awaiting the artist’s brush, your garden beds need deliberate attention.
Clear debris, test soil pH and nutrients, loosen compacted layers, blend in compost, and adjust amendments for vibrant spring garden preparation and soil improvement.
What is best to put on soil before planting?
Your best option is adding a 1 to 2 inch layer of well-aged compost mixed into the top 6 to 8 inches of soil, giving microbes time to stabilize nutrients before planting.
How to amend garden soil in the spring?
Most gardeners apply compost four to six weeks before the last frost, layering two to four inches of organic matter with balanced fertilizer to lift nitrogen levels, adjust soil pH, and restore microbe balance through natural soil aeration.
How deep should I dig my garden beds?
Most garden beds should be dug 8 to 12 inches deep—one spade depth—to let vegetable roots spread easily.
Root crops like carrots need 12 to 18 inches of loose, stone-free soil for straight growth.
Can I prepare soil with clay?
Yes, you can transform stubborn clay into thriving garden gold. Apply 2 to 3 inches of compost, work in gypsum at 1 to 2 pounds per 10 square feet, and avoid tilling when wet.
When is the best soil preparation time?
Late September through November works best for fall preparation, while late winter to early spring suits gardeners who skipped autumn.
Always wait until soil crumbles easily—working wet ground causes compaction damage.
What tools do I need for soil?
You’ll need an arsenal of garden tools to tackle soil prep like a pro: a round point shovel, garden fork, bow rake, hand trowel, wheelbarrow, and a soil pH meter for testing.
How often should I test garden soil?
Test your soil every three to five years for established beds, but sandy soils need testing every two to three years since nutrients wash out faster and pH levels shift more quickly.
Conclusion
Last spring, a gardener in Oregon skipped soil testing and dumped lime on already-alkaline beds—her tomatoes yellowed within weeks. Don’t let impatience sabotage your harvest.
Preparing garden soil for spring means following each step deliberately: test before amending, wait for proper drainage, and build structure with organic matter. Your reward isn’t just healthier plants—it’s baskets of vegetables you grew from dirt you actually understood and improved.
- https://journeywithjill.net/gardening/2018/10/23/garden-soil-testing-a-beginners-guide/
- https://www.mygardengeek.com/preparing-soil-in-late-winter-and-early-spring-for-a-thriving-summer-garden/
- https://katiespring.com/spring-garden-prep-when-to-work-soil/
- https://extension.umd.edu/resource/organic-matter-and-soil-amendments
- https://extension.colostate.edu/resource/using-compost-in-colorado-gardens/

