This site is supported by our readers. We may earn a commission, at no cost to you, if you purchase through links.

Success rates hover between 85 and 95 percent when you get the basics right: healthy cuttings, proper moisture, and indirect light. Whether you’re rooting in water or soil, the technique stays simple and repeats well across seasons.
Table Of Contents
- Key Takeaways
- Why Propagate Oregano From Cuttings?
- Choosing The Right Oregano Cuttings
- Tools and Materials Needed
- How to Take Oregano Stem Cuttings
- Rooting Oregano Cuttings in Water
- Rooting Oregano Cuttings in Soil
- Caring for Rooted Oregano Cuttings
- Transplanting and Potting Rooted Cuttings
- Troubleshooting Common Propagation Problems
- Frequently Asked Questions (FAQs)
- Conclusion
Key Takeaways
- Stem cuttings root in 10-14 days with 85-95% success rates and produce harvest-ready plants 30-60 days faster than seed-grown oregano while guaranteeing exact flavor replication from the parent plant.
- You’ll get best results taking 4-6 inch softwood cuttings during spring or early summer from healthy, non-flowering stems cut at a 45-degree angle just below a leaf node.
- Water propagation requires changing water every 3 days and placing containers in bright indirect light, while soil propagation needs well-draining mix with perlite and optional rooting hormone dipped 1-2 cm deep.
- Root rot and wilting stem from overwatering or poor drainage, so keep soil lightly moist but never soggy, maintain 65-75°F temperatures, and ensure proper airflow around cuttings.
Why Propagate Oregano From Cuttings?
Propagating oregano from stem cuttings is one of the smartest ways to expand your herb garden without spending a dime. This method gives you faster results and healthier plants compared to starting from seed.
Let’s look at why cuttings work so well and what makes them worth your time.
Benefits of Stem Cutting Propagation
When you propagate oregano through stem cuttings, you’ll see roots develop in just 10 to 14 days with success rates reaching 85–95%. This vegetative propagation method guarantees genetic consistency, so every plant matches your parent’s flavor profile.
Oregano stem cuttings root in 10–14 days with 85–95% success, guaranteeing every plant mirrors your parent’s exact flavor
You’ll also enjoy early harvesting—30 to 60 days ahead of seed-grown plants—plus improved disease resistance, adaptability across soil types, and economic efficiency for your herb garden.
To encourage root growth, consider using rooting hormone options.
Advantages Over Seed Propagation
Beyond quick roots, stem cuttings give you genetic consistency—every plant mirrors your parent’s exact flavor. Seeds often produce 20–30% variation, but cuttings deliver 100% fidelity. You’ll reach harvest 2–4 weeks faster, with higher viability rates (80–90% versus 70–80% for seeds) and enhanced vigor from the start. For hybrid or sterile cultivars, cuttings are your only reliable propagation method. Asexual reproduction ensures the new plant is genetically identical to the parent.
- Genetic consistency: Cuttings clone your parent plant’s traits perfectly
- Faster maturity: Harvest-ready in 4–6 weeks versus 10–12 for seeds
- Higher viability: 80–90% success rates with proper technique
- Enhanced vigor: Larger biomass and stronger early growth
- Cultivar reliability: Essential for hybrids that don’t come true from seed
Culinary and Ornamental Uses
Once you master stem cuttings, you’ll enjoy oregano’s dual nature. This culinary herb powers Italian cooking—fresh leaves enrich pasta sauces, marinades, and herb blends with bold flavor profiles.
Ornamental varieties like ‘Kent Beauty’ bring garden aesthetics to life with mauve blooms that attract pollinators.
Through companion planting and strategic propagation, your oregano cuttings expand both kitchen and landscape possibilities while supporting herb gardening goals.
Choosing The Right Oregano Cuttings
Your propagation success starts before you even pick up the scissors. The parent plant you choose and the timing of your cut can make the difference between vigorous roots and disappointing failures.
Let’s look at what makes a cutting worth taking and when to take it.
Selecting Healthy Parent Plants
Your oregano plant’s health sets the stage for successful cuttings. Visual health matters—look for vibrant green leaves, sturdy stems, and vigorous new growth. Disease resistance is key, so choose parent plants free from powdery mildew, wilting, or pest damage.
Nutritional status affects rooting success, with healthy plants showing no yellowing or browning. Plant age and growing conditions also influence your results, making parent plant selection your first critical step in choosing oregano cuttings.
Ideal Cutting Length and Maturity
The right stem cuttings make all the difference in rooting success. When selecting oregano cuttings, you’ll want to focus on softwood tips with new growth rather than woody stems.
- Cut stems 4 to 6 inches long from non-woody, green apical regions
- Choose softwood cuttings over hardwood for 95% success rates
- Confirm each cutting has 2 to 4 leaf nodes visible
- Make diagonal cuts just below a leaf node
- Avoid flowering stems that divert energy from root development
Best Time of Year to Take Cuttings
Regarding plant propagation, timing is everything. Spring versus fall presents a stark contrast in success rates—you’ll want to take oregano cuttings during the active growth phase in spring or early summer. Regional timing matters too, as climate influence shapes stem quality. Seasonal success peaks when softwood stems are pliable, generally achieving 85–95% rooting in ideal conditions.
| Season | Success Rate | Best For |
|---|---|---|
| Spring | 85–95% | Softwood stem cuttings with high vigor |
| Early Summer | 75–85% | Active growth, pliable stems |
| Fall | 50–65% | Lower success, dormancy preparation |
| Late Winter | 60–70% | Indoor propagation with controlled conditions |
| Winter | 40–50% | Requires artificial heat and light support |
Tools and Materials Needed
Before you start snipping stems, you’ll want to gather a few basic supplies. Having the right tools on hand makes the whole process smoother and sets your cuttings up for success.
Here’s what you need to propagate oregano effectively.
Pruning Shears or Sharp Scissors
Sharp tools are the backbone of successful propagation. You’ll need either clean pruning shears or sharp scissors for taking oregano cuttings. The right choice depends on stem thickness and your comfort. Cleanly cut stem cuttings boost rooting success by up to 30% compared to ragged cuts.
- Cut Quality: Sharp blades create precise, diagonal cuts above leaf nodes, minimizing tissue damage
- Tool Sterilization: Wipe blades with 70% isopropyl alcohol between cuts to prevent disease transmission
- Ergonomic Design: Comfortable grips reduce hand strain when preparing oregano cuttings in batches
- User Preference: Choose pruning shears for woody stems or scissors for softer, herbaceous growth
Rooting Hormone Options (Powder, Liquid, Honey)
Rooting hormone isn’t required, but it’s like giving your oregano cuttings a head start. Powder rooting hormone boosts success rates by up to 35% and often includes fungicides for disease protection. Liquid concentration allows precise dosing for faster root initiation.
Honey alternatives offer organic options with natural antibacterial properties, though synthetic hormones generally outperform them.
Most growers achieve 80%+ success with powder or liquid treatments on stem cuttings.
Containers and Potting Mix
Your container choice and potting mix directly impact rooting success. For oregano cuttings, you’ll need containers at least 6 inches wide with drainage holes—poor drainage cuts survival rates by over 30%.
Here’s what works best:
- Use sterile potting mix with 25% perlite or coarse grit for soil drainage
- Avoid garden soil; opt for peat-free, soil-based compost blends
- Make certain containers have adequate drainage holes to prevent waterlogging
- Consider 12-inch diameter pots for long-term container gardening success
Water Propagation Supplies
Water propagation demands the right setup for success. You’ll need a clear glass jar—mason jars between 250 and 500 mL work best—holding stems upright while roots develop.
Container sterilization with a 10% bleach solution cuts contamination by 92%. Use filtered water to root oregano in water, monitoring supplies like thermometers to track temperature, and support accessories such as floating foam discs for best positioning.
How to Take Oregano Stem Cuttings
Taking oregano cuttings isn’t complicated, but doing it right makes all the difference in whether your plants take root successfully. You’ll need to know where to cut, how to prep each stem, and which parts to remove before rooting.
Here’s how to take cuttings that actually grow.
Step-by-Step Cutting Instructions
You’ll want to grab sterilized pruning shears to take oregano cuttings from your plant’s newer growth. Select stems that are 3 to 5 inches long, cutting at a 45-degree angle just above a node to boost rooting potential.
- Make each cut at a diagonal to increase surface area for root development
- Choose segments with healthy leaves and no signs of disease
- Work quickly to prevent the stems from drying out before rooting
Prepping Cuttings for Rooting
Once you’ve taken oregano cuttings in the morning—when moisture levels are highest—you’ll need to handle them carefully. Place the stems immediately in a warm spot with bright, indirect light to prevent desiccation. Work quickly to maintain stem vitality before rooting begins.
Here’s what affects your success:
| Factor | Best Practice |
|---|---|
| Cutting Length | 4-6 inches with multiple nodes |
| Node Exposure | Keep 2-4 nodes visible on each stem |
| Hormone Application | Dip in 500-1500 ppm rooting hormone |
| Tool Sterilization | Use alcohol-cleaned pruning shears |
| Desiccation Prevention | Mist regularly or cover with plastic |
Removing Lower Leaves and Buds
After taking your stem cuttings, strip leaves from the lower two-thirds of each oregano cutting. This rot prevention step is critical—submerged foliage invites fungal growth and spoils the rooting environment.
Keep 2-3 leaf sets at the top for photosynthesis support while reducing water loss through transpiration. Bare nodes also enhance hormonal balance, directing auxins toward root development rather than sustaining unnecessary foliage during cutting propagation.
Rooting Oregano Cuttings in Water
Rooting oregano in water is often the easiest method for beginners because you can watch the roots develop right before your eyes. This approach requires minimal supplies and gives you full visibility into the progress of your cuttings.
Let’s walk through the key steps to set up your water propagation system and give your oregano the best chance to root successfully.
Preparing Water Containers
Think of your container as a nursery for rooting oregano cuttings. Choose clear glass or plastic containers 6 to 12 inches wide for easy monitoring. Clean them with a 10% bleach solution to prevent pathogens.
Use distilled or filtered water with proper pH levels around 5.8 to 6.2. Adding rooting hormone before placing stems in water helps speed root development markedly.
Placement and Light Requirements
Finding the sweet spot for rooting oregano cuttings starts with light intensity and prime placement. Position your water containers on a bright windowsill with filtered sunlight—direct rays cause overheating and algae growth.
For successful oregano plant propagation and strong root development, provide:
- 12 to 16 hours of daily light exposure
- Temperatures between 65–75°F for ideal rooting
- Bright, indirect light to prevent leaf scorch
- Distance from heat sources to maintain stable water levels
Monitoring and Changing Water
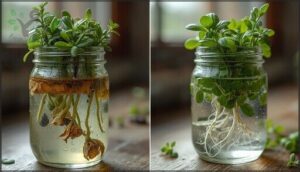
Clear water is the lifeline of your rooting oregano in water project. Change water every three days to maintain oxygen levels above 7 mg/L and prevent microbial control issues that lead to rot. Keep water temperature between 65–75°F and watch for cloudiness or sour smells—both signal declining water quality.
This water propagation method promotes root health and boosts success rates above 80% when you stay consistent with fresh water changes.
Rooting Oregano Cuttings in Soil
Rooting oregano cuttings directly in soil offers a straightforward path to established plants without the extra step of transferring from water. You’ll need the right soil mix, a bit of rooting hormone, and proper planting technique to give your cuttings the best chance at success.
Let’s walk through each element that sets up your oregano for strong root development.
Soil Preparation and Drainage
The foundation of successful rooting starts with well-drained soil that balances water retention and soil aeration.
Mix three parts peat moss with one part perlite to create potting soil that prevents waterlogging while keeping plant roots moist. This combination fosters proper drainage systems and maintains a soil pH between 6.0 and 8.0, giving your cuttings the oxygen and nutrients they need at root depth.
Using Rooting Hormone Effectively
Rooting hormone acts like a growth accelerator, helping your oregano cuttings develop strong roots faster than untreated stems. When you propagate oregano, proper auxin effects can boost success rates from under 50% to over 80%.
- Pour a small amount of rooting hormone powder into a separate dish to avoid contaminating your entire supply during plant propagation techniques.
- Dip only the bottom 1–2 cm of each cutting into the powder, then shake off excess for ideal hormone concentration.
- Apply immediately after making your cut to increase absorption before the stem tissue oxidizes.
- Store unused hormone in a cool, dry place to maintain potency and support future rooting success through proper hormone storage and plant hardening preparation.
Planting and Positioning Cuttings
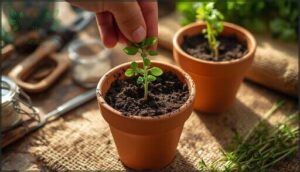
After dipping your cutting in rooting hormone, poke a hole 1–2 inches deep in moist potting soil using a pencil. This Soil Depth ensures proper Node Positioning for rooting oregano cuttings.
Insert the stem at a slight angle—Stem Orientation matters for Root Support during oregano propagation techniques. Firm the soil gently around the Cutting Placement to establish contact, then water lightly when transplanting oregano cuttings if the mix feels dry.
Caring for Rooted Oregano Cuttings
Once your oregano cuttings have developed roots, they enter a critical phase where proper care determines whether they thrive or struggle. The next few weeks require attention to watering, light exposure, and environmental conditions to help your new plants establish themselves.
Let’s walk through the key steps you’ll need to follow to keep your rooted cuttings healthy and growing strong.
Watering and Moisture Control
Once your cuttings are rooting, proper watering becomes critical to success. Check soil moisture by testing the top inch—when dry, water moderately to keep it lightly moist but never soggy.
For rooting oregano in water, change it every 1-3 days to prevent bacterial growth. Maintain humidity levels between 40-60% and use room-temperature, dechlorinated water to avoid root rot and support healthy development.
Providing Indirect Sunlight
After you’ve nailed watering, light intensity matters just as much. Place your rooting oregano cuttings where they’ll get bright but filtered light—think near an east-facing window with natural sunlight filters like sheer curtains.
If you’re growing oregano from cuttings indoors, a grow light set 12-18 inches above works well. Avoid harsh direct sun; simple shading techniques help maintain the ambient temperature between 65°F and 75°F for ideal oregano plant care during rooting.
Preventing Common Issues (Wilting, Rot)
Even with good light, Root Rot Prevention and managing Wilting Causes remain your biggest challenges. Watch for fungal disease signs—yellowing or mushy stems signal trouble.
- Keep Soil Moisture consistent but never soggy to avoid root rot
- Change Water Quality regularly in water propagation setups
- Remove any decaying leaves immediately to stop spread
- Promote airflow around cuttings to prevent plant diseases
Proper spacing and dry-between-watering cycles work better than pest control later.
Transplanting and Potting Rooted Cuttings
Once your oregano cuttings have developed healthy roots, it’s time to give them a permanent home where they can thrive. The transplanting process requires attention to timing, soil preparation, and proper handling to avoid damaging those delicate new roots.
Let’s walk through how to check for root readiness, prepare your containers or garden beds, and complete the transplant successfully.
Checking for Root Development
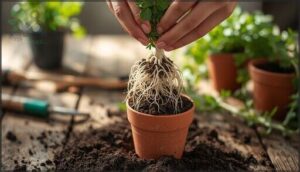
You’ll know your rooting oregano cuttings are ready when root development shows visible adventitious root growth between 1 and 2 inches long. Water clarity checks help you spot root hair detection easily in transparent containers. Try a gentle tug test—resistance means roots have formed.
Check node inspection methods for white, firm roots. Once stem cutting tests confirm strong root growth rates, you can transplant oregano cuttings successfully.
Preparing Pots and Garden Beds
Once your oregano cuttings show strong root growth, soil composition and pot selection become your next focus. You’ll want well-drained soil that matches your planting zone conditions. Here’s what works:
- Choose containers at least 12 inches deep with drainage systems at the bottom
- Mix two parts potting soil with one part coarse sand or perlite for proper aeration
- Add organic compost to garden bedding before transplanting oregano cuttings
Container maintenance starts with checking those drainage holes regularly.
Transplanting Techniques and Timing
When your cuttings reach 4-6 weeks old with 1-2 inch roots, you’re ready for transplanting oregano cuttings outdoors. Mid-spring to early summer works best, with temperatures between 59°F and 86°F supporting root development.
Plant hardening readies transplants through gradual outdoor exposure over 7-14 days. Set rooted cuttings at their original depth in well-prepared soil, then water deeply to encourage growth optimization.
Troubleshooting Common Propagation Problems
Even with careful attention, oregano cuttings don’t always cooperate the way you’d hope. Sometimes stems refuse to root, leaves start looking sickly, or growth stalls out completely.
Here’s how to spot what’s going wrong and get your cuttings back on track.
Cuttings Not Rooting
Sometimes your oregano cuttings refuse to root, and you need to understand why. Rooting challenges with stem failure often stem from three common environmental factors when you propagate oregano:
- Temperature extremes – Below 68°F or above 77°F can cause 30-40% failure rates
- Poor lighting – Too dim or too bright slows root development considerably
- Wrong rooting hormone concentration – Improper application reduces success below 50%
Signs of Overwatering or Disease
You’ll spot trouble fast if you watch for key warning signs in your oregano cuttings. Leaf yellowing appears within 1-4 weeks of overwatering, while root rot creates mushy, blackened roots in just 1-2 weeks. Stem blackening signals fungal infection, with disease timeframes usually showing symptoms in 2-3 weeks.
Catching these common problems early through proper watering techniques and plant care saves most cuttings from total failure.
Encouraging Strong Root Growth
Want to accelerate your rooting process? Keep your cuttings at 70°F and provide 12-16 hours of light exposure daily using grow lights. Apply rooting hormone at 1000-4000 ppm to boost root development.
Use high substrate porosity media like perlite for oxygen availability. Good air circulation prevents fungal issues while your new roots establish a strong root system within 3-4 weeks.
Frequently Asked Questions (FAQs)
Can oregano cuttings root in different seasons?
Yes, oregano cuttings root year-round, but success peaks during late spring and early summer when temperature, humidity, and light conditions maximize the rooting process.
Winter dormancy challenges slow root development considerably.
How often should established oregano be harvested?
You can harvest your oregano plant every few weeks once it reaches 4-6 inches tall.
Regular harvesting during the growing season boosts regrowth rate, flavor intensity, and oil concentration while maintaining excellent plant health.
What pests commonly affect propagated oregano plants?
Many growers believe pest problems worsen after propagation, but aphid control, mite damage prevention, and beetle prevention matter year-round.
Thrip signs, slug solutions, and disease management guarantee plant health through proper oregano plant care addressing common problems and solutions.
Does oregano need fertilizer after successful propagation?
Fertilizer application timing depends on soil nutrient levels and growth stage needs. Your oregano plant care after propagation requires minimal plant nutrients initially.
Over-fertilizing risks weak growth, while organic vs chemical options support essential oregano plant care differently.
Can you propagate oregano from flower stems?
Flowering stem viability drops to 60-70% compared to 98% for vegetative cuttings.
Nutrient reallocation effects and hormonal rooting impact reduce success when propagating oregano cuttings.
Best cutting timing before bloom ensures better results.
Conclusion
Your oregano plants will start multiplying faster than you can harvest them once this method clicks. The time you spend now learning to propagate oregano from stem cuttings pays off every season—no seed packets, no guesswork about flavor, just reliable herbs from your existing plants.
Keep those pruning shears sharp and your rooting station ready. Within weeks, you’ll have more oregano than your kitchen needs, and plenty to share with neighbors who ask for your secret.
- https://www.thespruceeats.com/greek-oregano-tea-1705058
- https://www.gardeningknowhow.com/edible/herbs/oregano/growing-oregano-from-cuttings.htm
- https://www.tandfonline.com/doi/full/10.1080/09064710.2011.570374
- https://www.xisdxjxsu.asia/V18I09-73.pdf
- https://newcropsorganics.ces.ncsu.edu/specialty-crops/specialty-crops-research/williewilson_oregano/

