This site is supported by our readers. We may earn a commission, at no cost to you, if you purchase through links.
 You’ll want to time your bulb harvesting just right – wait until the foliage turns yellow and dies back naturally, usually 6-8 weeks after blooming.
This lets the bulb store enough energy for next year’s show.
Dig carefully with a fork, staying several inches away from the bulb to avoid nicks.
Brush off soil gently, trim dead foliage to an inch, and let them cure in a warm, dry spot for a few days. Think of it like letting your garden’s treasure chest dry out before storing.
The secret lies in knowing exactly when each variety hits its sweet spot.
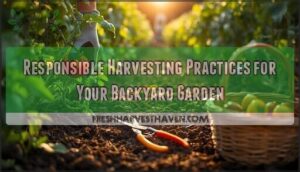
Table Of Contents
- Key Takeaways
- Harvesting Flower Bulbs
- Bulb Harvesting Techniques
- Top 10 Daylily Bulbs
- 1. DVFBTGA Daylily Bulbs USA Grown
- 2. Stella D’oro Yellow Daylily Bulbs
- 3. Purple D’oro Daylily Plant Divisions
- 4. Mixed Daylily Seeds Perennial Flowers
- 5. Votaniki Fragrant Daylily Bare Root Mix
- 6. Autumn Red Daylily Plant Divisions
- 7. Mixed Daylily Roots Value Pack
- 8. Mixed Daylily Bare Roots Perennials
- 9. DVFBTGA Daylily Bulbs USA Plantation
- 10. Earlybird Cardinal Reblooming Daylily Flower
- Storing Harvested Bulbs
- Replanting Harvested Bulbs
- Bulb Care and Maintenance
- Frequently Asked Questions (FAQs)
- Conclusion
Key Takeaways
- You’ll want to time your bulb harvesting just right, waiting until the foliage turns yellow and dies back naturally, to let the bulb store enough energy for next year’s show.
- To harvest bulbs correctly, you’ll dig them up carefully with a fork, staying several inches away from the bulb to avoid nicks, then brush off soil gently and trim dead foliage to an inch.
- After harvesting, you’ll store your bulbs in a cool, dark place, maintaining ideal temperature and humidity control, and using breathable containers to prevent moisture buildup and promote healthy bulb storage.
- When replanting, you’ll choose a location with well-draining soil, space the bulbs appropriately to prevent overcrowding, and consider rotating bulb locations annually to prevent disease and pest issues, promoting healthy growth and blooming.
Harvesting Flower Bulbs
You’ll get the best results from your flower bulbs when you harvest them at just the right time.
Timing depends on the bulb type, but most need their foliage to die back naturally before you can safely dig them up.
Timing is Crucial for Successful Harvesting
You must time flower bulb harvesting correctly, considering foliage dieback and bulb maturity.
Ideal harvesting times vary with seasonal variations, so wait patiently for the right moment to guarantee successful harvesting and replanting, managing bulb foliage effectively for the best results in your flower bulb harvesting journey.
Different Bulb Varieties Have Unique Harvesting Requirements
You’ll find that different bulb varieties have unique harvesting requirements.
For example, Oxblood timing and Narcissus handling vary, while Crinum durability makes it easier to harvest.
Consider the specific needs of your flower bulbs, like Tulip harvesting and Hyacinth bloom times, when planning your bulb harvesting techniques.
Proper planning should also include consideration of weather conditions impact to avoid damage, and understanding the complete concepts of flower bulb care is crucial for a successful harvest, which involves proper planning.
Waiting for Foliage to Die Back Naturally
You’ll often wait for foliage to die back naturally, a process that usually occurs late in the season, signaling ideal timing for harvest.
As yellowing foliage indicates the bulb’s energy storage is complete, marking the end of the natural withering process.
This process is vital for carbohydrate storage and bulb health.
Bulb Harvesting Techniques
You’re about to learn the best techniques for harvesting flower bulbs, and it’s easier than you think.
By following these expert tips, you’ll be able to dig up, dry, and store your bulbs like a pro.
This will set them up for a beautiful bloom next season.
Digging Up Bulbs Carefully to Avoid Damage

You carefully dig up bulbs using trowel techniques, considering soil type and bulb integrity.
Gentle lifting methods protect roots, preventing bulb bruising during harvesting, ensuring proper bulb handling to maintain their quality.
Early morning is ideal because of cooler temperatures, and it is crucial for proper bulb handling to use gentle lifting methods.
Removing Tops and Drying Bulbs in The Sun

When digging’s done, you’ll remove tops and dry bulbs in the sun.
Here’s how:
- Dry for 1-2 days
- Check for looseness
- Remove tops
- Dry further
- Cure bulbs, guaranteeing thorough drying for carbohydrate storage, and proper post-drying care for your bulb variety.
Remember that bulb foliage shouldn’t be cut while green to guarantee the bulb stores energy for the following year.
Storing Bulbs in a Cool, Dark Place

Now, store those bulbs in a cool, dark place, maintaining ideal temperature and humidity control.
Choose proper container choices, ensuring pest prevention, and promoting bulb dormancy, key to successful flower bulb storage.
Using superior bulb drying techniques and bulb storage containers for an ideal storage environment.
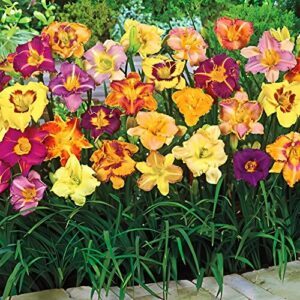
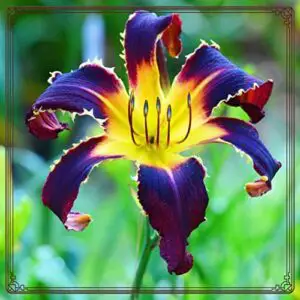
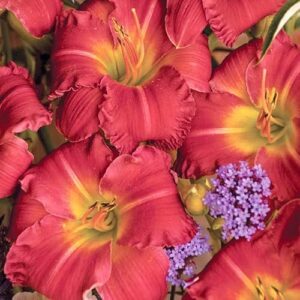
Top 10 Daylily Bulbs
You’re looking for the best daylily bulbs to add to your garden, and you’ve come to the right place.
Here, you’ll find the top 10 daylily bulbs, including popular varieties like DVFBTGA Daylily Bulbs and Stella D’oro Yellow Daylily Bulbs, to help you create a beautiful and thriving garden.
1. DVFBTGA Daylily Bulbs USA Grown
 View On Amazon
You’re considering DVFBTGA Daylily Bulbs USA Grown.
These bulbs are moderate growers, thriving in sunny conditions. They’re self-sufficient, hardy, and suitable for indoor or outdoor planting.
With proper care, they’ll bloom beautifully. Plant them 6-8 feet apart, water consistently, and fertilize for maximum growth.
Best For: gardeners who want low-maintenance, hardy plants that can thrive in sunny conditions with proper care.
- Requires patience and proper care for successful growth
- Mixed reviews on quality and viability, with some customers reporting poor condition upon arrival
- May take time to bloom, with some customers expecting 2 years for flowering
- Moderate growers that are self-sufficient and hardy
- Suitable for indoor or outdoor planting in fall or spring
- Available in packs of 5, 10, or 15 bulbs at a reasonable price of $15.00 for 5 bulbs
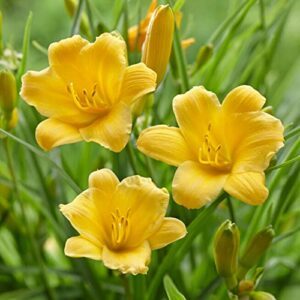
2. Stella D’oro Yellow Daylily Bulbs
 View On Amazon
You’re looking at Stella D’oro Yellow Daylily Bulbs, a great choice.
They bloom from early summer, reblooming later for extended color.
Plant them in well-draining soil with full sun to partial shade.
Make sure to deadhead spent flowers for continuous blooming.
With proper care, these daylilies will thrive, attracting pollinators and adding beauty to your garden.
Best For: gardeners who want low-maintenance, fragrant, and attractive flowers that bloom twice a year and are suitable for containers and outdoor use.
- Easy to grow and maintain with proper care
- Attracts pollinators like butterflies and hummingbirds, and is deer resistant
- Provides extended color with reblooming in later summer
- Requires well-draining soil and regular watering for optimal growth
- May not thrive in extreme weather conditions or with poor care
- Some customers reported bulbs failing to grow or produce results after planting
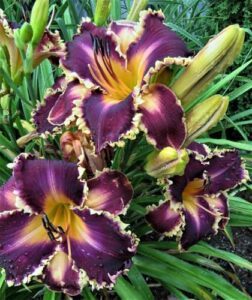
3. Purple D’oro Daylily Plant Divisions
 View On Amazon
Purple D’oro daylilies offer gardeners a compact powerhouse that’s practically foolproof. These 12-20 inch beauties pack up to 25 buds per season, blooming repeatedly from late spring through fall.
You’ll receive three plant divisions that thrive in full sun across zones 4-9. While they’re drought-tolerant and pest-resistant, don’t expect instant gratification—these patient performers may take a couple years to reach their full blooming potential.
To guarantee lasting beauty, consider bulb selection carefully. Space them 18-24 inches apart for ideal airflow.
Best For: Gardeners seeking low-maintenance perennial flowers that provide long-lasting color and attract pollinators with minimal care requirements.
- May take 2-3 years after planting to reach full blooming potential, requiring patience from gardeners expecting immediate results
- Mixed customer reviews indicate inconsistent sprouting success, with some divisions failing to emerge or establish properly
- Requires division every 3-5 years to maintain vigor and prevent overcrowding, adding ongoing maintenance tasks
- Extremely hardy and adaptable to various soil types and weather conditions, thriving in USDA zones 4-9 with excellent drought tolerance
- Produces abundant blooms with up to 25 buds per season that flower repeatedly from late spring through fall
- Requires minimal maintenance once established, needing only occasional deadheading and annual cleanup while being naturally pest and disease resistant
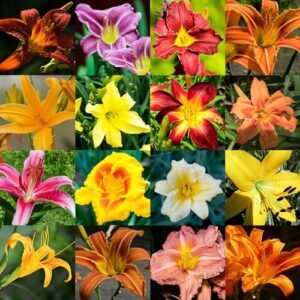
4. Mixed Daylily Seeds Perennial Flowers
 View On Amazon
If you’re ready for a garden that turns heads, give Mixed Daylily Seeds Perennial Flowers a try.
These beauties burst with color and attract butterflies and bees—pollinators will think you rolled out the red carpet.
With easy instructions and seeds suited for pots, gardens, or even balconies, success is just a few steps away no matter your experience.
Just remember, daylilies need sun, space, and a bit of patience.
Before you know it, your yard will be the talk of the neighborhood!
Best For: Gardeners—beginner or experienced—looking to add colorful, low-maintenance flowers that attract pollinators.
- Attracts butterflies and bees, boosting garden pollination.
- Low maintenance and drought tolerant once established.
- Includes a mix of vibrant, multi-colored perennial blooms.
- Some buyers received fewer seeds than advertised.
- Reports of low germination rates for some users.
- Flowering requires patience before full blooms appear.
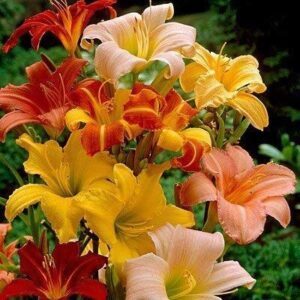
5. Votaniki Fragrant Daylily Bare Root Mix
 View On Amazon
Gardeners love a good workhorse, and the Votaniki Fragrant Daylily Bare Root Mix is exactly that—easygoing, hardy, and a real show-off all summer.
Plant these bare roots in a sunny spot or light shade, and you’ll enjoy vibrant blooms in yellows, oranges, pinks, and purples.
Once established, they barely fuss, shrugging off drought and ignoring hungry deer.
Just tuck the crowns at soil level and water well; before you know it, your garden’s blushing with color, scent, and effortless charm.
Best For: Gardeners looking for a hardy, low-maintenance perennial with colorful, fragrant blooms that thrive in various conditions.
- Long, vibrant blooming season from mid-summer to frost
- Tolerates drought, deer, and a wide range of soils
- Versatile for borders, containers, and ground covers
- Some customers received dried or poor-quality roots
- Requires correct planting depth and crown placement to thrive
- Occasional watering needed during dry spells
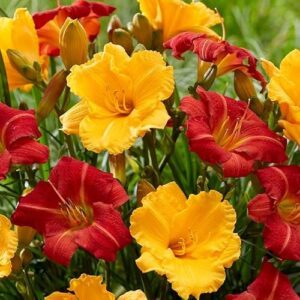
6. Autumn Red Daylily Plant Divisions
 View On Amazon
You’re considering Autumn Red Daylily Plant Divisions.
How will you guarantee their success?
Plant them in well-draining soil, providing full sun.
Space divisions to prevent overcrowding, and water thoroughly.
With proper care, these daylilies will thrive, offering vibrant red blooms and attracting pollinators to your garden, making them a great choice for any gardener, with proper care.
Best For: Gardeners seeking low-maintenance perennials that provide vibrant red blooms and attract pollinators across a wide range of climate zones.
- Mixed customer reviews indicate inconsistent product quality with some receiving fewer bulbs than ordered or dead plants upon arrival
- Bulbs may arrive in dry, non-green condition requiring careful monitoring and patience for establishment
- Price point of $17.00 for 3 divisions considered expensive by some customers relative to quality and quantity received
- Hardy across USDA zones 3-9 with minimal maintenance requirements once established
- Produces vibrant red blooms with golden throats that attract butterflies and bees throughout the growing season
- Easy to propagate through division every 4-6 years, allowing gardeners to expand their plantings or share with others
7. Mixed Daylily Roots Value Pack
 View On Amazon
You’re looking at the Mixed Daylily Roots Value Pack, a great option for gardeners.
It includes 25 dormant bare root perennial starter plant roots, tolerating less-than-ideal conditions and blooming faithfully for years.
This mix is perfect for adding some vibrant colors to your garden, and with proper care, it’ll thrive in full sun to partial shade, making it a great choice for gardeners.
Best For: gardeners who want to add vibrant colors to their garden with a low-maintenance perennial that can thrive in full sun to partial shade.
- Tolerates less-than-ideal conditions and blooms faithfully for years with virtually no attention.
- Includes 25 dormant bare root perennial starter plant roots, providing a great value for the price.
- Can be divided annually to expand the garden or share with others, making it a great option for gardeners who want to share plants with friends or family.
- Requires full sun to partial shade, which may not be suitable for gardens with heavily shaded areas.
- Roots may be affected by temperature during shipping, which can impact plant survival.
- Growth and bloom time may vary depending on location and climate, which can be unpredictable for some gardeners.
8. Mixed Daylily Bare Roots Perennials
 View On Amazon
You’re investing in Mixed Daylily Bare Roots Perennials, a great choice.
These hardy plants thrive in well-drained soil and full sun.
To get the best results, soak the roots in water for 1-2 hours before planting, and space them 15-24 inches apart.
With proper care, they’ll bloom beautifully and come back year after year, providing a gorgeous display of color in your garden.
Best For: gardeners who want low-maintenance, hardy perennials that thrive in well-drained soil and full sun.
- Hardy plants that come back year after year
- Beautiful blooms that provide a gorgeous display of color in the garden
- Low maintenance and drought-tolerant once established
- Requires full sun and well-drained soil to thrive
- May have issues with sprouting and growth
- Can be difficult to contact the seller for warranty fulfillment
9. DVFBTGA Daylily Bulbs USA Plantation
 View On Amazon
Priced at $14.81 for five bulbs, DVFBTGA Daylily Bulbs USA Plantation offers excellent value for gardeners wanting to expand their collection.
These American-grown bulbs arrive looking dry and seemingly lifeless, which might worry first-time buyers – but don’t panic! That’s perfectly normal.
You’ll need to plant them immediately, water thoroughly, and consider using a heating pad to maintain root temperature around 70°F. With proper care and patience, these hardy bulbs will reward you with beautiful blooms.
Best For: Budget-conscious gardeners seeking hardy, American-grown daylily bulbs that offer reliable blooms with proper care and patience.
- Bulbs arrive looking dry and lifeless, which can be concerning for new gardeners
- Requires immediate planting and careful temperature management (70°F heating pad recommended)
- Success depends heavily on proper initial care and patience during establishment period
- Excellent value at under $3 per bulb for quality American-grown stock
- Very hardy plants that can withstand challenging growing conditions once established
- Self-sufficient growth with potential for beautiful blooms when given proper initial care
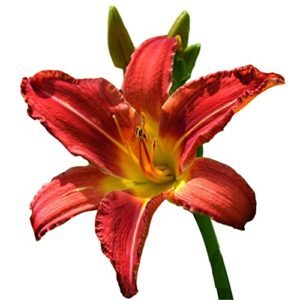
10. Earlybird Cardinal Reblooming Daylily Flower
 View On Amazon
You’re checking out the Earlybird Cardinal Reblooming Daylily Flower, a great choice.
It blooms earlier than most daylilies and produces multiple blooms per stem.
With its watermelon red flowers and yellow-green throat, it’s a stunning addition to any garden.
It’s also easy to grow and thrives in harsh conditions, making it perfect for beginners.
Best For: beginners and experienced gardeners who want a low-maintenance, vibrant, and long-blooming flower that can thrive in harsh conditions.
- Easy to grow and maintain
- Thrives in harsh conditions with poor, dry, or polluted soils
- Produces multiple blooms per stem with a long blooming period
- May not perform well in extremely cold or wet environments
- Requires firming of soil around roots during planting and adequate watering after planting
- Can be sensitive to overwatering or poor drainage
Storing Harvested Bulbs
You’re now ready to store your harvested bulbs, and it’s essential to do it correctly.
You’ll want to clean and dry them thoroughly, then store them in a cool, dark place to keep them healthy until replanting time.
Cleaning and Drying Bulbs Thoroughly

You’re done selecting daylilies, now clean and dry bulbs thoroughly.
Here are key steps:
- Remove excess soil
- Inspect for blemishes
- Dry for several days
Check for rot to guarantee bulbs are thoroughly cleaned, promoting airflow and preventing surface blemishes, which is crucial for thoroughly cleaned bulbs.
Using Breathable Containers for Storage

You’ll want to store your cleaned bulbs in breathable containers, like paper or mesh bags, to maintain ventilation and control moisture, ensuring healthy flower bulb storage and proper storing conditions for your bulbs.
For suitable options, consider using specialized bulb containers designed for this purpose.
Bulbs ideally need 10-15% moisture to prevent dehydration.
Maintaining a Cool, Dark Storage Area

Once your bulbs are snug in their breathable containers, finding the right spot makes all the difference.
Think of cool storage as a mini-vacation for bulbs—shoot for 35-45°F, out of sunlight.
Humidity levels should stay low, so a garage or basement works well.
Good ventilation keeps mold away, and dark storage guarantees bulbs don’t sprout early.
Checking for Signs of Moisture or Pests

After tucking your bulbs away, keep an eagle eye out for trouble!
Watch for these red flags:
- Mold identification—white fuzz or odd odors often mean moisture control issues.
- Bulb discoloration and soft spots scream pest damage.
- Tiny holes or wriggling critters signal a bulb pest infestation.
Believe me, ignoring these signs just invites unwanted roommates, which is a serious trouble!
Replanting Harvested Bulbs

You’re now ready to replant your harvested bulbs, and it’s essential to do it correctly for their survival.
By following the right steps, you’ll be able to give your bulbs the best chance to thrive and bloom beautifully in their new location.
Planting Bulbs in Well-draining Soil
Now that you’ve stored your bulbs, it’s time to plant them in well-draining soil.
| Soil Composition | Drainage Techniques |
|---|---|
| Loamy soil | Add organic matter |
| Clay soil | Use raised beds |
| Sandy soil | Install French drains |
Spacing Bulbs Appropriately to Prevent Overcrowding
Now that you’ve planted bulbs in well-draining soil, consider proper spacing to prevent overcrowding. This guarantees:
- Airflow around plants
- Reduced root competition
- Disease reduction
Proper bulb spacing promotes healthy growth.
Rotating Bulb Locations Annually
You’ll want to rotate bulb locations annually to prevent disease and pest issues, promoting soil health and fertility through sustainable gardening practices like crop rotation.
To further optimize your garden, consider staggered planting methods for a continuous harvest.
| Method | Benefits | Outcome |
|---|---|---|
| Rotation | Disease Prevention | Healthy Bulbs |
| Crop Rotation | Soil Health | Nutrient Rich |
| Sustainable Gardening | Pest Control | Thriving Plants |
| Soil Fertility | Nutrient Depletion | Balanced Ecosystem |
By following these methods, you can achieve a balanced ecosystem and ensure your garden remains thriving with healthy bulbs.
Amending Soil With Compost for Improved Fertility
You’re rotating bulb locations annually, now enrich your soil with compost to boost fertility, promoting healthy growth and sustainable gardening.
which improves soil structure and nutrients, enhancing overall soil health with added organic matter from various compost types.
Bulb Care and Maintenance

You’re now focusing on bulb care and maintenance, a vital step in ensuring your flowers bloom beautifully.
By following proper care techniques, you’ll be able to provide your bulbs with the right conditions to thrive and bloom again.
Providing Proper Care for Newly Transplanted Bulbs
After replanting, you’ll focus on providing proper care.
Establish a watering schedule, add soil amendments, and make certain adequate sunlight needs are met.
Effective pest control will also support healthy bulb establishment, promoting a successful first bloom after transplanting, which is crucial for healthy bulb development.
Ensuring Sufficient Carbohydrate Storage for Blooming
After getting your bulbs back in the ground, think about their food supply. It’s all about carbohydrate storage! You need to make sure your bulbs have enough energy reserves for a beautiful bloom.
Here’s how:
- Allow foliage dieback naturally.
- Consider bulb size when harvesting.
- Time your harvesting right.
- Replanting promptly is key.
Good storage conditions help, but it’s the foliage that really fuels that next bloom, which is crucial for a beautiful bloom!
Preventing Bulb Rot and Pest Infestations
To prevent bulb rot and pest infestations, inspect stored bulbs regularly for signs of moisture or pests.
Control the storage environment to prevent bulb rot causes, checking for common bulb pests and using resistant bulb varieties for natural pest control and bulb rot prevention.
Using Natural Repellents to Deter Pests
Protecting your precious bulbs from unwanted visitors doesn’t require harsh chemicals.
These natural repellents work wonders against common bulb pests:
- Cedar Chips – Scatter around bulbs to deter beetles and mites
- Companion Planting – Add marigolds and garlic nearby for natural protection
- Diatomaceous Earth – Sprinkle this powder to control crawling insects
- Garlic Spray – Mix with water for effective nematode control
- Essential Oils – Peppermint deters most bulb pest infestations naturally
Consider using cedar chips for bulbs to protect your plants.
Frequently Asked Questions (FAQs)
How do you save flower bulbs for next year?
You save flower bulbs by digging, drying, and storing them in a cool, dark place, ensuring they’re firm and healthy for next year’s bloom, with proper care and handling.
How long store bulbs before replanting?
You can store bulbs for several months before replanting, typically from summer to fall, to allow them to dry and prepare for new growth, ensuring healthy blooming next year.
Can bulbs be harvested in winter?
A million bulbs are waiting, but you can’t harvest them in winter, as most bulbs need a dormant period, and winter harvesting can damage or kill them, so wait patiently.
What soil pH do bulbs prefer?
You’ll find most bulbs thrive in slightly acidic to neutral soil, typically between 0 and 0 pH, allowing for ideal growth and blooming.
How deep plant small bulbs?
You’ll plant small bulbs at a depth of 2-3 times their height, making sure not to overcrowd them for healthy growth and blooming.
Can bulbs be grown indoors year-round?
You can grow bulbs indoors year-round with proper care, including sufficient light, water, and temperature control, allowing you to enjoy blooms anytime.
Conclusion
You’ve mastered the art of harvesting, now it’s time to reap the rewards.
Proper harvesting of flower bulbs is key to a beautiful bloom, so you’ll want to get it right.
By following these tips, you’ll be enjoying gorgeous flowers in no time, and with the right techniques, you’ll be a pro at the proper harvesting of flower bulbs.
- https://www.masterclass.com/articles/how-to-store-flower-bulbs-during-the-winter
- https://masterofhort.com/2012/04/how-and-when-to-harvest-bulbs/
- https://www.johnnyseeds.com/growers-library/flowers/tulips/video-v322.html?srsltid=AfmBOoovrbnFEKQ9w4kGODB9in5GuKrHZi-Kq6wJ1WyuG3pKXchGHF9j
- https://www.dutchbulbs.com/blogs/blog-post/growing-and-harvesting-tulips?srsltid=AfmBOorqZpv2aAmw4A8SzsoxCquTcP9ZfBqY8f2lZJFEbdLLC5oU53uR
- https://www.umass.edu/agriculture-food-environment/greenhouse-floriculture/fact-sheets/postharvest-handling-tips-for-some-spring-flowering-bulbs