This site is supported by our readers. We may earn a commission, at no cost to you, if you purchase through links.
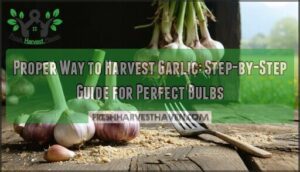
After you’ve pulled your garlic from the ground, just brush away the dirt and hang them somewhere with good airflow where it stays around 75-85°F for a few weeks.
It’s pretty amazing how this simple drying process turns those fresh bulbs into storage champions that’ll last you through winter and beyond.
Table Of Contents
- Key Takeaways
- When is Garlic Ready to Harvest?
- Preparing Your Garlic for Harvest
- Step-by-Step Garlic Harvesting Techniques
- Proper Curing and Drying Methods
- Storing and Using Your Harvested Garlic
- Frequently Asked Questions (FAQs)
- What is the proper way to harvest garlic?
- Is it possible to leave garlic in the ground too long?
- What happens if it rains during harvest?
- Can you harvest garlic in the morning?
- How deep should you plant garlic originally?
- What pests attack garlic during growing season?
- Should you fertilize garlic before harvesting?
- What weather conditions affect garlic harvest timing?
- How do you know if garlic is overripe?
- Can you harvest garlic in wet conditions?
- Conclusion
Key Takeaways
- Wait for harvest timing when about 40% of garlic leaves turn brown, signaling peak bulb development and proper clove formation. Use a garden fork to gently loosen soil around bulbs, then lift straight up by grasping stalks near the base to avoid damaging the harvest. Cure harvested garlic in well-ventilated areas at 75-85°F for 2-4 weeks to remove excess moisture and develop protective outer layers. * Store properly cured bulbs at 60-65°F with good airflow in breathable containers like mesh bags for months-long preservation.
When is Garlic Ready to Harvest?
Knowing when your garlic is ready makes the difference between perfect bulbs and disappointing harvests.
You’ll need to watch for specific visual cues and understand your garlic variety’s unique timing to get it just right.
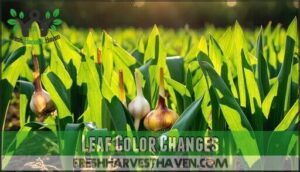
Leaf Color Changes
Think of garlic leaves as nature’s traffic light system—when about 40% of those green flags start turning brown, it’s your cue that harvest time is just around the corner. This yellowing causes the plant to redirect energy into bulb development.
When about 40% of garlic leaves turn brown, it’s nature’s signal that your bulbs are ready to harvest
Things like hot weather can make leaves brown early, while poor soil might slow it down.
Keep an eye on this color shift—it’s your best guide for timing the harvest just right.
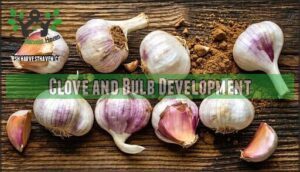
Clove and Bulb Development
While leaves give you the first clue, the real treasure lies beneath the soil where plump cloves should be pressing snugly against their papery wrapping. You’ll know your garlic bulb has reached proper maturity when individual cloves fill out completely, creating a firm bulb size that feels solid in your hand.
Each garlic variety has its own timeline—softneck types typically mature their bulbs weeks before hardneck varieties finish developing.
Your soil conditions can either speed up or slow down this whole process, affecting how quickly those cloves reach their full potential.
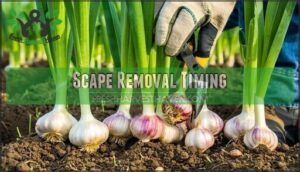
Scape Removal Timing
Those curly flower stalks that shoot up from your hardneck garlic aren’t just for show—they’re actually your countdown timer to harvest. Remove these scapes when they curl once or twice but before they straighten out completely.
This scape removal benefits your bulbs by redirecting energy into clove development rather than flower production. After cutting scapes, you’ll usually harvest garlic in two to three weeks when lower leaves start browning.
Differences by Variety (Hardneck Vs. Softneck)
Understanding hardneck versus softneck varieties helps you time your garlic harvest perfectly. Hardneck varieties produce 4-12 larger cloves around a central stalk and thrive in colder climates, requiring harvest 3-4 weeks after scape removal. Softneck varieties yield up to 20 smaller cloves in layered rings, adapt better to warmer regions, and harvest about two weeks after hardneck garlic.
Climate adaptation directly affects storage duration—properly cured softneck garlic stores 9-12 months versus hardneck’s 3-8 months. Understanding the best growing zones for each type can greatly impact your yield.
How you arrange those cloves affects when you harvest and what you do afterward.
Hardneck garlic peels much easier because the skin stays thin, but softneck works better for braiding since the stems bend without breaking and those outer layers stay nice and thick.
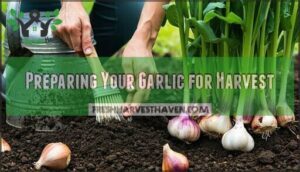
Preparing Your Garlic for Harvest
Getting your garlic ready for harvest sets the stage for successful bulb development and long-term storage.
You’ll need to time your watering schedule, assess soil conditions, and gather the right tools before you start digging.
Stopping Watering at The Right Time
Think of watering your garlic like feeding a marathon runner—you want to fuel them through the race, but cut off the snacks right before they cross the finish line. When decline indicators appear, watering cessation becomes key for proper bulb health and harvest timing.
You’ll know it’s time to stop watering when you spot these telltale signs:
- Lower leaves turning yellow or brown
- Soil moisture consistently high despite reduced watering
- Bulb maturity approaching (cloves filling skins)
- Three weeks before planned harvest garlic date
Stopping water at the right time lets your garlic bulbs toughen up their outer skins—the natural armor they need for long-term storage.
Checking Soil Conditions
Your garlic’s underground world tells a story through the soil around it, and reading those clues can make the difference between perfect bulbs and a disappointing harvest.
Check soil moisture levels by digging down three inches—it should feel slightly damp but not waterlogged. Poor drainage quality creates soggy conditions that rot bulbs, while soil compaction prevents proper clove development and limits your harvest window for best bulb maturity.
Choosing The Best Tools
A garden fork beats a shovel every time when you’re digging up those precious bulbs. The fork vs. shovel choice matters because tines slip between roots without slicing through your harvest.
Before you start, grab these tools:
- Garden fork – penetrates soil gently around bulbs
- Cotton gloves – protect hands during root trimming
- Clean pruning shears – for precise stem cutting
- Mesh bags – ideal for curing and storage
- Disinfectant spray – tool sanitization prevents disease spread
Having the right gear makes all the difference – your bulbs will thank you for it.
Step-by-Step Garlic Harvesting Techniques
Once you’ve prepared your garlic bed and confirmed the bulbs are ready, it’s time to carefully extract them from the soil.
The key is working slowly and gently to avoid bruising or damaging the bulbs, which can lead to rot during storage.
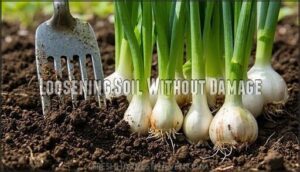
Loosening Soil Without Damage
Picture trying to extract a delicate treasure from a sandbox without breaking it – that’s exactly what you’re facing when it’s time to loosen the soil around your garlic bulbs. Your tool selection impact determines success here. A garden fork works better than a spade because it won’t slice through bulbs.
Start working about four inches away from each plant, gently working inward to respect root system sensitivity and avoid soil compaction risks that damage bulb integrity preservation.
| Factor | Best Practice |
|---|---|
| Tool Choice | Garden fork over spade |
| Starting Distance | 4 inches from plant |
| Soil Moisture | Slightly dry conditions |
| Working Method | Gentle inward motion |
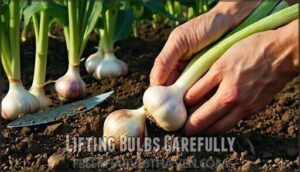
Lifting Bulbs Carefully
Once you’ve loosened the soil around each bulb, it’s time to lift them like precious gems from their earthly vault. Garlic’s strong root system requires gentle extraction methods to prevent bulb bruising. Your tool selection impact matters—use clean hands or a small trowel for delicate work.
- Grasp the stalk near the base, not the leaves
- Pull straight up with steady, gentle pressure
- Prop the bulb with your other hand
- Shake off loose soil immediately after lifting
- Place harvested bulbs on a clean surface away from direct sunlight
Getting the soil loose enough beforehand saves you a lot of hassle when it’s time to pull up those bulbs.
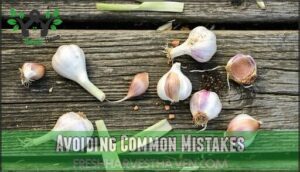
Avoiding Common Mistakes
Even experienced gardeners can turn a perfect harvest into a disappointing disaster with just one wrong move. Here’s what to watch for:
| Mistake | Problem | Prevention |
|---|---|---|
| Premature harvesting | Small, poorly-storing bulbs | Wait for 40% brown leaves |
| Bulb bruising during harvest | Creates entry points for rot | Use gentle lifting motions |
| Improper curing conditions | Mold and decay develop | Make certain of good airflow, dry location |
A single mistake during harvest can destroy months of hard work in your garden.
Proper Curing and Drying Methods
Once you’ve harvested your garlic bulbs, proper curing becomes the key to long-term storage success.
This critical step removes excess moisture and transforms your fresh harvest into shelf-stable bulbs that can last for months.
Brushing Off Soil and Handling Bulbs
Think of your freshly dug garlic bulbs like delicate treasures that need gentle care—one wrong move with wet hands or rough brushing can ruin months of patient growing.
When it comes to getting that soil off your freshly harvested garlic, you’ve got three solid approaches that’ll keep your bulbs in perfect shape:
- Shake gently by hand – Let gravity do the work while preventing bruising
- Use a soft brush – Remove stubborn soil without damaging outer papery skins
- Trim roots to one inch – Complete your initial inspection before curing begins
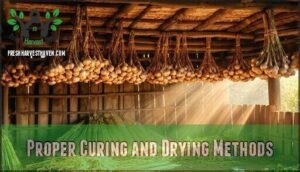
Bundling and Hanging for Airflow
Your freshly harvested garlic bulbs are like wet laundry—they won’t last without proper airflow to dry them out. Bundle six to eight stalks together with rubber bands, keeping bundle size manageable for even drying.
Choose your hanging location wisely—a well-ventilated garage or covered porch works perfectly. Good ventilation prevents mold while keeping pests away from your precious bulbs.
Curing Duration and Environment
To get the best storage life from your garlic, you’ll want to cure it first at around 75-85°F with humidity between 40-60%.
This drying phase takes anywhere from 10 days to over a month, depending on how much air circulation you’ve got and how quickly moisture evaporates. Good airflow is your friend here—it stops mold from ruining your harvest.
The best way to guarantee your garlic lasts is to provide a cool, dark place for storage. Well-ventilated areas help garlic lose 25-40% of its harvest weight while developing crispy outer skins. Storage conditions after curing determine whether your bulbs last two months or eight.
Storing and Using Your Harvested Garlic
Once your garlic bulbs have cured properly, storing them correctly will keep them fresh for months to come.
The right storage conditions and regular checks help you enjoy your homegrown garlic all year long.
Best Storage Conditions
After all that careful curing work, you can’t just toss your garlic bulbs into any old spot and expect them to stay fresh for months. Your garlic needs ideal temperature between 60-65°F with humidity control around 60-70%. Good air circulation prevents moisture buildup that leads to rot.
Choose breathable container types like mesh bags or woven baskets for long-term preservation and extended shelf life.
Trimming and Cleaning Bulbs
Now that your garlic has properly cured, it’s time to give those bulbs a final cleanup before they head to storage. Start by trimming roots down to about a quarter-inch using clean scissors—this prevents moisture retention while maintaining the bulb’s integrity.
For stalk removal, cut stems to one inch above the bulb unless you’re planning to braid them.
Gentle cleaning with a soft brush removes loose papery layers without damaging the protective outer skin, helping your harvest garlic stay fresh longer.
Braiding, Mesh Bags, and Pantry Storage
Three storage methods will keep your cured garlic fresh for months: traditional braiding, breathable mesh bags, or simple pantry containers.
Braiding techniques work best with softneck varieties—weave stems together while they’re still pliable.
Mesh bag benefits include excellent airflow and easy access.
For pantry conditions, choose cool, dark spots with good ventilation to extend shelf life and prevent spoilage.
Using Green Garlic and Checking for Spoilage
Don’t let perfectly good garlic go to waste—learning to spot spoilage early and make the most of green garlic can transform your harvest from garden to table. Green garlic uses include stir-fries and soups, while spoilage signs like soft spots require immediate removal to prevent spread.
- Watch for sprouting – Green shoots indicate storage differences and signal time for immediate use
- Check bulb firmness – Soft or spongy areas show spoilage signs requiring quick action
- Use early harvest greens – Young green leaves make excellent scallion substitutes in cooking
- Prevent further sprouting – Cool, dry storage helps with sprout prevention during garlic harvest season
Frequently Asked Questions (FAQs)
What is the proper way to harvest garlic?
Timing matters most when harvesting garlic. Watch for lower leaves turning brown while upper ones stay green—that’s your signal.
Use a garden fork to gently loosen soil, then lift bulbs carefully to avoid damage.
Is it possible to leave garlic in the ground too long?
Yes, leaving garlic in the ground too long causes serious problems. Overripe garlic develops bulb splitting, where cloves burst from their protective skins.
This creates pest susceptibility and reduced storage life. Flavor changes occur, and determining garlic harvest time becomes critical for preserving your garlic bulbs properly.
What happens if it rains during harvest?
Rain-soaked harvest conditions create serious challenges for your garlic crop. Wet conditions during harvesting garlic increase mold risks and complicate proper drying.
Rain can really mess with your garlic harvest:
- Mold Prevention becomes critical – Wet garlic bulbs develop fungal issues that ruin entire storage batches
- Drying Challenges multiply – Moisture trapped in bulb papery skins extends curing time considerably
- Storage Issues emerge – Improperly dried garlic rots quickly, wasting months of careful growing
- Flavor Changes occur – Excess moisture dilutes garlic’s signature pungency and reduces cooking quality
Wait for dry weather before you harvest garlic, or cover plants with tarps during unexpected downpours.
Can you harvest garlic in the morning?
Like catching dewdrops before they vanish, morning harvests offer the sweetest rewards.
You can absolutely harvest garlic in the morning when overnight soil moisture makes digging easier and cooler temperatures reduce plant stress, creating ideal harvest conditions for your bulbs.
How deep should you plant garlic originally?
For best garlic growth, plant cloves 2 inches deep and 4-6 inches apart in well-draining soil with full sun exposure. Proper planting depth ensures strong root development and protects cloves from temperature fluctuations.
- Planting depth: Position garlic cloves pointed end up, 2 inches below soil surface
- Spacing: Allow 4-6 inches between individual cloves for adequate root expansion
- Soil type: Choose loose, well-draining soil with pH 0-0 for healthy bulb formation
- Sun exposure: Select locations receiving 6-8 hours of direct sunlight daily
- Initial watering: Apply light moisture after planting, then reduce frequency as shoots emerge
What pests attack garlic during growing season?
Several common pests target garlic plants during the growing season. Nematode threats include root-knot and bulb nematodes that damage root systems.
Mite infestations, particularly bulb mites, attack developing bulbs underground.
Prevention methods include crop rotation and avoiding nitrogen deficiency through proper soil management.
Should you fertilize garlic before harvesting?
While you shouldn’t plant yourself in confusion, stop fertilizing garlic six weeks before harvest. Late-season nitrogen can delay bulb development and reduce storage quality.
Focus on soil testing earlier in the growing season to address any nitrogen deficiency beforehand.
What weather conditions affect garlic harvest timing?
When humidity levels spike and rainfall impact increases, your harvest timing gets pushed back. Wet soil moisture delays the drying process that turns green leaves brown, signaling readiness for harvest garlic.
How do you know if garlic is overripe?
Overripe garlic affects up to 15% of home harvests when timing goes wrong. You’ll spot soft, spongy bulbs that give under gentle pressure—a clear sign you’ve waited too long. The cloves start separating from their papery wrappers, and you might notice green shoots sprouting from the top.
These taste alterations make your garlic bitter and harsh. When you test harvest a bulb, overripe garlic shows loose cloves that fall apart easily.
This storage impact means your harvest won’t last through winter, defeating the purpose of growing your own.
Can you harvest garlic in wet conditions?
Harvesting garlic in wet conditions creates serious Wet Soil Risks that can lead to Bulb Rot and compromise your entire harvest.
Muddy Conditions make the garlic harvesting process difficult, while excess moisture presents Drying Challenges that prevent proper curing and storage of your bulbs.
Conclusion
Ready to transform your garden’s bounty into months of flavorful cooking? Following the proper way to harvest garlic makes certain your bulbs reach peak flavor and storage potential.
From recognizing harvest timing through careful curing, each step protects your investment in homegrown quality. With patience and attention to detail, you’ll master this essential garden skill and enjoy perfectly preserved garlic that far surpasses store-bought alternatives.
- https://www.canr.msu.edu/resources/organic_garlic_production_e3371
- https://extension.umn.edu/vegetables/growing-garlic
- https://fieldreport.caes.uga.edu/publications/C854/garlic-production-for-the-gardener/
- https://cvp.cce.cornell.edu/submission.php?id=88
- https://wikifarmer.com/library/en/article/garlic-harvest-yield-and-storage

