This site is supported by our readers. We may earn a commission, at no cost to you, if you purchase through links.
 A seasonal herb gardening calendar helps you know when to plant, prune, and harvest herbs so your garden thrives all year.
In spring, you’ll start seeds indoors and pinch new growth. Summer means deadheading, mulching, and picking fresh herbs for dinner.
Fall is time to prune and collect seeds, while winter calls for planning and caring for indoor plants. You’ll avoid common missteps like overwatering or forgetting sunlight.
With the right timing, your herbs stay healthy and productive. Think of it as your secret recipe for flavorful meals and a lush garden. There’s more to uncover about mastering every season.
Table Of Contents
- Benefits of Seasonal Herb Gardening
- Choosing The Right Herbs for Your Garden
- Preparing Your Herb Garden for The Seasons
- Spring Herb Gardening Calendar
- Summer Herb Gardening Calendar
- Fall Herb Gardening Calendar
- Winter Herb Gardening Calendar
- Propagating and Dividing Herbs
- Common Herb Garden Mistakes to Avoid
- Year-Round Herb Gardening Tips
- Frequently Asked Questions (FAQs)
- What is a herb planting chart?
- Why do I need a herb planting chart?
- What to plant in January?
- When is the best time to plant a vegetable?
- How do you start a garden in February?
- How do I boost my herb garden?
- What month to start an herb garden?
- What herbs cannot be planted next to each other?
- What is the most difficult herb to grow?
- Can you grow herbs anytime of the year?
- Conclusion
Benefits of Seasonal Herb Gardening
Seasonal herb gardening lets you enjoy fresh flavors, healthy meals, and a more interesting plate throughout the year.
You’ll also find that tending herbs brings color, calm, and a sense of gratitude to your daily routine.
Prevents Boring Dinners
Spicing up your meals is easy when you have a well-planned culinary herb garden. Seasonal herb planting means you’ll always have the best herbs to grow right at your fingertips.
Imagine your kitchen as a chef’s playground, where you can try creative herb recipes or drizzle herb-infused oils over warm bread.
Try these ideas:
- Mix flavorful herb combinations for homemade dressings.
- Use fresh herb garnishes to brighten up simple dishes.
- Create herb butters to melt on steaks or veggies.
- Add chopped herbs to soups for a flavor boost.
- Follow your herb gardening calendar for a steady supply.
Your meals will never feel dull again with these creative herb recipes!
Health Benefits of Herb Gardening
Tending your herb garden does more than flavor your meals—it’s a quiet way to boost your Mental Wellbeing and happiness.
You’ll find that herb gardening offers a blend of gentle Physical Activity and daily Stress Reduction.
Even a few minutes in the garden can help you reset and recharge.
The act of caring for plants brings a sense of Seasonal Appreciation, connecting you to nature’s rhythms.
Plus, fresh herbs pack a punch of Natural Nutrients that your body will thank you for.
Here are five health benefits you’ll enjoy from herb gardening:
- Mental Wellbeing: Lifts your mood and calms your mind.
- Physical Activity: Keeps you active with hands-on tasks.
- Stress Reduction: Lowers stress levels naturally.
- Natural Remedies: Herbs like mint and chamomile support wellness.
- Herb Nutrition: Delivers antioxidants and vitamins straight from your garden.
Visual Appeal and Stress Relief
After exploring the health perks of herb gardening, let’s look at how your garden can lift your mood and calm your mind.
A well-planned herb garden is more than just a collection of plants—it’s a sensory haven. When you follow a herb gardening calendar, you’re building a space that’s pleasing to the eye and soothing to the soul.
Think of it as your personal retreat, where every corner offers something to enjoy:
- Garden Aesthetics: Mix bold basil, golden sage, and vibrant chives for a striking color palette.
- Sensory Gardens: Enjoy the calming scent of lavender or rosemary for real stress relief.
- Therapeutic Gardening: Create peaceful nooks with benches for quiet moments.
- Herb Fragrance: Stroll winding paths and let nature’s aromas ease your worries.
Cultivating Gratitude
After soaking in the calming beauty of your garden, you’ll notice how Mindful Herb Gardening helps you slow down and appreciate life’s small moments.
Keeping a seasonal herb gardening calendar or jotting notes in a gratitude journal brings Seasonal Appreciation front and center.
Each morning, harvesting mint for tea or snipping basil can feel like Garden Meditation—a simple ritual that reminds you of nature’s gifts.
Share cuttings with neighbors or host a swap to build connections and spread joy.
Try this table for inspiration:
| Activity | Benefit | Practical Tip |
|---|---|---|
| Morning mint harvest | Starts your day calmly | Steep fresh leaves for tea |
| Thankful propagation | Builds connection through sharing | Gift rooted cuttings |
Let your herb garden schedule nurture gratitude and belonging year-round.
Choosing The Right Herbs for Your Garden
In terms of choosing the right herbs for your garden, think about both your climate and your culinary preferences. Some herb varieties, like rosemary and thyme, love full sun and dry soil, while mint thrives in damp spots.
Check your space constraints—many common herb varieties grow well in containers. For a peaceful sanctuary, consider choosing a quiet, private area and following herb garden planning.
Use a soil pH tester to keep levels between 6.5-7.5 for healthy roots. Companion planting, such as basil with tomatoes, can boost flavor and growth. Follow a seasonal herb gardening calendar or herb planting guide to match maintenance needs and maximize harvests.
- Match herbs to your climate
- Consider culinary preferences
- Use containers for small spaces
- Try companion planting
- Check maintenance needs
Preparing Your Herb Garden for The Seasons
You’ll get the best results from your herb garden when you match your care routine to each season’s needs.
Start by understanding your local climate, testing your soil, and choosing a spot that gets plenty of sunlight and drains well, which will help you achieve the best results with proper care.
Understanding Climate and Soil Conditions
Once you’ve picked your herbs, it’s time to match them with your garden’s unique climate and soil conditions.
Start by checking your Hardiness Zones—these help you know which herbs can handle your winters.
Test your soil pH; most herbs like it between 6.5 and 7.5. If your soil’s too sour or sweet, add lime or sulfur to fix it.
Good Drainage Solutions are a must—herbs hate soggy feet, so mix in compost or use raised beds.
Watch how much sunlight each spot gets; Sunlight Exposure matters for flavor and growth. Don’t overlook Local Microclimates—a sheltered nook or sunny patch can be a hidden gem.
For ideal growth, remember that most herbs need at least six hours of daily sunlight. These climate considerations keep your seasonal herb gardening calendar on track.
Selecting The Right Location for Your Herb Garden
After understanding your local climate and soil conditions, it’s time to pick the perfect spot for your herb garden.
Sunlight Needs top the list—herbs want at least six hours of sunlight exposure daily.
Scout out areas with good Soil Drainage, since soggy roots can spell trouble fast.
Notice Microclimates around your yard; a fence or wall can shield plants from wind or create a warm pocket for tender herbs.
Maximizing yields often requires supplemental light sources.
- Place taller herbs like rosemary or sage on the north side so they don’t shade out smaller neighbors.
- Test your soil to keep pH between 6.5 and 7.5.
- Keep your garden close to the kitchen for easy harvesting.
Think about Space Availability and even Container Gardening if ground space is tight.
A good location boosts your herb gardening calendar’s success.
Preparing The Soil for Planting
Every thriving herb garden starts with good soil. First, check your soil pH—most herbs grow best in the 6.5 to 7.5 range.
Use a simple test kit, then adjust with lime if it’s too acidic or sulfur for high alkalinity. Drainage solutions matter just as much.
Mix in compost or coarse sand to boost drainage, or try raised beds if water tends to pool. Clear out weeds so your herbs don’t have to fight for nutrients or sunlight.
Sprinkle in a balanced organic fertilizer—herbs like a healthy boost, not a feast. Top things off with mulch types like straw or bark to keep moisture in and weeds out.
A critical step is verifying proper soil drainage to prevent root rot. Following the herb gardening calendar guarantees you match soil conditions and temperature for the best results.
Spring Herb Gardening Calendar
Spring is the time to wake up your herb garden and set the stage for healthy growth.
You’ll focus on pinching new shoots, testing soil drainage, starting seeds indoors, and planting cool-season herbs before summer heat arrives.
Pinching Out Tips of New Plants
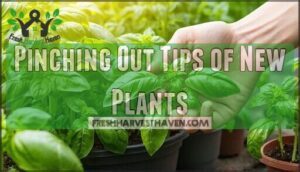
After prepping your herb garden for the season, it’s time to focus on pinching out tips of new plants—a move that can make all the difference.
Pinching Benefits are clear: you’ll encourage bushier growth, prevent early bolting, and boost flavor intensity. This simple pruning technique is easy to master.
When your herbs like basil, oregano, or mint reach about six inches tall, pinch off the top inch above a leaf node. Use your fingers or clean scissors. This signals the plant to branch out, giving you more leaves for herb harvesting and better herb garden maintenance.
Think of it as giving your herbs a gentle nudge to grow fuller and tastier.
- Promotes Technique Mastery for beginners and pros
- Supports bushier growth and denser harvests
- Helps prevent bolting and keeps flavors bold
Testing Soil Drainage
A simple Percolation Test helps you check soil drainage before planting.
Dig a 12-inch hole, fill it with water, and watch how fast it drains—aim for 1-2 inches per hour.
Slow drainage or standing water signals compaction or poor Soil Composition, which can lead to Root Rot.
Improve things with Drainage Amendments like compost or coarse sand.
In humid climates, raised beds and gravel mulch boost moisture retention without soggy roots.
Well-drained soil, balanced soil pH, and steady soil temperature support healthy herb gardening.
Starting Pepper Plants Indoors
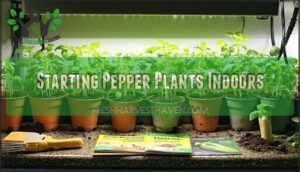
One surefire way to boost your pepper harvest is to start seeds indoors.
Here’s how to get it right:
- Sow seeds in a pre-moistened Seed Starting Mix 8–10 weeks before your last frost, following your herb planting guide.
- Keep Germination Temperature steady at 80–85°F with a heat mat.
- Use a Grow Light Setup for 14–16 hours daily.
Consider pepper seed starting supplies to promote healthy growth.
Begin Hardening Off seedlings before Transplant Timing outdoors—your herb garden planner will thank you, ensuring a successful seed starting process.
Planting Less Heat Tolerant Herbs
After starting pepper plants indoors, it’s time to focus on cool-season herbs. If you love fresh parsley, cilantro, and chervil, spring planting is your window of opportunity.
Plant these less heat tolerant herbs about 2-3 weeks before your last expected frost, once the soil reaches 50°F. Choose shady locations or tuck them beside taller plants to give them relief from rising temperatures.
Mulching and morning watering help keep roots cool and reduce the risk of bolting. Succession planting every few weeks keeps your harvest coming and delays flowering.
For areas where spring quickly turns to summer, look for bolt-resistant varieties. Use this quick herb planting calendar for reference:
| Herb | Planting Time | Heat Care Tactic |
|---|---|---|
| Parsley | 2-3 weeks pre-frost | Partial Shade |
| Cilantro | 2-3 weeks pre-frost | Frequent Watering |
| Chervil | 2-3 weeks pre-frost | Mulching |
Summer Herb Gardening Calendar
Summer brings long days and strong sun, so you’ll need to focus on heat-loving herbs like basil, oregano, and thyme.
Keep your garden healthy by deadheading flowers, adding mulch, watching for pests, and pruning for steady growth.
Deadheading Herbs
Every thriving herb garden deserves a little summer upkeep, and deadheading herbs is a top technique for keeping things vibrant.
By trimming away spent flowers, you’re not just tidying up—you’re encouraging bushier growth and better flavor.
This hands-on approach to herb garden maintenance keeps basil, oregano, and thyme from bolting, so your harvests last longer and taste fresher.
Think of deadheading as your secret weapon for flavor enhancement and reblooming herbs.
- Boosts flavor by focusing energy on leaves
- Extends harvests through bolting prevention
- Encourages bushier growth for fuller plants
- Supports easy seed collection for next season
- Simplifies pruning techniques for ongoing harvesting herbs
Stay consistent, and your summer herbs will reward you with better flavor and a longer harvest season, making it a key part of herb garden maintenance.
Mulching The Base of Plants
After deadheading your herbs, it’s time to focus on mulching the base of your plants.
In summer, a 2-inch layer of organic mulch acts like a shield for your herb garden. Apply mulch materials such as straw for moisture retention, pine needles for better drainage, or wood chips for long-term weed suppression.
Grass clippings work well if you need a quick fix during hot spells. Keep the mulch depth consistent but always leave a small gap around stems to prevent rot.
The right application timing is early summer, just as the soil warms up and weeds start to appear. Mulching cuts down on watering and weeds, and also helps stabilize soil temperatures.
Over time, organic mulch breaks down, adding nutrients and making herb garden maintenance easier. Your herbs will thank you with steady, healthy growth.
Monitoring for Pests
A sharp eye is your first line of defense against seasonal threats in the herb garden.
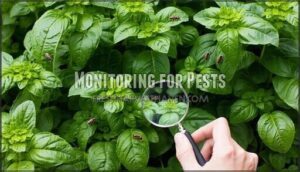
Pest monitoring means checking both sides of leaves weekly for early signs of aphids, spider mites, or caterpillars—think of it as your garden’s regular health check.
For pest identification, use a magnifier to spot tiny troublemakers.
Preventative measures like spacing plants and removing debris help, but companion planting—such as basil near oregano—adds another layer.
When pests appear, reach for organic solutions like neem oil or insecticidal soap.
If things get tough, introduce beneficial insects like ladybugs for biological control.
With steady pest control, you’ll keep your herbs strong and productive, letting you enjoy the fruits of your labor all summer.
Harvesting and Pruning Herbs
After checking for pests, it’s time to focus on harvesting and pruning—your ticket to a lush, productive herb garden.
Smart harvesting techniques and proper pruning keep plants healthy and boost flavor intensity.
Here’s how to get it right:
- Harvest timing: Pick herbs early in the morning, using sharp shears for clean cuts.
- Pruning techniques: Snip just above leaf nodes at a 45-degree angle to encourage bushy growth.
- Storage methods: Harvest only a third at a time, then store extras by drying or freezing for later use.
Keep your garden thriving!
Fall Herb Gardening Calendar
As fall arrives, you’ll need to focus on preparing your herb garden for colder weather by pruning back plants, removing old or diseased growth, and adding mulch.
This is also the perfect time to collect seeds and store them for next year’s planting.
Pruning Back Herbs
One key step for fall herb care is using the right pruning techniques.
For woody herbs like rosemary and thyme, trim back about one-third with clean, sharp tools—think bypass pruners or garden shears.
For soft-stemmed herbs like basil, cut stems down to 6 inches using scissors or pruning shears.
Pruning helps prevent bolting, boosts bushier growth, and keeps flavor intensity high.
Always sanitize your tools before and after to protect your herb garden’s health.
| Herb Type | Pruning Depth | Recommended Tools |
|---|---|---|
| Woody (e.g., thyme) | Trim 1/3 | Bypass pruners, garden shears |
| Soft-stemmed (e.g., basil) | Cut to 6 inches | Sharp scissors, pruning shears |
| Overgrown herbs | Shape as needed | Lightweight hand pruners |
Removing Spent and Diseased Plant Material
As autumn settles in, set your herb garden up for success by focusing on Disease Prevention.
Removing spent plant material and anything diseased is key to keeping your herbs healthy and strong. Walk through your garden, looking for signs of trouble:
- Yellowed or spotted leaves—these might signal fungal issues.
- Blackened stems—often a sign of disease.
- Moldy patches—check dense growth for hidden problems.
- Dried flowers—these can lead to unwanted reseeding.
Use clean, sharp tools for pruning, and practice Tool Sterilization by wiping blades with alcohol between cuts. Cut well below any discoloration to fully remove trouble spots.
Proper Disposal matters: compost only healthy debris, and toss anything infected. This routine helps protect Plant Health and makes harvesting more rewarding.
Mulching Overwintering Herbs
After clearing out old growth, it’s time to shield your winter herb garden from the cold.
Mulching overwintering herbs locks in warmth and moisture, giving them a fighting chance.
Here’s a step-by-step guide for effective herb care:
- Spread 2–3 inches of mulch; use 3–4 inches for tender herbs like rosemary.
- Choose mulch materials such as leaves, pine needles, straw, or shredded bark.
- Keep mulch a few inches from stems to prevent rot.
- Remove mulch gradually in spring as growth returns.
- For extra winter protection, mound soil before mulching—especially in colder gardening zones.
To guarantee winter survival, consider choosing cold-hardy varieties for your herb garden, ensuring a successful and thriving winter herb garden with proper mulching techniques.
Collecting and Storing Seeds
After mulching overwintering herbs, it’s smart to start seed saving. Let seed heads dry on healthy plants, then snip or shake them into bags.
Use drying methods like screens or paper bags to avoid mold. Store seeds in labeled seed packets inside airtight storage containers.
Keep a seed log for tracking seed viability and germination testing. Organized seeds mean easier seed starting and better results next season.
Winter Herb Gardening Calendar
Winter is the perfect time to plan your next herb garden, organize your seeds, and order new starter plants.
You can also care for herbs overwintering indoors by checking light, water, and temperature needs to keep them healthy until spring.
Planning Your Next Herb Garden
Grab your planner and start mapping out your next herb garden.
Good herb garden planning begins with a smart Garden Layout.
Think about sunlight, drainage, and how to use space—maybe even try Vertical Gardening.
Use a herb planting calendar to time your crops and match herbs to your climate.
Here’s a quick checklist:
- Choose herbs using a “when to plant herbs calendar.”
- Plan Companion Planting for healthier growth.
- Explore Container Choices for flexibility.
- Use Budget Planning to manage seeds, soil, and tools.
Inventorying Herb Seeds
Every winter, take time to review your herb seeds and set yourself up for spring success.
Start by organizing seeds into labeled containers—think of it as seed cataloging for gardeners.
Check expiration dates and test seed viability by placing a few older seeds on a damp paper towel.
Record germination testing results and notes in a seed log, and store your seeds in airtight containers under cool, dry storage conditions.
Good seed saving habits and proper seed storage make planting easier, save money, and help guarantee healthy, thriving herbs all season.
Buying Seeds and Ordering Starter Plants
Now that you’ve inventoried your seeds, it’s time to stock up for the coming season. Buying seeds and ordering starter plants in winter helps you avoid the spring scramble and sets you up for success.
Check seed viability with a simple germination test before planting. Choose organic seeds from reputable suppliers, and keep an eye on starter size for slow growers like rosemary or lavender.
You can buy herb seeds from various online retailers. Store all seed packets in a cool, dry place for best results.
Staying organized with your seed storage makes seed starting much smoother.
- The thrill of fresh seed packets on a cold day
- Hope for a lush, green herb garden
- Confidence in your Seed Starting game
Caring for Herbs Overwintering Indoors
When you bring herbs indoors for winter, focus on Indoor Lighting—aim for six hours of sun or use grow lights.
Humidity Control matters, so mist plants or set pots on moist pebbles.
Keep Watering Frequency low; let soil dry a bit before watering.
Temperature Regulation helps—keep rooms between 60–70°F.
Check leaves for pests often.
With care, your winter herb garden thrives.
Propagating and Dividing Herbs
You can grow your herb garden by starting new plants from seeds, stem cuttings, or by dividing mature herbs.
These methods let you expand your garden and keep your herbs healthy season after season.
Propagating From Seed
A solid start to your herb garden begins with smart seed starting. Check seed viability by looking at the dates on seed packets and always use a fresh seed starting mix.
For starting indoors, aim for a soil temperature of 65-70°F to boost germination rates. Give seedlings 12-16 hours of light daily, and keep the soil evenly moist.
When direct sowing outdoors, wait until after the last frost. Seedling care matters—thin crowded sprouts and label trays so you don’t mix up your herbs.
Store leftover seeds in a cool, dry spot. With these steps, you’ll set your herbs up for success.
- Fresh seeds matter for germination
- Keep soil temperature steady
- Use a quality seed starting mix
- Label trays to avoid confusion
- Thin seedlings for healthy growth
Propagating From Stem Cuttings
Once you’ve mastered starting herbs from seed, stem cuttings open up a whole new world in your herb gardening journey.
Choose healthy, green stems for your Cutting Selection—aim for 4 to 6 inches, snipped just below a leaf node. Strip the lower leaves, dip the end in rooting hormone, and set the cutting into moist, well-draining Rooting Mediums like perlite or seed mix.
Humidity Control is key: cover with a clear bag or place in a warm, shaded spot to keep moisture high without letting leaves touch plastic.
- **Clone your favorite herbs for consistent flavor.
- **Skip the seed stage for faster, reliable results.
- **Easily expand your herb collection with minimal fuss.
Once roots develop, you’re ready for Transplanting Cuttings outdoors or into larger pots.
Dividing and Repotting Herbs
After rooting cuttings, you might notice your herb garden feels a bit crowded. That’s when dividing herbs and repotting comes into play.
Division keeps perennial herbs like mint, chives, and oregano healthy and productive. Start by digging up the clump in early spring or fall—these are the best Division Timing windows to reduce plant stress.
Gently tease apart the roots, making sure each section has both roots and shoots. Trim away about one-third of the roots with clean shears (Root Pruning) before setting each piece in fresh, nutrient-rich Potting Mixes.
Choose a Container Size that gives roots room to spread. For Post-Transplant Care, water deeply and keep your herbs out of direct sun for a few days. This simple herb propagation step helps your herb garden stay lively and thriving.
Common Herb Garden Mistakes to Avoid
You can avoid many common herb gardening problems by learning what to watch for each season.
Paying attention to sunlight, water, and regular pruning helps your herbs stay healthy and productive all year.
Overwatering and Poor Drainage
After learning how to propagate and divide herbs, let’s talk about a common pitfall—overwatering.
Watering your herbs too much is like giving them rain boots with holes; Root Rot sneaks in, and your plants suffer.
The secret is to focus on Soil Composition and smart Drainage Solutions.
Here’s how you keep your herbs happy:
- Test your soil—Mix in sand, perlite, or coarse compost for better drainage.
- Pick the right pots—Good Container Choice means drainage holes.
- Check Watering Frequency—Only water when the top inch is dry.
- Mind the spot—Keep containers in places with airflow.
Good drainage, proper watering techniques, and monitoring soil temperature for herbs help prevent overwatering disasters.
Not Providing Enough Sunlight
Nearly every herb garden struggles when sunlight exposure falls short. Herbs need 6-8 hours of direct light, or you’ll spot Light Deprivation Symptoms—leggy stems, pale leaves, and slow growth.
If your garden’s tucked in a shady spot, try Shade-Tolerant Herbs like mint or parsley. For indoor herb gardening, Artificial Lighting Options such as LED grow lights save the day.
Seasonal Light Changes can sneak up on you, so keep an eye out and move pots as needed. Optimizing Light Exposure is key—use a light requirements chart to guide your choices and consider reflective surfaces to boost indoor lighting.
- Monitor for Light Deprivation Symptoms
- Use Artificial Lighting Options indoors
- Choose Shade-Tolerant Herbs
- Adjust for Seasonal Light Changes
- Reference a light requirements chart
Not Pruning Herbs Regularly
Think of pruning as your secret weapon for herb garden success. If you skip it, you’ll face herb gardening challenges like weak stems, leaf drop, and early bolting.
Regular pruning keeps your plants bushier, boosts plant health, and ramps up flavor intensity. Always use sharp scissors or pruners, not kitchen knives, to avoid crushing stems.
Snip just above a healthy leaf pair—this encourages bushier growth and bolting prevention, leading to an extended harvest. Pruning is one of the most effective herb gardening techniques for vibrant, productive plants.
Make it a habit, and you’ll enjoy better herbs and a more rewarding garden year-round, which is the key to vibrant, productive plants.
Year-Round Herb Gardening Tips
You can keep your herb garden productive all year by planning for each season and choosing the right herbs for your climate.
With a few smart container choices and regular care, you’ll enjoy fresh herbs no matter what the weather brings, and have a productive garden.
Creating a Year-Round Herb Garden Plan
A solid year-round herb gardening plan starts with mapping your garden’s microclimates and tracking your herb planting calendar.
Use succession planting to keep fresh herbs on hand. Adapt your care for each season, using indoor growing for winter protection and zone adaptations for outdoor beds.
Monitor light and temperature indoors. Stay ahead with these tips:
- Map sun and shade spots
- Use succession planting
- Adjust for microclimates
- Monitor indoor growing
- Adapt care for each season
Monitor light and temperature indoors to ensure the best results for your herb garden, and remember to always map your garden’s conditions carefully.
Selecting Herbs for Different Seasons
Every season brings its own rhythm to herb gardening, and matching your choices to the weather makes all the difference.
Use a seasonal herb gardening calendar to guide your herb planting calendar and boost your year-round harvests. Spring is the time for Cool-season Herbs like parsley and chives—these early risers thrive in brisk soil and partial sun.
As summer heats up, switch to Heat-tolerant Herbs like basil and oregano; they demand full sun and warm soil for bold, Seasonal Flavors. Fall is perfect for dill and cilantro, which love cool temps and moist soil, but keep an eye on early frosts.
Winter Hardiness matters most when you want rosemary and thyme to survive the cold; these perennials do well in frost and even indoors with enough Herb Sunlight. To thrive, many herbs need supplemental lighting, so consider using full-spectrum LED grow lights for maximum growth.
Follow a herb gardening schedule and adjust your herb growing calendar for each season to enjoy fresh herbs all year.
| Season | Top Herbs | Ideal Conditions | Notes |
|---|---|---|---|
| Spring | Chives, Parsley | Cool soil, partial sun | Early growth starts strong |
| Summer | Basil, Oregano | Full sun, warm soil | Heat boosts vibrant flavors |
| Fall | Dill, Cilantro | Cool temps, moist soil | Avoid early frost exposure |
| Winter | Rosemary, Thyme | Hardy, frost-resistant | Perfect for indoor pots |
Using Containers for Year-Round Herb Gardening
Once you’ve picked the right herbs for each season, container gardening keeps your herb garden thriving year-round—rain, shine, or snow.
It’s a smart move for anyone wanting fresh flavors on hand. Here’s how to master year-round herb gardening:
- Pick pots with solid Drainage Solutions—no swampy roots.
- Choose Container Soil that fits your Herb Selection and herb needs.
- Adjust herb pot depth—basil likes it deep, thyme prefers shallow.
- Use Indoor Lighting or sunlight for 6–8 hours.
- Add Winter Protection when frost threatens.
The key to successful container gardening is following these steps to ensure your herbs receive the right conditions to thrive, including proper care and attention to their specific needs.
Frequently Asked Questions (FAQs)
What is a herb planting chart?
Did you know most herbs need 6-8 hours of sun?
A herb planting chart gives you the best times to sow, transplant, and harvest each herb.
It’s like a roadmap, helping your garden thrive all season.
Why do I need a herb planting chart?
You’ll avoid planting too early or late, sidestep frost, and get the best harvests.
A herb planting chart acts like a gardening GPS, guiding you on when to start seeds, transplant, and harvest for your region.
What to plant in January?
Like sharpening your tools before a big project, January’s perfect for starting onion, leek, and parsley seeds indoors.
Order new seeds, plan your garden layout, and check your supplies so you’re ready when planting season kicks in, and make sure to have everything needed for the project, including seeds and a well-planned garden layout.
When is the best time to plant a vegetable?
You’ll want to plant vegetables after your area’s last frost date, when soil temperatures reach 50°F or higher.
Always check your seed packet for “days to harvest” so your crops mature before the first fall frost.
How do you start a garden in February?
Think of February as prepping your stage before the big show.
Start seeds indoors for cool crops like broccoli and cabbage, use a heat mat for better germination.
Sharpen your garden tools while the ground’s still frozen.
How do I boost my herb garden?
Give your herb garden a leg up by pruning often, watering just enough, and making sure your soil drains well.
Six to eight hours of sunlight daily keeps flavors bold.
Pinch new growth to get bushier, fuller plants.
What month to start an herb garden?
Picture your garden as a fresh notebook—spring is the perfect time to start writing.
Sow cool-season herbs like parsley or cilantro in early spring, then tuck in basil and oregano once the last frost melts away, which can be considered a complete concept to apply in your gardening schedule.
What herbs cannot be planted next to each other?
Don’t plant basil near sage or rue—they’ll clash and fight for space.
Keep fennel by itself; it’s a loner and stunts neighbors.
Mint spreads fast, so give it its own pot, away from other herbs.
What is the most difficult herb to grow?
Many gardeners find cilantro tricky—it bolts fast in heat and can be fussy about water.
If you miss its window, you’ll get flowers, not leaves.
Stay on your toes, and you’ll catch its best flavor.
Can you grow herbs anytime of the year?
Funny how timing works—herbs can grow year-round if you match them to your climate and give them enough light.
Indoors, use grow lights. Outdoors, follow frost dates and choose varieties suited to the season.
Conclusion
Think of your garden as a living calendar, each season turning a new page.
With a seasonal herb gardening calendar, you’re ready for every step—planting, pruning, and harvesting.
You’ll avoid common mistakes, keep your herbs healthy, and enjoy fresh flavors all year.
Follow the guide, adjust for your space, and use containers if needed.
With a little planning, your herb garden won’t just survive; it’ll thrive, making every meal more vibrant and your gardening journey more rewarding.

