This site is supported by our readers. We may earn a commission, at no cost to you, if you purchase through links.
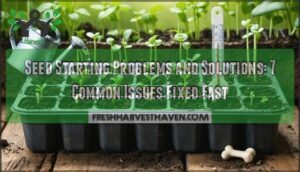
You’ll see poor germination when seeds get too wet or dry, face wrong temperatures, or sit in compacted soil.
Damping-off disease strikes overwatered seedlings, while leggy growth signals inadequate light.
Seeds won’t sprout in old, low-quality soil or when planted at wrong depths.
Fix these issues by maintaining consistent moisture without waterlogging, keeping temperatures between 65-75°F, using quality seed starting mix, providing 12-16 hours of bright light, and following packet directions for depth and timing.
Most failures happen because one element’s missing from this essential recipe.
Table Of Contents
- Key Takeaways
- Seed Germination Issues
- Common Seedling Problems
- Seed Starting Methods
- Factors Affecting Seed Growth
- Troubleshooting Seed Issues
- Frequently Asked Questions (FAQs)
- What are 10 factors that affect seed germination?
- What is wrong with my seedlings?
- What are five factors that may cause poor germination?
- Is it better to germinate seeds in soil or paper towel?
- Why wont my seeds sprout after several weeks?
- Can old seeds still be planted successfully?
- Should seeds be soaked before planting them?
- What causes seedlings to fall over suddenly?
- How deep should different seeds be planted?
- Why arent my seeds sprouting after planting?
- Conclusion
Key Takeaways
- Control your five key factors: You’ll solve 90% of seed problems by maintaining proper moisture, temperature (65-75°F), quality soil, adequate light (12-16 hours), and correct timing.
- Watch for overwatering signs: You can prevent damping-off disease and root rot by keeping soil like a wrung-out sponge rather than waterlogged, and ensuring containers have proper drainage.
- Test and prepare your seeds: You’ll avoid germination failures by checking seed viability, using fresh quality starting mix, and treating seeds with a diluted bleach solution to eliminate pathogens.
- Provide consistent growing conditions: You’ll prevent leggy growth and transplant shock by maintaining steady environmental conditions, gradually hardening off seedlings, and monitoring daily for early problem detection.
Seed Germination Issues
When your seeds refuse to germinate, you’re likely facing one of five common problems that can stop sprouting in its tracks.
Understanding these issues helps you identify what went wrong and fix it quickly for your next planting attempt, which involves complete concepts and quickly solving them.
Insufficient Watering
When you don’t water seeds properly, you’re basically putting them in suspended animation. Dry soil prevents germination and creates stunted growth that derails your entire gardening project.
Without adequate moisture, seeds can’t activate the biological processes needed to sprout. Here’s how to fix watering issues:
- Check soil moisture daily by inserting your finger one inch deep
- Water gently using a spray bottle to avoid disturbing seeds
- Maintain consistent moisture without creating waterlogged conditions
- Create a watering schedule based on container size and room temperature
- Watch for wilting leaves as your first warning sign
Root damage occurs when seeds alternate between bone-dry and soaked conditions. Many gardeners find success using specialized plant misters. Your germination issues often stem from inconsistent watering rather than bad seeds.
Quality seedling care means finding that sweet spot where soil feels like a wrung-out sponge. This prevents the feast-or-famine cycle that causes seed starting problems and makes healthy development possible.
Incorrect Temperature
Temperature troubles can make or break your seed starting success. You need consistent soil temperatures between 65-75°F for ideal germination. Most seeds won’t sprout in cold conditions, while excessive heat kills them outright.
Heat mats deliver steady warmth for indoor starts. Cold stratification breaks dormancy in stubborn seeds like wildflowers. Temperature monitoring with soil thermometers prevents guesswork and germination issues.
Seedling hardening gradually adjusts plants to outdoor conditions, preventing shock from temperature swings. One should also consider cold-hardy plant varieties for early outdoor planting.
| Temperature Range | Seed Type | Action Needed |
|---|---|---|
| Below 60°F | Most vegetables | Add heat mats, relocate |
| 60-65°F | Cool-season crops | Monitor, may need warmth |
| 65-75°F | Warm-season vegetables | Perfect conditions |
| 75-85°F | Heat-loving plants | Good for peppers, tomatoes |
| Above 85°F | All seeds | Remove heat, improve ventilation |
Temperature control makes the difference between thriving seedlings and seed starting problems. It is crucial for achieving consistent soil temperatures and ensuring the success of your seed starting efforts, ultimately leading to healthy seedlings.
Poor Soil Quality
Three out of four seeds fail when you start with poor-quality soil. Your growing medium determines whether seedlings thrive or struggle from germination onward.
Quality seed starting mix provides the foundation your seeds need. Garden soil stays too heavy and harbors diseases that kill young plants. Commercial seed starting mixes offer better drainage and sterile conditions. For those seeking a reliable option, consider exploring options for pre-mixed soil blends.
Key soil quality factors include:
- Soil Composition – Use sterile, well-draining seed starting mix instead of garden soil
- pH Levels between 6.0-7.0 for ideal nutrient availability and healthy root development
- Water Retention that stays moist but not waterlogged to prevent damping off disease
- Soil Structure with proper aeration to support strong root growth and seed viability.
Test your soil before planting. Nutrient deficiency and poor soil quality cause slow growth that weakens seedlings permanently.
Inadequate Light
Light spectrum affects seedling development, but light intensity determines growth success.
Weak lighting creates leggy seedlings with slow growth and pale leaves.
Your seed starting needs 12-16 hours of bright light daily.
Distance matters – position artificial lighting 2-4 inches above plants.
Light duration of 14-16 hours prevents stretching.
Poor light requirements lead to damping off and weak stems.
Contaminated Seeds
Contaminated seeds carry invisible threats that destroy germination rates before you even start.
Hidden enemies lurk on every seed surface, ready to sabotage your garden dreams.
Seedborne pathogens including bacteria, fungi, and viruses live on seed surfaces, ready to multiply when conditions turn warm and moist.
These microscopic enemies cause damping-off, mold growth, and complete seed starting failure.
You can protect your investment with simple prevention methods:
- Soak seeds in 10% bleach solution for ten minutes to kill surface pathogens
- Apply hydrogen peroxide treatment for natural bacterial infections control
- Purchase certified disease-free seeds from trusted suppliers
- Use fungicidal treatments to prevent viral transmission and fungal contamination
- Store seeds properly to avoid chemical residues and moisture buildup
Garden sanitation starts with clean seeds.
Quality seed starting depends on eliminating contamination before it spreads throughout your growing medium, which is crucial for a healthy harvest and requires proper seed care.
Common Seedling Problems
Once your seeds have sprouted, you’ll face a new set of challenges that can make or break your seedlings.
These common problems can stop healthy growth in its tracks, but they’re all fixable with the right approach.
Overwatering
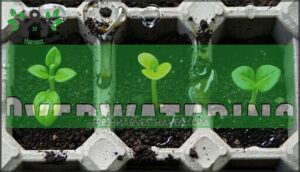
Waterlogged soil creates a death trap for seedlings through oxygen deprivation. You’ll notice yellow leaves and wilting seedlings with mushy, darkened stems when soil saturation becomes problematic.
Looking at the paragraph about waterlogged soil and the engaging, direct tone throughout the content, here’s a short blockquote:
Soggy soil suffocates seedlings faster than drought ever could.
Root rot develops rapidly in soggy conditions, preventing proper nutrient uptake. Fungal growth thrives in constantly wet environments, leading to damping off disease that kills seedlings overnight.
Test soil moisture by pressing your finger one inch deep—if it feels wet, wait before watering again. Make certain your containers have adequate drainage holes to prevent water from pooling.
Moisture control prevents these devastating garden issues that destroy weeks of careful seed starting work.
Underwatering
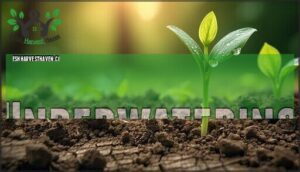
Underwatering creates dry soil conditions that prevent seeds from achieving proper germination and leads to stunted growth in emerging seedlings.
Your seed starting medium needs consistent moisture to support healthy root health and prevent wilting signs from appearing.
While overwatering drowns seeds, underwatering starves them of life-giving moisture.
- Check dry soil daily by inserting your finger one inch deep into the medium
- Establish a consistent watering schedule when the surface feels dry but before wilting signs appear
- Use bottom watering techniques to guarantee root health reaches deeper zones
- Monitor seedlings for early drought stress indicators like leaf curling or stunted growth
- Maintain proper moisture control during seed starting with mulching techniques
Nutrient Deficiencies
When proper watering isn’t enough, nutritional deficiencies often plague your seedlings.
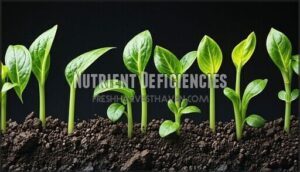
Identifying deficiencies starts with recognizing deficiency symptoms: yellowing leaves indicate nitrogen shortage, while purple-tinged foliage signals phosphorus problems.
Stunted growth reveals multiple essential nutrients are missing from your garden soil.
Correcting imbalances requires soil improvement through balanced fertilizers or organic amendments like compost.
Most seedlings need feeding once their first true leaves appear, preventing plant growth issues before they establish.
Pests and Diseases
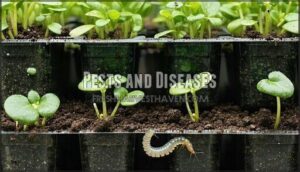
Tiny invaders can destroy your seedling dreams faster than you’d expect. Pest identification becomes essential when fungus gnats, aphids, and cutworms target vulnerable young plants. These pests weaken roots, transmit diseases, and create entry points for harmful pathogens.
Disease prevention requires sterile growing conditions since common seedling diseases like damping-off thrive in contaminated soil. One of the most common issues is fungi causing damping-off, which can be prevented with proper soil preparation.
Organic solutions include beneficial nematodes for pest control and proper sanitation practices. Natural pesticides from neem oil or insecticidal soap protect plant health without harsh chemicals.
- Monitor seedlings daily for early signs of garden issues monitoring
- Use bottom watering to reduce fungal growth conditions
- Apply garden specific tips like companion planting with pest-repelling herbs
Garden health depends on catching problems before they spread throughout your seed starting operation.
Transplant Shock
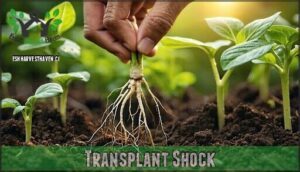
Moving seedlings from their protected environment can minimize shock with proper preparation. Hardening off begins seven days before transplanting – gradually expose plants to outdoor conditions for increasing periods daily. This process strengthens seedlings against temperature fluctuations and wind.
Root disturbance causes most transplant problems. Handle seedlings by their leaves, never stems, and keep root balls intact. Watering practices matter greatly – water thoroughly before and after moving plants.
To help them thrive, consider how microclimates affect growth.
| Transplant Factor | Before Moving | During Transfer |
|---|---|---|
| Soil Amendments | Match pH levels | Minimize handling |
| Timing | Cool, cloudy day | Early morning |
| Preparation | Water 2 hours prior | Keep roots moist |
| Recovery | Shade for 2-3 days | Light watering |
Following these garden preparation steps guarantees your seed quality investment pays off through successful plant care.
Seed Starting Methods
Your seed starting method can make or break your garden before it even begins.
Whether you choose soil, paper towels, trays, or DIY containers, each approach has specific advantages that can solve common germination problems when applied correctly.
Soil Vs Paper Towel
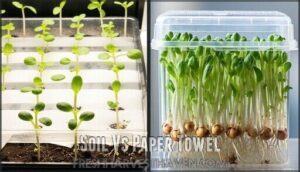
Paper towel germination offers faster seed quality assessment and higher germination rates within 3-7 days.
You’ll control paper towel moisture precisely while monitoring root development visually.
However, transfer success requires careful handling to prevent damage.
Soil nutrients support natural growth but hide progress.
For mold prevention, make certain to have proper airflow.
This method allows for testing seed viability simultaneously.
Both methods work for seed cultivation across different seed varieties, though gardening tips favor soil for reduced transplant shock.
Indoor Seed Starting
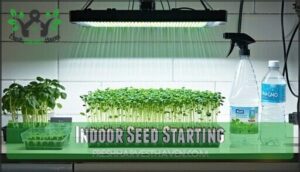
Indoor seed starting puts you in the driver’s seat for seedling heat and indoor lighting control.
Choose containers with drainage holes and create a watering schedule that keeps soil moist but not soggy.
Airflow needs matter—use fans to prevent damping-off disease.
Select seed varieties suited for your space and nonGMO seeds with proven germination rates for reliable seed cultivation.
Outdoor Seed Starting
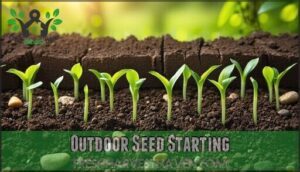
Direct sowing outdoors builds stronger plants than indoor methods since roots develop without transplant shock.
Your seed knowledge matters most when working with your garden’s microclimate selection and natural conditions.
Key outdoor seed starting steps:
- Test soil temperature – Most seeds need 60-70°F soil for proper germination
- Prepare seedbeds thoroughly – Work compost into existing soil for better drainage
- Time your seed selection wisely – Match planting dates to your last frost date
Cold stratification helps certain seeds break dormancy naturally.
Hardening off isn’t needed since seeds adapt to outdoor conditions from the start.
Pest protection becomes important early – row covers shield vulnerable seedlings from insects and birds.
This new world seed approach creates resilient plants ready for your garden’s challenges.
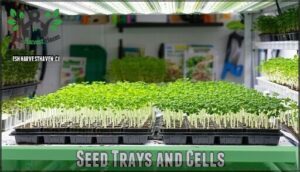
Seed Trays and Cells
Professional seed starting trays with proper cell size guarantee uniform gardening success.
Choose durable material types like polystyrene or biodegradable options for tray longevity. Essential drainage solutions include bottom holes preventing waterlogged roots.
Between seasons, follow sterilization methods using diluted bleach to eliminate pathogens. Many gardeners find success using specialized starting systems.
Match cell dimensions to seed requirements—smaller cells for herbs, larger for tomatoes. Quality gardening supplies create consistent garden plants while garden kits often include standardized trays.
Track varieties across cells for organized seed starting seasons.
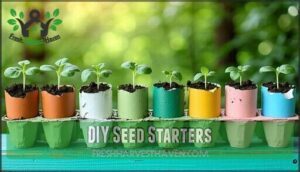
DIY Seed Starters
Creating your own seed starters from upcycled containers saves money while giving you complete control over your garden plants’ early development.
You don’t need expensive gardening supplies when household items work just as well.
Here are three reliable DIY options that deliver professional results:
- Egg cartons – Each compartment holds one seed perfectly, and the cardboard decomposes when planted directly into garden soil improvement mixes
- Toilet rolls – Cut in half, these create biodegradable pots that support strong root systems without transplant shock
- Yogurt containers – Deep sides accommodate peat alternatives and homemade mixes while proper drainage holes prevent waterlogging
Punch drainage holes in any container you choose. Fill with quality potting mix or create your own blend using compost and vermiculite. These gardening tools rival expensive garden kits availability while costing practically nothing. Your seedlings won’t know the difference, but your wallet will.
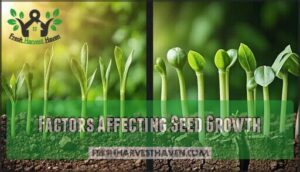
Factors Affecting Seed Growth
Your seeds’ success depends on getting the growing conditions just right from the start.
Even small changes in soil pH, moisture levels, temperature, or air flow can make the difference between healthy seedlings and disappointing failures.
Soil PH and Composition
Your soil’s pH directly affects nutrient availability for seeds. Most seeds prefer slightly acidic to neutral conditions (pH 6.0-7.0).
Test your garden soil first, then adjust with soil amendments as needed.
| pH Range | Soil Acidity Level | Best For |
|---|---|---|
| 5.5-6.0 | Slightly Acidic | Blueberries, potatoes |
| 6.0-7.0 | Neutral | Most vegetables, herbs |
| 7.0-7.5 | Slightly Alkaline | Brassicas, asparagus |
Add organic matter like garden compost to improve water retention and feed soil microbes.
Well-prepared garden beds with proper compost making techniques create the foundation for successful germination. Focus on garden bed preparation before planting.
Moisture and Humidity
Seeds need steady moisture control to sprout successfully.
Keep soil damp like a wrung-out sponge, never soggy. Humidity levels around 60-70% help germination without inviting mold.
Good airflow effects prevent condensation issues while maintaining watering frequency.
Garden consistent moisture through proper drainage prevents both drought stress and root rot that kills seedlings.
Light and Temperature
Two critical factors determine your seedling success rate when starting seeds indoors.
Light spectrum and temperature fluctuations directly impact germination speed and plant health.
Heat mats provide consistent warmth while grow lights deliver necessary energy for photosynthesis.
To avoid leggy seedlings, make certain your setup meets the optimal light intensity.
Follow these guidelines for garden best results:
- Seedling Placement: Position grow lights 6-12 inches above plants for ample light exposure
- Temperature Control: Maintain 65-75°F using heat mats for garden consistent moisture retention
- Light Duration: Provide 12-16 hours daily illumination for garden thriving conditions
Air Circulation and Oxygen
Stagnant air creates the perfect breeding ground for fungal diseases that destroy seedlings overnight.
You’ll need consistent airflow benefits to maintain healthy oxygen levels and prevent moisture buildup around delicate stems.
Preventing dampness requires gentle fans positioned to create cross-ventilation without directly blasting seedlings.
Proper circulation methods enhance oxygen uptake while strengthening stem development.
Seedling vigor depends on this constant air exchange, much like opening windows in a stuffy room revitalizes everyone inside.
Microbial Activity and Mycorrhizae
Good oxygen flow sets the stage, but beneficial microbes and mycorrhizae truly power your seedlings’ success.
These soil ecosystem partners boost nutrient uptake by 400% while releasing growth hormones. Like probiotics for your gut microbiome, they maintain microbial balance and prevent disease.
Root health depends on this underground network working like nature’s dietary supplements.
- Mycorrhizal fungi extend root networks far beyond natural reach
- Beneficial bacteria release plant growth hormones directly to seeds
- Soil microbes suppress harmful pathogens through competitive exclusion
- Prebiotics from organic matter feed helpful microbial communities
- Healthy microbial diversity creates resilient seedlings that resist stress
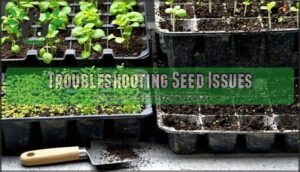
Troubleshooting Seed Issues
When your seeds refuse to sprout or your seedlings start looking sickly, don’t panic—most problems have straightforward fixes.
You can identify and resolve common seed starting issues by understanding what went wrong and taking targeted action to get your garden back on track.
Identifying Seed Problems
When your seeds won’t germinate, seed age often holds the answer. Check expiration dates and seed source reputation first.
Look for physical damage like cracks or chips that prevent proper water absorption. Test germination rates by sprouting samples on damp paper towels.
Poor seed quality from unreliable garden supplies creates seed starting problems and solutions headaches. Genetic defects and dormancy issues also impact success rates, requiring specific gardening advice for each variety.
Resolving Germination Issues
After identifying failing seeds, quick fixes can save your entire crop.
Test seed viability by placing samples in water—viable seeds sink while dead ones float.
Break dormancy in stubborn seeds through scarification methods like gentle sanding or nicking hard coats.
Cold-loving seeds need stratification in your refrigerator for weeks.
Maintain consistent moisture without sogginess, and guarantee proper temperature using heat mats.
Fresh soil prevents fungal prevention issues that destroy germination rates.
Managing Seedling Diseases
Fungal infections devastate seedlings faster than you’d think.
Damping off strikes pre-emergence and post-emergence seedlings, causing collapse at soil level.
Prevent disease by sterilizing containers with 10% bleach solution and using fresh potting mix.
Avoid overwatering – waterlogged soil invites bacterial diseases.
Remove infected plants immediately to stop spread.
Apply fungicide seed treatments for vulnerable varieties.
Good gardening techniques include proper drainage and air circulation.
These gardening solutions tackle most seedling disease problems effectively.
Preventing Pests and Infestations
Smart gardening practices start with prevention.
Set up physical barriers like floating row covers to block pests from reaching your seeds.
Early detection matters—inspect seedlings daily for signs of aphids, fungus gnats, or soil mites.
Companion planting with marigolds provides natural deterrents through chemical compounds that repel insects.
Beneficial insects like ladybugs control harmful pests naturally.
Focus on soil health by sterilizing seed-starting mix and maintaining proper drainage.
These gardening techniques create gardening solutions for common gardening challenges without harsh chemicals.
Optimizing Seed Starting Conditions
Now that you’ve tackled pest prevention, fine-tuning your garden tools and environment becomes your next victory.
Optimal Temperature ranges from 65-75°F work best for most seeds, while full-spectrum LED lights provide the right Light Spectrum for indoor spring gardening.
Monitor Soil Moisture with your finger—it should feel like a wrung-out sponge.
Seed Depth equals twice the seed’s width in garden improving soil quality mixtures.
Air Circulation prevents fungal problems without creating drafts.
Quality seeds guarantee reliable sprouting.
These adjustments boost garden productivity and support successful garden planning year-round.
Frequently Asked Questions (FAQs)
What are 10 factors that affect seed germination?
Ten key factors that affect your seed germination include temperature, moisture, oxygen, light levels, seed quality, soil pH, planting depth, soil structure, seed age, and proper timing for your specific variety.
What is wrong with my seedlings?
Your seedlings might be suffering from overwatering, damping-off disease, insufficient light, poor air circulation, wrong temperature, nutrient deficiency, or contaminated soil.
Check moisture levels, provide adequate lighting, and make certain proper ventilation for healthy growth, which can help prevent issues like damping-off disease.
What are five factors that may cause poor germination?
Oh sure, blame the seeds when you’re probably drowning them like a helicopter parent.
You’re likely dealing with old seeds, wrong soil temperature, overwatering, poor soil quality, or insufficient light – each factor sabotaging your germination dreams.
Is it better to germinate seeds in soil or paper towel?
You’ll get better control and higher success rates with paper towel germination. It lets you monitor progress, catch problems early, and transplant only viable seedlings into soil.
Why wont my seeds sprout after several weeks?
Dead seeds often result from old, damaged stock or poor storage conditions.
Check your seed packet’s expiration date—viability drops substantially after two years.
You’ve likely encountered temperature, moisture, or depth issues during planting, which can also be related to poor storage conditions.
Can old seeds still be planted successfully?
Yes, you can plant old seeds, but their viability decreases over time.
Test germination rates first by placing ten seeds on damp paper towels for a week.
If half sprout, plant twice as many seeds to compensate for lower success rates.
Should seeds be soaked before planting them?
Some seeds benefit from soaking, especially large or hard ones like beans, peas, and sunflowers.
Soak them 8-12 hours to soften tough coats and speed germination.
However, small seeds like lettuce don’t need it.
What causes seedlings to fall over suddenly?
Roughly 90% of seedling deaths happen within the first two weeks after germination.
Your seedlings are likely falling over from "damping-off", a fungal disease that weakens stems at soil level, causing sudden collapse and death.
How deep should different seeds be planted?
Plant seeds at depths roughly twice their diameter.
Small seeds like lettuce need just a light covering, while large beans go one to two inches deep.
Follow packet instructions for specific varieties, as proper depth guarantees maximum germination rates and is crucial for germination.
Why arent my seeds sprouting after planting?
Picture dormant seeds sitting in cold, waterlogged soil like reluctant commuters waiting for the right conditions.
You’re likely dealing with poor soil temperature, excessive moisture, old seeds, or planting too deep.
Check soil warmth, drainage, and seed viability first.
Conclusion
Successfully addressing seed starting problems and solutions requires consistent attention to moisture levels, temperature control, and soil quality.
You’ll prevent most germination failures by monitoring these critical factors daily. When you maintain proper watering schedules, provide adequate light exposure, and use quality starting materials, your seeds will develop into healthy seedlings.
Remember that patience and observation are your best tools for identifying issues early and applying the right solutions quickly.
- https://www.saferbrand.com/articles/seedling-problems-id-and-fix-10-common-problems-for-indoor-seedlings
- https://homestead-honey.com/seed-starting-problems/
- https://www.sierraflowerfarm.com/blog/2020/1/21/nitty-gritty-troubleshooting-seed-germination-for-the-flower-farmer
- https://generationacresfarm.com/4-common-seed-starting-problems-how-to-fix-them/
- https://journeywithjill.net/gardening/2024/02/15/prevent-indoor-seed-starting-problems-before-they-start/

