This site is supported by our readers. We may earn a commission, at no cost to you, if you purchase through links.

You’ll need quality seed-starting mix, containers with drainage, and consistent warmth around 65-75°F.
Choose seeds that benefit from early starts like tomatoes, peppers, and herbs.
Timing matters – count backward from your last frost date to determine when to plant.
Use grow lights or south-facing windows for adequate illumination, keeping soil consistently moist but not waterlogged.
This method gives you stronger seedlings and extends your growing season substantially.
The secret lies in creating microclimates that fool seeds into thinking spring has arrived early.
Table Of Contents
- Key Takeaways
- Winter Sowing Basics
- Choosing Seeds Wisely
- Preparing Containers
- Sowing and Caring
- Transplanting Seedlings
- Frequently Asked Questions (FAQs)
- Can I plant seeds indoors in winter?
- Do seeds take longer to germinate in winter?
- How to germinate seeds during winter?
- How cold is too cold for seeds to germinate?
- Will seeds germinate indoors in winter?
- How cold is too cold to start seeds?
- What happens if you start seeds indoors too early?
- How to prevent mold in seed trays?
- What temperature is ideal for germination indoors?
- Can seeds be started without grow lights?
- Conclusion
Key Takeaways
- You’ll create stronger seedlings by maintaining 65-75°F temperatures and using grow lights or south-facing windows for 12-16 hours daily.
- You’ll save money and avoid transplant shock by choosing cold-hardy varieties like tomatoes, peppers, and herbs that benefit from early indoor starts.
- You’ll extend your growing season by timing seed starts backward from your last frost date, giving plants a significant head start.
- You’ll prevent common failures by using quality seed-starting mix with proper drainage and keeping soil consistently moist but not waterlogged.
Winter Sowing Basics
Winter sowing transforms cold weather from a gardening obstacle into your ally by using natural temperature fluctuations to stratify seeds and promote stronger germination.
You’ll harness winter’s freeze-thaw cycles to mimic nature’s own seed-starting process, giving your plants a head start that would make even the most experienced gardener jealous.
What is Winter Sowing
Winter sowing lets you start seeds outdoors during winter months, using natural temperature fluctuations for seed germination.
You’ll place seeds in transparent containers that act like mini cold frames, providing frost protection while exposing them to winter’s stratification cycles.
Key winter sowing principles:
- Seeds experience natural cold stratification outdoors
- Containers create greenhouse effects for controlled germination
- Method eliminates indoor seed starting equipment needs
This winter seed starting technique works because many seeds require cold exposure before sprouting in spring.
By utilizing a technique like cold stratification methods, gardeners can effectively promote healthy seedling growth.
The use of natural cold stratification and greenhouse effects in winter sowing allows for a unique approach to seed starting.
This method is particularly useful for seeds that need cold exposure to germinate, making it an effective way to start seeds outdoors during the winter months.
Benefits of Winter Sowing
Winter sowing offers several compelling advantages for home gardeners.
Skip the expense and hassle of indoor seed starting—winter does the work for you naturally.
You’ll save money by bypassing expensive grow lights and heated indoor spaces while achieving superior seed viability through natural cold stratification.
Your seedlings develop stronger root systems and increased frost protection since they adapt gradually to outdoor conditions.
This method eliminates transplant shock entirely – seedlings never experience the jarring shift from artificial indoor lighting to natural sunlight.
Cold frames work exceptionally well for winter seed starting, creating perfect microclimates for early growth.
This approach allows for natural cold stratification, which is beneficial for the seeds.
Suitable Plants for Winter Sowing
Not all plants thrive in winter’s grip, but cold crops and hardy vegetables actually prefer the chill.
You’ll find success with frost tolerant varieties like kale, Brussels sprouts, and winter lettuce.
These tough customers handle temperature swings better than their warm-weather cousins.
Flower enthusiasts can start winter blooms like pansies and snapdragons.
Smart seed selection means choosing varieties bred for cold resilience.
Choosing Seeds Wisely
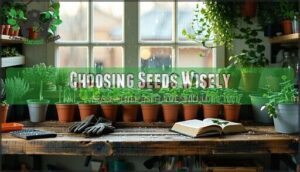
Success in winter seed starting begins with strategic seed selection. You’ll need varieties that tolerate cold stratification and match your indoor growing timeline perfectly.
Selecting Seeds for Winter Sowing
Looking beyond common garden varieties will facilitate winter sowing success.
Focus on seed selection criteria: cold-hardy perennials, native wildflowers, and vegetables requiring stratification excel outdoors.
Check seed viability dates and choose varieties labeled "self-sowing" or "cold stratification required".
Hardy herbs, leafy greens, and ornamental grasses demonstrate exceptional germination rates when winter conditions naturally break dormancy through freeze-thaw cycles.
Storing Seeds Properly
Proper seed storage determines your starting seeds indoors success rate. Store seeds in airtight containers with moisture control packets to maintain seed viability. Cool storage temperatures between 32-41°F preserve genetic integrity for months.
Label containers with variety names and harvest dates. Check stored seeds periodically for moisture buildup or mold development.
These seed storage tips guarantee your seed starting guide delivers reliable germination rates. Understanding proper harvesting methods is also vital for maintaining crop quality and ensuring the best possible starting conditions.
Recommended Seeds for Winter Sowing
You’ll find incredible success with specific seed varieties designed for cold-weather germination.
Hardy perennials like echinacea, rudbeckia, and native wildflowers actually require cold stratification naturally provided by winter temperatures.
Vegetables such as lettuce, spinach, and kale thrive in cool conditions, making them perfect winter crops for indoor seed starting techniques.
Cold frames enhance germination rates substantially.
For outstanding results, selecting the right cold hardy seeds is vital for winter sowing success.
Preparing Containers
Your container choice determines whether your winter seedlings thrive or struggle against harsh weather conditions.
You’ll transform everyday recyclables into effective mini-greenhouses that protect germinating seeds while allowing proper air circulation and drainage, which can be considered a complete method to ensure proper air circulation.
Types of Containers for Winter Sowing
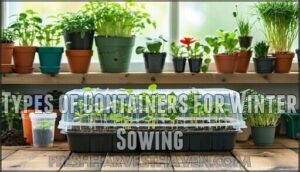
Container selection determines your winter sowing success. You’ll need receptacles that withstand freezing temperatures while providing adequate space for root development and proper drainage.
- Seed Trays: Professional-grade plastic trays offer uniform spacing and easy handling
- Plastic Cups: Yogurt containers and disposable cups work perfectly for individual plantings
- Wooden Boxes: Cedar or pine boxes provide natural insulation and rustic charm
- Cell Packs: Six-pack modules from nurseries maximize space efficiency
- Mini Greenhouses: Clear plastic covers create controlled microclimates for delicate varieties
When choosing containers, consider using seed tray options to improve your seed starting experience.
Creating Mini-Greenhouses
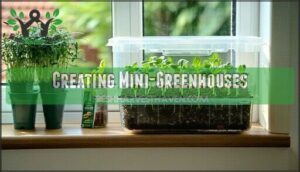
Transform clear plastic containers into effective Mini Greenhouse structures by securing translucent lids that trap heat while allowing natural Indoor Lighting penetration.
Fill each container with 3-4 inches of quality Soil Mixtures, creating ideal conditions for Indoor Seedlings Care.
Your DIY seed starting kits provide essential Climate Control for winter Seedling Growth, maintaining stable temperatures that support successful Indoor Gardening Setup during harsh outdoor conditions.
Using proper greenhouse kits can enhance the overall seed starting experience.
Adding Drainage and Ventilation Holes
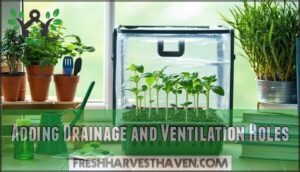
Beyond your mini-greenhouse’s protective walls, proper hole placement transforms container drainage systems and ventilation tips into thriving environments.
You’ll need 4-6 drainage holes in the bottom for water management, plus 2-3 ventilation holes near the top for air circulation.
This setup prevents soggy soil quality while maintaining ideal moisture for seed starting kits.
Strategic hole spacing guarantees your indoor seedling care routine supports healthy seedling growth throughout winter’s harsh months.
Effective herb garden planning also requires consideration of drainage and ventilation to promote healthy plant growth.
Sowing and Caring
You’ll place seeds directly into your prepared containers using proper spacing and depth guidelines for each variety.
Winter sowing requires consistent moisture levels and temperature monitoring to guarantee successful germination during the cold months.
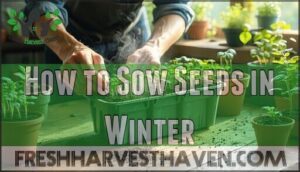
How to Sow Seeds in Winter
With your containers ready, fill them with pre-moistened seed starting mix, leaving quarter-inch space at the top.
Plant seeds at depths specified on packets—typically twice the seed’s diameter.
Label containers clearly with variety and sowing date.
Gently press seeds into soil without compacting, cover lightly and mist surface.
This methodical seed selection and soil preparation sets the foundation for successful starting seeds indoors winter.
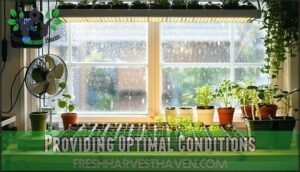
Providing Optimal Conditions
After sowing your seeds, success hinges on maintaining precise environmental controls that mimic nature’s perfect germination conditions.
Your seed starting essentials include consistent monitoring of four critical factors:
- Ideal Temperature: Maintain soil temperature between 65-75°F using heating mats to boost germination rates by 30%
- Adequate Lighting: Provide 12-16 hours daily with LED grow lights placed 2-4 inches above seedlings
- Soil Moisture: Keep medium consistently damp through bottom watering while maintaining 50-70% humidity for the best seed starting process
Air Circulation prevents damping-off disease through gentle fan movement, while Pest Control starts with sterile growing mediums during your seed starting timeline.
Utilizing techniques for extending growing seasons can further enhance your winter gardening efforts.
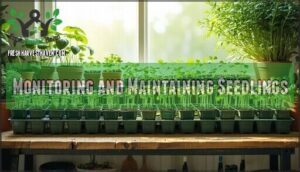
Monitoring and Maintaining Seedlings
Once ideal conditions support your seedlings, monitoring becomes your daily ritual for successful indoor seedling growth.
Regular soil monitoring and water management prevent common setbacks while growth tracking reveals development patterns.
| Monitoring Task | Frequency |
|---|---|
| Soil moisture check | Daily |
| Temperature readings | Twice daily |
| Growth measurements | Weekly |
| Pest control inspection | Every 3 days |
| Light adjustment | As needed |
Watch for damping-off disease—those telltale dark stems at soil level.
Adjust watering schedules based on seedling development stages, reducing frequency as roots establish.
Document growth patterns to identify which varieties thrive in your indoor seedling cultivation setup.
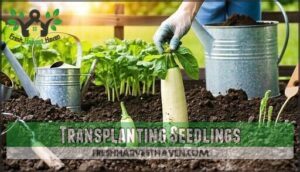
Transplanting Seedlings
Your winter-started seedlings need careful timing and preparation before they face the outdoor world.
You’ll transplant these hardy seedlings once they’ve developed their second set of true leaves and outdoor temperatures consistently stay above freezing.
When to Transplant Seedlings
Recognizing transplant timing prevents stunted growth and maximizes seedling development success.
Your winter-sown seedlings need proper assessment before outdoor placement to guarantee vigorous establishment.
- Seedling Strength: Look for 2-4 true leaves and sturdy 2-4 inch stems that aren’t stretching or leggy
- Transplant Timing: Wait 4-8 weeks after sowing when roots hold soil together without circling containers
- Soil Acclimation: Check soil temperatures reach 50-60°F and nighttime lows stay above 45°F consistently
- Seedling Hardening: Plan transplanting 1-2 weeks after last frost date for ideal survival rates
- Outdoor Placement: Choose overcast days or late afternoons to minimize transplant shock during relocation
Preparing Seedlings for Outdoor Transfer
Your seedlings need gradual outdoor acclimation before permanent transfer.
Start seedling hardening one week prior to transplanting by placing containers outside for increasing periods daily. Begin with two hours of filtered sunlight, then extend exposure while monitoring for stress signs.
This climate adjustment process strengthens stems and prepares leaves for harsh outdoor conditions, ensuring successful winter seedling cultivation.
Proper soil preparation, including understanding soil nutrient replenishment, is essential for the overall health of your seedlings after transplanting.
Tips for Successful Transplanting
Once your seedlings have developed robust root systems and sturdy stems, timing becomes everything for successful transplanting.
You’ll want to transplant when soil temperatures consistently reach 60°F and nighttime temperatures stay above 45°F.
Before moving seedlings outdoors, complete the hardening off process over 7-10 days.
Choose overcast days for transplanting to reduce transplant shock. Water thoroughly before and after transplanting to support root development.
Frequently Asked Questions (FAQs)
Can I plant seeds indoors in winter?
Yes, you can plant seeds indoors during winter months.
This technique, called winter sowing, gives you a head start on spring gardening.
You’ll need proper lighting, temperature control, and timing to guarantee successful germination and healthy seedling development.
Do seeds take longer to germinate in winter?
Seeds typically germinate 25-50% slower during winter months due to cooler indoor temperatures.
You’ll need patience as germination rates drop when ambient temperatures stay below ideal 65-75°F ranges, even indoors.
How to germinate seeds during winter?
You’ll need heat mats, grow lights, and proper humidity to create ideal germination conditions. Set soil temperature between 65-75°F and maintain consistent moisture levels using seed-starting mix.
How cold is too cold for seeds to germinate?
Like a plant hitting a wall, most seeds won’t germinate below 45°F. You’ll find ideal germination occurs between 65-85°F, while temperatures below 40°F typically halt the process entirely.
Will seeds germinate indoors in winter?
Indoor temperatures typically stay above the minimum germination threshold, so you’ll achieve successful sprouting during winter months.
Most vegetable and flower seeds germinate readily at room temperature, regardless of outdoor conditions, which supports the idea that you can achieve successful sprouting with minimum care.
How cold is too cold to start seeds?
Nobody’s starting seeds in arctic conditions—you’re not running a polar research station.
Most seeds fail below 50°F because cellular processes slow dramatically.
You’ll need consistent 65-75°F temperatures for reliable germination rates and healthy seedling development.
What happens if you start seeds indoors too early?
Starting seeds too early creates leggy, weak seedlings that struggle with transplant shock.
You’ll waste time, space, and money while risking plant failure when outdoor conditions aren’t ready for your overeager sprouts.
How to prevent mold in seed trays?
Mold thrives like unwelcome guests in damp conditions. Make certain proper ventilation, avoid overwatering, use sterilized soil mix, maintain consistent temperatures, and space seedlings adequately for airflow circulation.
What temperature is ideal for germination indoors?
You’ll want to maintain temperatures between 65-75°F for most vegetable seeds, though heat-loving crops like tomatoes prefer 70-80°F.
Cool-season varieties germinate well at the lower end of this range.
Can seeds be started without grow lights?
You’ll be burning the midnight oil without lights, but seeds can still germinate using bright windowsills or fluorescent bulbs.
Natural sunlight through south-facing windows provides sufficient photons for germination, though growth rates may slow compared to specialized grow lights.
Conclusion
Like a master gardener conducting a winter symphony, starting seeds indoors winter transforms cold months into productive growing periods.
You’ve mastered the essential techniques: selecting appropriate seeds, creating ideal microclimates, and maintaining consistent conditions.
Your seedlings will emerge stronger and healthier than direct-sown alternatives.
The controlled environment you’ve established provides superior germination rates and extended growing seasons.
Success depends on maintaining proper temperature, moisture, and lighting conditions throughout the process, which is crucial for achieving extended growing seasons.

