This site is supported by our readers. We may earn a commission, at no cost to you, if you purchase through links.

Most gardeners lose their first round of summer squash to bad timing, swampy soil, or bugs they didn’t see coming. The plant itself isn’t picky—it just won’t tolerate cold feet, inconsistent water, or leaves that stay wet past noon.
Master those basics, and you’ll pull zucchini and yellow squash by the armload all season. The trick is nailing your planting window when soil hits 70°F, building a bed that drains fast but holds moisture deep, and staying one step ahead of squash vine borers and powdery mildew.
Get your soil right, water smart, and scout for trouble early—your summer squash plant care tips boil down to those three moves, executed with precision.
Table Of Contents
- Key Takeaways
- Essential Summer Squash Planting Tips
- Watering, Feeding, and Mulching Techniques
- Preventing Pests, Diseases, and Plant Stress
- Top 5 Products for Summer Squash Care
- Frequently Asked Questions (FAQs)
- What is the secret to growing squash?
- How do you take care of summer squash plants?
- Should I cut the yellow leaves off my squash plant?
- What does an overwatered squash plant look like?
- How do you harvest summer squash correctly?
- Can summer squash grow well in containers?
- How to prune summer squash for better airflow?
- What companion plants benefit summer squash growth?
- How to store harvested summer squash effectively?
- When should summer squash be harvested?
- Conclusion
Key Takeaways
- You’ll lose your first squash crop if you don’t nail three fundamentals: warm soil (70°F+), fast-draining beds that hold deep moisture, and aggressive early scouting for vine borers and powdery mildew.
- Timing your planting when soil hits 70°F and staggering new plantings every 2-3 weeks transforms a single harvest into continuous armloads of zucchini all season long.
- Deep watering beats frequent shallow watering every time—it pushes roots 6-8 inches down for drought tolerance, while 2-3 inches of organic mulch cuts evaporation by half and slashes weeding work up to 70%.
- Your harvest window is narrow: pick squash daily when they hit 6-8 inches for peak tenderness and flavor, because waiting even a day or two past prime turns them tough and seedy.
Essential Summer Squash Planting Tips
You can’t just toss squash seeds into the ground and hope for the best—these heat-loving plants have specific needs that’ll make or break your harvest. Getting the timing, soil, and spacing right from day one sets you up for a summer full of prolific zucchini and crookneck squash.
Let’s break down the essentials so you can plant with confidence and watch your squash thrive.
Best Time to Plant Summer Squash
Timing isn’t just a suggestion—it’s your secret weapon for explosive summer squash yields. You’ll plant once soil hits 70°F and frost danger has passed, usually late May to early June in most temperate zones.
- Germination thrives between 60–95°F, peaking at a sweet 86°F
- Urban heat islands can accelerate your planting schedule by up to two weeks
- Coastal breezes may delay soil warming beyond inland frost dates
- Stagger plantings every 2–3 weeks for continuous harvests all season
To achieve the best results, consider using clear science methods when planning your summer squash crop.
Soil Preparation and PH Requirements
Your squash revolution starts six inches down. Soil testing reveals whether pH sits in that ideal 6.0–7.5 range where calcium, magnesium, and nitrogen flow freely to roots.
Mix 2–4 inches of mature compost into loose, crumbly soil—this boosts nutrient availability and prevents waterlogging. Skip high phosphorus fertilizer unless tests demand it.
Proper soil preparation and management means you’re building a foundation for explosive yields, not just filling holes. Understanding research methodology is essential for optimizing crop growth and development.
Planting Depths and Spacing
Once your soil is primed, seed depth and row spacing determine whether you’re bottlenecking yields or unleashing them. Plant seeds 1 inch deep when soil temperature hits 70°F—shallow enough for quick emergence, deep enough for moisture contact.
Space them 18–24 inches within rows and leave 4–5 feet between rows. This bed layout boosts airflow, cuts disease pressure, and gives each plant the real estate it needs to pump out fruit.
Direct Sowing Vs. Transplants
Your planting method matters. Direct sowing wins when soil temperature stays above 70°F—seeds germinate fast, skip transplant shock, and lock in stronger root development from day one. Transplanting works if you’re racing frost or controlling timing, but handle seedlings gently to avoid root disturbance.
- Direct sowing eliminates repotting stress and speeds field establishment
- Seed germination thrives in warm, prepared beds with even moisture
- Transplanting summer squash demands careful handling to protect fragile roots
Full Sun and Temperature Needs
Light fuels your harvest. Summer squash demands 6 to 8 hours of direct sunlight daily for peak fruit production. Position transplants where morning-to-afternoon sun hits uninterrupted. In scorching climates, afternoon shade prevents heat stress and sunscald on developing fruits.
Temperature control matters as much as sunlight requirements. Warm season crops like summer squash thrive when nights stay above 60°F and days hit 70–85°F. Soil warming techniques—black plastic mulch, for instance—accelerate ideal germination in early spring. Beyond 90°F, heat stress kicks in, slashing fruit set even with perfect squash care.
| Factor | Ideal Range | Impact |
|---|---|---|
| Daytime Temperature | 70–85°F | Maximum fruit set and vigor |
| Night Temperature | Above 60°F | Continuous growth, reduced stress |
| Soil Temperature | 70–95°F | Reliable seed germination |
| Excessive Heat | Above 90°F | Slowed growth, reduced fruit production |
| Frost Exposure | 32°F or below | Plant death, complete growth halt |
These gardening tips give you mastery over every variable.
Watering, Feeding, and Mulching Techniques
You’ve got your squash in the ground—now it’s time to keep those plants thriving with the right balance of water, nutrients, and soil protection.
Get this trio right, and you’ll be harvesting tender squash all season long instead of dealing with stressed, struggling plants.
Here’s how to master the fundamentals that separate bumper crops from disappointing yields.
Maintaining Consistent Moisture

You’ll win this battle if you master water balance—it’s the secret weapon behind explosive yields. Keep soil moisture steady with drip systems delivering 1 inch weekly, adjusting your irrigation scheduling based on heat and rainfall.
A solid watering schedule prevents calcium stress and blossom end rot while well-drained soil with 2–3 inches of mulch locks in moisture.
Monitor daily during peak summer, and you’ll dominate fertilization and pest control challenges too.
Deep Watering Vs. Frequent Watering

Often, you’ll face a critical choice: should you water deeply or frequently? Deep watering wins for drought tolerance—it pushes root development down 6–8 inches, building resilient squash plant care and maintenance habits. Frequent watering keeps surface soil moist but risks shallow roots.
Your irrigation scheduling should balance:
- Water depth reaching root zones, not just topsoil
- Soil moisture consistency preventing stress and cracking
- Watering schedule aligned with heat, rainfall, and your soil type
- Summer squash needs met through drip systems or soaker hoses
- Fertilization and pest control supported by stable watering and irrigation practices
Mulching to Retain Moisture and Control Weeds

A 2–3 inch layer of organic mulching—straw, shredded bark, or compost—cuts evaporation up to 50% while keeping soil temperature steady between 55–75°F. You’ll slash weed suppression work by 40–70% and improve moisture retention for your summer squash without constant watering and irrigation.
A 2–3 inch layer of organic mulch cuts evaporation by half, slashes weeding work up to 70%, and stabilizes soil temperature for thriving summer squash
Just keep mulch materials a few inches from stems to avoid rot and maintain well-drained soil prep underneath.
Selecting and Applying Fertilizers

Fertilization isn’t guesswork—soil testing reveals exactly what your summer squash needs before you dig in. Start with a balanced 10-10-10 fertilizer at planting to build strong roots, then switch to a 5-10-10 formula when blooms appear to fuel fruit production.
Side-dress trenches at the drip line, water it in, and you’ll hit that nutrient balance sweet spot without burning leaves or wasting money.
Organic Fertilizer Options

You don’t need synthetic chemicals to feed your squash powerhouse. Compost tea and well-aged manure deliver nitrogen and potassium for vigorous growth, while rock phosphate or bone meal supplies phosphorus for strong roots. Liquid fertilizers like fish emulsion give quick nutrient hits during bloom time.
These soil amendments boost organic matter, support plant nutrition, and align perfectly with sustainable and organic gardening practices—proof that soil preparation and fertilization can be both effective and earth-friendly.
Preventing Pests, Diseases, and Plant Stress

You’ve nurtured your squash plants with perfect soil, consistent water, and plenty of sunshine—but pests and diseases can still threaten your harvest if you’re not ready to defend it.
The good news? You don’t need harsh chemicals to keep your plants healthy and productive.
Let’s walk through how to spot trouble early, protect your leaves, and use smart organic tactics that actually work.
Identifying Common Squash Pests
You can’t win the war against squash pests if you don’t know your enemy. Scout your plants regularly, flipping leaves to catch aphids and whiteflies before colonies explode.
Check stems near the soil for telltale entry holes from squash vine borers—they’re sneaky assassins that tunnel in and wreck your harvest.
Early detection through pest inspection is your secret weapon for effective squash pest control.
Disease Prevention and Leaf Care
Healthy leaves are your first line of defense against disease, so start with leaf inspection—scan for yellowing, spots, or powdery mildew weekly. Water at soil level to keep foliage dry, practice soil sanitation by removing debris, and rotate crops to break pathogen cycles.
Organic treatments like neem oil offer fungal control, while balanced nutrients prevent blossom-end rot. Smart pest and disease management means you stay one step ahead.
Supporting Plants and Pruning Tips
Beyond keeping leaves clean, proper plant staking and stem training give your squash plants the backbone they need. Trellis systems keep heavy fruit off the ground, minimizing stem breakage—think of it as building a scaffolding for success.
Pinch back terminal growth once plants hit your desired height, and remove suckers between the main stem and fruiting branches. These pruning techniques boost air circulation while channeling energy into fruit production.
Organic Pest Control Methods
Once your trellis is in place, you’ll face the inevitable battle with garden pests. Row covers block cucumber beetles during their peak feeding frenzy, while neem oil and diatomaceous earth create a double barrier against squash bugs and soft-bodied invaders.
Layer these organic matter strategies with beneficial insects like lady beetles, then practice crop rotation—your most powerful pest management weapon for long-term control.
Top 5 Products for Summer Squash Care
You’ve mastered the fundamentals of growing summer squash, and now it’s time to arm yourself with the right seeds to make your garden unstoppable. The varieties you choose can mean the difference between a mediocre harvest and a prolific one that keeps your kitchen stocked all season long.
Here are five outstanding seed options that’ll help you take complete control of your squash-growing game.
1. Old Farmers Almanac Heirloom Zucchini Seeds
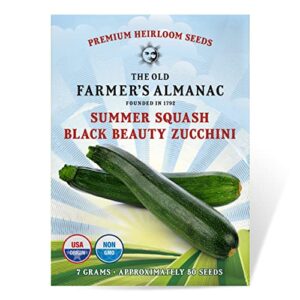
If you’re ready to break free from grocery store zucchini, Old Farmers Almanac Heirloom Zucchini Seeds deliver the real deal—open-pollinated, non-GMO Black Beauty variety that puts you in control of your summer squash destiny. With about 50 seeds per packet, you’ll command vigorous growers producing dark-green fruits perfect for any dish.
Germination tips? Soil temps above 60°F work wonders, though some gardeners report mixed results.
The heirloom benefits shine when you save seeds for future seasons, ensuring seed storage preserves those heritage traits. This is gardening liberation at its finest.
- Open-pollinated heirloom seeds let you save seeds year after year, giving you control over your garden’s future
- Black Beauty variety produces vigorous plants with plentiful dark-green zucchini perfect for countless recipes
- Non-GMO heritage traits mean you’re growing authentic, time-tested zucchini with real flavor
- Germination rates get mixed reviews from customers, with some reporting disappointing results
- Around 50 seeds per packet might not be enough if you’re planning a larger garden or expecting some duds
- Success depends heavily on your planting conditions—soil temp, timing, and technique all matter more than with modern hybrids
2. Old Farmers Almanac Heirloom Squash Seeds
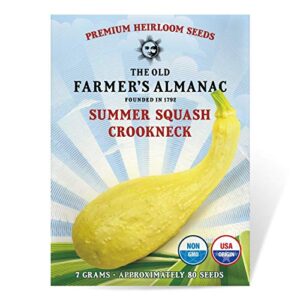
You want full command of your summer squash varieties? Old Farmers Almanac Heirloom Squash Seeds hand you Yellow Crookneck power—bumpy, curve-necked beauties maturing in 50-60 days. With roughly 70 open-pollinated seeds per packet, you’re planting heritage preservation, not corporate control.
Heirloom seed benefits mean you can save seeds season after season, building your own gardener community legacy. Seed storage tips? Keep ’em cool and dry.
Just remember: these USA-origin seeds thrive with proper fertilization and consistent care, turning your gardening rebellion into a productive harvest.
- Open-pollinated heirloom seeds let you save and replant year after year, building your own seed supply without buying new packets each season.
- Fast 50-60 day maturity means you get bumpy, curve-necked squash ready for cooking, baking, or soups pretty quickly after planting.
- Versatile growing options work in garden beds, decks, or porches, and you can even fry the edible flowers in light batter for a bonus harvest.
- Some gardeners reported seeds didn’t produce many squash or weren’t true to the Crookneck variety, so results can be inconsistent.
- Best performance requires specific fertilization (like 8-4-8 organic plant food), so you can’t just plant and forget them.
- Climate matters—these may not thrive everywhere, and performance varies by growing zone and conditions.
3. Seeds of Change Dark Star Zucchini Seeds
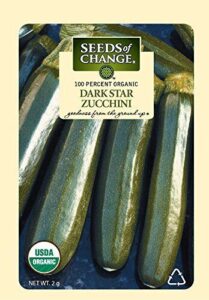
Hybrid benefits meet liberation with Seeds of Change Dark Star Zucchini Seeds—your F1 vigor ally for commanding massive yields. This bush-type powerhouse delivers dark blue-green fruit on 6–8-foot vines, proving you don’t need garden sprawl for serious summer squash production.
Organic certification, GMO-free seed selection, and disease resistance stack the deck in your favor. You’re planting zucchini growth that thrives in full sun with minimal fuss, germinating best around 85°F.
Sure, some gardeners report spotty germination, but proper squash care and planting technique release reliable harvests worth every seed.
- F1 hybrid vigor delivers reliable, massive yields of dark blue-green zucchini on compact 6–8-foot bush-type vines
- Certified organic and GMO-free with strong disease resistance to common cucurbit pests
- Requires less water than other zucchini varieties and comes in moisture-proof, resealable packets with seeds viable for up to 5 years
- Some users report low or inconsistent germination rates despite following proper planting techniques
- Expensive for the small amount of seeds you get (0.16 ounces)
- May be susceptible to blight and requires specific conditions (full sun, well-drained soil, optimal 85°F germination temperature) to perform best
4. Black Beauty Zucchini Seeds
Black Beauty zucchini seeds unleash serious garden planning firepower—this open-pollinated classic delivers cylindrical, dark-green summer squash that’s earned its legendary status among squash varieties.
You’ll harvest 6–8” fruits in 45–55 days, timing your harvests for peak squash nutrition and tender texture. Seed viability stays strong when stored cool and dry, and zucchini care stays simple: full sun, 65–75°F soil, and consistent moisture.
Among zucchini varieties, Black Beauty’s vigorous vines produce reliably, giving you command over your harvest timing without fussy maintenance demands.
- Compact 3-4′ vines fit smaller garden spaces while still producing generous harvests of 6-8″ squash in just 45-55 days.
- Open-pollinated heirloom seeds let you save seeds year after year, cutting costs and building a sustainable garden.
- Thrives across USDA Zones 3-12 and adapts to outdoor beds, containers, or even indoor hydroponic setups.
- Seeds need warm soil (65-75°F) to germinate, so early-season planting in cooler climates requires patience or indoor starts.
- Vigorous growth may need trimming if vines spread too aggressively for your space.
- Small pack size (21-27 seeds) limits how many plants you can grow in one season without buying multiple packs.
5. Max’s Gold Zucchini Squash Seeds

Max’s Gold Zucchini Squash Seeds bring a game-changing gold variety to your summer squash lineup—this vibrant zucchini transforms routine squash recipes with its mild, sweet flesh and eye-catching color.
You’ll control seed germination by warming soil to 70–85°F and planting 1″ deep, then watch high-yielding plants deliver 6–8″ fruits in 45–60 days.
Summer harvesting stays simple with daily picking, and proper squash care and maintenance—full sun, consistent watering, mulching—keeps your gardening rebellion productive all season long.
- Vibrant golden color adds visual appeal to your garden and meals, making it stand out from standard green zucchini varieties.
- High-yielding plants produce 6–8″ fruits in just 45–60 days, giving you a quick turnaround from planting to harvest.
- Mild, sweet flesh works well in a variety of recipes, from sautéing to roasting, with a flavor that’s more tender than some traditional squash.
- Germination can be hit-or-miss, with some seeds potentially rotting if soil conditions aren’t ideal or temperatures are too cool.
- Requires specific growing conditions—full sun, loam soil, and consistent watering—which means it’s not forgiving if you’re dealing with poor soil or inconsistent care.
- Limited seasonal planting window (fall planting for summer harvest) means you can’t grow it year-round, and fresh fruits only store for about a week after picking.
Frequently Asked Questions (FAQs)
What is the secret to growing squash?
The real trick? Treat your squash variety like royalty—warm soil temperature above 65°F, full sun, and consistent moisture trigger explosive growth habits and fruit formation.
Master those basics, and harvest timing becomes second nature.
How do you take care of summer squash plants?
You’ll need consistent watering—about an inch weekly—plus full sun, well-draining soil around pH 0 to 8, and regular harvesting.
Mulch helps retain moisture, while side-dressing fertilizer when blooms appear keeps your zucchini care on track.
Should I cut the yellow leaves off my squash plant?
Yellow leaves on your squash? Here’s the twist—don’t rush to prune. First, diagnose the cause: water stress, nutrient deficiency, or pests. Remove only dead tissue to support squash plant recovery and disease management.
What does an overwatered squash plant look like?
You’ll spot waterlogged roots through wilting leaves, soft stems near the base, and leaf edema on undersides.
Root rot and fungal diseases follow quickly when squash sits in saturated soil too long.
How do you harvest summer squash correctly?
Grip the fruit near the blossom end and cut with sharp pruners, leaving half an inch of stem attached.
Harvest daily when squash reach six to eight inches for peak tenderness and flavor.
Can summer squash grow well in containers?
Think container gardening means sacrificing squash harvests? Actually, summer squash thrives in 5-gallon pots with proper soil mix, water management, and pollination methods—often fruiting earlier than raised beds when container placement optimizes sunlight.
How to prune summer squash for better airflow?
Remove crowded leaves and lateral shoots with clean shears to boost air circulation around your summer squash.
Thin dense foliage every week or two, cutting strategically near the base for ideal canopy management and healthier vines.
What companion plants benefit summer squash growth?
Plant beans for nitrogen, dill to lure pest predators, and nasturtiums to repel beetles. Marigolds suppress soil pathogens, while cucumbers share similar needs—maximizing your Three Sisters companion planting strategies and attracting pollinators naturally.
How to store harvested summer squash effectively?
Your harvest’s bounty deserves careful handling. Refrigerate washed squash in perforated containers for one week, or freeze blanched slices using proper storage containers for extended shelf life.
Alternatively, explore pickling recipes that transform harvesting and storage into culinary rebellion.
When should summer squash be harvested?
Your summer squash hits peak flavor at 6 to 8 inches long—harvest daily once production starts.
Look for glossy skin, firm texture, and tight blossom ends to achieve tenderness and best yield.
Conclusion
Think of your squash bed as a high-performance engine—it only runs clean when you feed it right, keep the belts tight, and catch problems before they knock.
These summer squash plant care tips aren’t about coddling a fussy crop; they’re about setting up systems that work while you’re not watching. Soil, water, and vigilance—lock those in, and you’ll harvest more squash than your neighbors know what to do with.
Now get your hands dirty.
- https://all-americaselections.org/
- https://academichelpexpress.blog/2024/08/please-use-the-bulleted-points-and-the-rubric-below-to-guide-your-work-your-pa/
- https://www.writingclearscience.com.au/category/writing-guides/writing-research-papers/page/2/
- https://www.sciencedirect.com/science/article/pii/S0749208123000268
- https://pmc.ncbi.nlm.nih.gov/articles/instance/9553038/bin/pone.0275964.s005.docx