This site is supported by our readers. We may earn a commission, at no cost to you, if you purchase through links.

Somewhere in a quiet orchard, a tree bears two different apple varieties on the same trunk—one crisp and tart, the other honeyed and soft. That’s not a genetic accident.
Someone made a precise cut, pressed two pieces of living wood together, and trusted biology to do the rest.
Grafting turns a single rootstock into a tailored fruit producer, and the results can last decades.
The difference between a graft that thrives and one that fails often comes down to a handful of decisions made before the knife even touches the wood. Getting those decisions right is exactly what this guide walks you through.
Table Of Contents
- Key Takeaways
- Choosing Rootstock for Fruit Tree Grafting
- Selecting and Preparing Scion Wood
- Best Timing and Environmental Conditions
- Essential Fruit Tree Grafting Techniques
- Tools, Hygiene, and Binding Methods
- Post-Graft Care and Common Mistakes
- Top 8 Fruit Tree Grafting Products
- Frequently Asked Questions (FAQs)
- What is the most successful grafting technique?
- What month do you graft fruit trees?
- What are the 5 requirements for successful grafting?
- How to graft fruit trees step by step?
- Which fruit trees can you graft together?
- What are the 3 most common grafting methods?
- What are the 5 grafting techniques?
- How long does it take for grafts to heal?
- Can grafted trees grow in containers successfully?
- How does grafting affect tree lifespan?
- Conclusion
Key Takeaways
- Rootstock choice isn’t just about size — it determines disease resistance, soil compatibility, and how well your graft holds for decades, so sourcing certified, disease-free stock is non-negotiable before you ever pick up a knife.
- Timing your graft to the dormant window (late winter to early spring), keeping daytime temps between 60–75°F, and maintaining 40–60% humidity are the invisible conditions that quietly decide whether your union heals or fails.
- Cambium alignment is the single most critical physical step — both cut surfaces must meet fully, because even a clean cut with perfect tools means nothing if the living tissue layers don’t touch.
- Post-graft care — consistent watering without overwatering, weekly pest scouting, and waiting 6–14 weeks before removing tape — is just as important as the graft itself, and skipping it is where most beginners quietly lose what they worked for.
Choosing Rootstock for Fruit Tree Grafting

The rootstock you choose sets the foundation for everything that follows — tree size, disease resistance, and how well your graft takes. Getting this decision right means knowing what to look for before you ever make a cut.
For small spaces especially, understanding how rootstock shapes fruit tree size in compact gardens can save you from planting something that outgrows its welcome fast.
Here’s what to think about when choosing rootstock for your fruit tree grafting project.
Rootstock Compatibility and Species Selection
Before you choose a rootstock, think of it as choosing a foundation — get it wrong, and even the best scion wood won’t save you. Compatibility between scion and rootstock species depends heavily on taxonomic relatedness and rootstock phylogeny; the closer the two plants are genetically, the stronger the union.
Choosing appropriate rootstock for fruit trees also means factoring in disease resistance pairing, soil pH compatibility, and vigor class matching, since all of these shape how well your graft holds long-term.
Clonal Rootstock for Size and Vigor Control
Once you’ve nailed compatibility, rootstock selection gets even more strategic.
Clonal rootstock lets you control tree size through dwarfing genetics, limiting growth rate to 40–70% of standard. That directly shapes canopy density, improves hydraulic conductivity efficiency, and helps early fruit set.
The result? Better yield uniformity across your orchard. A dwarfing rootstock isn’t just smaller — it’s smarter management built right into the roots.
Research shows that B.9 rootstock provides strong drought tolerance.
Sourcing Healthy Rootstock From Nurseries
Sourcing quality rootstock from nurseries starts with asking the right questions. Request phytosanitary documentation, traceability records, and proof of disease indexing from mother blocks.
Reputable suppliers run regular nursery audits and provide certification verification for viral and bacterial pathogens.
Disease-free stock isn’t a bonus — it’s the foundation your entire graft depends on. Don’t skip this step.
Popular Rootstocks for Apples, Cherries, and Pears
Once you’ve sourced clean stock, matching it to the right variety makes all the difference.
For apples, Malling 9, Malling 26, and Geneva 41 each offer distinct dwarfing benefits and soil adaptability.
Cherry growers lean on Colt for vigor or Gisela 6 for compact, high-density planting.
Pear varieties like Anjou pair well with Quince A, which delivers reliable precocity and manageable size.
Selecting and Preparing Scion Wood

Your rootstock is only half the equation — the scion wood you choose will make or break the graft. Getting it right means knowing what to look for, when to cut, and how to handle it before it ever touches the rootstock.
what you need to cover at each stage.
Identifying Disease-free Scion Wood
Healthy scion wood is the foundation of every successful graft. Before you select quality scion wood, start with visual symptom inspection — check for smooth bark, no oozing sap, and tight bud scale integrity. Then go deeper:
- Review certification documentation from your nursery
- Assess bark texture for cracks or lesions
- Request laboratory pathogen testing when possible
- Maintain proper hygiene and disease‑free stock throughout handling
Collecting Scion During Dormant Season
Timing matters more than most beginners expect. Collect scion wood during dormant season scion collection — after leaf drop but before bud swelling indicators appear.
Watch sap flow monitoring cues closely; once sap rises, wood quality drops fast. Choose pencil-thick shoots from last season’s growth, and always practice scion variety labeling right at harvest. That small habit prevents costly mix-ups later.
Proper Storage and Handling of Scion Wood
Once you’ve collected your scion wood, proper Cold Storage Protocols make or break your dormant season scion collection. Store scions in a cellar or refrigerator drawer at 32–40°F — temperature control for scion storage is non‑negotiable.
Moisture Retention matters equally; wrap cut ends in damp sphagnum moss. Good Bundle Organization and Sanitation Practices extend Shelf Life Monitoring across weeks.
- Wrap scions in damp moss or paper towels before sealing
- Bundle 8–12 stems by variety with waterproof labels
- Keep storage at 32–40°F; avoid freezing or temps above 45°F
- Inspect weekly for mold, soft spots, or discoloration
Preparing Scion for Grafting
Right before grafting day, give each scion a quick once-over — plump buds, smooth bark, no soft spots. Do a gentle bend test; good scion wood flexes without cracking.
Trim to 6–8 inches, keeping 3–5 viable buds. A fresh angled cut at the base improves cambial contact.
Keep your labeling and tracking current so no variety gets mixed up at the bench.
Best Timing and Environmental Conditions

Timing a graft well is just as important as making a clean cut. Get the conditions wrong, and even a perfectly prepared scion won’t take.
Here’s what you need to know about the seasonal window, temperature, and sap flow before you start.
Dormant Season Grafting Window
The dormant season is your best ally — a natural pause that makes grafting far more forgiving. Your window length generally spans four to eight weeks, running from late winter through early spring, just before bud swell begins.
Plan your seasonal timing for grafting operations around three key markers:
- Frost timing — graft after the hardest freezes have passed
- Local microclimate adjustment — warmer pockets move earlier
- Callus development — stable temps above 5°C support healthy tissue fusion
Temperature and Humidity Requirements
Think of temperature and humidity as the invisible hands holding your graft together. Your Ideal Daytime Temp sits between 60 and 75°F, while the Nighttime Temperature Threshold shouldn’t dip below 50°F.
Keep Relative Humidity Range at 40–60% — too high invites fungus, too dry risks scion desiccation. Microclimate Management, humidity control, and environmental monitoring all reduce Temperature Fluctuation Effects, supporting stronger unions.
For temperature control for scion storage, hold wood at temperature ranging between 40 and 45 degrees Fahrenheit. These environmental factors affecting graft success aren’t optional — they’re foundational.
Managing Sap Flow for Successful Grafts
Once temperature and humidity are dialed in, sap flow becomes your next focus. Understand sap flow dynamics early — rising sap signals the cambium is ready, but uncontrolled sap bleeding prevention matters, too.
Proper grafting techniques and methods, combined with sealant breathability and water potential monitoring, keep pressure balanced. Bind and protect the graft promptly, monitor environmental conditions, and use temperature stabilization alongside humidity control to maintain steady union development.
Seasonal Considerations for Stone Fruits
Stone fruit grafting has its own rhythm — and sap flow is just one piece of it. Meeting chill requirements below 7°C matters just as much, because without enough winter cold, dormancy breaks unevenly and grafts face a weaker start.
Dormant season scion collection for stone fruits like peaches and cherries ideally happens in January, before buds swell. Slope microclimate plays a role too — mid-slope sites drain cold air away, reducing frost timing risks. Heat stress and rain-induced rot during ripening are real threats if seasonal timing for graft success isn’t planned carefully.
Here’s what to keep in mind for stone fruit grafting:
- Collect scion in deep winter — stone fruits need dormant season scion collection in January, before any bud movement begins.
- Mind your microclimate — a mid-slope location with good air drainage protects young grafts from late frosts and excess moisture.
- Watch the weather window — heat stress after budbreak and rain-induced rot during wet springs can compromise even a well-executed union.
Essential Fruit Tree Grafting Techniques
Each grafting technique has its own purpose, and choosing the right one depends mostly on the size of your rootstock and the time of year. Some methods work best on young, slender stems, while others are designed for thicker, more mature wood.
Here are the core techniques worth knowing.
Whip and Tongue Graft Method

When rootstock and scion share similar diameters — ideally under ½ inch — whip and tongue grafting becomes your strongest option.
Matching diagonal cuts create the base, while the Interlocking Tongue Design locks both pieces together, maximizing cambial layer alignment and resisting lateral slipping.
Assemble with minimal force, wrap firmly with grafting tape, and monitor weekly for callus development.
Cleft Grafting for Thicker Rootstocks

When your rootstock runs 2–4 inches thick, cleft grafting takes over where whip-and-tongue leaves off.
Start with Rootstock Burr Removal — a clean, smooth cut face prevents air pockets at the graft union. On wider stock, use the Double Cleft Technique or a Staggered Cleft Angle to keep cambium contact strong on both sides.
Here’s how to do it right:
- Split the rootstock 2–3 inches deep with a clean vertical cut.
- Insert two scions with tapered wedges, aligning cambium on at least one edge.
- Wrap firmly with grafting tape or parafilm as your primary binding material.
- Apply Callus Moisture Management by sealing exposed wood with grafting wax.
- Use Stake Support Strategies to stabilize tall rootstock and reduce flex at the union.
Rootstock selection for specific fruit species matters here — thicker apple or pear stock manages cleft grafting well, while stone fruits need extra care with moisture and temperature.
Bark Grafting for Mature Trees

Bark grafting works best on mature trees with branches thicker than 2 inches, but only when the bark slips easily in late spring.
Start with Branch Surface Preparation — smooth the cut face cleanly.
Slide your scion wood under the lifted bark, keeping Scion Orientation vertical for strong graft union contact.
Wrap with a Moisture Retention Wrap, seal exposed wood for Infection Prevention Strategies, and shield the site for Temperature Buffering.
Bud Grafting for Stone Fruit Varieties

Regarding stone fruit grafting, bud grafting gives you precise control over placement and compatibility. Start with a Bud Viability Assessment — only firm, plump buds from healthy scion wood make the cut.
Mind your Bud Placement Angle for solid rootstock compatibility contact. Wrap snugly, apply your chosen Wax Sealant Types, build a simple Microclimate Enclosure, and watch for early Necrosis Detection signals.
Cambium Alignment and Union Formation

Once your cuts are clean and snug, cambium layer alignment is what makes or breaks the graft union formation. Think of the cambium as a handshake — both hands need to meet fully.
Cambium alignment is the handshake that makes or breaks every graft union — both hands must meet fully
- Callus Development begins within days when cambial cells touch
- Vascular Differentiation rebuilds nutrient pathways across the union
- Hormonal Regulation drives auxin-guided tissue fusion
- Mechanical Strength Testing confirms union integrity before removing grafting tape or grafting sealant
Tools, Hygiene, and Binding Methods

Your technique only goes as far as your tools allow. Getting the right equipment — and keeping it clean — is what separates a graft that takes from one that fails quietly overnight.
Here’s what you need to have on hand before you make your first cut.
Selecting Grafting Knives and Pruners
Your grafting tools are only as good as the hands holding them — so choosing well matters.
A sharp knife with the right blade material (stainless or high‑carbon steel) stays clean and holds its edge through long sessions. Look for an edge angle between 12–18 degrees for smooth, precise cuts. Good handle ergonomics — contoured grips in hardwood or rubberized plastic — reduce fatigue and improve control. Weight balance between blade and handle keeps your wrist steady. For thicker stock, quality pruning shears with thin bypass blades minimize tissue damage. A grafting chisel helps with cleft work on larger rootstocks.
| Tool | Key Feature | Best Use |
|---|---|---|
| Sharp knife | High‑carbon blade, 12–18° edge angle | Whip-and‑tongue, bud grafts |
| Pruning shears | Thin bypass blade, ergonomic grip | Clean scion and rootstock cuts |
| Grafting chisel | Sturdy, flat‑edged blade | Cleft grafting on thick stock |
Some newer grafting tools even feature an antimicrobial coating that adds a layer of protection between cuts.
Sterilizing Tools and Preventing Infection
A contaminated blade can silently ruin a graft before it even begins. That’s why sanitizing tools between every cut matters so much.
Wipe blades with 70% isopropyl alcohol as part of a consistent cleaning workflow, and store sterilized tools in sterile packaging.
Use indicator strips to confirm sterilization worked. Aseptic transfer during grafting and maintaining proper hygiene throughout prevents contamination from reaching the union.
Using Grafting Tape, Parafilm, and Sealants
Once the cut is clean, your next job is keeping it that way.
Layered tape application works better than one tight wrap — multiple lighter passes with grafting tape protect the graft union without girdling.
Parafilm’s stretch ratio lets it conform snugly to uneven surfaces, sealing out moisture loss while still allowing gas exchange.
Finish with a sealant rated for sealant biodegradability — it breaks down naturally as the union heals, maintaining humidity barrier optimization without smothering the cambium.
Supporting and Securing Graft Unions
Tape and sealant hold the union together — but movement is what quietly breaks it apart.
Adjustable Stakes and Support Frames keep the scion steady during those first fragile weeks. Add Windbreak Barriers to cut wind stress, and use mulch for Moisture Retention and Temperature Insulation at the root zone.
Securing grafts with proper binding techniques means grafting tape, parafilm, and grafting wax all work as one system.
Post-Graft Care and Common Mistakes

Getting the graft right is only half the job — what you do afterward decides whether it actually takes. A few consistent habits and some honest awareness of common slip-ups will carry you most of the way to a healthy union.
Here’s what to keep in mind once the tape is on.
Watering and Environmental Protection
Once your graft is wrapped and waiting, how you water makes all the difference. Drip irrigation delivers moisture directly to the roots, reducing evaporation by up to 30%. Mulch moisture retention further stabilizes soil conditions. To prevent overwatering the grafted tree, employ soil moisture sensors for precise monitoring.
Rainwater harvesting and evapotranspiration scheduling complete a holistic irrigation management strategy. These practices support consistent temperature regulation and address critical environmental factors affecting graft success, ensuring optimal conditions for healing and growth.
Monitoring for Pests and Diseases
Once watering is steady, shift your attention to what’s living on your tree.
Walk your orchard weekly — a solid scouting schedule catches trouble early.
Use sticky trap placement at canopy height to flag flying pests.
Environmental sensor integration and degree-day modeling help predict outbreaks before they hit.
Check leaves with disease symptom imaging, practice organic pest control, and maintain proper hygiene to keep graft unions clean and protected.
Removing Grafting Materials at The Right Time
Once your pest monitoring routine is solid, you can start watching for the right moment to unwrap your graft.
Removal timing documentation matters — note the exact date and visible callus development signs before cutting anything loose.
- Watch for new leaf flush as a green light to remove wrap
- Peel parafilm gradually once tissue hardens to prevent girdling
- Remove grafting tape after growth confirms union strength, usually 6–14 weeks out
- Stay within a temperature stability window above 5°C and a humidity comfort range of 40–60%
- Run post-removal healing checks every few days to catch desiccation early
Aftercare and removal of grafting materials go hand in hand with seasonal considerations for fruit tree grafting — timing grafting during dormant season makes postgraft care and maintenance noticeably smoother.
Avoiding Incompatible Pairings and Technique Errors
Pairing the wrong species is one of the most common mistakes beginners make in grafting. Cross genus risks are real — incompatible partners can release toxins and block union formation entirely.
Always confirm vigor class matching and scion labeling accuracy before you cut anything. Not securing the graft properly leaves gaps where desiccation sneaks in.
Rapid temperature drops compound weak technique fast.
Overwatering and Aftercare Pitfalls
Too much water is just as damaging as neglect. Overwatering and water management for grafted trees go hand in hand — soggy soil cuts off oxygen, invites root rot, and leaches nutrients fast.
Practice smart soil moisture management: water only when the top 2–3 inches feel dry.
Keep mulch placement a few inches from the trunk, prioritize drainage solutions, and remove graft wrap once callus forms.
Top 8 Fruit Tree Grafting Products
Having the right tools and resources makes every step of the grafting process easier and more reliable. Whether you’re just starting out or refining your technique, a few well-chosen products can genuinely change your results.
Here are eight worth keeping on your radar.
1. Fruit Tree Grafting DIY Guide

Here’s the written product blurb for 7.1. Fruit Tree Grafting DIY Guide:
Think of this book as having a knowledgeable mentor right beside you in the orchard.
Fruit Tree Grafting for Everyone by Susan Poizner covers cleft, bark, and whip-and-tongue grafting for spring, plus chip and T-budding for summer — all in 172 pages of clear, photo-supported instruction.
At $21.95, it’s a practical investment that walks beginners through compatibility matching, tool selection, and troubleshooting weak unions.
You get seasonal guidance, a full-color visual approach, and the kind of confidence that turns your first graft into a real success.
| Best For | Home growers and beginners who want to graft fruit trees with confidence, preserve heirloom varieties, or get more fruit from limited garden space. |
|---|---|
| Price | $21.95 |
| Format | Book |
| Skill Level | Beginner–Intermediate |
| Visual Aids | Full-color photos & diagrams |
| Language | English |
| Supplemental Resources | Troubleshooting Q&A |
| Additional Features |
|
- Step-by-step instructions with full-color photos make it easy to follow along, even on your very first attempt
- Covers both spring and summer grafting techniques, so it stays useful throughout the growing season
- The compatibility guide and troubleshooting Q&A take a lot of the guesswork out of the process
- Focused strictly on fruit trees, so it won’t help much if you want to graft ornamentals or other woody plants
- Advanced growers may find the coverage a bit surface-level for their needs
- Real-world results can still vary depending on your climate, tree health, and timing — the book can’t account for every variable
2. Konload Self Adhesive Grafting Tape
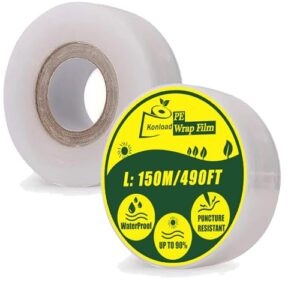
Good tape is the quiet hero of a successful graft. Konload’s self-adhesive LDPE film stretches snugly around the union, holds firm without glue, and lets you actually see callus forming through its clear surface — no guesswork, no unwrapping too soon.
At $8.38 for two rolls, it covers a full season of grafting without breaking the budget.
It works across apples, cherries, roses, grapevines, and more. Just overlap your wraps slightly to compensate for the lighter tack.
| Best For | Home gardeners and hobbyist growers who do a lot of grafting across fruit trees, roses, or grapevines and want an affordable, see-through tape that doesn’t need extra glue. |
|---|---|
| Price | $8.38 |
| Format | Tape roll |
| Skill Level | All levels |
| Visual Aids | Transparent film |
| Language | N/A |
| Supplemental Resources | Multi-purpose usage guide |
| Additional Features |
|
- Clear film lets you watch the graft heal without disturbing it
- Self-adhesive and stretchy — no glue needed, just wrap and go
- Two rolls for $8.38 makes it easy to stock up without spending much
- Light tack means you’ll need to overlap wraps carefully or it won’t hold well
- Thin film can wrinkle or shred into stringy bits when you remove it
- Doesn’t quite match the stickiness or durability of professional options like Parafilm M
3. QWORK Manual Grafting Cutter
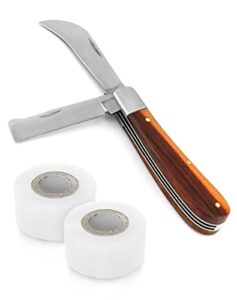
Clean cuts are the foundation of a strong graft union, and the QWORK Manual Grafting Cutter (model CA7622) gives you two blades to work with — a curved one for precise scion cuts and a straight one for splitting rootstock.
The stainless-steel blades and wooden handle feel solid in hand, and the self-locking mechanisms keep things safe between cuts.
It even comes with two rolls of PE grafting tape in different sizes.
Just know that the included tape is thin, so many growers swap it for parafilm on trickier grafts.
| Best For | Hobbyist gardeners and small-scale growers who want an affordable, portable tool for grafting fruit trees and general pruning tasks. |
|---|---|
| Price | Not listed |
| Format | Tool + tape |
| Skill Level | All levels |
| Visual Aids | Blade design image |
| Language | N/A |
| Supplemental Resources | Included tape rolls |
| Additional Features |
|
- Two blade styles (curved and straight) handle both precise scion cuts and rootstock splitting
- Self-locking positions make it safer to carry and use between cuts
- Comes ready to go with two sizes of grafting tape included
- Included PE tape is very thin and often needs to be replaced with parafilm for better results
- The blade can dull faster than expected, especially on tougher wood
- Packaging sometimes arrives damaged, and overall build quality is just okay for the price
4. Corona RatchetCUT Hand Pruner
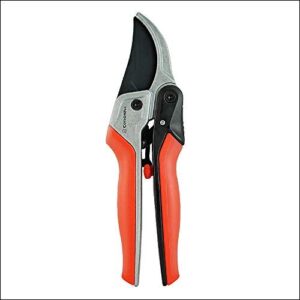
Pruning scion wood cleanly matters more than most beginners realize. The Corona RatchetCUT Hand Pruner makes that easier with its four-gear ratchet action, which builds cutting power with each click — no white-knuckle squeezing required.
High-carbon steel blades stay sharp through repeated cuts, and the ComfortGEL grips reduce hand fatigue during longer sessions.
It manages stems up to ¾ inch with ease. Just note that the ratchet pin can wear out over time, and replacement parts aren’t readily available.
| Best For | Gardeners with limited hand strength or arthritis who need a low-effort pruner for light to moderate trimming of small branches and scion wood. |
|---|---|
| Price | Not listed |
| Format | Pruning tool |
| Skill Level | All levels |
| Visual Aids | Product image |
| Language | N/A |
| Supplemental Resources | Warranty documentation |
| Additional Features |
|
- The four-gear ratchet action builds cutting power with each click, so you’re not straining to get through tougher stems
- High-carbon coated blades stay sharp and make clean cuts that won’t tear or damage live plant tissue
- Lightweight aluminum body with ComfortGEL grips keeps hand fatigue low during longer pruning sessions
- The ratchet pin and pivot components have a reputation for breaking or falling out after limited use, leaving the tool useless
- Replacement parts aren’t available through the manufacturer, so a broken internal piece basically means buying a new pruner
- The locking mechanism can be tricky to operate one-handed and tends to slip during repeated cuts, which gets frustrating fast
5. Fruit Tree Pruning Science and Art
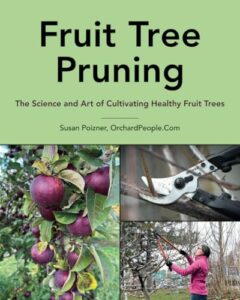
Sharp tools handle the cutting — but knowing why you cut makes all the difference.
Fruit Tree Pruning: The Science and Art of Cultivating Healthy Fruit Trees by Susan Poizner bridges that gap beautifully.
At 172 pages and $21.95, it walks you through Central Leader and Open Center training systems with full-color photos, diagrams, and worksheets.
It’s built for temperate climates and leans toward young trees, so keep that in mind if you’re managing older stock.
| Best For | Home growers and small orchard managers who are just starting out and want a clear, science-backed guide to pruning young fruit trees in temperate climates. |
|---|---|
| Price | $21.95 |
| Format | Book |
| Skill Level | Beginner–Intermediate |
| Visual Aids | Full-color photos & diagrams |
| Language | English |
| Supplemental Resources | Quizzes & worksheets |
| Additional Features |
|
- Covers the why behind pruning, not just the how — so you actually understand what you’re doing out there
- Full-color photos, diagrams, and worksheets make it easy to use right in the orchard
- Walks you through both Central Leader and Open Center systems step by step, with seasonal timing guidance to avoid costly mistakes
- Doesn’t go deep on mature or older trees, so it may leave experienced growers wanting more
- At $21.95 for 172 pages, a few readers feel the price is a bit steep for the page count
- Focused on temperate climates, so if you’re growing in a tropical or year-round setting, a lot of the advice won’t apply
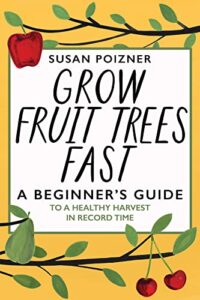
6. Grow Fruit Trees Fast Guide
Knowing why you cut matters — and so does knowing how to grow confidently from the start.
Grow Fruit Trees Fast: A Beginner’s Guide to a Healthy Harvest in Record Time by Susan Poizner picks up right where pruning knowledge leaves off. At just $4.99 for the ebook and 106 pages, it covers variety selection, organic soil care, watering, mulching, and natural pest management in a format you can read in under an hour.
Think of it as your season-by-season reference — practical, no-fluff, and written by a certified arborist who genuinely understands backyard orchards.
| Best For | Beginner gardeners who want a practical, affordable starting point for growing temperate fruit trees in a backyard or small orchard setting. |
|---|---|
| Price | $4.99 |
| Format | Book |
| Skill Level | Beginner |
| Visual Aids | Diagrams & links |
| Language | English |
| Supplemental Resources | Online articles & podcasts |
| Additional Features |
|
- Covers the full beginner journey — variety selection, planting, watering, mulching, and pest control — all in one short read
- At $4.99 and 106 pages, it’s easy to pick up and revisit each season without a big time or money commitment
- Focuses on organic and natural methods, so it fits well with anyone leaning toward low-chemical or regenerative gardening
- Tropical and citrus growers won’t find much help here — the focus stays firmly in temperate climates
- Advanced growers may find it too high-level, since it skips deep dives into species-specific details
- Several resources and lessons point back to the author’s paid courses and website, which could mean extra costs if you want the full picture
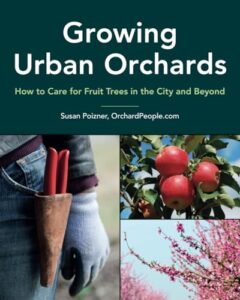
7. Growing Urban Orchards Fruit Tree Guide
Urban orchards demand a different kind of thinking — and Growing Urban Orchards by Susan Poizner meets that challenge head‑on.
At $19.95 for 122 pages, it walks you through everything from site selection and soil prep to pruning, pollination, and pest management — all designed for compact city spaces.
You’ll find real guidance on dwarf varieties, container growing, and working with limited root zones.
If your grafted trees are destined for a small yard or community plot, this is the reference you’ll reach for again and again.
| Best For | First-time fruit tree growers working with small yards, community gardens, or urban spaces who want a friendly, practical guide without getting overwhelmed by technical detail. |
|---|---|
| Price | $19.95 |
| Format | Book |
| Skill Level | Beginner |
| Visual Aids | Photos & diagrams |
| Language | English |
| Supplemental Resources | Author courses & podcast |
| Additional Features |
|
- Covers the full basics in one slim book — site selection, pruning, pest management, and more
- Real case studies from community orchards and school projects make the advice feel grounded and doable
- At $19.95, it’s an easy yes for beginners or anyone running a horticulture program on a budget
- Only 122 pages, so don’t expect deep dives into advanced pruning or long-term tree physiology
- Region-specific pests and microclimates get limited coverage, which could leave some growers with unanswered questions
- Serious horticulturalists or researchers will likely need to supplement this with more comprehensive texts
8. Joe Lamp L Organic Vegetable Gardening Book
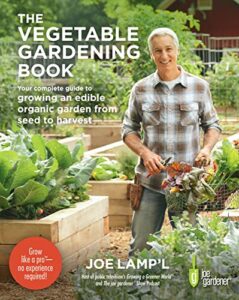
While Growing Urban Orchards zeroes in on city trees, Joe Lamp’l’s The Vegetable Gardening Book broadens your whole growing picture. Lamp’l, Emmy-winning host of Growing a Greener World, draws on decades of hands-on experience and grower interviews to make every page genuinely useful.
At $17.28 for 256 pages, it covers soil health, crop rotation, composting, and organic pest management — the same foundational skills that keep grafted trees and garden beds thriving together.
If you’re building an edible landscape around your grafted fruit trees, this is the companion guide that fills in the gaps.
| Best For | Home gardeners at any skill level who want a practical, organic approach to growing vegetables and building a productive edible garden from the ground up. |
|---|---|
| Price | $17.28 |
| Format | Book |
| Skill Level | Beginner–Intermediate |
| Visual Aids | Charts, diagrams & photos |
| Language | English |
| Supplemental Resources | TV, podcast & interviews |
| Additional Features |
|
- Covers all the essentials — soil health, crop rotation, and pest management — in one affordable, well-organized book
- Great for small spaces, with dedicated sections on raised beds, containers, and grow bags
- Backed by real grower experience and interviews, so the advice feels tested, not theoretical
- Strictly organic focus means it won’t help if you’re looking for conventional growing methods
- Introductory to intermediate level — seasoned horticulturists may find it too basic
- Some used copies have been reported with pages stuck together, which is worth watching for if you buy secondhand
Frequently Asked Questions (FAQs)
What is the most successful grafting technique?
Whip-and-tongue grafting consistently delivers the strongest results.
It maximizes cambium contact between scion and rootstock, giving the union a solid foundation to heal quickly and hold firm through the growing season.
What month do you graft fruit trees?
Late winter to early spring — normally February through April — is your sweet spot.
Most fruit trees graft best just before buds begin to swell, when sap flow is rising and cambium cells are ready to fuse.
What are the 5 requirements for successful grafting?
Successful grafting needs five things: compatible rootstock and scion, clean, sharp tools, precise cambium alignment, secure binding, and the right timing.
Get all five right, and your graft has every reason to take.
How to graft fruit trees step by step?
Grafting starts with matching a healthy rootstock to compatible scion wood, making clean cuts, aligning the cambium layers, securing the union with grafting tape, and protecting it until callus forms.
Which fruit trees can you graft together?
Think of grafting like a family reunion — the closer the relatives, the smoother the gathering.
Apples graft onto crabapples, pears onto quince, and peach, plum, cherry, and apricot all share enough Prunus genetics to pair well together.
What are the 3 most common grafting methods?
The three most common grafting methods are whip-and-tongue, cleft, and bud grafting. Each suits different rootstock sizes and species, giving you flexible options depending on what you’re working with.
What are the 5 grafting techniques?
The five grafting techniques are whip-and-tongue, cleft, bark, bud (chip), and approach grafting.
Each method suits different rootstock sizes, species, and seasonal conditions, giving you flexible options for nearly any tree pairing.
How long does it take for grafts to heal?
Healing doesn’t wait for your schedule — most grafts form initial attachment within 5 to 14 days, with visible callus and bud growth signaling success by weeks two to four.
Can grafted trees grow in containers successfully?
Yes, grafted trees grow well in containers.
Choose a dwarfing rootstock like M9 or M26, use a 15–25 liter pot, provide good drainage, and water consistently to keep roots healthy and productive.
How does grafting affect tree lifespan?
Grafting is like giving a tree a stronger foundation to build on.
The right rootstock boosts disease resistance, reduces stress, and sustains decades of steady growth — helping your tree live longer and produce more fruit.
Conclusion
Mastering fruit tree grafting techniques means accepting that you’re doing something both simple and profound — pressing two cut surfaces together and asking nature to finish what you started.
The knife work takes minutes. The patience takes seasons.
But every union that holds is proof that you understood the wood, respected the timing, and made the right call before the cut.
That’s not luck. That’s craft, built one graft at a time.
- https://raintreenursery.com/pages/growing-fruit-trees-rootstock
- https://www.cumminsnursery.com/buy-trees/index.php?type=rootstock
- https://courses.cit.cornell.edu/hort494/mg/methods.alpha/ClefMeth.html
- https://www.syracuse.edu/stories/tree-of-40-fruit-sam-van-aken/
- https://www.fedcoseeds.com/trees/rootstock