This site is supported by our readers. We may earn a commission, at no cost to you, if you purchase through links.

Most gardeners water by feel, and most lose plants because of it. Summer heat doesn’t forgive guesswork—a tomato plant wilting at noon might need water, or it might already have too much. The difference between a thriving bed and a struggling one often comes down to one overlooked skill: knowing exactly how much water your soil is holding at any given moment.
solid summer gardening watering schedule accounts for more than just temperature. Soil type, root depth, rainfall, and delivery method all shape how water moves through your garden. Get these variables working together, and your plants stop depending on luck.
Table Of Contents
- Key Takeaways
- Build Your Weekly Watering Baseline
- Schedule Watering by Root Depth
- Adjust Frequency by Soil Type
- Water at The Best Time
- Use The Right Watering Method
- Measure Water Before You Guess
- Spot Underwatering and Overwatering
- Handle Heat Waves and Drought
- Save Water While Growing More
- Top 5 Summer Watering Helpers
- Frequently Asked Questions (FAQs)
- How do you water a small garden?
- How do you care for plants in summer?
- How often should you water your garden?
- How often should you water a succulent garden?
- How often should you water your garden in summer?
- What is the 1/2/3/2:1 watering method?
- How often should I water my garden in 90 degree weather?
- What is the best time to water garden in hot weather?
- Why should you water your garden during summer?
- When is the best time to water a garden?
- Conclusion
Key Takeaways
- Your soil type—sandy, clay, loam, or raised bed—determines how often you water, so match your schedule to what’s actually under your plants, not just what the calendar says.
- Water deeply and infrequently rather than a little every day, since slow soaking pushes roots downward and builds plants that can handle heat and drought on their own.
- The best time to water is between 6 and 8 a.m., when cooler air cuts evaporation by up to 30 percent and leaves dry out before nightfall, keeping fungal disease in check.
- Don’t guess at moisture levels—use a finger test, rain gauge, or soil sensor to confirm what your soil actually holds before you add more water.
Build Your Weekly Watering Baseline

Every summer garden needs a clear starting point, and that starts with knowing how much water your plants actually need each week. Once you have that number, everything else—timing, frequency, method—falls into place.
A summer vegetable planting calendar can help you map out watering schedules alongside planting dates, spacing, and fertilization windows all in one place.
Here’s how to build that baseline from the ground up.
Start With 1–1.5 Inches of Water Per Week
Your summer vegetable garden watering schedule starts with one simple number: 1 to 1.5 inches of water per week. That’s your water budget planning baseline.
One inch equals about 0.623 gallons per square foot, so a 100-square-foot bed needs roughly 62 gallons weekly.
Stick to this target, use soil moisture checking methods to confirm it’s working, and adjust as seasonal evaporation rates climb.
Remember that sprinklers need 76 minutes to deliver one inch of water.
Subtract Rainfall Using a Rain Gauge
Once you know your weekly water budget, a rain gauge helps you spend it wisely.
Place yours in an open spot, about 2 feet high, away from eaves — solid Gauge Placement Tips prevent splash errors.
Read it at eye level to avoid Parallax Reading Errors, then subtract that depth from your 1–1.5-inch target before adjusting your watering schedule based on weather conditions.
Convert Inches Into Gallons Per Square Foot
Once you’ve subtracted rainfall, turn that remaining depth into real gallons using a simple Conversion Formula: multiply your square footage by 0.623 for every inch needed. That Depth‑Gallon Ratio makes your Area Water Estimate concrete fast.
- One inch over 100 sq ft = about 62 gallons
- Use this Volume Calculator approach before each watering session
- A Practical Worksheet helps track soil moisture week to week
- One to two inches of water each week keeps roots in a deep soak zone
Plan Deeper, Less Frequent Watering Sessions
Gallons per square foot give you the "how much," but deep watering tells you the "how often." Instead of light daily sprinkles, deliver water slowly enough to reach 6–12 inches down. That Infiltration Rate Optimization keeps Root Zone Saturation consistent without runoff waste. Think of it as banking moisture underground.
Skip the daily sprinkle—water deep and slow to bank moisture underground where roots actually drink
| Crop Type | Irrigation Cycle Length |
|---|---|
| Lettuce, Spinach | Every 1–2 days |
| Cucumbers, Peppers | Every 2–3 days |
| Tomatoes, Squash | Once weekly |
| Raised Beds | Every 1–2 days |
| Sandy Soil Crops | Every 2–3 days |
Subsurface Drip Systems and Organic Soil Amendments work together to extend each deep soak longer. Add mulching on top, and your soil moisture holds steady between sessions.
Adjust The Baseline During Dry or Humid Weeks
When dry spells hit, add 0.25 to 0.5 inches extra per week to your Dry Spell Increment and apply your Baseline Reset Protocol after any rain event above 0.5 inches.
Your Humidity Adjustment Factor drops evaporation when ambient humidity rises, so reduce baseline watering slightly.
Weather Trend Integration keeps steady Soil Moisture stable — always adjust for weather conditions before your next session.
Schedule Watering by Root Depth

Not every plant in your garden drinks on the same schedule, and that’s completely normal. How deep a crop’s roots grow determines how often it actually needs water.
Here’s how to match your watering days to each root type.
Shallow-rooted Crops: Lettuce, Spinach, Radishes
Lettuce, spinach, and radishes root only 6 to 12 inches deep, so they need water every day or every other day in summer.
Don’t let the top 2 inches dry out.
Morning watering helps soil moisture, pest prevention, and better nutrient management.
Smart shade strategies and companion planting extend harvest timing for these shallow-rooted vegetables while following summer vegetable garden watering guidelines.
Moderate-rooted Crops: Cucumbers, Peppers, Potatoes
Cucumbers, peppers, and potatoes root 12 to 18 inches deep and follow summer vegetable garden watering guidelines of 2 to 3 sessions weekly. Uneven moisture triggers bitterness in cucumbers and blossom end rot in peppers.
Drip irrigation benefits gardens by delivering steady moisture directly to the root zone, while mulching for moisture retention aids nutrient management, pest prevention, and better disease resistance across all three moderate-rooted vegetables.
Deep-rooted Crops: Tomatoes, Squash, Melons
Tomatoes, squash, and melons send roots 24 inches or deeper, which changes everything about watering frequency based on root depth.
Root depth mapping shows these crops pull moisture from lower soil layers, so deep watering once weekly is usually enough.
Drip irrigation advantages shine here—slow delivery improves water use efficiency, nutrient uptake, and disease resistance, while mulching for moisture retention keeps those deeper roots consistently fed.
Daily Versus Weekly Watering Needs
Your frequency decision comes down to one thing: crop demand. Shallow-rooted crops like lettuce need daily water in summer, while deep-rooted tomatoes do fine with a deep soak every 3 to 4 days.
- Use watering frequency guidelines based on root depth
- Apply seasonal adjustments during heat waves
- Lean on scheduling tools and water efficiency practices to stay consistent
Encouraging Deeper Roots With Slow Soaking
Slow soaking is how you train roots to reach down, not spread sideways. Apply water gradually until the soil is saturated 8 to 12 inches deep, using drip irrigation or soaker hoses for steady slow infiltration techniques.
Gradual soil saturation signals roots to follow moisture deeper.
deep soak every 3 to 4 days, combined with moisture depth monitoring, builds stronger, drought-resilient plants all season.
Adjust Frequency by Soil Type

Your watering schedule doesn’t just depend on what you’re growing — it depends on what’s underneath your plants. Sandy, clay, loam, and raised bed soils all hold moisture differently, and that gap changes everything about how often you need to water.
Here’s how to adjust your schedule for each type.
Sandy Soil Watering Schedule
Sandy soil drains fast—think of it as watering a colander. Capillary action moves moisture down quickly, so your watering schedule needs 3 to 4 sessions weekly, each delivering about half an inch.
Drip irrigation limits evaporation and keeps roots consistently moist.
Mulching slows surface moisture loss between sessions.
Rainwater harvesting and irrigation automation help you maintain this rhythm without constant manual effort.
Clay Soil Watering Schedule
Clay soil holds moisture like a sponge, so your watering schedule only needs 1 to 2 deep sessions weekly. Overwatering causes soil compaction management problems and blocks root zone monitoring.
Apply a 2 to 3-inch mulch layer for mulch benefits that cut evaporation substantially. Set irrigation timer settings to early morning, and keep water pressure optimization low to prevent surface crusting.
Loam Soil Watering Schedule
Loam gives you a real advantage in summer. Its natural Soil Water Retention means you only need to water every 4 to 7 days, delivering about 1 inch per session.
Check soil moisture 2 to 3 inches deep before each watering.
Add mulch for moisture retention and weed control, which facilitates Evaporation Reduction Strategies and keeps your Water Budget Tracking simple and consistent.
Raised Bed Watering Adjustments
Raised beds dry out faster than ground-level soil because heat reaches them from all sides. Plan on watering 3 to 4 times per week in summer.
A smart Drip Line Layout with emitters every 6 to 9 inches provides even moisture across the bed. Add 2 to 3 inches of mulch for Evaporation Reduction Techniques that cut daily water loss by up to 40 percent.
Container Garden Moisture Checks
Container plants dry out faster than anything else in your garden.
Before sticking to any watering schedule, use the Finger Test Technique — push your finger 2 inches into the Container Soil Mix. If it feels dry, water now.
Pot Weight Monitoring works well too: a light pot means thirsty roots.
Watch for the Surface Color Indicator — pale, powdery soil signals it’s time.
Moisture Meter Calibration keeps guesswork out of your summer watering tips routine.
Improving Water Retention With Compost
Compost does more than feed your soil — it turns it into a moisture reservoir. Work in a 2–5% compost amendment by volume and watch your water holding capacity climb noticeably within one season.
- Soil Aggregate Formation binds particles into stable clumps with better pore space
- Compost CEC Increase holds moisture longer between watering events
- Biochar Compost Blend creates larger pore networks that cut surface runoff
- Microbial Moisture Cycling keeps water moving steadily to roots
- Organic mulch on top slows evaporation and helps soil retention
Water at The Best Time

Timing matters more than most gardeners realize, and getting it wrong can quietly work against everything else you do right. hour you choose to water shapes how much actually reaches the roots and how much stress you put on your plants.
Here’s what you need to know about watering at the right time.
Why Early Morning Watering Works Best
Early morning is the most effective time to water your vegetable garden.
Cooler air and calm winds reduce evaporation loss, so more water reaches the root zone where plants actually need it.
Leaves dry quickly once the sun rises, cutting fungal disease risk.
Morning moisture also enhances stronger nutrient uptake and encourages deep root development throughout the day.
Ideal Watering Window: 6–8 A.m
The 6–8 a.m. window is your garden’s sweet spot. Morning humidity boost and dew point alignment mean soil absorbs water more efficiently, improving root zone uptake before heat sets in.
Evaporation reduction through early watering saves up to 30 percent compared to midday. Leaf drying benefits follow naturally as sun rises, keeping fungal pressure low throughout your summer watering schedule.
When Late-afternoon Watering is Acceptable
Morning isn’t always possible. When life gets in the way, late afternoon or early evening watering is your next best option.
Cooler temperatures reduce evaporation loss and heat impact on soil moisture, supporting Root Zone Recharge before nightfall. Pair this timing with mulch for Mulch Compatibility and Soil Temperature Benefits.
Watch Wind Influence to avoid leaf splash, and you’ll still see solid Water Conservation Gains.
Why Midday Watering Wastes Water
Watering at noon is one of the quickest ways to waste water in summer. The Midday Evaporation Spike means heat pulls moisture off the soil surface drying faster than roots can absorb it — up to a third of what you apply never reaches the root zone.
That’s Inefficient Water Use. You also risk Root Shock from sudden temperature swings, and Leaf Wetness Risk from droplets lingering under intense sun.
Reducing Fungal Disease Through Timing
Timing your irrigation around the Fungal Risk Window makes a real difference. When you water during the 6–8 a.m. Canopy Drying Window, leaves dry well before nightfall, cutting Nighttime Moisture Control problems at the source.
Use Humidity Forecast Timing to skip evening sessions on humid days.
Dew-Free Scheduling and avoiding overhead watering keep leaf wetness and disease from taking hold.
Use The Right Watering Method
How you deliver water matters just as much as how much you use. The right method keeps moisture at the roots where plants actually need it, cutting waste and lowering disease risk.
Here are the main watering methods worth knowing for your summer garden.
Drip Irrigation for Steady Soil Moisture

Drip irrigation gives your garden a slow, steady drink right where it counts — at the root zone. Here’s what makes it work so well:
- Emitter Placement delivers 0.5–2.0 gallons per hour directly to roots
- Pressure Regulation keeps lines at 10–25 psi for consistent flow
- Filtration Maintenance prevents clogging and uneven output
- Sensor Integration allows weather-responsive scheduling all summer long
Soaker Hoses for Vegetable Beds

Soaker hoses take a different approach than drip lines — instead of individual emitters, they sweat moisture evenly along their entire length. Lay one straight down your vegetable rows, bury it under an inch or two of mulch, and connect a pressure regulator to keep flow steady between 10 and 25 psi.
That simple placement strategy cuts water waste dramatically while keeping soil moisture consistent all summer.
Hand Watering at The Plant Base

Hand watering gives you something no automated system can — direct feedback from every plant. Direct your can at the plant base only, practicing Base-Only Watering and Root Zone Targeting so water reaches where roots actually drink.
Use a 1–2 gallon can for Gentle Soil Infiltration, apply slowly, and always check soil moisture 2–3 inches deep before refilling.
Plant Base Precision prevents overwatering every time.
Low-flow Nozzles for Small Gardens

For small garden beds, low-flow nozzles give you real control without waste. Rotary and adjustable spray nozzles offer Adjustable Spray Angles ranging from 45 to 360 degrees, with Nozzle Flow Rates between 0.4 and 2.0 gallons per minute.
They support Drip System Compatibility, improve water use efficiency, and built-in filters help with Clog Prevention Tips. Budget Nozzle Options in brass or reinforced plastic hold up well outdoors.
Avoiding Overhead Watering When Possible

Overhead sprinklers might seem convenient, but they’re one of the fastest ways to invite fungal disease into your tomatoes and squash. Water sitting on leaves overnight creates exactly the conditions pathogens love.
Instead, keep moisture where it belongs — at the root zone.
- Use drip irrigation or subsurface irrigation to deliver water directly below the surface
- Pair with soil moisture monitoring techniques so you’re never guessing
- Add mulching benefits by layering 2–3 inches of organic material to hold that moisture longer
Matching Methods to Garden Size

Your watering method should match your garden’s scale — because what works for a sprawling backyard won’t suit a balcony setup.
| Garden Size | Best Method |
|---|---|
| Tiny containers | Container Water Efficiency via hand watering tips for small gardens |
| Compact raised beds | Compact Bed Drip irrigation |
| Vertical Trellis Systems | Soaker hose usage in vegetable beds |
| Modular Bed Zoning | Drip lines with Small Plot Timers |
| Large plots | Rain barrels feeding a full watering schedule |
Measure Water Before You Guess

Guessing how much water your garden actually gets is one of the fastest ways to over- or under-water your plants.
A few simple tools and checks take the guesswork out completely.
Here’s what you need to measure and track your watering with confidence.
How to Measure One Inch of Water
Guessing at water depth is how crops get shorted. Hitting one to two inches of water each week starts with actually measuring what you apply—not estimating.
Use these tools to nail measuring irrigation depth and volume every time:
- Place a depth marker tray flat on the soil and run your system
- Read the fill line with a ruler for watering depth importance confirmation
- Use rain gauge calibration to subtract natural rainfall from your weekly target
- A container volume method tracks gallons per square foot precisely
- A digital flow meter paired with irrigation timing removes all guesswork
Using a Tuna Can Irrigation Test
A tuna can is one of the most reliable soil moisture testing methods you have on hand. Set cans across each zone for Zone Uniformity Analysis, following a smart Test Placement Strategy. Run your system, then measure each can.
| Step | Action |
|---|---|
| Placement | Space cans evenly across the bed |
| Wind Effect Mitigation | Test on calm days only |
| Evaporation Compensation | Read cans immediately after irrigation |
| Data Logging Techniques | Record depths in a garden journal |
| Scheduling | Adjust your summer watering schedule accordingly |
Calculating Gallons for Garden Beds
Once you know your bed dimensions, the math gets simple. One inch of water equals about 0.62 gallons per square foot — so a 4×6 bed needs roughly 15 gallons weekly.
Bed Volume Conversions matter here: use soil bulk density and compost volume adjustment to adjust your totals.
Smart irrigation system sizing and water storage planning start with calculating gallons per square foot accurately.
Checking Soil Moisture 2–3 Inches Deep
Gallons give you the target, but your finger gives you the truth. Push it 2–3 inches into the soil — that’s your Reading Interpretation zone.
Proper Depth Consistency Checks and Cross-Plot Sampling across your bed reveal uneven moisture pockets.
Think of it as Moisture Trend Logging made tactile. Combine this finger test with basic Probe Calibration to master reliable soil moisture monitoring techniques all season.
Using Moisture Sensors for Accuracy
Your finger test works well, but soil moisture sensors take the guesswork out entirely. Capacitive vs TDR sensors differ in method—capacitive models measure dielectric changes and use less power, making Wireless Node Integration practical for most home setups.
Proper Sensor Calibration for your soil type sharpens accuracy. Data-driven Alerts then notify you before stress sets in, making smart irrigation systems genuinely reliable.
Tracking Weekly Watering in a Garden Log
Once your sensors give you solid readings, write them down. A simple garden log — or better yet, Digital Log Templates paired with Mobile App Integration — turns scattered notes into Weekly Trend Charts you can actually use.
Track rainfall, watering frequency, and soil moisture monitoring results each week. Those patterns make Seasonal Adjustments obvious, so your watering schedule stops being guesswork.
Spot Underwatering and Overwatering

Your plants can’t speak, but they do send signals when something’s off with their water supply. Learning to read those signs early saves crops before the damage gets serious.
Here are the key symptoms to watch for in your summer garden.
Persistent Wilt That Does Not Recover
When your plants droop and stay down even after watering, that’s not drought stress — that’s a warning sign. Persistent wilting that won’t recover often points to a pathogen blocking water flow inside the stem.
Look for diagnostic symptoms like dark vascular streaking when you cut the stem open.
At that stage, soil moisture checking methods won’t help.
Remove infected plants immediately, plan crop rotation, and consider resistant varieties next season.
Dry, Crumbly Soil Below The Surface
Dry, crumbly soil an inch below the surface is your clearest signal that deep watering hasn’t reached the roots yet. When you check soil moisture and find that texture — loose, powdery, disconnected — crust management becomes urgent.
Poor infiltration enhancement blocks capillary distribution, and preferential pathways form around cracks instead. Subsoiling techniques or slow drip irrigation help push moisture down where it actually matters.
Yellowing Leaves in Wet Soil
Yellow leaves on wet soil usually signal root oxygen deprivation, not drought. When roots sit in saturated ground, nutrient deficiency follows fast — nitrogen and iron become unavailable, triggering leaf chlorosis symptoms across older foliage.
Waterlogged conditions also invite pathogen growth and root rot, while soil pH shifts reduce nutrient uptake further. To avoid overwatering, always check soil moisture at 2–3 inches before adjusting your watering schedule.
Soft, Limp Foliage From Excess Water
soft, limp foliage feels different from drought wilting — leaves look waterlogged, with squishy, translucent patches and swollen veins.
This signals Leaf Waterlogging Effects tied to Root Aeration Issues, where Chlorophyll Loss follows oxygen-starved roots.
Check soil moisture 2–3 inches deep before watering again.
Watch for these overwatering signs:
- pale, floppy leaves despite wet soil
- soft stems bending under their own weight
- yellowing that spreads from older leaves inward
- wet-looking film on leaf surfaces, hinting at Pathogen Growth Conditions
Root Rot Risks in Soggy Beds
Soggy beds don’t just drown roots — they invite trouble. Soil Oxygen Depletion drives out air, letting Anaerobic Microbes and pathogens like Phytophthora thrive fast.
Fine Root Decay starts within days, quietly shutting down nutrient uptake. Crown Rot Symptoms — soft, pale tissue at the base — signal serious damage.
Check soil moisture 2–3 inches deep before watering again, and adjust your watering schedule to avoid overwatering.
When to Pause Your Watering Schedule
Sometimes your garden needs you to step back. Pause irrigation when weekly rainfall hits 0.75 inches or daytime highs drop below 60°F for three straight days.
Moisture sensor alerts and plant stress indicators tell you more than the calendar ever will.
Forecast-driven pauses based on a 3-day rain outlook, combined with soil moisture checks at 4–6 inches, keep adjusting your watering schedule aligned with actual conditions, not guesswork.
Handle Heat Waves and Drought

Heat waves don’t follow your watering schedule — they rewrite it. When temperatures push past 90°F, your garden needs a different game plan, not just more water at the usual time.
Here’s exactly what to do to keep your plants alive and productive when the heat hits hard.
Watering When Temperatures Exceed 90°F
When the thermometer climbs past 90°F, your garden enters survival mode. Heat impact on soil moisture becomes severe—water vanishes faster than roots can absorb it. Shift to morning watering benefits immediately, watering between 6 and 8 a.m. to take advantage of evaporation reduction through early watering.
- Use mulch and shade structures as soil temperature buffers and evaporation barriers
- Apply water conservation strategies in summer by adjusting watering schedule based on weather conditions
- Consider windbreak implementation and hydrogel soil additives to retain moisture longer
Daily Checks During Extreme Heat
Beyond adjusting your timing, daily checks become non‑negotiable during extreme heat.
Each morning, do a quick Leaf Turgor Check—firm, upright leaves mean adequate moisture; limp ones don’t.
Check soil moisture 2–3 inches deep before deciding to water.
Track Ambient Temperature, and watch Evaporation Rate Observation closely, since temperature impact on garden water demand rises sharply above 90°F.
Also scan for Pest Activity Watch opportunities and assess Shade Coverage Assessment needs.
Extra Watering for Containers and Raised Beds
Containers and raised beds lose moisture faster than ground-level gardens—sometimes twice as fast on hot days. Poor Container Water Retention and high Raised Bed Temperature Control demands mean you’ll water 3–4 times weekly, or daily during heat waves.
Use drip irrigation, add mulch, and check Potting Mix Drainage often.
Self-Watering Pot Design with a bottom reservoir helps maintain steady soil moisture between checks.
Protecting Fruiting Crops From Stress
Fruiting crops like tomatoes, peppers, and squash are especially vulnerable when heat pushes past 90°F. Consistent root zone irrigation through drip irrigation benefits for gardens by keeping moisture steady without wetting foliage.
Strong Nutrient Balance, Mycorrhizal Inoculation, Canopy Management, Windbreak Installation, and Hormonal Regulation all work together to protect fruit set:
- Keep potassium levels balanced for better drought tolerance
- Inoculate roots with mycorrhizal fungi to extend water uptake
- Trim dense canopy growth to improve airflow and reduce disease
- Install windbreaks on exposed sides to cut rapid moisture loss
- Support natural hormonal regulation by avoiding drought-stress cycles
Using Mulch to Slow Evaporation
Mulch does more than tidy up a bed — it’s most reliable water conservation strategies in summer.
A 2 to 3 inch layer of organic mulch cuts surface evaporation considerably while the mulch insulation effect keeps soil temperature moderation steady, dropping surface heat by up to 10°F. That directly helps soil moisture retention when your plants need it most.
Returning to Normal After Heat Breaks
Once the heat breaks, don’t just flip back to your regular schedule overnight. Gradual rewetting aids the root recovery process without shocking stressed plants.
Soil moisture recovery by following these steps:
- Check moisture at 2–3 inches deep before watering
- Resume adjusted irrigation timing over 2–3 days
- Monitor plant vigor daily for color and firmness
- Reduce watering frequency optimization once steady growth returns
Save Water While Growing More

Using less water doesn’t mean settling for less growth — it just means being smarter about how you deliver it. A few simple habits can stretch every gallon further while keeping your plants healthy through the hottest weeks.
Here’s what actually works.
Apply 2–3 Inches of Organic Mulch
A 2–3 inch layer of organic mulch is one of the simplest water conservation strategies for home gardeners. Proper Mulch Installation Technique means keeping material away from stems by at least 6 inches to prevent rot.
Your Mulch Material Selection—straw, wood chips, or composted leaves—affects both mulch moisture retention and mulch soil temperature stability.
This natural mulch weed barrier also slows evaporation considerably, reducing how often you water.
Group Plants by Similar Water Needs
Think of your garden as a map of Hydration Zones, where each section holds plants with matching Plant Water Profiles.
Grouping lettuce with spinach and radishes creates Water Use Clusters that need daily attention, while tomatoes and melons form their own Moisture Requirement Groups, watered just once weekly.
This Irrigation Compatibility approach simplifies your watering schedule and cuts waste immediately.
Install Timers for Morning Irrigation
Automatic timers take the guesswork out of morning irrigation — you set them once, and they water early in the morning without you lifting a finger. Timer Placement matters: mount directly on your outdoor faucet and use a hose splitter if needed. Smart Integration lets you adjust schedules remotely via app.
- Enable Rain Delay Setup to skip cycles after rainfall
- Program Zone Sequencing so each bed waters in order
- Check Battery Maintenance monthly to prevent missed cycles
Collect Rainwater in Barrels
Every drop of rain that hits your roof is free irrigation waiting to happen.
Place UV Resistant Barrels directly under downspouts for smart Barrel Placement, and fit the inlet with Mesh Screen Filtration to block debris.
A First Flush Diverter discards the dirtiest initial runoff, while a built‑in Overflow Outlet Design protects your foundation.
Rainwater harvesting makes sustainable garden watering practices genuinely simple.
Reduce Runoff With Slow Watering
Fast watering doesn’t mean effective watering. When you blast water onto dry soil, most of it runs off before roots can absorb a drop.
Drip irrigation and soaker hoses use Gradual Infiltration Techniques and smart Emitter Placement Strategy to deliver water slowly, right where it counts. Pair that with mulch for Soil Surface Conditioning and Low-Flow Scheduling, and runoff nearly disappears.
Keep Weeds From Stealing Soil Moisture
Weeds don’t just crowd your plants — they drain the water you’ve carefully scheduled.
A organic mulch materials like straw or wood chips blocks light, locks in mulch moisture retention, and keeps root zone shading consistent.
Living mulch species such as creeping thyme also suppress weed seeds naturally, making your watering schedule work harder for your crops, not the competition.
Top 5 Summer Watering Helpers
The right tools make your watering schedule easier to stick with, especially when summer heat turns unpredictable. A few well-chosen helpers can take the guesswork out of when, how much, and where to water.
Here are five worth keeping in your garden rotation.
1. Beday Smart Plant Watering System
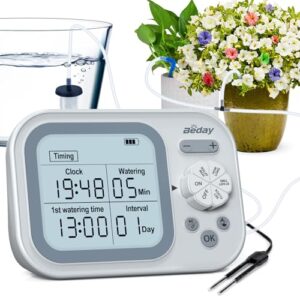
The Beday Smart Plant Watering System takes the guesswork out of keeping up to 15 potted plants hydrated. At $29.98, it runs on a USB-C rechargeable battery and delivers water through 33 feet of flexible drip tubing.
You can program daily or weekly watering intervals, and its built-in humidity detection adjusts output based on actual soil moisture.
That means no more overwatering on a rainy week. It’s a reliable, low-maintenance option for indoor gardens, balconies, or when you’re away from home.
| Best For | Plant lovers who travel often or anyone who tends to forget watering day—especially those with multiple indoor pots and no outlet nearby. |
|---|---|
| Primary Use | Indoor plant watering automation |
| Plant Compatibility | Indoor potted plants |
| Indoor Suitable | Yes |
| Organic / Natural | No |
| Price | $29.98 |
| Ease of Use | Programmable, set-and-forget |
| Additional Features |
|
- Handles up to 15 plants at once, so one little pump does all the heavy lifting across your whole collection
- The soil moisture sensor actually thinks for itself—if the ground’s still damp, it won’t water again just because the timer says so
- Runs on a rechargeable battery, so you’re not stuck running cords across your kitchen or balcony
- It’s slow—getting even a quarter cup of water to a plant can take around 6 minutes, so bigger plants might feel a little neglected
- Unequal tubing lengths between pots can throw off how much each plant gets, which takes some fiddling to get right
- The filter and drip tips need regular cleaning or you’ll run into clogs, and the anti-siphon valve placement matters more than you’d think
2. Fox Farm Big Bloom Organic Plant Food
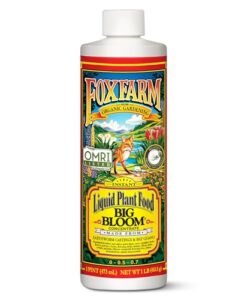
While automated systems handle delivery, your plants still need the right nutrients to produce well. Big Bloom Organic Plant Food fills that role cleanly.
Made with bat guano, earthworm castings, and Norwegian kelp, it feeds roots gently without synthetic salts.
Mix 4 tablespoons per gallon of water and apply every other watering throughout the season.
At $18.99 for 16 oz, it works with drip systems, watering cans, and hose sprayers — no clogging, no guesswork.
| Best For | Gardeners who want an organic boost during flowering and fruiting — especially those running drip systems or container setups. |
|---|---|
| Primary Use | Plant fertilization |
| Plant Compatibility | All plant types and stages |
| Indoor Suitable | Yes |
| Organic / Natural | Yes, OMRI certified |
| Price | $18.99 |
| Ease of Use | Dilute and apply every watering |
| Additional Features |
|
- Certified organic with natural ingredients (bat guano earthworm castings) that feed plants without harsh synthetic salts
- Works with pretty much any watering setup — drip lines, hose sprayers, watering cans — no clogging issues
- Safe for all growth stages, so you’re not juggling multiple products throughout the season
- Very low nitrogen, so if your plants are in a heavy growth phase, you’ll likely need to pair it with something else
- Needs regular reapplication (every week or two), which adds up in time and cost
- Easy to over-apply in already fertile soil, which can cause nutrient burn if you’re not careful
3. Mosser Lee Desert Sand for Plants
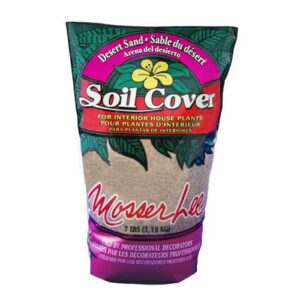
Once your nutrients are dialed in, keeping surface moisture stable is the next piece.
Mosser Lee Desert Sand (Model ML1113) gives you a clean, dust-free top layer that slows evaporation between waterings — useful when summer heat hits hard.
Spread it over potted plants, terrariums, or dish gardens to hold moisture longer and block fungus gnats from reaching the soil.
One 7 lb bag covers a medium-sized container well, and it won’t introduce nutrients that could throw off your feeding plan.
| Best For | Plant lovers who want a clean, decorative top dressing that pulls double duty — keeping moisture in and fungus gnats out. |
|---|---|
| Primary Use | Soil amendment / top-dressing |
| Plant Compatibility | Houseplants, roses, terrariums |
| Indoor Suitable | Yes |
| Organic / Natural | Yes, natural sand |
| Price | Not listed |
| Ease of Use | Mix into soil or top-dress |
| Additional Features |
|
- Dust-free and fine-textured, so it looks sharp in vases, terrariums, and dish gardens
- Helps slow evaporation between waterings and blocks pests from reaching the soil
- Won’t mess with your nutrient plan — pure sand, no additives
- Pricier than bulk silica sand, so it’s not the move for large-scale projects
- One 7 lb bag only goes so far — a medium plant or two at most
- Zero nutrients, so you’ll still need to fertilize regularly
4. Organic Orchid Potting Bark
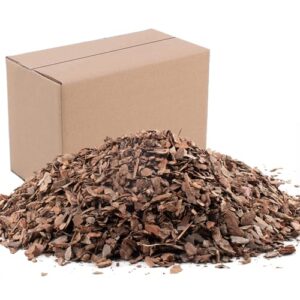
Pine bark chips pull double duty in summer containers. Mix them into your potting blend to open up air channels around roots and keep drainage consistent, even during back-to-back waterings.
The CJGQ organic pine bark chips come in ½ to 1-inch pieces — coarse enough to prevent compaction without drying out too fast.
Blend 2 parts bark with 1 part perlite for aroids or tropicals that need moisture without sitting wet.
Just watch your soil pH, since pine bark runs slightly acidic.
| Best For | Orchid growers and houseplant enthusiasts who want to improve drainage and aeration in their potting mixes. |
|---|---|
| Primary Use | Orchid and plant potting media |
| Plant Compatibility | Orchids, aroids, indoor plants |
| Indoor Suitable | Yes |
| Organic / Natural | Yes, untreated pine bark |
| Price | $12.69 |
| Ease of Use | Mix into potting media |
| Additional Features |
|
- 100% natural pine bark with a coarse ½–1 inch chip size that keeps roots breathing and drainage flowing
- Works great as a standalone orchid medium or mixed with perlite and other amendments for aroids and tropicals
- Resealable bag keeps unused chips fresh, and the organic material slowly releases nutrients over time
- Pine bark is acidic, so heavy use can drop your soil pH and stress pH-sensitive plants
- Holds onto moisture too long for succulents, cacti, or anything that likes to dry out completely between waterings
- Some customers reported inconsistent fill levels and occasional foreign debris like small rocks or plastic fragments in the bag
5. WhaleLife Small Green Watering Can

The WhaleLife Small Green Watering Can earns its spot on this list for one simple reason: control. Its 18-centimeter narrow spout delivers water directly to the soil, keeping leaves dry and reducing disease risk.
At 1.4 liters, it’s light enough to handle repeatedly without tiring your wrist.
The clear body lets you track water levels at a glance, so you won’t run dry mid-session. Compact and sturdy, it fits any windowsill or shelf without taking over your space.
| Best For | Anyone who tends small houseplants, succulents, or a desk herb garden and wants precise watering without making a mess. |
|---|---|
| Primary Use | Manual indoor plant watering |
| Plant Compatibility | Houseplants, succulents, herbs |
| Indoor Suitable | Yes |
| Organic / Natural | No |
| Price | Not listed |
| Ease of Use | Fill and pour manually |
| Additional Features |
|
- The long, narrow spout puts water right at the roots — no soggy leaves, no guesswork.
- At 1.4L, it’s light enough to use repeatedly without wearing out your wrist.
- The transparent window lets you see exactly how much water you have left before you start.
- A few users reported leaks at the base or seam, especially right out of the box.
- 1.4L fills up fast but also runs out fast — not ideal if you’re watering a lot of larger plants.
- The spout can drip while you’re carrying it, so watch out for floors and furniture.
Frequently Asked Questions (FAQs)
How do you water a small garden?
Water your small garden at the base of each plant, not the leaves.
Aim for 1 to 5 inches per week, delivered in slow, deep sessions every few days rather than light daily sprinkles.
How do you care for plants in summer?
Summer plant care means watching soil moisture, timing your waterings well, and protecting roots from heat stress. Check leaves daily, mulch generously, and adjust watering as temperatures climb.
How often should you water your garden?
Most gardens need about 1 to 5 inches of water per week. Shallow-rooted crops like lettuce need water every day or two, while deep-rooted tomatoes do fine with one deep soak weekly.
How often should you water a succulent garden?
Most succulents do fine with watering once every 7 to 14 days during the growing season. Let the soil dry out completely between sessions — they handle drought far better than soggy roots.
How often should you water your garden in summer?
Think of your garden like a sponge—it absorbs, holds, then releases. Most summer vegetables need 1 to 5 inches of water weekly, adjusted for rainfall, soil type, and heat.
What is the 1/2/3/2:1 watering method?
The 1/2/3/2/1 method runs a five-day watering cycle. You start light, peak on day three, then taper back down, giving roots a deep soak while letting soil breathe between sessions.
How often should I water my garden in 90 degree weather?
Ninety degrees sounds like a good excuse to skip the garden—but your plants disagree. Water every day or every other day, giving a 10×10-foot plot roughly 8–9 gallons daily.
What is the best time to water garden in hot weather?
Water your garden between 6 and 8 a.m. That window cuts evaporation, lets foliage dry before nightfall, and delivers moisture straight to the roots when plants need it most.
Why should you water your garden during summer?
Your garden loses moisture fast in summer heat. Without regular watering, plants wilt, roots struggle, and yields drop.
Consistent moisture keeps cells firm, facilitates photosynthesis, and helps crops produce through the hottest weeks.
When is the best time to water a garden?
The best time to water your garden is between 6 and 8 a.m. Cooler air reduces evaporation by up to 30 percent, and foliage dries before nightfall, which limits fungal disease risk.
Conclusion
Water is simple—until the plant in front of you tells a different story. The gardener who learns to read soil, roots, and rhythm instead of relying on guesswork is the one who harvests well past the first heat wave.
Your summer gardening watering schedule isn’t a rigid checklist; it’s a living system you adjust with each dry spell and each surprise storm. Build it thoughtfully, and your garden stops surviving summer—it thrives through it.