This site is supported by our readers. We may earn a commission, at no cost to you, if you purchase through links.

Most gardeners don’t fail because they picked the wrong seeds. They fail because they picked the wrong spot, skipped the soil test, and crammed plants together hoping for the best. A single planning mistake—like placing a tomato bed where it catches only four hours of sun—can turn a whole season into a frustrating harvest of green marbles.
Soil pH, drainage, spacing, and frost timing aren’t details you circle back to later; they determine everything before a single seed goes in the ground. These vegetable garden planning tips cut through the guesswork and give you a clear framework to build a productive garden from the start.
Table Of Contents
- Key Takeaways
- Choose Your Best Garden Site
- Test and Improve Your Soil
- Pick The Right Garden Layout
- Map Spacing and Sunlight Needs
- Plan Planting for Bigger Harvests
- Top 5 Garden Planning Items
- Frequently Asked Questions (FAQs)
- How do you plan a vegetable garden?
- Should you plan your vegetable garden layout correctly?
- What are the best vegetable garden layout plans?
- How do you make a vegetable garden look good?
- What is the 70 30 rule for gardening?
- What is the 80 20 rule in gardening?
- Do you need help planning a vegetable garden layout?
- What are the different layouts for vegetable gardens?
- What should you do before planting in your vegetable garden?
- What should I consider when creating a new vegetable garden?
- Conclusion
Key Takeaways
- Your garden’s location — sunlight, drainage, and wind exposure — determines your harvest before you plant a single seed.
- Test your soil pH and aim for 5.8–6.8 so nutrients stay accessible and your plants don’t silently starve.
- Space, airflow, and layout choice (raised beds, rows, containers, or vertical) directly control how much you can grow and how easily you can maintain it.
- Succession planting every 2–4 weeks and rotating crops yearly keep harvests steady and soil healthy across the whole season.
Choose Your Best Garden Site

Before your seeds ever hit the soil, your garden’s location decides half the battle. The right site gives your plants sun, drainage, and protection — the wrong one fights you all season. Here’s what to check before you commit to a spot.
Even before scouting your yard, it helps to understand common seed starting problems and solutions so you know what pitfalls a poor site can trigger down the line.
Check Local Frost Dates
Your last frost date is the starting line for your whole garden plan. In Falkenstein, Saxony, that date commonly falls in late April to early May. Use a frost date calculator to confirm your local window.
From there, count forward to your first autumn frost — usually late September — to map your full growing season length. You can also utilize frost protection techniques to safeguard your most delicate plants.
Track Daily Sun Patterns
Once you know your frost dates, sunlight becomes your next puzzle. Step outside at 9am, 12pm, and 3pm and note where shadows fall. That three-snapshot method reveals which spots get full sun — 8-plus hours — and which hide in shade.
A sun path diagram for your location makes this even sharper, showing seasonal sun shifts before you break ground.
Assess Drainage and Slope
Sun tells you where to plant. Slope tells you whether your plants will drown.
Identify natural hollows — low spots that collect runoff after rain. These become waterlogged fast and suffocate roots.
- Standing water lingers for hours after rainfall
- Muddy patches appear even on dry days
- Soil crusts and cracks between rain events
- Roots rot before harvest ever comes
Test soil permeability by digging a 12-inch hole, filling it with water, and timing how fast it drains. Slower than one inch per hour means poor drainage. Design contour swales — shallow channels that redirect runoff — to steer water away from beds. For serious saturation, install French drains: perforated pipes packed in gravel that pull excess moisture laterally underground. Monitor seasonal flow across wet and dry periods to catch problems before they cost you a harvest.
Plan Wind Protection
Water directs you down. Wind can cut just as deep.
Windbreak placement starts with your prevailing wind direction. Shield that side first. A solid wooden fence blocks about 60 percent of wind at bed height. Dense evergreen shrubs work too, but take 3 to 5 years to reach full effect.
| Barrier Type | Key Benefit |
|---|---|
| Solid wooden fence | Blocks ~60% of wind immediately |
| Evergreen shrub row | Year-round protection when mature |
| Lattice or brush screen | Allows airflow, reduces heat stress |
| Stone wall or berm | Absorbs gusts at ground level |
| Recycled pallet barrier | Low-cost temporary option |
Don’t place barriers directly against beds. Too close traps moisture and invites fungal disease. Keep a gap of at least one barrier-height in distance. That gap also creates warm microclimates — sheltered pockets where soil heats faster and evaporation slows. For raised beds, this effect matters in early spring.
Inspect barriers twice per season. Fix loose boards or torn fabric fast. Wind won’t wait.
Watch for Wildlife Pressure
Wildlife can end a season before it starts. Before you finalize your site, check for deer, rabbits, and raccoons in your area.
Deer move most at dawn and dusk. Motion-activated sprinklers cover 5 to 8 meters and cut repeat visits by up to 70 percent. Garden nets with 1.6 cm mesh stop rabbits without blocking rain.
Test and Improve Your Soil

Good soil is the difference between a garden that limps along and one that actually delivers. Before you plant a single seed, you need to know what you’re working with — and what it’s missing. Here’s how to get your soil ready to perform.
Test PH and Nutrients
Your soil is either working for you or against you — and you won’t know which until you test it.
Soil testing removes the guesswork. A basic home kit checks pH and primary nutrients quickly. A lab test goes deeper, measuring nitrogen, phosphorus, potassium, calcium, magnesium, and key micronutrients. Lab results also include recommended amendments appropriate to what you’re actually growing.
Test every one to two years to stay ahead of nutrient depletion. Soil fertility shifts over time due to irrigation, fertilizer use, and organic matter breakdown. Microbial activity also affects how nutrients become available to roots — healthy soil biology matters as much as the numbers on your report.
Here’s what a solid soil test tells you:
- Current pH level and whether lime or sulfur is needed
- Nitrogen, phosphorus, and potassium levels — your big three
- Secondary nutrients like calcium and magnesium
- Micronutrient gaps that limit growth even when macros look fine
- A baseline to track soil health trends across seasons
Aim for 5.8–6.8 PH
That sweet spot of 5.8–6.8 pH is where your vegetable garden really performs. Within this range, phosphorus, nitrogen, and potassium all stay accessible to plant roots. Microbial activity also peaks near 6.0–6.5, breaking down organic matter efficiently. Drift outside it, and nutrients lock up — even in fertile soil.
Keep your soil between 5.8 and 6.8 pH — outside that window, nutrients lock up and even fertile soil works against you
| Vegetable | Ideal pH Range |
|---|---|
| Tomatoes | 6.0–6.5 |
| Lettuce | 5.8–6.0 |
| Carrots | 6.0–6.5 |
| Broccoli | 6.0–7.0 |
| Herbs (Cilantro/Dill) | 6.0–6.5 |
Use elemental sulfur to lower pH toward 5.8 or lime to raise it. Test every one to two years to catch slow drift before it costs you a harvest.
Add Compost Before Planting
Compost is the cheapest upgrade your garden will ever get. Before planting, mix a 2–3 inch layer into the top 6–12 inches of soil.
This single step boosts water retention, feeds beneficial microbes, and releases nitrogen, phosphorus, and potassium right when seedlings need them most. It also suppresses weeds and cuts your watering frequency during dry spells.
Improve Clay or Sandy Soil
Clay grips water like a sponge and drains poorly. Sandy soil does the opposite — it dries out fast. Either extreme will limit your harvest.
Add 2–4 inches of finished compost into the top 6–8 inches of both soil types. This improves drainage in clay and boosts moisture retention in sand.
For clay, cover crops like hairy vetch in fall break up compacted layers and feed microbes as they decompose. For sandy soil, biochar at 5–10 percent by volume strengthens nutrient retention between waterings.
Finish with a 2–3 inch mulch layer to stabilize soil temperature and reduce surface crusting year-round.
Calculate Soil Volume Needed
Before you order a single bag of soil, do the math. Multiply your bed dimensions — length × width × depth in feet — to get cubic feet. Divide by 27 to convert to cubic yards.
- Use 12-inch depth for root crops, 6–8 inches for greens
- Add 10–15% extra for compaction after settling
- Match the total to standard bag sizes (0.5, 1.0, or 2.0 cubic feet)
Pick The Right Garden Layout

Your garden layout shapes everything — how you water, weed, and harvest all season long. The right setup depends on your space, your goals, and how much time you want to spend maintaining it. Here are the main layout options worth considering.
Raised Bed Planning
A raised bed puts you in control from day one. Build beds 3 to 4 feet wide so you can reach the center without stepping inside and compacting the soil. Keep bed height between 12 and 18 inches for drainage and comfortable planting access.
Cedar and redwood naturally resist rot, lasting 7 to 12 years. For long-term durability, galvanized steel edges last over 15 years.
In-ground Row Gardens
If raised beds aren’t your style, in-ground row gardens are worth serious consideration. They’re ideal for large harvests of corn, potatoes, and squash.
Shape each row into a slightly raised mound to improve drainage and warm the soil faster in spring. Run drip irrigation lines along the base, rotate crops on a four-year cycle, and cultivate between rows to control weeds.
Container and Grow Bags
Not everyone has space for rows or raised beds. That’s where container gardening becomes your best option.
Use 7–10 gallon fabric grow bags for most vegetables, or go up to 20 gallons for tomatoes and peppers. Fabric materials allow air pruning of roots, which prevents circling and builds stronger plants. Look for bags with UV-resistant coatings to extend their lifespan across multiple seasons.
Square Foot Gardening
Square foot gardening turns a 4×4 raised bed into 16 individual planting squares, each one foot apart. Follow plant density guidelines: one tomato per square, four beans, or up to 16 radishes.
Use Mel’s Mix — compost, sphagnum moss, and vermiculite — to keep roots loose and fed. Run drip irrigation along the frame and mulch between squares to hold moisture.
Vertical Garden Structures
Going vertical is one of the smartest moves in garden layout optimization.
Wall-mounted systems use rigid backing boards with fabric pockets — great for herbs or lettuce on a fence. Freestanding towers and modular panels work well on balconies. For climbers like beans or cucumbers, trellis integration adds height without sacrificing floor space. Hydroponic walls deliver fast yields but require a pump and power source.
Map Spacing and Sunlight Needs
Getting spacing and sunlight right is where good harvests are actually won or lost. Every vegetable has a non-negotiable preference — ignore it, and you’re working against the plant from day one. Here’s what you need to map out before a single seed goes in the ground.
Tomatoes Need Full Sun

Tomatoes are sun-hungry plants. They need at least 6 hours of direct sunlight daily, but 8 to 10 hours delivers the best tomato yield.
- Morning sun benefits include drying dew fast, which cuts disease risk
- Afternoon shade protection helps prevent heat stress in hot climates
- Strong sunlight hours impact flower set and fruit size
- Reflective mulch use bounces light onto lower leaves
- Poor sun exposure causes blossom drop and weak growth
Greens Tolerate Partial Shade

Not every corner of your vegetable garden layout needs blazing sun. Leafy greens like lettuce, spinach, and kale actually thrive with just 3 to 6 hours of light daily.
Partial shade benefits these cool-season crops by keeping soil cooler, slowing bolting, and extending your harvest window. Dappled light planting also improves leaf tenderness — a win for flavor and longevity.
Space Plants for Airflow

Good airflow is plant health insurance. Airflow between rows cuts disease pressure fast — crowded leaves trap moisture, and moisture invites fungal problems.
- Plant spacing guidelines: tomatoes need 24–36 inches apart
- Canopy circulation benefits: dry leaves mean fewer pathogens
- Vertical trellis airflow: lifts vines, opens air corridors below
Align beds with prevailing winds for wind direction alignment that works naturally.
Plan Paths Between Beds

Think of your paths as the backbone of your garden design. Without them, even the best layout plans fall apart.
Keep primary paths at least 36 inches wide — enough for a wheelbarrow. Secondary paths between beds can be 24 inches. Use compacted gravel or mulch for drainage and traction. Add edging to define boundaries and stop soil from creeping onto walkways.
Use Trellises for Climbers

A trellis turns dead vertical space into productive real estate. Install it on the northern bed edge so it won’t shade shorter plants. Cedar and redwood last 10–15 years; galvanized steel lasts even longer. Keep it 2 inches from walls for airflow.
Four climbers that reward vertical gardening:
- Cucumbers
- Pole beans
- Peas
- Melons
Plan Planting for Bigger Harvests

A good harvest doesn’t happen by accident — it starts with smart planting decisions made before you put a single seed in the ground. The right combinations, sequences, and crop placements can double what you pull from the same space. Here’s what to focus on.
Choose Vegetables You Eat
Start with what you actually eat. Your kitchen garden exists to feed you — not to impress anyone.
| Vegetable | Why It Works |
|---|---|
| Tomatoes | Long harvest window, peak summer flavor |
| Carrots | Easy storage, broad meal integration |
| Kale | High nutrient density, seasonal preference for fall |
| Peppers | Colorful variety, suits warm-month cooking |
| Lettuce | Fast vegetable production, partial shade tolerant |
Pair Helpful Companion Plants
Once you know what you’re growing, the next step is deciding what grows with it. Companion planting turns your vegetable garden layout into a system where plants work for each other.
Pair tomatoes with basil — the Basil Tomato Pair repels thrips and reduces aphids. Add marigolds nearby. The Marigold Carrot Companion attracts beneficial insects that hunt common pests. Nasturtiums act as a Nasturtium Squash Trap, pulling aphids away from your main crops. Plant Garlic Chives near carrots to cut carrot fly pressure. In any raised bed, add beans or peas. This Legume Nitrogen Share feeds leafy neighbors naturally.
Separate Poor Plant Partners
Not every plant pair works in harmony. Beans and onions conflict — shared root exudates reduce onion flavor and create moisture competition. Spinach and peppers don’t mix either; peppers release allelopathic compounds — natural chemicals — that slow spinach growth.
Keep fennel away from kale, and separate tomatoes from corn to avoid shading and light competition during peak sun hours.
Rotate Crops Yearly
Moving plants around yearly does more than just reset the scenery.
A solid Crop Rotation Plan breaks disease cycles by removing the pathogens’ preferred host. It also delivers a Legume Nitrogen Fix — legumes add 50 to 150 pounds of nitrogen per acre — cutting synthetic fertilizer needs by up to 40 percent the following season.
Sow Successions Every Few Weeks
Stagger your sowings every 2 to 4 weeks to keep harvests coming all season. Lettuce and spinach need new seeds every 2 to 3 weeks. Radishes and arugula do well on a two-week planting cycle. Don’t sow everything at once — that’s how you end up with 30 heads of lettuce and nothing a week later.
Top 5 Garden Planning Items
Good planning doesn’t stop at the soil — it extends to the tools you keep within arm’s reach. The right gear makes every step easier, from testing your ground to harvesting your first crop. Here are five items worth having before you get started.
1. Cesun Stainless Steel Garden Hose
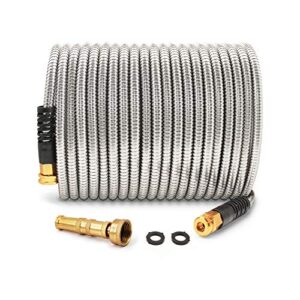
The Cesun Stainless Steel Garden Hose is built for gardeners who need reliability without the bulk. Its 304 stainless steel shell resists punctures, kinks, and animal bites — common problems with rubber hoses. At 50 feet and 5.6 pounds, it’s light enough to maneuver around raised beds without flattening plants.
The 10-pattern spray nozzle covers everything from delicate seedlings to hard-surface rinsing. Just drain it after use to keep it performing season after season.
| Best For | Gardeners and homeowners who want a durable, low-maintenance hose that holds up against pets, rough terrain, and harsh weather. |
|---|---|
| Primary Material | 304 Stainless Steel |
| Assembly Required | Minimal |
| Skill Level | All Levels |
| Durability | High |
| Maintenance Needed | Drain After Use |
| Primary Use | Watering |
| Additional Features |
|
- Built tough — the 304 stainless steel shell shrugs off kinks, punctures, and even dog chews
- Light at 5.6 lbs, so it’s easy to drag around the yard without wearing yourself out
- The 10-pattern nozzle handles everything from gentle watering to blasting mud off the driveway
- Water flow runs a bit weaker than a standard rubber hose, so it’s slower to fill buckets or run sprinklers
- The screw-on fittings don’t play nice with push-fit hose reels — you may need an adapter
- Heavy daily use can cause leaks over time, and it needs to be fully drained before storage to last
2. Rapitest Soil Test Kit
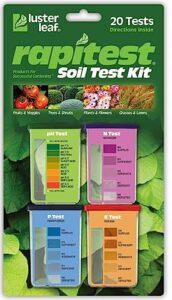
Knowing exactly what’s in your soil takes the guesswork out of fertilizing. The Rapitest Soil Test Kit tests pH, nitrogen, phosphorus, and potassium — the four numbers that drive plant growth. Each kit includes 20 total tests, five per variable, using color-matched capsules you read against a comparator chart. Results appear in minutes.
Keep in mind: NPK tests require soaking soil in water for up to 24 hours. It’s a small wait for real data that tells you what to add and what to skip.
| Best For | Home gardeners — beginner or experienced — who want a straightforward way to test soil before fertilizing. |
|---|---|
| Primary Material | Cardboard & Capsules |
| Assembly Required | None |
| Skill Level | Beginner to Advanced |
| Durability | Moderate |
| Maintenance Needed | Store in Dry Place |
| Primary Use | Soil Testing |
| Additional Features |
|
- Tests all four key soil variables (pH, N, P, K) in one kit
- Color comparator makes reading results simple and accessible
- Includes a pH guide for over 450 plants, so you know exactly what your soil needs
- NPK tests require soaking soil for up to 24 hours, so no instant answers
- Small container openings make adding capsules awkward and messy
- Refill capsules for individual elements are hard to track down
3. Galvanized Metal Raised Garden Bed Kit
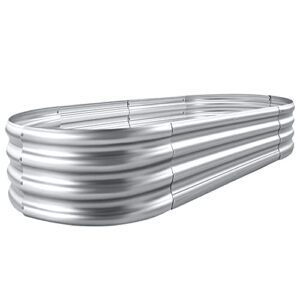
A galvanized metal raised bed puts you in control from day one. This 4 x 2 x 1 ft kit uses double-layer anti-corrosion steel panels — 0.78 mm thick on average — to hold shape without rotting or warping. The open base design lets roots reach native soil, improving nutrient absorption.
Assembly requires a wrench and screwdriver. Expect bolts — there are many. The stackable panels let you add height whenever your crops need deeper soil.
| Best For | Gardeners who want a durable, budget-friendly raised bed that can grow with their setup over time. |
|---|---|
| Primary Material | Galvanized Steel |
| Assembly Required | Yes |
| Skill Level | All Levels |
| Durability | High |
| Maintenance Needed | Seasonal Inspection |
| Primary Use | Planting |
| Additional Features |
|
- Double-layer galvanized steel resists rust and holds its shape season after season
- Open base lets roots tap into native soil for better nutrients and drainage
- Stackable panels mean you can add depth whenever your plants need more room
- Assembly is bolt-heavy and can take a while — have a wrench and screwdriver ready
- Some buyers have gotten kits with missing or defective hardware
- Stacking units may mean hunting down longer bolts and busting out a drill
4. Granite Ware Canning Kit

Once your harvest starts rolling in, you need a way to preserve it. The Granite Ware Canning Kit manages that job well.
It includes a 21.5-quart water bath canner, a 5-piece tool set, and a chromed steel jar rack that holds 7 quart jars or up to 12 half-pints.
The enamelware construction won’t react with acidic foods like tomatoes. Hand wash only — chips lead to rust.
| Best For | Home gardeners and beginner canners who want everything they need to start preserving fruits, jams, and pickles in one kit. |
|---|---|
| Primary Material | Enamelware |
| Assembly Required | None |
| Skill Level | Beginner |
| Durability | Moderate |
| Maintenance Needed | Hand Wash Only |
| Primary Use | Food Preservation |
| Additional Features |
|
- Big 21.5-quart pot handles up to 12 half-pint jars at once — plenty of room for a solid batch
- Enamelware won’t react with acidic foods like tomatoes or citrus
- Comes with all the basics (jar lifter, funnel, bubble remover) so you’re not hunting for extras
- Enamel chips easily, and once it does, rust becomes a real problem
- Tools are entry-level — serious canners may want to upgrade over time
- Not safe for pressure canning, so low-acid vegetables like green beans are off the table
5. INFLATION Heavy Duty Leaf Rake
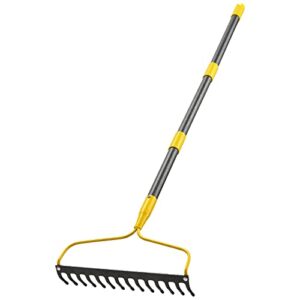
A good rake is the unsung hero of garden prep. The INFLATION Heavy Duty Leaf Rake clears debris fast so you can start planting without fighting through dead leaves and rocks.
It uses a four-tine metal design with a 14-inch head. That’s narrow enough for raised beds and paths between rows. Assembly takes a little patience — the instructions aren’t great — but once it’s together, it manages scarifying, seed spreading, and general cleanup reliably.
| Best For | Home gardeners who want a reliable, no-fuss rake for clearing debris, spreading seed, and keeping raised beds tidy. |
|---|---|
| Primary Material | Metal |
| Assembly Required | Yes |
| Skill Level | All Levels |
| Durability | Moderate |
| Maintenance Needed | Clean After Use |
| Primary Use | Garden Raking |
| Additional Features |
|
- Sturdy metal build that holds up to regular use
- 14-inch head is wide enough to cover ground fast but narrow enough for tight spaces
- Handles scarifying, rock raking, and seed spreading without switching tools
- Assembly is tricky and the instructions don’t help much
- Four tines mean it’s not the best for heavy leaf volume
- Bulky to store given its size
Frequently Asked Questions (FAQs)
How do you plan a vegetable garden?
Start with site, soil, and sunlight. Pick a spot that gets 6–8 hours of direct sun daily. Test your soil pH. Then choose your layout, space your plants correctly, and rotate crops each year.
Should you plan your vegetable garden layout correctly?
Yes — layout shapes everything. It controls sunlight, airflow, and access. A poorly planned bed wastes space and kills yields. Get it right once, and your garden works harder for you all season.
What are the best vegetable garden layout plans?
The best layouts are raised beds, in-ground rows, containers, square foot grids, and vertical structures. Each suits different spaces and crop types. Pick the one that fits your yard size and the vegetables you want to grow.
How do you make a vegetable garden look good?
Use uniform bed materials, mulch paths, and evenly spaced plants. Add edible flowers like calendula for color. Keep edges crisp and stake tall crops neatly.
What is the 70 30 rule for gardening?
The 70/30 rule splits your garden into 70% structural plants — perennials and natives that hold shape year-round — and 30% seasonal accents like annuals that rotate for color and variety.
What is the 80 20 rule in gardening?
Like a magnifying glass focusing sunlight, the 80/20 rule concentrates your effort where it matters most. 20% of your actions drive 80% of your garden’s results.
Do you need help planning a vegetable garden layout?
Yes — and it’s easier than you think. A clear layout saves you time, cuts waste, and helps every plant thrive. Start simple, stay organized, and your garden will do the rest.
What are the different layouts for vegetable gardens?
Every garden lays out differently. Raised beds, in-ground rows, containers, square foot grids, and vertical trellises each suit different spaces and goals. Pick the one that fits your yard.
What should you do before planting in your vegetable garden?
Before you plant anything, test your soil’s pH and nutrient levels. Aim for a pH of 8 to 8. Add compost and clear weeds. Then you’re ready to grow.
What should I consider when creating a new vegetable garden?
Creating a new vegetable garden starts with sun, soil, and space. You need at least 6 to 8 hours of direct sunlight, well-draining soil, and a layout that fits what you want to grow.
Conclusion
The best harvests are built before a single seed ever goes in the ground — that’s the paradox most gardeners never fully grasp. Planning is the crop.
These vegetable garden planning tips give you the framework to stop guessing and start growing with real intention. Get your site right, fix your soil, space your plants for airflow, and time your successions. Do those things well, and the garden rewards you with exactly what you put in.